2014 BMW 335I XDRIVE GRAN TURISMO light
[x] Cancel search: lightPage 193 of 240
Approved wheels and tires
The manufacturer of your vehicle recom‐
mends that you use only wheels and tires that
have been approved for your particular vehicle
model.
For example, despite having the same official
size ratings, variations can lead to body con‐
tact and with it, the risk of severe accidents.
The manufacturer of your vehicle cannot eval‐
uate non-approved wheels and tires to deter‐
mine if they are suited for use, and therefore
cannot ensure the operating safety of the vehi‐
cle if they are mounted.◀
Recommended tire brands
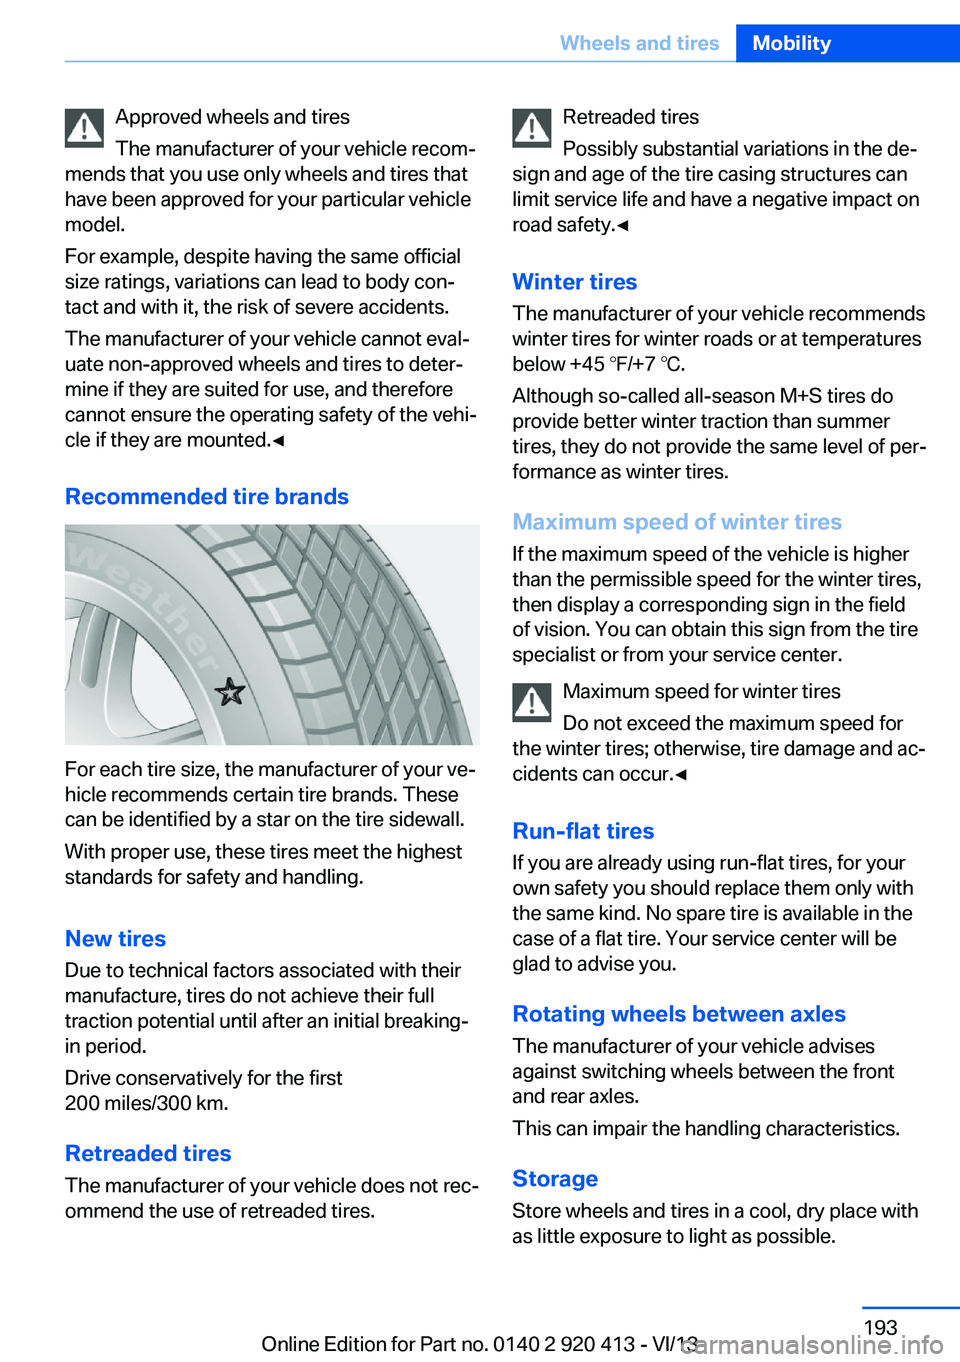
For each tire size, the manufacturer of your ve‐
hicle recommends certain tire brands. These
can be identified by a star on the tire sidewall.
With proper use, these tires meet the highest
standards for safety and handling.
New tires Due to technical factors associated with their
manufacture, tires do not achieve their full
traction potential until after an initial breaking-
in period.
Drive conservatively for the first
200 miles/300 km.
Retreaded tires
The manufacturer of your vehicle does not rec‐
ommend the use of retreaded tires.
Retreaded tires
Possibly substantial variations in the de‐
sign and age of the tire casing structures can
limit service life and have a negative impact on
road safety.◀
Winter tires
The manufacturer of your vehicle recommends
winter tires for winter roads or at temperatures
below +45 ℉/+7 ℃.
Although so-called all-season M+S tires do
provide better winter traction than summer tires, they do not provide the same level of per‐
formance as winter tires.
Maximum speed of winter tires If the maximum speed of the vehicle is higher
than the permissible speed for the winter tires,
then display a corresponding sign in the field
of vision. You can obtain this sign from the tire
specialist or from your service center.
Maximum speed for winter tires
Do not exceed the maximum speed for
the winter tires; otherwise, tire damage and ac‐
cidents can occur.◀
Run-flat tires If you are already using run-flat tires, for your
own safety you should replace them only with
the same kind. No spare tire is available in the
case of a flat tire. Your service center will be
glad to advise you.
Rotating wheels between axles
The manufacturer of your vehicle advises
against switching wheels between the front
and rear axles.
This can impair the handling characteristics.
StorageStore wheels and tires in a cool, dry place with
as little exposure to light as possible.Seite 193Wheels and tiresMobility193
Online Edition for Part no. 0140 2 920 413 - VI/13
Page 198 of 240
Performing a detailed measurement
In order to perform a detailed measurement of
the engine oil level:1."Vehicle Info"2."Vehicle status"3. "Measure engine oil level"4."Start measurement"
The oil level is checked and displayed via a
scale.
Duration: approx. 1 minute.
Adding engine oil Filler neck
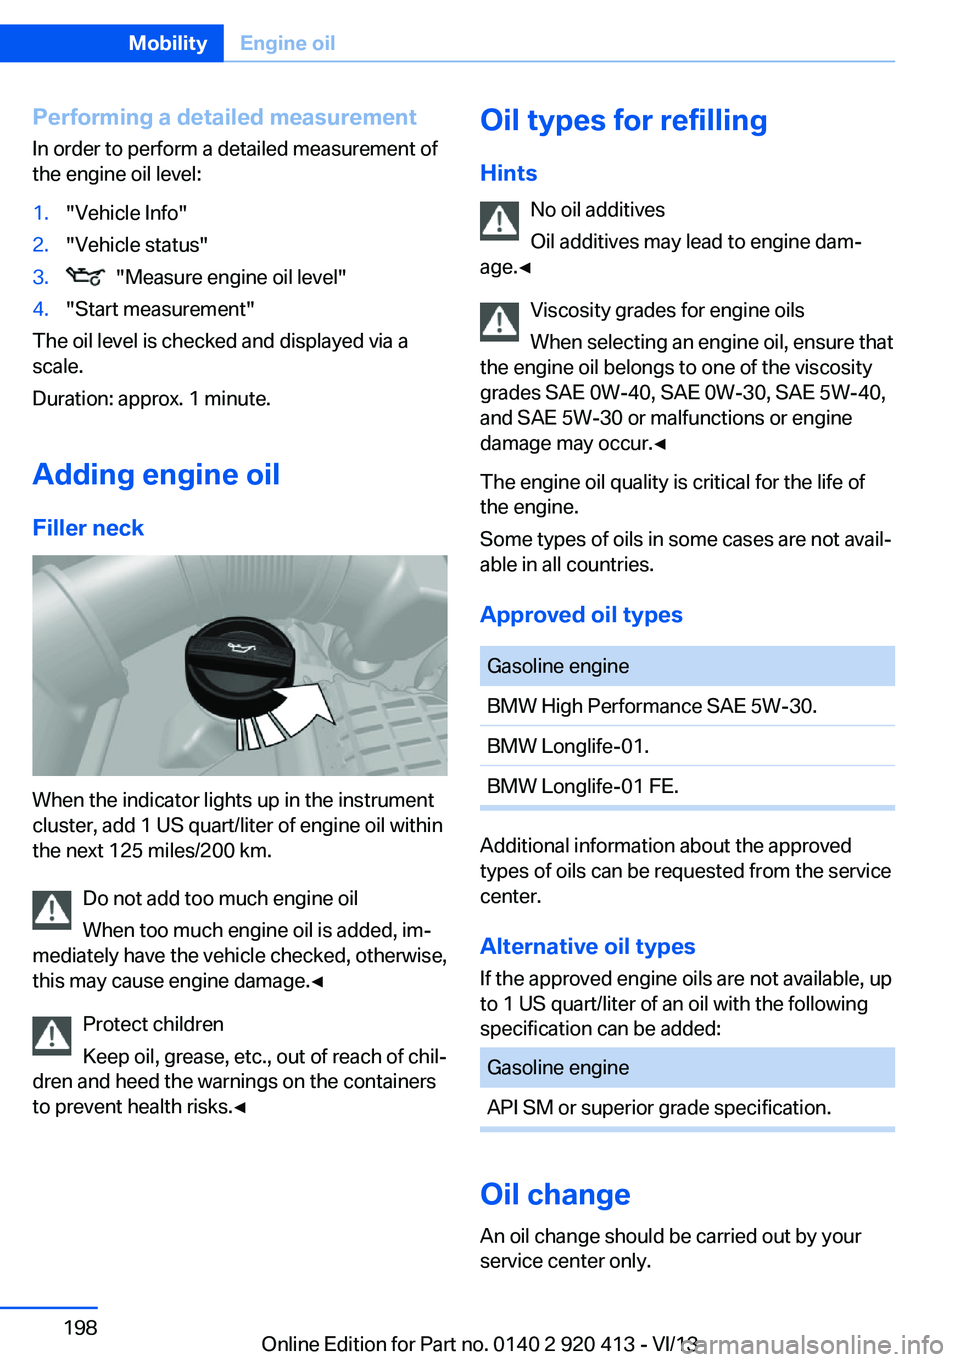
When the indicator lights up in the instrument
cluster, add 1 US quart/liter of engine oil within
the next 125 miles/200 km.
Do not add too much engine oil
When too much engine oil is added, im‐
mediately have the vehicle checked, otherwise,
this may cause engine damage.◀
Protect children
Keep oil, grease, etc., out of reach of chil‐
dren and heed the warnings on the containers
to prevent health risks.◀
Oil types for refilling
Hints No oil additives
Oil additives may lead to engine dam‐
age.◀
Viscosity grades for engine oils
When selecting an engine oil, ensure that
the engine oil belongs to one of the viscosity
grades SAE 0W-40, SAE 0W-30, SAE 5W-40,
and SAE 5W-30 or malfunctions or engine
damage may occur.◀
The engine oil quality is critical for the life of
the engine.
Some types of oils in some cases are not avail‐
able in all countries.
Approved oil typesGasoline engineBMW High Performance SAE 5W-30.BMW Longlife-01.BMW Longlife-01 FE.
Additional information about the approved
types of oils can be requested from the service
center.
Alternative oil types If the approved engine oils are not available, up
to 1 US quart/liter of an oil with the following
specification can be added:
Gasoline engineAPI SM or superior grade specification.
Oil change
An oil change should be carried out by your
service center only.
Seite 198MobilityEngine oil198
Online Edition for Part no. 0140 2 920 413 - VI/13
Page 200 of 240
CoolantVehicle equipmentAll standard, country-specific and optional
equipment that is offered in the model series is
described in this chapter. Therefore, equip‐
ment is also described that is not available in a
vehicle, e. g., because of the selected optional
equipment or country variant. This also applies
for safety-related functions and systems.
General information Danger of burns from hot engine
Do not open the cooling system while
the engine is hot; otherwise, escaping coolant may cause burns.◀
Suitable additives
Only use suitable additives; otherwise,
engine damage may occur. The additives are
harmful to your health.◀
Coolant consists of water and additives.
Not all commercially available additives are
suitable for your vehicle. Ask your service cen‐
ter for suitable additives.
Coolant level
Checking Marks are provided on the side of the coolant
reservoir.SymbolMeaningMaximumMinimum1.Let the engine cool.2.The coolant level is correct when it is be‐
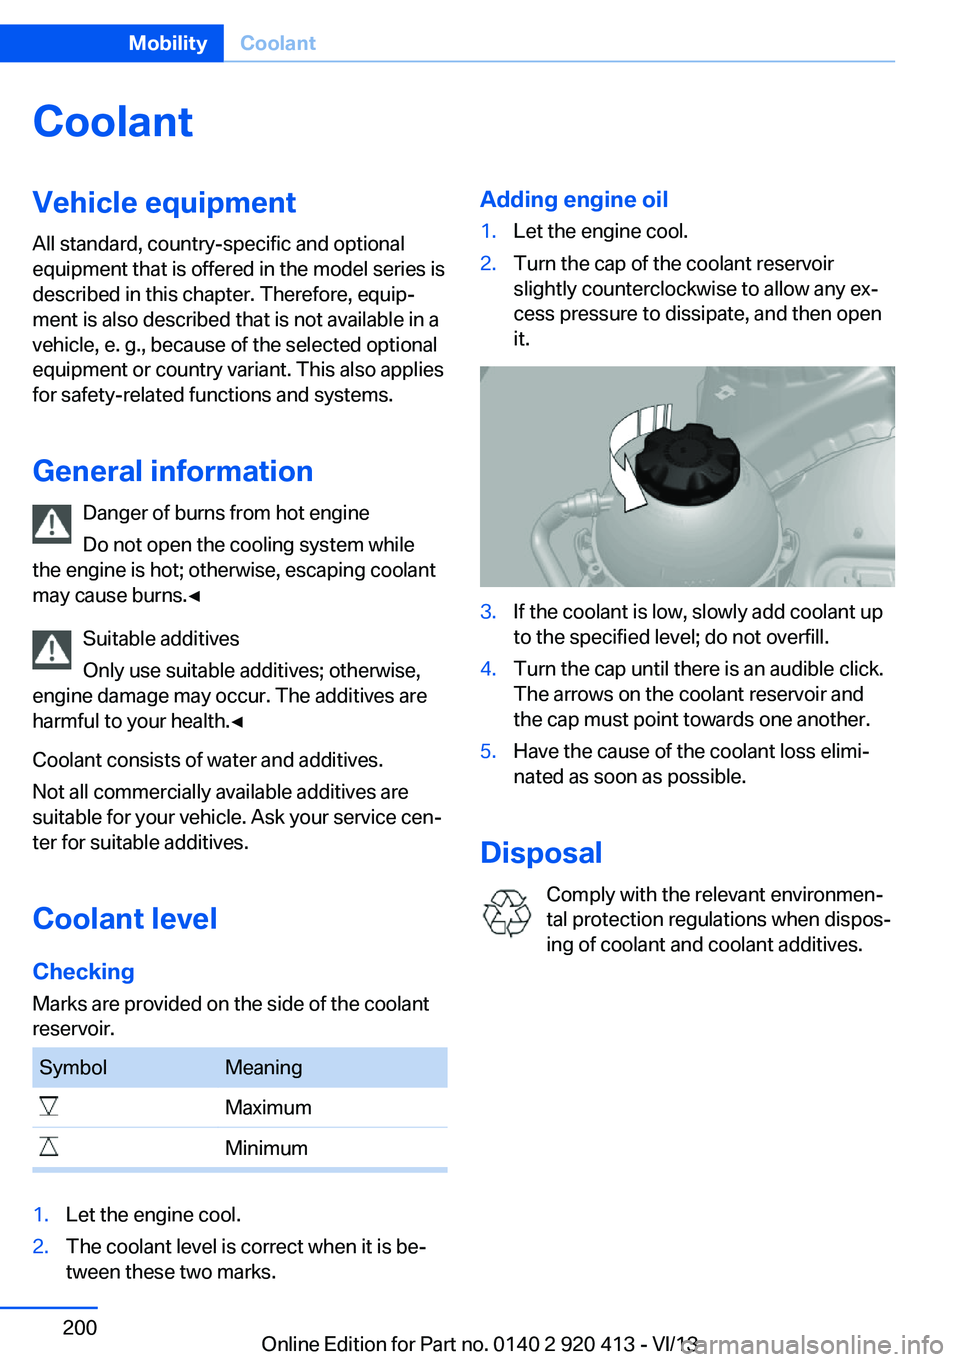
tween these two marks.Adding engine oil1.Let the engine cool.2.Turn the cap of the coolant reservoir
slightly counterclockwise to allow any ex‐
cess pressure to dissipate, and then open
it.3.If the coolant is low, slowly add coolant up
to the specified level; do not overfill.4.Turn the cap until there is an audible click.
The arrows on the coolant reservoir and
the cap must point towards one another.5.Have the cause of the coolant loss elimi‐
nated as soon as possible.
Disposal
Comply with the relevant environmen‐
tal protection regulations when dispos‐
ing of coolant and coolant additives.
Seite 200MobilityCoolant200
Online Edition for Part no. 0140 2 920 413 - VI/13
Page 202 of 240
Socket for OBD Onboard
Diagnosis
Position
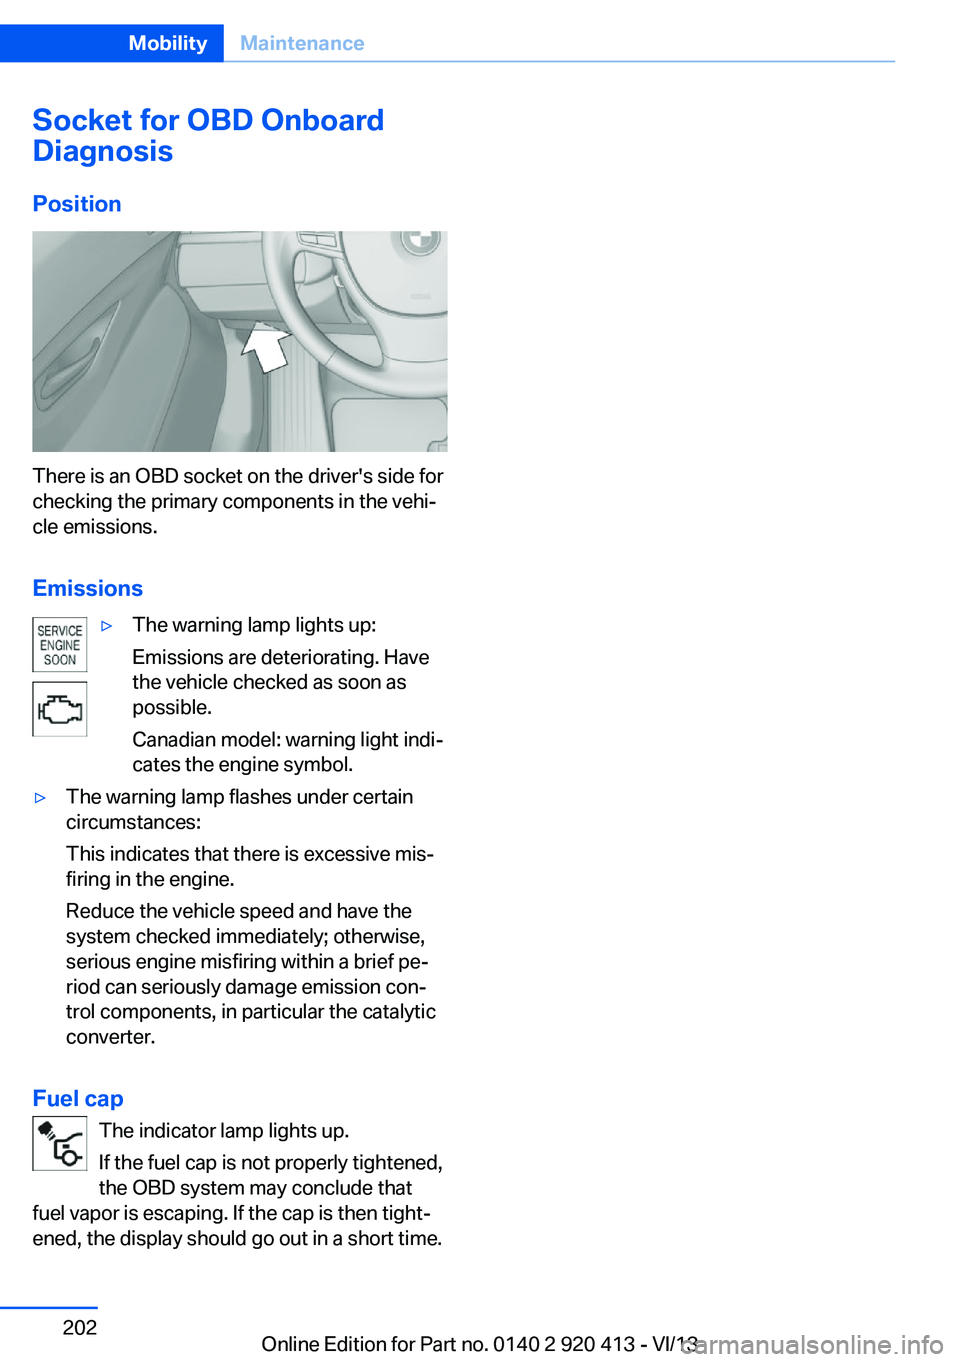
There is an OBD socket on the driver's side for
checking the primary components in the vehi‐
cle emissions.
Emissions
▷The warning lamp lights up:
Emissions are deteriorating. Have
the vehicle checked as soon as
possible.
Canadian model: warning light indi‐
cates the engine symbol.▷The warning lamp flashes under certain
circumstances:
This indicates that there is excessive mis‐
firing in the engine.
Reduce the vehicle speed and have the
system checked immediately; otherwise,
serious engine misfiring within a brief pe‐
riod can seriously damage emission con‐
trol components, in particular the catalytic
converter.
Fuel cap
The indicator lamp lights up.
If the fuel cap is not properly tightened,
the OBD system may conclude that
fuel vapor is escaping. If the cap is then tight‐
ened, the display should go out in a short time.
Seite 202MobilityMaintenance202
Online Edition for Part no. 0140 2 920 413 - VI/13
Page 204 of 240
Danger of burns
Only change bulbs when they are cool;
otherwise, there is the danger of getting
burned.◀
Working on the lighting system
When working on the lighting system,
you should always switch off the lights af‐
fected to prevent short circuits.
To avoid possible injury or equipment damage
when replacing bulbs, observe any instructions
provided by the bulb manufacturer.◀
Do not perform work/bulb replacement
on xenon headlamps
Have any work on the xenon lighting system,
including bulb replacement, performed only by
a service center. Due to the high voltage
present in the system, there is the danger of
fatal injuries if work is carried out improperly.◀
Do not touch the bulbs
Do not touch the glass of new bulbs with
your bare hands, as even minute amounts of
contamination will burn into the bulb's surface
and reduce its service life.
Use a clean tissue, cloth or something similar,
or hold the bulb by its base.◀
Light-emitting diodes (LEDs)
Light-emitting diodes installed behind a cover
serve as the light source for controls, display
elements and other equipment.
These light-emitting diodes, which are related
to conventional lasers, are officially designated as Class 1 light-emitting diodes.
Do not remove the covers
Do not remove the covers, and never
stare into the unfiltered light for several hours; otherwise, irritation of the retina could result.◀Headlamp glass
Condensation can form on the inside of the ex‐
ternal lamps in cool or humid weather. When
driving with the light switched on, the conden‐
sation evaporates after a short time. The head‐
lamp glasses do not need to be changed.
If the headlamps do not dim despite driving
with the light switched on, increasing humidity
forms, e. g. water droplets in the light, have the
service center check this.
Headlamp setting
The headlamp adjustments can be affected by
changing lamps and bulbs. Therefore after a
change, have the headlamp setting checked
and corrected by Service.
Front lamps, bulb replacement
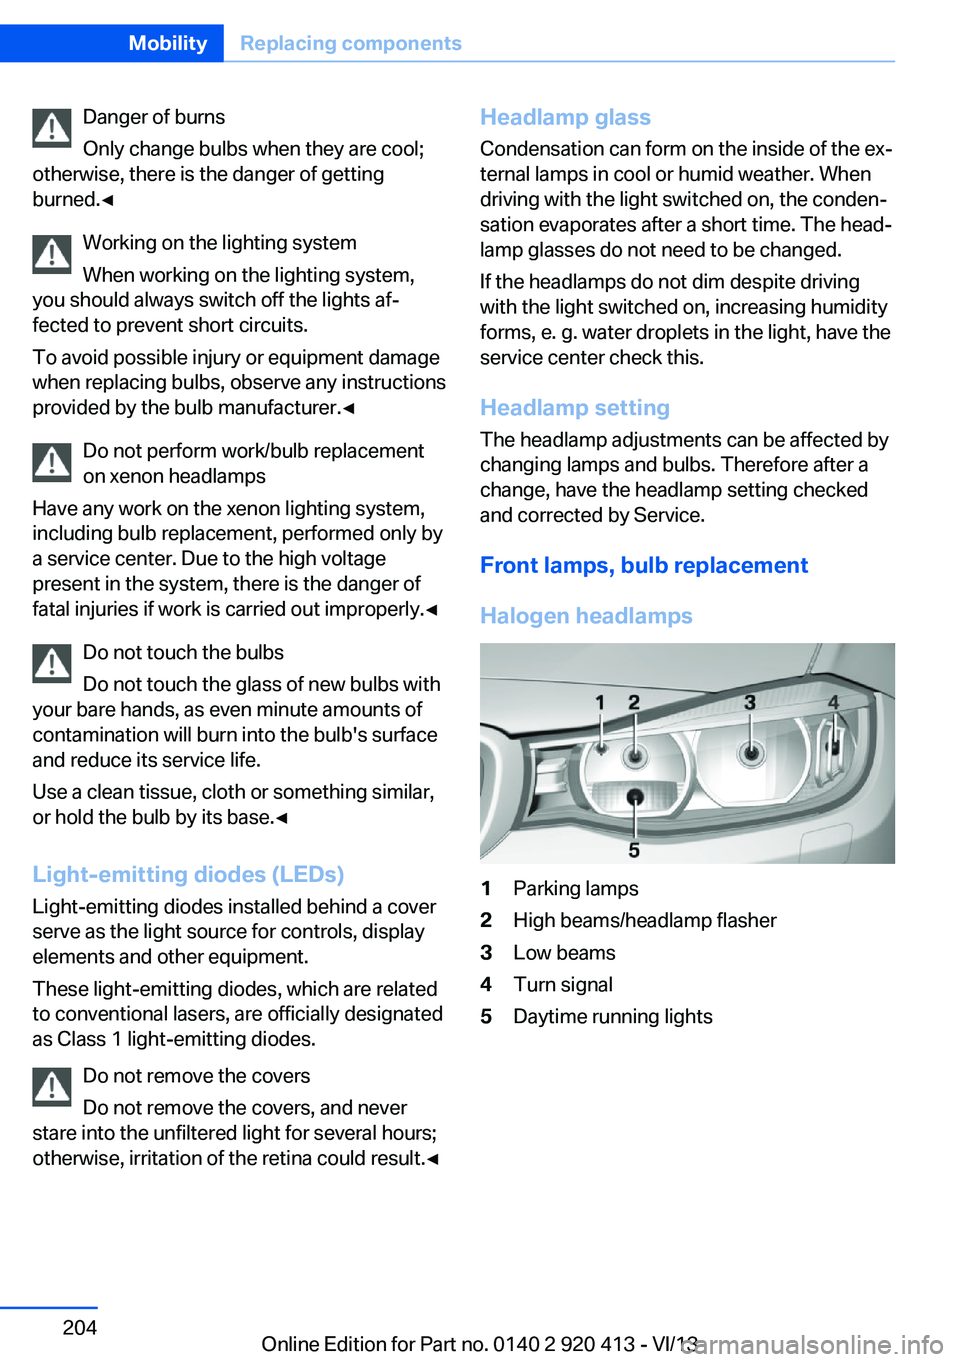
Halogen headlamps1Parking lamps2High beams/headlamp flasher3Low beams4Turn signal5Daytime running lightsSeite 204MobilityReplacing components204
Online Edition for Part no. 0140 2 920 413 - VI/13
Page 205 of 240
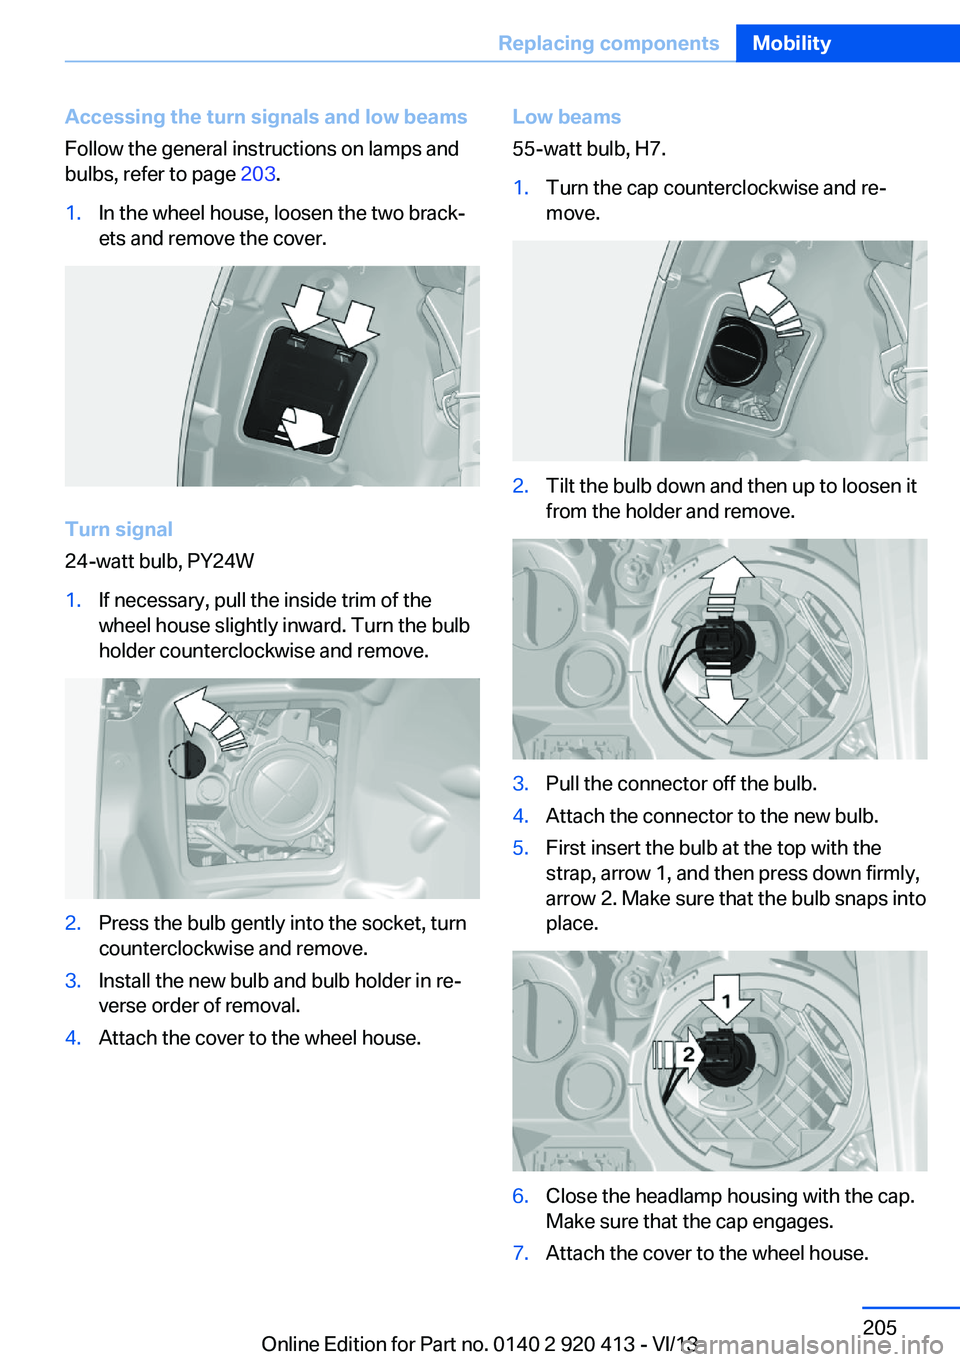
Accessing the turn signals and low beams
Follow the general instructions on lamps and
bulbs, refer to page 203.1.In the wheel house, loosen the two brack‐
ets and remove the cover.
Turn signal
24-watt bulb, PY24W
1.If necessary, pull the inside trim of the
wheel house slightly inward. Turn the bulb
holder counterclockwise and remove.2.Press the bulb gently into the socket, turn
counterclockwise and remove.3.Install the new bulb and bulb holder in re‐
verse order of removal.4.Attach the cover to the wheel house.Low beams
55-watt bulb, H7.1.Turn the cap counterclockwise and re‐
move.2.Tilt the bulb down and then up to loosen it
from the holder and remove.3.Pull the connector off the bulb.4.Attach the connector to the new bulb.5.First insert the bulb at the top with the
strap, arrow 1, and then press down firmly,
arrow 2. Make sure that the bulb snaps into
place.6.Close the headlamp housing with the cap.
Make sure that the cap engages.7.Attach the cover to the wheel house.Seite 205Replacing componentsMobility205
Online Edition for Part no. 0140 2 920 413 - VI/13
Page 206 of 240
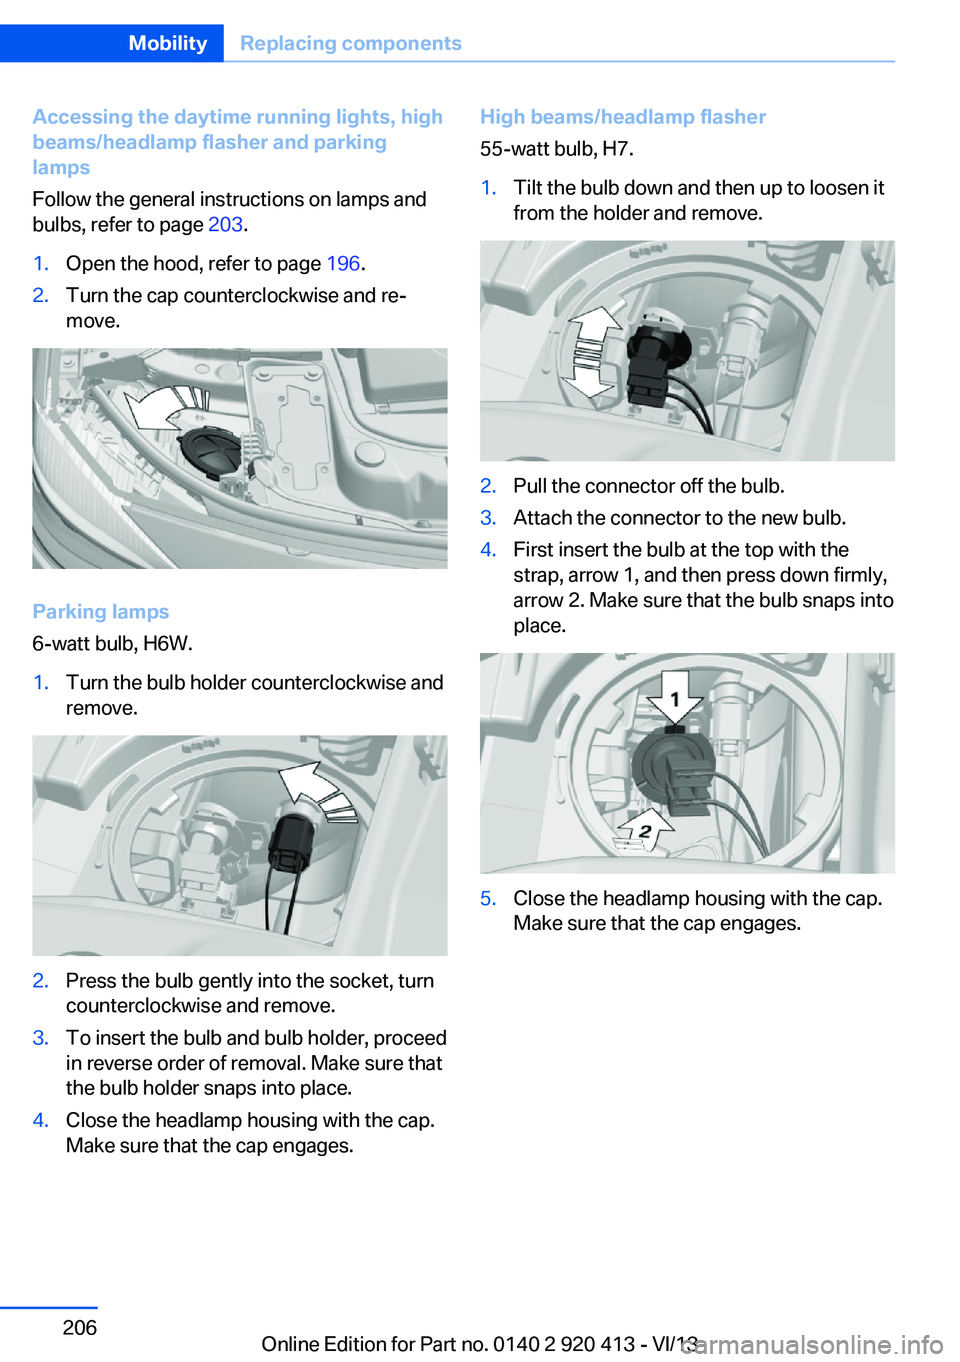
Accessing the daytime running lights, high
beams/headlamp flasher and parking
lamps
Follow the general instructions on lamps and
bulbs, refer to page 203.1.Open the hood, refer to page 196.2.Turn the cap counterclockwise and re‐
move.
Parking lamps
6-watt bulb, H6W.
1.Turn the bulb holder counterclockwise and
remove.2.Press the bulb gently into the socket, turn
counterclockwise and remove.3.To insert the bulb and bulb holder, proceed
in reverse order of removal. Make sure that
the bulb holder snaps into place.4.Close the headlamp housing with the cap.
Make sure that the cap engages.High beams/headlamp flasher
55-watt bulb, H7.1.Tilt the bulb down and then up to loosen it
from the holder and remove.2.Pull the connector off the bulb.3.Attach the connector to the new bulb.4.First insert the bulb at the top with the
strap, arrow 1, and then press down firmly,
arrow 2. Make sure that the bulb snaps into
place.5.Close the headlamp housing with the cap.
Make sure that the cap engages.Seite 206MobilityReplacing components206
Online Edition for Part no. 0140 2 920 413 - VI/13
Page 207 of 240
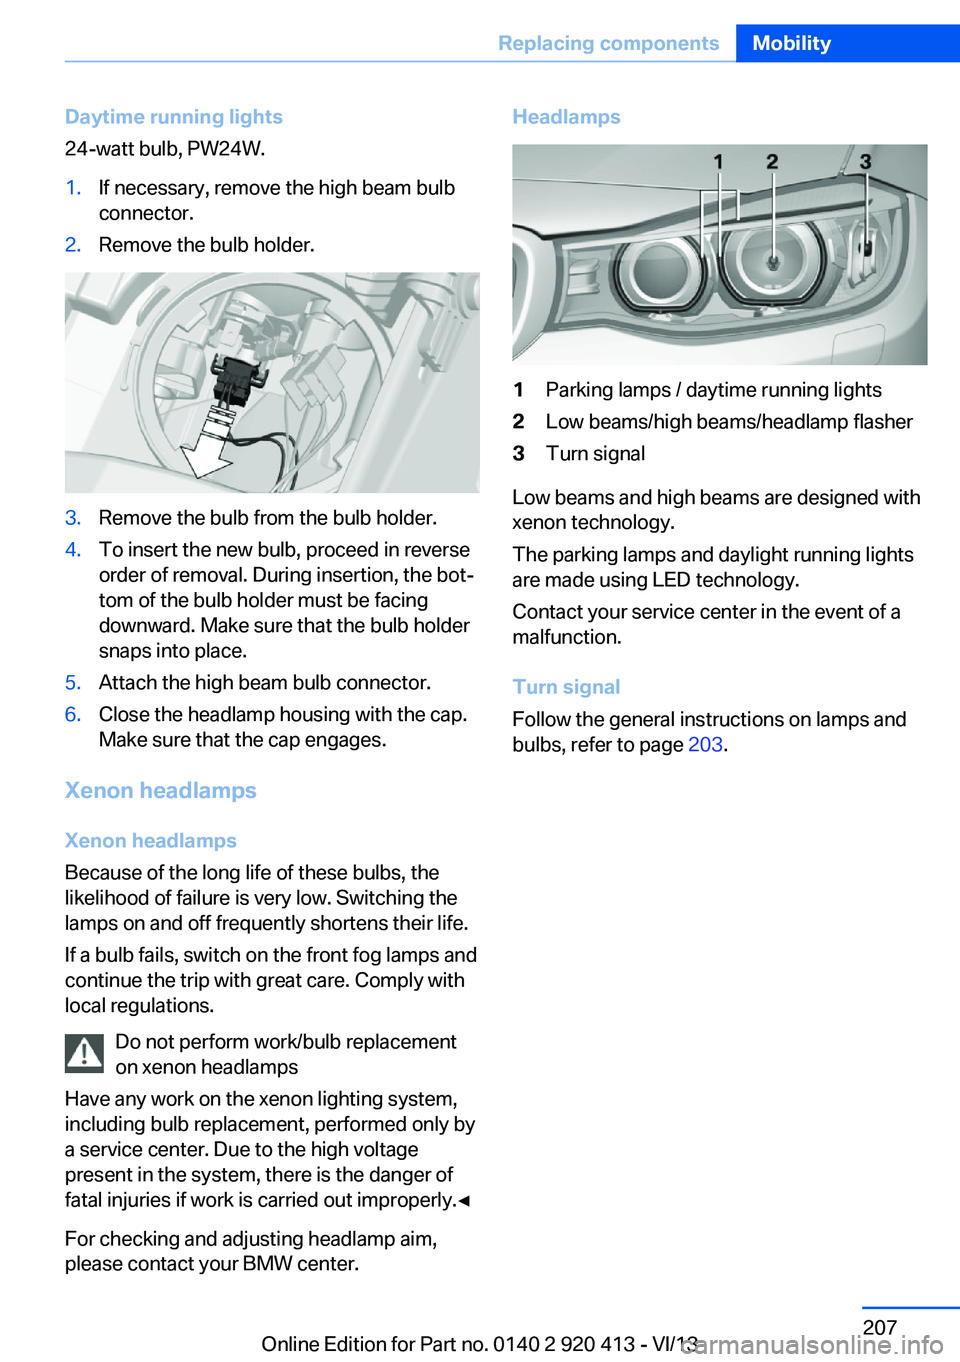
Daytime running lights
24-watt bulb, PW24W.1.If necessary, remove the high beam bulb
connector.2.Remove the bulb holder.3.Remove the bulb from the bulb holder.4.To insert the new bulb, proceed in reverse
order of removal. During insertion, the bot‐
tom of the bulb holder must be facing
downward. Make sure that the bulb holder
snaps into place.5.Attach the high beam bulb connector.6.Close the headlamp housing with the cap.
Make sure that the cap engages.
Xenon headlamps
Xenon headlamps
Because of the long life of these bulbs, the
likelihood of failure is very low. Switching the
lamps on and off frequently shortens their life.
If a bulb fails, switch on the front fog lamps and
continue the trip with great care. Comply with
local regulations.
Do not perform work/bulb replacement
on xenon headlamps
Have any work on the xenon lighting system,
including bulb replacement, performed only by
a service center. Due to the high voltage
present in the system, there is the danger of
fatal injuries if work is carried out improperly.◀
For checking and adjusting headlamp aim,
please contact your BMW center.
Headlamps1Parking lamps / daytime running lights2Low beams/high beams/headlamp flasher3Turn signal
Low beams and high beams are designed with
xenon technology.
The parking lamps and daylight running lights
are made using LED technology.
Contact your service center in the event of a
malfunction.
Turn signal
Follow the general instructions on lamps and
bulbs, refer to page 203.
Seite 207Replacing componentsMobility207
Online Edition for Part no. 0140 2 920 413 - VI/13