2014 AUDI TT ROADSTER trunk
[x] Cancel search: trunkPage 5 of 244

Knee airbags . . . . . . . . . . . . . . . . . . . . . 124
Side airbags . . . . . . . . . . . . . . . . . . . . . 126
Child Safety . . . . . . . . . . . . . . . . . . . 130
Important things to know ......... .
Child safety seats ................ .
Instal ling a chi ld safety seat .. .. .. . .
Additional Information ........... .
Vehicle operation ............ .
Intelligent technology .. .. .. . .
Notice about data recorded by vehicle
control modules .............. ... .
Electronic Stabilization Control (ESC) .
Rear spoiler ................ ... . .
Braking ........................ .
E lect ro-me chan ical power assis t ... . .
D riving w ith your quattro ......... .
Energy management ............. .
Driving and environment .....
The first 1,000 miles (1,500 km) and
afterwards .............. .. .. .. . .
Avoid damaging the vehicle ........ .
Driving through water on roads ... . .
Catalytic converter ............... .
Shutting down vehicle ............ .
Operate your vehicle economically and
minimize pollution ............... . 130
135
138
141
142
142
142
142
144
145
146
1 47
147
1 5 0
150
151
151 151
152
15 2
Tra iler towing . . . . . . . . . . . . . . . . . . . . 154
Vehicle care . . . . . . . . . . . . . . . . . . . 155
Vehicle care and cleaning . . . . . 155
General information . . . . . . . . . . . . . . 155
Car washes . . . . . . . . . . . . . . . . . . . . . . 155
Cleaning and care information . . . . . . 156
Fuel supply and filling your
fuel tank . . . . . . . . . . . . . . . . . . . . . . .
16 1
Gasoline . . . . . . . . . . . . . . . . . . . . . . . . 161
Fuel tank. . . . . . . . . . . . . . . . . . . . . . . . 162
Checking and filling . . . . . . . . . . . 16 5
Engine hood . . . . . . . . . . . . . . . . . . . . . 165
Eng ine oil . . . . . . . . . . . . . . . . . . . . . . . 167
Eng ine cooling system............. 172
Brake fluid ...................... 174
Table of contents 3
Battery . . . . . . . . . . . . . . . . . . . . . . . . . 175
Windshield/headlight washer
container . . . . . . . . . . . . . . . . . . . . . . . 180
Tires and wheels ........... .. .
Tires ..... .. .... .. . .. .......... .
Tire pressure monitoring system ... .
Run-flat tire s .. .. ............... .
Do-it-yourself service ........ .
What do I do now? ........... .
Trunk escape handle ............. .
Vehicle tool kit .... .............. .
T ire repai r .... ... .. ............. .
What should I be aware of when
h . t
' 7 c angmg a ire .................. .
Fuses and bulbs .. .. .. ..... ... .
El ectr ical fuses . .. .. ............. .
Bulbs .......................... .
Emergency situations ........ .
General ........................ .
Starting by pushing or towing ...... .
Starting with jumper cables ....... .
U se of jump er cables ............. .
Emergency towing with commercia l
tow truck ...................... .
Lifting vehicle .. .. ............... . 181
181
199
202
205
205
205
205
206
209
213
213
216
217
217
217
217
218
219
222
Technical data
. . . . . . . . . . . . . . . . . 223
Technical Data . . . . . . . . . . . . . . . . . 223
Vehicle identification . . . . . . . . . . . . . . 223
Weights . . . . . . . . . . . . . . . . . . . . . . . . 223
Dimensions . . . . . . . . . . . . . . . . . . . . . . 224
Capacities . . . . . . . . . . . . . . . . . . . . . . . 224
Gasoline engines . . . . . . . . . . . . . . . . . 225
Consumer Information . . . . . . . 226
Warranty coverages . . . . . . . . . . . . . . . 226
Operating your vehicle outside the
U.S. A. or Canada . . . . . . . . . . . . . . . . . 226
Audi Service Repair Manuals and
Literature . . . . . . . . . . . . . . . . . . . . . . . 226
Maintenance. . . . . . . . . . . . . . . . . . . . . 226
Additional accessories, modifications
and parts rep lacement . . . . . . . . . . . . 228
•
•
Page 24 of 244

22 Driver in formation sy ste m
Driver information
system
Introduction
The Driver information display inside the in
strument cluster provides you, the driver ,
with important information.
Fig . 6 In strum en t cl ust er: center display
Fig. 7 Wiper le ver: con trols fo r the menu disp lay
Cent er d ispla y
With the igni tion on, the display in the Dr iver
I nformation System shows the fol low ing in
formation :
- CD* inserted or Radio* station set
- Outs ide temperature* : At temperatures be-
low 41 °F ( +S °C), a snowflake symbol ap
pears in front of the temperatu re d isplay
c::> .&_ .
- Warning when a door, the engine compa rt-
ment lid or the trunk lid is not closed .
Additional functions
You can open the following functions in the
Driver Information Sys tem disp lay by p ressing
the
! R ESE T I button c::> fig. 7 one or more times:
Digital speedometer *
T ire pressure monitoring
c::> page 199
Trip computer c::> page 23
Menu d isplay c::> page 24
Efficiency program c::> page 27
Service interval disp lay
c::> page 28
Lap timer* c::> page 29
Speed warn ing
c::> page 76
Auto Check Control
Some f unct ions and vehicle components are
scanned for their operati ng sta tus when yo u
switch the ign ition on and whi le you a re driv
ing. Malfunctions or req uired service proce
dures ar e signaled audib ly and indicated by
red and yellow i lluminated symbols and re
m inders in the display.
A WARNING -
- Never rely exclusively on the outside
temperature display to determine if a
road surface is icy or not . K eep in m ind
that road surfaces, espec ially br idges
and overp asses, co uld be ice covered and
slippe ry even at an outside tempe ra tu re
above 4 1 °F (+5 °C).
- Always remembe r, even if the "snow
f lake" symbo l (ice warning) does not ap
pear in the disp lay, black ice could be on
the road .
- A lways reduce your speed and d rive with
specia l care in cold weather cond itions
when the chance of encountering icy
road surfaces increases.
(D Tips
- If the vehicle is stationary, or if you are
dr iving at a very low speed, the tempera
t u re s hown in the d isp lay m ight be
slightly h igher than the actual o utside
temperature. Th is is caused by the heat
being radiated from the engine .
- On vehicles with Audi Nav igat ion sys
tem *, the displays may differ from their
normal appearance during navigation .
Page 39 of 244

,&_ WARNING
-If you use the power locking switch with
the doors closed , remember that all the
vehicle doors will lock.
- Locked doors make it more difficult for
emergency workers to get into the vehi
cle, which puts lives at risk. Do not leave
anyone behind in the vehicle, especially
children.
Emergency locking
If the power locking system fails (pow er fail
ure), you will need to lock the passenger door
separately.
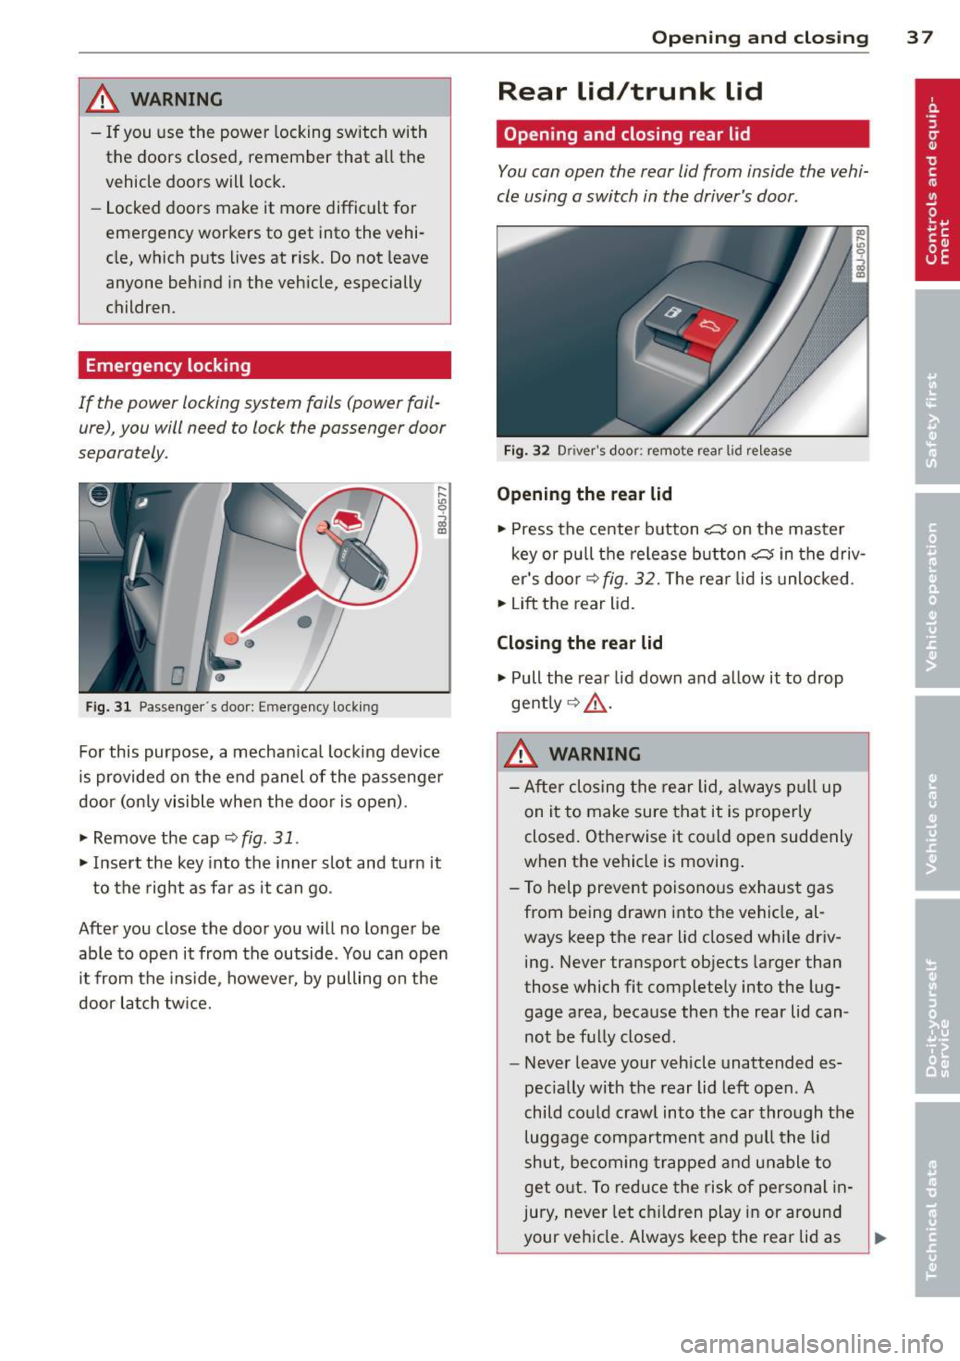
Fig. 3 1 Passenge r's door: E merge ncy lock ing
For this purpose, a mechan ica l locking device
i s provided on the end panel of the passenger
door (only visible when the door is open) .
• Remove the cap
~ fig . 31 .
• Insert the key into the inner slot and turn it
to the right as far as it can go .
After you close the door you w ill no longer be
able to open it from the outside . You can open
it from the inside, however, by pulling on the
door latch tw ice.
Op enin g an d clos ing 3 7
Rear lid/trunk lid
Opening and closing rear lid
You can open the rear lid from inside the vehi
cle using a switch in the driver's door .
Fig. 32 D river 's doo r: remote rear l id re lease
Openin g the rear lid
• Press the center button Cc5 on the master
key or pu ll the release button
c:s in the driv
er's doo r
~fig. 32. The rea r lid is unlocked.
• Lift the rear lid.
Closin g the re a r lid
• Pull the rear lid down and a llow it to drop
gent ly ~ .&, .
A WARNING
-After closing the rear lid, always pull up
on it to make sure that it is p roperly
closed. Otherwise it could open suddenly
when the vehicle is moving .
- To help prevent poisono us exhaust gas
from being drawn into the vehicle, al
ways keep the rear lid closed whi le driv
ing. Never transport objects larger than
those which fit complete ly into the lug
gage area, because then the rear lid can not be fully closed.
- Never leave your vehicle unattended es
pecially with the rear lid left open . A
child cou ld craw l into the car through the
luggage compartment and pull the lid
shut, be coming trapped and unable to
get o ut. To reduce the risk of personal in
jury, never let c hildren play in or around
your veh icle. Always keep the rear lid as
II-
Page 40 of 244

38 Openin g and clo sing
well as the vehicle doors closed when not
in use.
@ Tips
- If the rear lid is ope n or not properly
locked when the ignition is turned on,
the door and rear lid warning appears in
the instrument cluster disp lay.
- If the rear lid on a locked vehicle is un
locked with the middle button
c;j on the
remote key, the rear lid is automatically
l ocked again immediately after clos ing .
This is indicated by the turn signals blinking .
Rear Lid Emergency Release
If the rear lid cannot be opened , an emergen
cy release is provided .
Fig. 33 Storage compartment between t he seatbacks
Fig. 3 4 Handle for emergency re lease
., Pull the hand le on the lid in the d irect ion of
the arrow
i=;, fig. 33 and swing the lid down
ward .
.. Remove the handle from its anchor.
.. Pull the hand le
r::;, fig. 34 in the direction of
the arrow.
A WARNING
-Never operate the emergency release for
the trunk lid while the vehicle is moving .
Anti-theft alarm
system
The anti -the~ alarm triggers an alarm if any
one attempts to break into the vehicle.
F ig . 35 D iode positio n in th e instr ument pane l
,..
-q
i
The anti-theft alarm system triggers an audi
ble a larm and turns on the emergency flasher
if an unauthorized interference with the vehi
cle is sensed by the system .
How is the anti- theft ala rm sy ste m
sw itched on ?
The anti-theft alarm system is switched on
when you lock t he driver's door manually us
ing the fold-out key, or when you use the re
mote control. The system is activated approx i
mately 30 seconds after the vehicle is locked.
T he ind icator light
r::;,fig. 35 starts flashing
rapid ly for 30 seconds and then bl inks slowly .
How is th e anti-theft alarm sy stem
sw itched off?
T he anti-theft alarm system is switched off
o nly when you use the remote control to un
lock your vehicle . If you do not open a door
within 30 seconds after you have unlocked
with the remote control, the vehicle wi ll lock
itself aga in automatically .
If you lock just the driver's door using your
key, the front passenger's door and the rear
lid remain locked. ..,.
Page 47 of 244

-Lock the convertible top: The latches for
the convertible top must be locked with the
emergency lock key.
-Close the hydraulic system's emergency
operation bolt:
T urn the emergency opera
tion bolt¢
page 45, fig. 46 to the right to
close the hydraulic system that operates the
convertible top.
&_ WARNING
- When raising the convert ible top, take
ca re not to reach into the linkage that
operates the convertible top or any of its
other moving parts. Otherwise, your
hands may be trapped in the mechanism
- risk of injury!
- Never drive while the convertible top is
not properly secu red. Otherwise, it may
be pulled open by the wind. This can
cause injuries and damage to the vehicle
- danger of an accident!
@ Tips
Get a second person help you to close the
convertible top. It is much easier to raise
the convertib le top with the help of a sec
ond person.
Step 1: Depressurizing the hydraulic
system
Applies to vehicles: with power convertible top
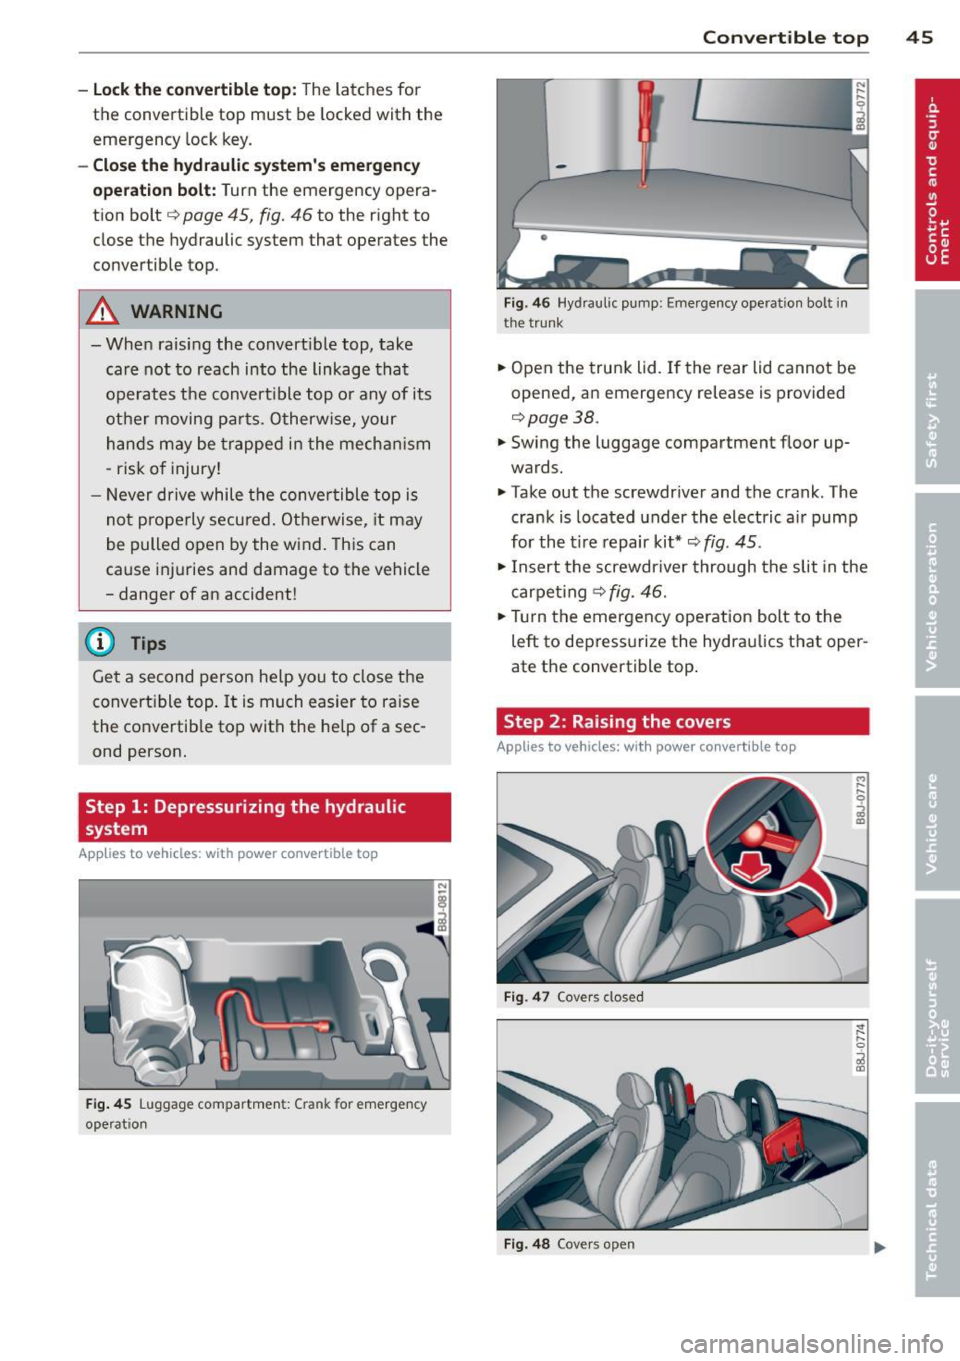
Fig . 45 Luggage compartment: Crank for emerg ency
operation
-
Convertible top 45
-
Fig . 46 Hy draul ic pump: Emergency operation bolt i n
the tr unk
.,. Open the trunk lid. If the rear lid cannot be
opened, an emergency release is provided
r=>page38.
.,. Swing the luggage compartment floor up
wards .
.,. Take out the screwdr iver and the crank. The
crank is located under the electric air pump
for the t ire repair kit*¢
fig. 45.
.,. Insert the screwdr iver through the slit in the
carpeting ¢
fig. 46.
.,. Tur n the emergency operation bolt to the
left to depressurize the hydraulics that oper
ate the convertible top .
Step 2: Raising the covers
Applies to vehicles: with power convertible top
Fig. 47 Cove rs close d
Fig . 48 Covers open
Page 65 of 244

-To reduce the risk of injury in the case of
sudden braking or accident, front pas
sengers must never ride in a moving ve
hicle with the seatback reclined. Safety
belts and the airbag system offer maxi
mum protection only when the seatback
is upright and the safety be lts are prop
erly positioned on the body. The more
the seatback is reclined, the greater the
risk of personal injury from an incorrect
seating position and improperly posi
tioned safety be lts!
- Always make sure the front seatbacks are
in the upright position and securely
locked in place when dr iving.
Head restraints
Adjusting head restraints, front seats
The head restraints must be adjusted proper
ly to provide protection .
Fig. 70 Dr iver 's seat head restraint: ad just ing t he
height
The head restraints on the front seats can be
adjusted to provide safe support to head and neck at the opt imum he ight. When optimally
adjusted, the top of the restraint should be
level with the top of the head ¢
page 95,
Proper adjustment of head restraints.
... Grasp the sides of the head restraint with
both hands and slide it upward/downward
until you feel it click into place¢
fig. 70.
_& WARNING
- Driving without head restraints or with
head restraints that are not properly ad-
-
Seats and storage 63
justed increases the risk of serious or fa
tal neck injury dramat ica lly.
- Read and heed all WARNINGS
¢page 95.
(D Tips
Correctly adjusted head restraints and
safety be lts are an extreme ly effective
combination of safety features.
Luggage compartment
Pass-through with Ski Bag
Using the pass-through and the removable
ski bag, you can transport long objects (e .g.
skis) neatly and without damaging the interi
or.
Fig. 71 Open storage co mpartmen t between th e seat
backs
Fig. 72 Retainer fo r the ski bag between the seatbacks
Loading
... Open the flip cover to the storage compart
ment between the seatbacks ¢
page 67 .
... To unlock it, pull the handle and fold the
cover of the pass-through to the trunk
<=> fig. 71.
"'"Flip the cover upward in the direction of the
arrow.
"'" Open the trunk lid .
Page 66 of 244

64 Seats and storage
• Push the ski bag from the trunk through the
opening in the rear wall
c::> &_.
• Load up the ski bag.
Securing
• Hook the ski bag 's safety strap @ c::> fig. 72.
• Adjust the retain ing strap @ to the des ired
length .
• Clip the retaining strap.
Storag e
• Unhoo k the ski bag's safety strap @
¢fig. 72.
• Fold the cover¢
fig. 71 downward in the op
posite direction of the arrow .
• Loosen the retaining strap@.
• Pull the ski bag backward through the rear
wall.
• Close the cover of the pass-through to the
trunk .
• Close the flip cove r to the storage compart
ment between the seatbacks ¢
page 67.
• If necessary, collapse the s ki bag.
_& WARNING
After loading, the sk i bag must be secured
w ith the safety strap.
(D Tips
Ma ke sure that the s ki bag is not folded up
while still damp.
Cup holder
F ig. 73 Cup holder
_& WARNING ,. -
Spilled hot liquid can cause an accident
and pe rsonal injury. -
Never carry any beverage conta iners with
hot liqu ids, such as hot coffee or hot tea,
in the vehicle while it is moving. In case
of an acc ident, sudden braking or other
veh icle movement, hot liquid could spill,
causing scalding burns . Spilled hot liquid
can also cause an accident and pe rsonal
inju ry.
- Us e only soft cups in the c upholder. Hard
cups and glasses can cause injury in an
accident.
- Neve r use the cupholder or adapter as an
ashtray -ris k of fire.
(1) Note
Only drink containers with Lids should be
carried in the cuphold er. L iquid could spill
out and damage your vehicles electronic
equipmen t or s tain t he upho lstery, etc.
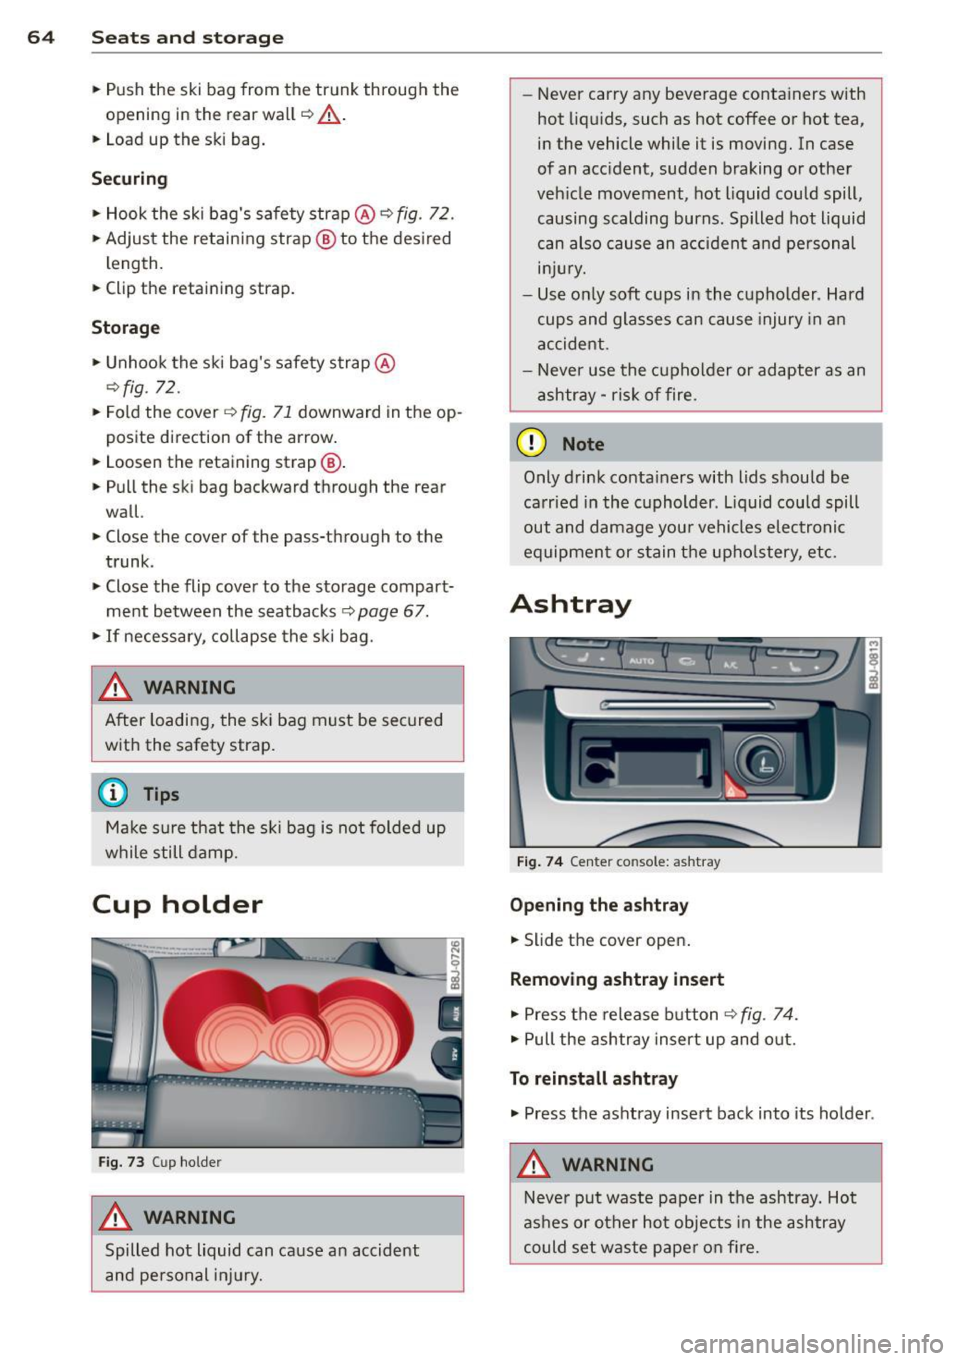
Ashtray
Fig . 7 4 Center console: ashtray
Opening the ashtray
• Slide the cover open.
Removing ashtray insert
• Press the release button ¢fig . 74.
• Pull the ashtray insert up and out.
To r einstall a shtray
• Press the ashtray insert back into its holder.
_& WARNING
-Never put waste paper in the ashtray. Hot
as hes or other hot objects in the ashtray
could set waste paper on fire.
Page 207 of 244

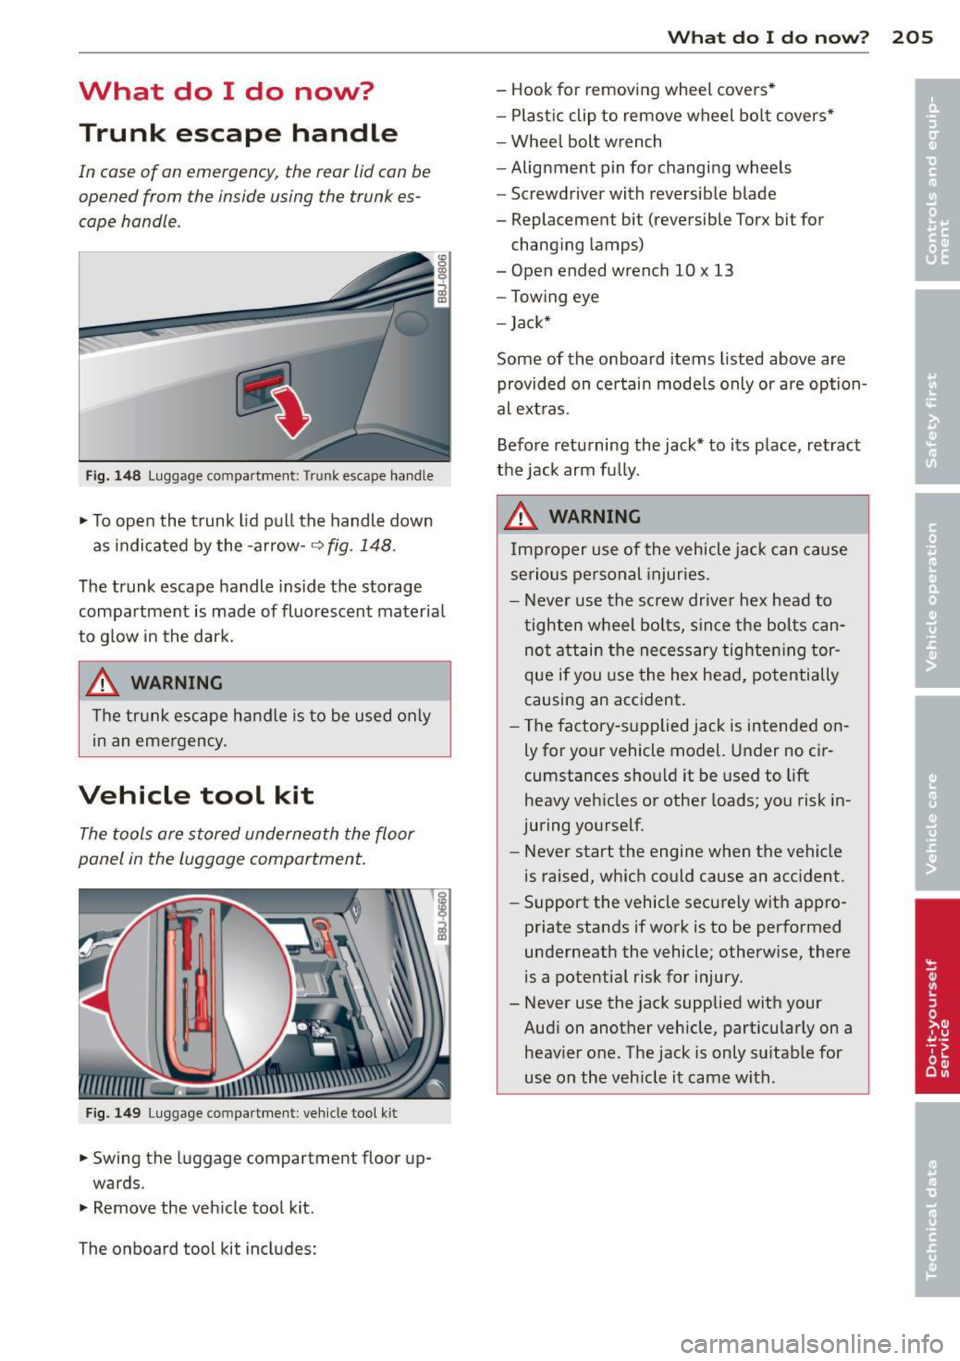
What do I do now? Trunk escape handle
In case of an emergency, the rear lid can be
opened from the inside using the trunk es
cape handle .
Fig. 148 Luggage compa rtment: Tr unk escape handle
"' To open the trunk lid pu ll the handle down
as indicated by the -arrow-~
fig. 148.
The trunk escape handle inside the storage
compartment is made of fluorescent materia l
to g low in the dark.
& WARNING
The trunk escape handle is to be used only
in an emergency .
Vehicle tool kit
The tools ore stored underneath the floor
panel in the luggage compartment.
F ig. 1 49 Luggage co mpa rt ment : veh icle tool ki t
"'Swing the luggage compartment floor up
wards.
"' Remove the vehicle tool k it.
The onboard tool kit includes:
What do I d o now ? 205
- Hook for removing wheel covers*
- Plastic clip to remove wheel bo lt covers*
- Wheel bolt w rench
- Alignment pin for changing wheels
- Screwdriver with reversible blade
- Replacement bit (reversible Torx bit for changing lamps)
- Open ended wrench 10 x 13
- Towing eye
- Jack*
Some of the on board items listed above are
provided on ce rtain mode ls only or are option
al ext ras.
Before returning the jack* to its place, retract
the jack arm fu lly.
& WARNING
Improper use of the vehicle jack can cause
serious pe rsonal injuries .
- Never use the screw drive r hex head to
tighten wheel bo lts, since the bolts can
not attain the necessary tighte ning tor
que if you use the hex head, potentially
causing an accident.
- The factory-supplied jack is intended on
ly for yo ur vehicle model. Under no ci r
cumstances should it be used to lift
heavy veh icles or other loads; you risk in
juring yourself .
- Never start the engine when the vehicle
is raised, wh ich could cause an accident.
- Support the vehicle securely with appro
priate stands if work is to be performed
underneath the vehicle; otherwise, there
is a potential risk for injury.
- Never use the jack supplied with your Audi on another vehicle, particularly on a heav ier one . The jack is only suitable for
use on the veh icle it came with .