2014 AUDI RS7 SPORTBACK door lock
[x] Cancel search: door lockPage 60 of 292
58 Seats and storage
Remote Memory button
control master
key
Driver Driver Front
passen- ger
Seat X X X
Stee ring X X
wheel*
Both exterior
X X
rearview mir-
rors*
Remote control key
Applies to vehicles: with memory function
To assign the driver's seat settings to the re
mote control key when locking the vehicle, the
function must be switched on .
• Se lect:
I CAR I funct ion button > (Ca r)* sys
tems
con trol button > Vehicle settings >
Seats > Driver seat > Remote control key >
On.
@ Tips
If you do not want another driver's set
tings to be assigned to the remote contro l
key, switch off the memory function using
the MMI or the
!OFF ! button c::> page 58.
Memory buttons
Applies to vehicles: with memory function
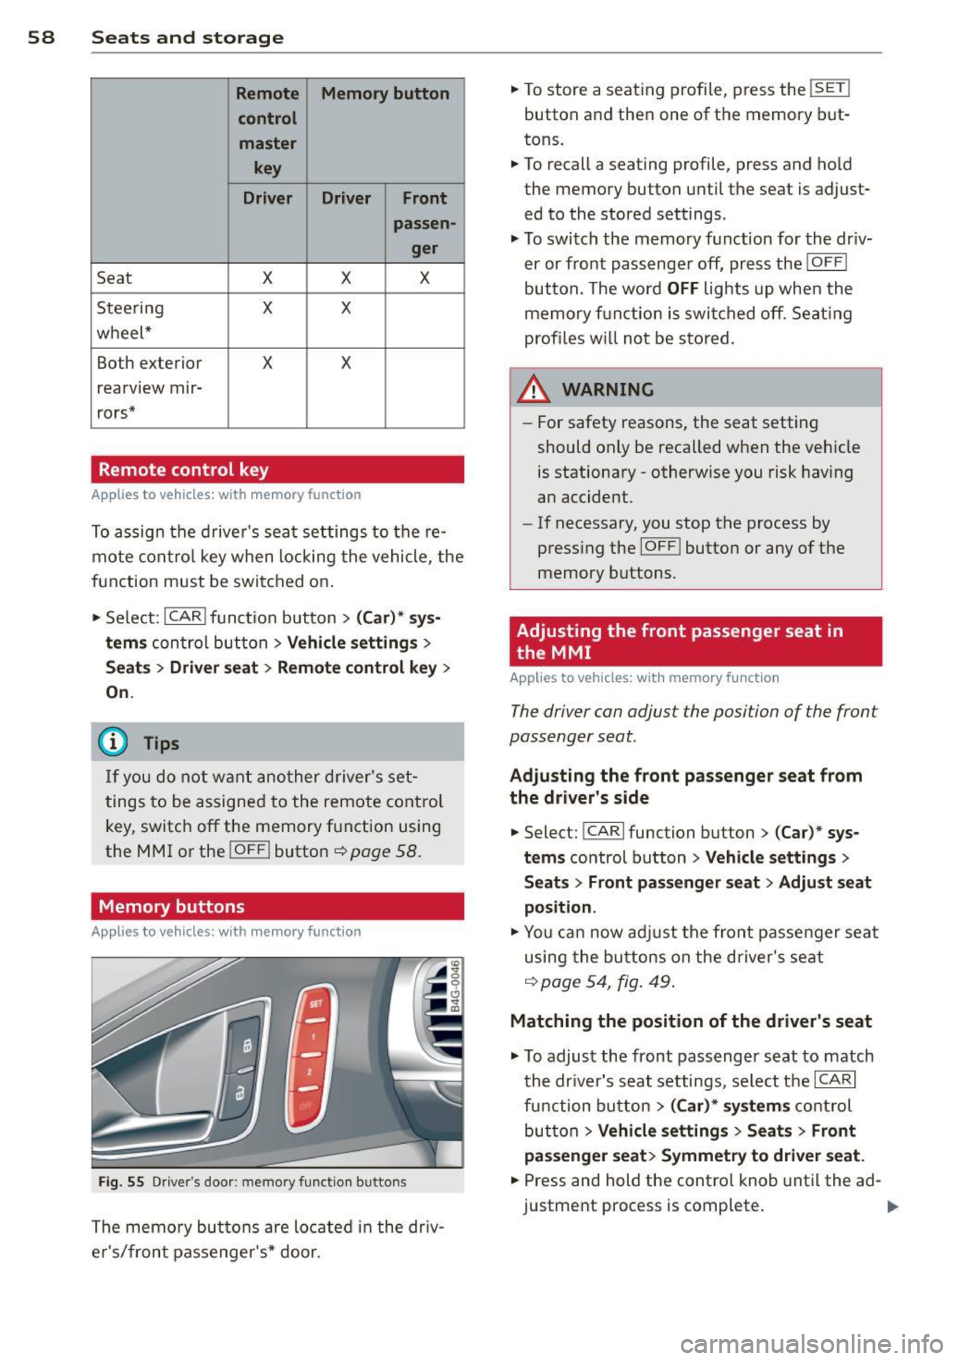
Fig. 55 Driver's door: memory function buttons
The memory buttons are located in the dr iv
e r's/front passenger's* door. •
To store a seat ing profile, press the
!SET !
button and then one of the memory but
tons .
• To recall a seating profile, press and hold
the memory button until the seat is adjust
ed to the stored settings.
• To switch the memory function for the driv
er or front passenge r off, press the
IOFF I
button. The word OFF lights up when the
memory fu nctio n is swi tched off. Seating
profi les wi ll not be stored.
.&, WARNING
- For safety reasons, the seat setting
should only be recalled when the vehicle
is stationary -otherwise you risk having
an accident.
- If necessary, you stop the process by
press ing the
I OF F! button or any of the
memory buttons.
Adjusting the front passenger seat in
. the MMI
Applies to vehicles: with memory function
The driver con adjust the position of the front
passenger seat.
Adjusting the front pas senger seat from
the driver's side
• Select: !CARI function button> (C ar) * sys
tems
control button > Vehicle settings >
Seats> Front passenger seat > Adjust seat
position .
• You can now adjust the front passenger seat
using the buttons on the d river's seat
q poge54 , fig. 49.
Matching the position of the driver's seat
• To adjust the front passenger seat to match
the dr iver's seat settings, select the
ICARI
function button > (Car)* systems control
button
> Vehicle settings > Seats> Front
passenger seat> Symmetry to driver seat.
• Press and hold the control knob until the ad
justment process is complete.
Page 63 of 292
Front cupholder
• To open the cupholder, tap the cover
¢fig. 61.
Rear cupholder*
• To open the rear cupholder, press on the
symbol
'i @ ¢ fig. 62.
• To adjust the arm@, swing it in the direc
t ion of the arrow.
• Place the beverage in the holder and release
the arm. The arm swings back by itself and
automatically secures the beverage.
• To close the rear cup holder, press on the
center section between the two arms and
push the cupholder in the slot as far as it
will go .
& WARNING
Spilled hot liquid can cause an accident
and personal injury.
- Never carry any beverage containers with
hot liquids, such as hot coffee or hot tea,
in the vehi cle while it is moving . In case
of an accident, sudden braking or other
vehicle movement, hot liquid could spill,
causing sca lding burns. Spilled hot liquid
can a lso cause an accident and personal
injury.
- Use only soft cups in the cupholder . Hard
cups and g lasses can cause injury in an
accident.
- Never use the cupholder or adapter as an
ashtray -risk of fire.
(D Note
On ly drink containers with lids should be
carried in the cupho lder. Liquid could spill
out and damage your vehicle's e lectronic
equipment or stain the upholstery, etc.
Seats and storage 61
Cooled glove compartment
Applies to vehicles: w ith cooled g love compart men t
The cooled glove compartment only functions
when the AIC system is switched on .
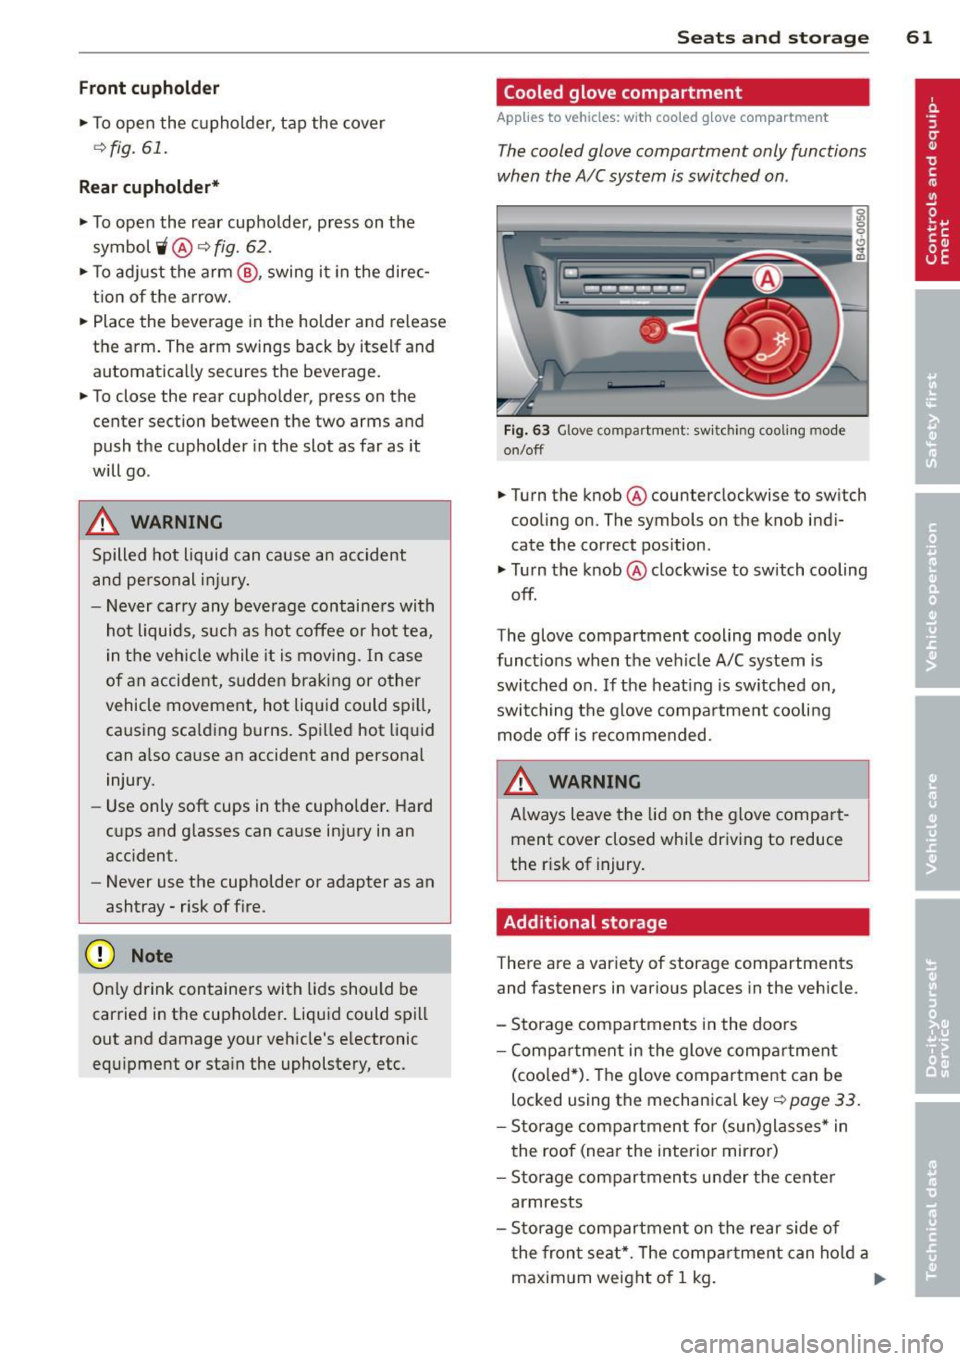
Fig. 63 Glove compartment: sw it c h in g cooling mode
on/off
• Turn the knob@counterclockwise to switch
cooling on. The symbols on the knob indi
cate the correct position .
• Turn the knob @clockwise to switch cooling
off.
The glove compartment cooling mode only
functions when the vehicle A/C system is
switched on . If the heating is switched on,
switching the glove compa rtment cooling
mode off is recommended.
& WARNING ~ -
Always leave the lid on the glove compart
ment cover closed while driving to reduce
the r isk of injury.
Additional storage
There are a variety of storage compartments
and fasteners in various places in the vehicle .
- Storage compartments in the doors
- Compartment in the glove compartment
(coo led*) . Th e g love compartment can be
locked using the mechanica l key ¢
page 33.
-Storage compartment for (sun)glasses* in
the roof (near the interio r mirror)
- Storage compartments under the center
armrests
- Storage compartment on the rear side of
the front seat*. The compartment can hold a
maximum weight of 1 kg. ..,..
Page 67 of 292
Removing the cover in the rear lid
• Remove the knobs CD c::> fig. 66 from the ball
mounts.
• Pull the cover @out of the retainers@ in
the direct ion of the arrow .
Installing the cover in the rear lid
• Slide the cover upward into the retainers @.
• Press the knobs
CD onto the ball mounts.
Removing the cover behind th e rear bench
seat
• Pull the cover ¢ fig. 67 back.
• Pull the cover upward to release.
Installing the cover behind the rear bench
seat
• Insert the left and right sides of the cover
into the mounts on the side trim .
• Slide the cover forward until it locks into
place .
A WARNING
-To prevent accidents, never install the
luggage compartment cover unsecured.
- The luggage compartment cover is not a
surface for storing objects. Objects
placed on the cover could endanger all
vehicle occupants during sudden braking
maneuvers or in a crash.
(D Note
Objects located on the rear shelf that rub
aga inst the rear window could damage the
heating wires for the rear window defog
ger .
Seats and storage 65
Enlarging cargo capacity of the vehicle
, interior
The seat backs can be folded forward to en
large the cargo capacity.
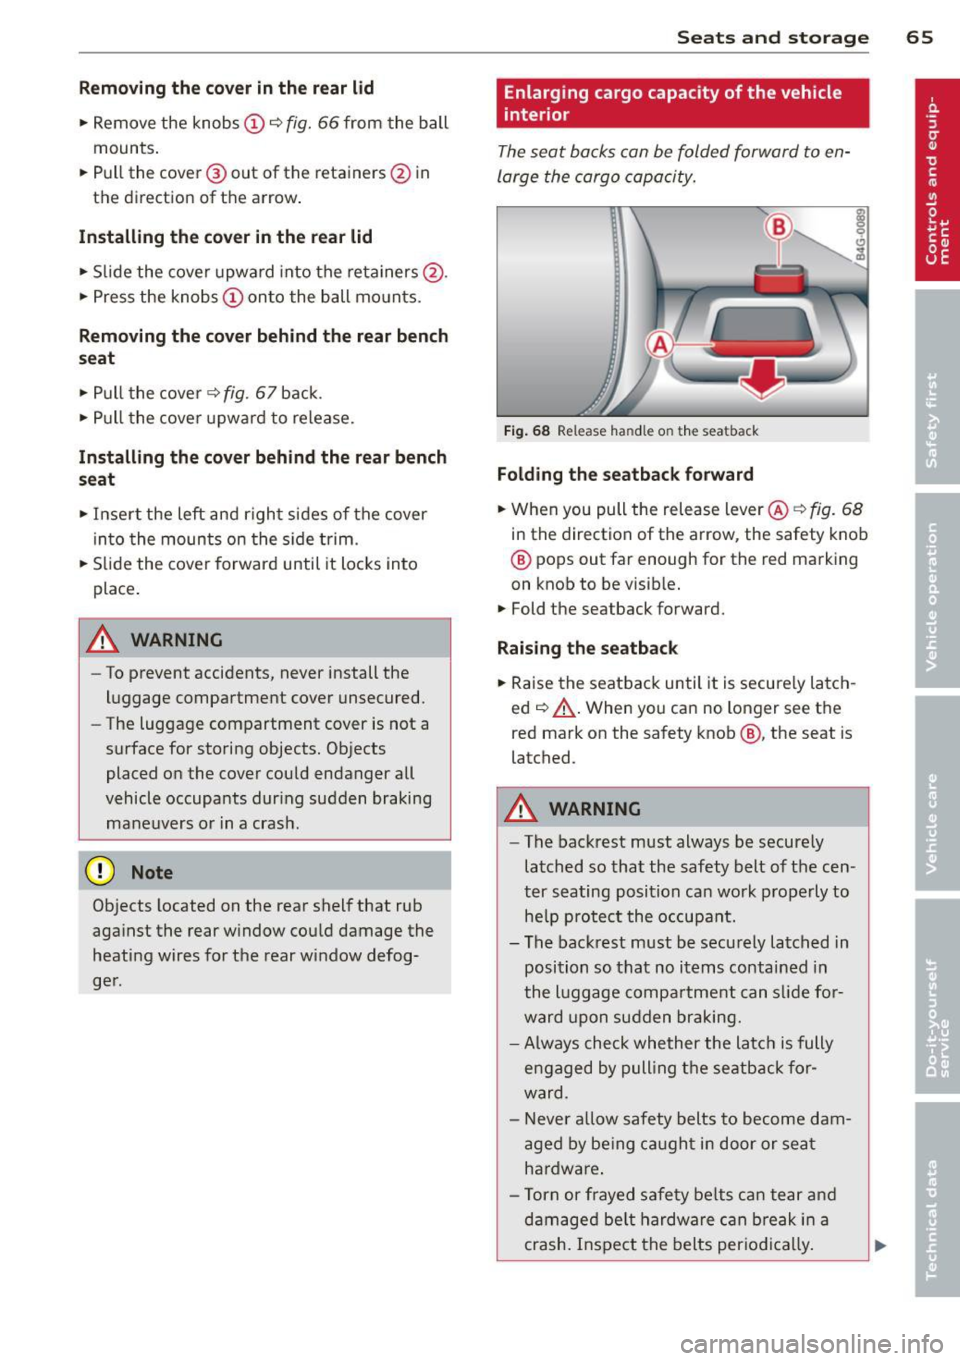
Fig. 68 Release handle on t he seatback
Folding the seatback forward
• When you pull the release lever @<=:> fig. 68
in the direction of the arrow, the safety knob
® pops out far enough for the red marking
on knob to be visib le.
.,. Fold the seatback forward.
Raising the seatback
.,. Raise the seatback until it is secure ly latch
ed¢ &,.. When you can no longer see the
red mark on the safety knob@, the seat is
latched .
_& WARNING
-
-The backrest must always be securely
latched so that the safety belt of the cen
ter seating position can work properly to he lp protect the occupant.
- The backrest must be securely latched in
position so that no items contained in
the luggage compartment can s lide for
ward upon sudden braking.
- Always check whether the latch is fully
engaged by pulling the seatback for
ward .
- N ever a llow safety belts to become dam
aged by being caught in door or seat
hardware .
- Torn or frayed safety belts can tear and
damaged be lt hardware can break in a
crash. Inspect the belts periodical ly.
Page 78 of 292
76 On the road
Driver message in the instrument
cluster display
Turn off ignition befor e le a v ing car
This message appears and a warning tone
sounds if yo u open the dr iver's door when the
ignition is switched on.
Press brake p edal to start engin e
This message appears if you press the
I STAR T ENGINE ST OP ! button to start the en
g ine and do not depress the brake pedal. The
engine can on ly be started if the brake pedal
is depressed.
!I I s ke y in th e vehicle?
If the indicator light turns on and the mes
sage appears, the remote control key was re
moved from the vehicle while the engine was
running. If the ignit ion key is not in the vehi
cle you w ill not be able to sw itch on the ign i
tion or resta rt the engine after it has been
switched off. You w ill also not be ab le to lock
the veh icle from the outside.
Shift to P , oth erwise vehicl e can roll away.
Doors do not lo ck if lever i s not in P .
This message appears for safety reasons
along w ith an audib le warn ing tone if the P
selecto r lever posit io n is not engaged when
stopping the engine with the
I STAR T ENGINE ST OP ! button. Select the P se
lector lever pos it ion. Othe rwise the veh icle
could ro ll and it cannot be locked.
(I Key is n ot recogn iz e d . Ho ld b ack o f key
ag ain st marked ar ea . Se e owner's manual.
If the indicator light tu rns on and th is mes
sage appears, there is a malfunction
c::>page 76. Starting the engine if there is a
malfunction
It may not be possible to start the engine un
der certain circumstances, for example if the
battery in the vehicle key
is drained, if inter
ference has affected the key or if there
is a
system malfunction .
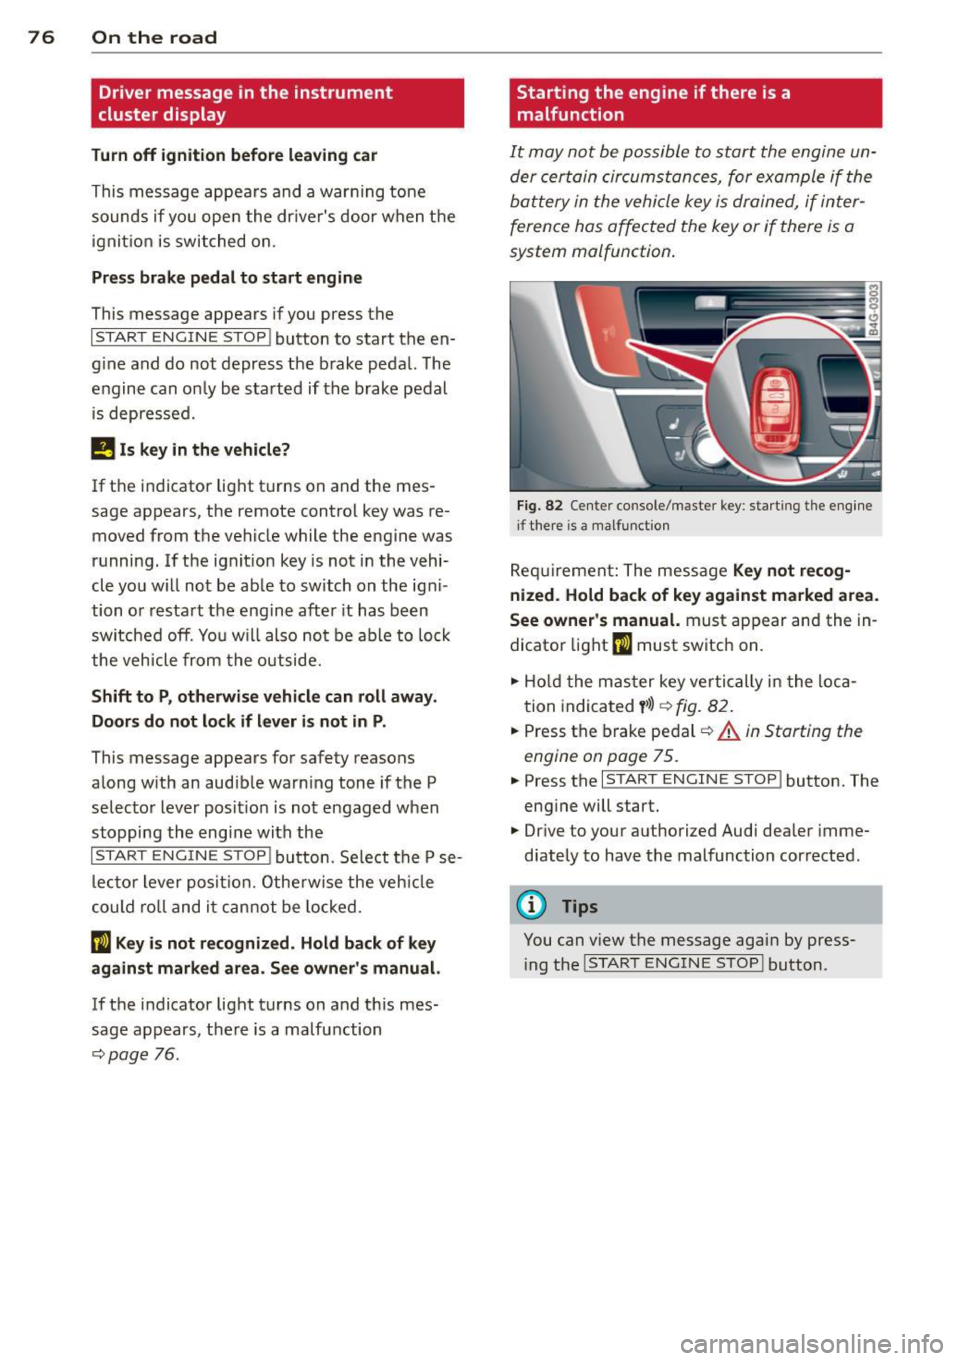
Fig . 82 Center console/master key: starting the eng ine
i f there is a malfunction
Req uirement: The message Ke y not r ecog
ni ze d. H old back of key aga inst ma rked are a.
Se e owne r's manual.
must appear and the in
dicator
light (I must switch on.
.,.. Ho ld the mas ter key vertically in the loca
tion indicated
y >l) r=:>fig. 82.
.,.. Press the brake pedal c::> A in Starting the
engine on page 75.
.,.. Press the I START ENGINE S T OP ! button. The
eng ine will start.
.,.. Dr ive to your authorized Audi dealer imme
diately to have the malfunction corrected.
(D Tips
You can v iew the message again by press
i ng the
I STAR T ENGINE STOP I button.
Page 108 of 292
106 Automatic Transmission
lever is left in N (Neutral) for more than ap
proximately 2 second, without the brake ped
a l being pressed .
Release button
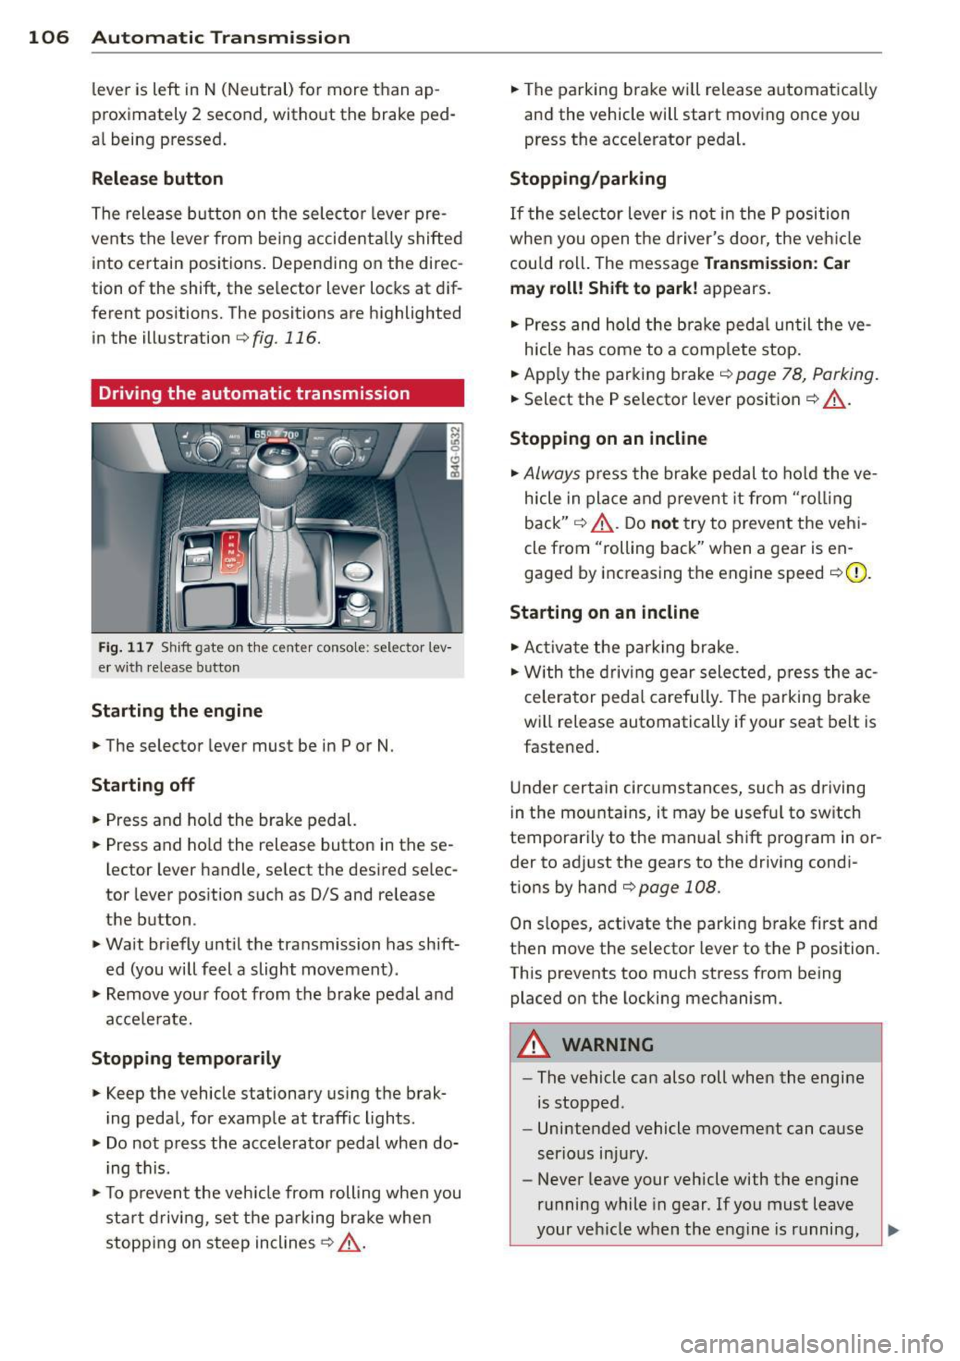
The release button on the selector lever pre
vents the lever from being accidentally shifted
into certain positions. Depending on the direc
tion of the shift, the se lector lever locks at d if
ferent positions. The positions are highlighted in the illustration
c:;, fig. 116.
Driving the automatic transmission
Fig. 117 Sh ift gate on the center conso le: selector lev
er w ith release button
Starting the engine
,.. The selector lever must be in P or N.
Starting off
,.. Press and ho ld the brake pedal.
,.. Press and ho ld the release button in these
lector lever handle, se lect the desired se lec
tor lever position such as 0/5 and release
the button .
,.. Wait briefly until the transmission has shift
ed (you will feel a slight movement) .
,.. Remove your foot from the brake pedal and
acce le rate.
Stopping temporarily
,.. Keep the vehicle stationary us ing the brak
ing peda l, for example at traffic lights.
,.. Do not press the accelerator pedal when do
ing this .
,.. To prevent the veh icle from rolling when you
sta rt driving, set the parking brake whe n
stopping on steep inclines
c:;, _& .
,.. The parking brake will release automatica lly
and the vehicle will start moving once you
press the acce lerator pedal.
Stopping/parking
If the sele ctor lever is not in the P position
whe n you open t he driver's door, the veh icle
could roll. The message
Transmission: Car
may roll! Shift to park!
appears.
,.. Press and hold the brake pedal until the ve-
hicle has come to a complete stop.
,.. App ly the parking brake
c::> page 78, Parking.
,.. Select the P selector lever position c:;, _& .
Stopping on an incline
,.. Always press the brake pedal to hold the ve
hicle in place and prevent it from "rol ling
back"
c:;, _& . Do not try to prevent the vehi
cle from "rolling back" when a gear is en
gaged by increasing the engine speed
c::>(D .
Starting on an incline
,.. Activate the parking brake.
,.. With the driving gear selected, press the ac
celerator pedal carefully. The parking brake
will release automatically if your seat belt is
fastened .
Under certain circumstances, such as driving
in the mounta ins, it may be usefu l to sw itch
temporarily to the manual shift program in or
der to adj ust the gears to the driving condi
t ions by hand
c::>page 108 .
On slopes, activate the parking brake first and
then move the selector lever to the P position.
This prevents too much stress from being placed on the locking mechanism.
A WARNING
-
- The vehicle can also roll when the engine
is stopped .
- Unintended vehicle movement can cause
serious injury.
- Never leave your vehicle with the engine
running while in gear . If you must leave
your vehicle when the engine is running,
Page 132 of 292

130 Driving Safely
&_ WARNING
-
To help prevent poisonous exhaust gas
from being drawn into the vehicle, always keep the rear lid closed while driving .
- Never transport objects larger than
those fitting completely into the luggage
area because the rear lid cannot be fully
closed.
- If you absolutely must drive with the rear
lid open, observe the following notes to
reduce the risk of poisoning:
- Close all windows,
- Close the power roof*,
- Open all air outlets in the instrument
panel,
- Switch off the air recirculation,
- Set the fresh air fan to the highest
speed.
&_ WARNING
Always make sure that the doors, all win
dows, the power roof* and the rear lid are
securely closed and locked to reduce the
risk of injury when the vehicle is not being
used.
- After closing the rear lid, always make
sure that it is properly closed and locked.
- Never leave your vehicle unattended es
pecially with the rear lid left open. A
child could crawl into the vehicle through
the luggage compartment and close the
rear lid becoming trapped and unable to
get out . Being trapped in a vehicle can
lead to serious personal injury.
- Never let children play in or around the
vehicle .
- Never let passengers ride in the luggage
compartment . Vehicle occupants must
always be properly restrained in one of
the vehicle's seating positions.
(D) Tips
- Air circulation helps to reduce window fogging. Stale air escapes to the outside
through vents in the trim panel. Be sure
to keep these slots free and open .
-
-The tire pressure must correspond to the
load. The tire pressure is shown on the
tire pressure label. The tire pressure la
bel is located on the driver's side B-pillar.
The tire pressure label lists the recom mended cold tire inflation pressures for
the vehicle at its maximum capacity
weight and the tires that were on your
vehicle at the time it was manufactured.
For recommended tire pressures for nor
mal load conditions , please see chapter
r::!) page 232.
Tie-downs
The luggage compartment is equipped with
four tie-downs to secure luggage and other
items.
Use the tie-downs to secure your cargo prop
erly ¢
page 129, Loading the luggage com
partment.
In a collision, the laws of physics mean that
even smaller items that are loose in the vehi
cle will become heavy missiles that can cause
serious injury. Items in the vehicle possess en
ergy which vary with vehicle speed and the
weight of the item. Vehicle speed is the most
significant factor.
For example , in a frontal collision at a speed
of 30 mph (48 km/h), the forces acting on a 10-lb (4.5 kg) object are about 20 times the
normal weight of the item. This means that
the weight of the item would suddenly be about 200 lbs. (90 kg). You can imagine the
injuries that a 200 lbs . (90 kg) item flying
freely through the passenger compartment
could cause in a collision like this.
&_ WARNING
Weak, damaged or improper straps used
to secure items to tie-downs can fail dur
ing hard braking or in a collision and cause
serious personal injury.
- Always use suitable mounting straps and properly secure items to the tie-downs in ..,.
Page 149 of 292
q fig. 160. The general location of the airbags
is marked "AIRBAG".
There is a lot you need to know about the air bags in your vehicle. We urge you to read the
detailed information about airbags, safety
belts and child safety in this and the other
chapters that make up the owner's literature.
Please be sure to heed the WARNINGS -they
are extremely important for your safety and
the safety of your passengers, especially in
fants and small children .
A WARNING
Never rely on airbags alone for protection.
- Even when they deploy, airbags provide only supplemental protection .
- Airbag work most effectively when used
with properly worn safety belts .
- Therefore, always wear your safety belts
and make sure that everybody in your ve
hicle is properly restrained .
- Always hold the steering wheel with both
hands on the outside of the steering
wheel rim at the 9:00 o'clock and 3:00 o'clock positions to help reduce the risk
of personal injury if the driver's airbag in
flates.
- Never hold the steering wheel at the 12
o'clock position or with your hands any
where inside the steering wheel or on the
steering wheel hub. Holding the steering
wheel the wrong way increases the risk
of severe injury to the arms, hands, and
head if the driver airbag deploys .
A WARNING
Objects between you and the airbag will
increase the risk of injury in a crash by in
terfering with the way the airbag unfolds
and/or by being pushed into you as the air
bag inflates.
- Always make sure nothing is in the front
airbag deployment zone that could be
struck by the airbag when it inflates.
- Objects in the zone of a deploying airbag
can become projectiles when the airbag
Airbag system 147
deploys and cause serious personal in
Jury.
- Never hold things in your hands or on
your lap when the vehicle is in use.
- Never place accessories or other objects
(such as cup holders, telephone brackets,
note pads, navigation systems, or things
that are large, heavy, or bulky) on the
doors; never attach then to the doors or
the windshield; never place them over or
near or attach them to the area marked
,,AIRBAG" on the steering wheel, instru
ment panel or the seat backrests; never
place them between these areas and you
or any other person in the vehicle.
- Never attach objects to the windshield
above the passenger front airbag, such
as accessory GPS navigation units or mu
sic players. Such objects could cause seri
ous injury in a collision, especially when
the airbags inflate.
- Never recline the front passenger seat to
transport objects. Items can also move
into the deployment area of the side air
bags or the front airbag during breaking
or in a sudden maneuver. Objects near
the airbags can fly dangerously through
the passenger compartment and cause injury, particularly when the seat is re
clined and the airbags inflate.
WARNING
A person on the front passenger seat, es
pecially infants and small children, will re
ceive serious injuries and can even be kil
led by being too close to the airbag when
it inflates.
- Although the Advanced Airbag System in
your vehicle is designed to turn off the
front passenger airbag if an infant or a
small child is on the front passenger
seat, nobody can absolutely guarantee
that deployment under these special conditions is impossible in all conceiva
ble situations that may happen during
the useful life of your vehicle . .,.
•
•
Page 178 of 292

176 Child Safety
the convertible locking feature on the safety
belt to prevent the child safety seat from
moving ¢
page 179 or install the seat using
the LATCH attachments .
.,. Push the child safe ty seat down with your
full weight to get the safety belt really tight so that the seat cannot move forward or
sideways more than one inch (2.5 cm)
¢ page 179.
.,. If the child safety seat is equipped with a
tether strap, attach it to the tether anchors
¢page 185.
.,. Secure unused safety belts on the rear seat
¢ page 174.
A toddler or child is usually too large for an in
fant restraint if it is more than one year old
and weighs more than 20 lbs. (9 kg).
Toddlers and children who are older than one
year up to about 4 years old and weigh more
than 20 lbs (9 kg) up to 40 lbs. (18 kg) must
always be properly restrained in a child safety
seat certified for their size and weight
¢fig. 171 and ¢fig. 172.
The airbag on the passenger side makes the
front seat a potentially dangerous place for a
child to ride . The front seat is not the safest
place for a child in a forward-facing child safe
ty seat. It is a very dangerous place for an in
fant or a larger child in a rearward-facing seat.
A WARNING
Not using a child safety seat, using the
wrong child safety seat or improperly in
stalling a child restraint increases the risk
of serious personal injury and death in a
collision or other emergency situation.
- Children on the front seat of any car,
even with Advanced Airbags, can be seri
ously injured or even killed when an air
bag inflates. A child in a rearward-facing
child safety seat installed on the front
passenger seat will be seriously injured
and can be killed if the front airbag in
flates -even with an Advanced Airbag
System . -
The inflating airbag will hit the child
safety seat or infant carrier with great
force and will smash the child safety seat and child against the backrest, center
arm rest, door or roof .
- Always install rear-facing child safety
seats on the rear seat .
- If you must install a rearward facing
child safety seat on the front passenger
seat because of exceptional circumstan
ces and the
PASSENGER AIR BAG OFF
light does not come on and stay on, im
mediately install the rear-facing child
safety seat in a rear seating position and
have the airbag system inspected by your
Audi dealer.
- The rear side of the child safety seat
should be positioned as close as possible
to the backrest on the vehicle seat.
- For adjustable head restraints: adjust or remove the rear seat head restraint if it
is difficult to install the child seat with
the head restraint in place
¢ page 57. In
stall the head restraint again immediate
ly once the child seat is removed. Driving
without head restraints or with head re straints that are not properly adjusted increases the risk of serious or fatal neck
injury dramatically.
- Always read and heed all WARNINGS
whenever using a child restrained in ave
hicle is being used
¢page 133, Safety
belts,
¢ page 142, Airbag system and
¢ page 168, Important things to know.
A WARNING ~ -
If exceptional circumstances require the
use of a forward-facing child restraint on
the front passenger's seat, the child's safe
ty and well-being require that the follow ing special precautions be taken:
- Make sure the forward-facing seat has
been designed and certified by its manu
facturer for use on a front seat with a passenger front and side airbag .