2014 AUDI RS7 SPORTBACK start stop button
[x] Cancel search: start stop buttonPage 17 of 292

Instrument s and warnin g/indic ator ligh ts 15
(USA models): If the warnin g light 1111 and
the warning light
EiJ appear together, imme
d iate ly contact your authorized Aud i dea ler or
qua lified workshop to have all brake pads in
spected
¢ page 20 .
When t he light comes on, an audib le warning
signal is also given .
A WARNING
-Always observe the warnings in
¢ page 213, before opening the hood
and checking the brake fluid.
- Driv ing with low brake fluid is a safety
hazard . Stop the car and get professional
assistance.
- If the 1111 (USA models)/ . (Canada
mode ls) brake system indicator light
tu rns on together with the ABS and ESC
indicator lights, the ABS/ESC regu lating
function may have failed. Functions tha t
stabilize the ve hicl e are no longer availa
ble. This cou ld cause the vehicle to
swerve and increase the risk of sliding .
Drive carefully to the nearest a uth orized
Audi dealer or other qualified workshop
and have the malfunction corrected.
- If the brake warning/indicator light does
not go out after a few seconds and the
park ing brake is released, or lights up
wh ile you are drivi ng, the fluid level in
the brake fluid reservoir is too low .
If you
b elieve that it is safe to do so, proceed
immediately at low speed to the nearest
autho riz ed Au di d ealer o r qualifie d re pair
f acili ty and have the bra ke system in
spected.
- Always kee p in m ind tha t afte r several
brake applicat ions, yo u will nee d greater
pressure on the brake peda l to stop your
vehicle. Do not re ly on strained brakes to
respond w ith maxim um stopping power
in critical situations. You must allow for
increased braking distances . The extra
distance used up by fad ing brakes could
lead to an acc ident.
PARK!< ®> Electromechanical parking brake
The warning/indicator light monitors the
electromechanical parking brake .
If the indicator light- (USA models)/ .
(Canada models) turns on, the parking brake
was set . If the park ing brake is set when the
ignition is off, the indicator light turns off af
te r abo ut 20 seconds.
The warning/indic ator light will go out when
the parking brake is re leased .
-(USA models ) ,. (Canada models )
Caut ion: Vehicle parked too steep
If the indicator light b links and the message
appears, there is not enough braking power to
keep the vehicle from roll ing. The brakes have
overheated. The vehicle could roll away even
o n a small incl ine .
Press brake pedal to release parking brake
To re lease the par king brake, press the brake
peda l and press the button ~ or start driv ing
with starting assist at the same time
¢ page 78.
Pl eas e r elease parking brake
To re lease the park ing b rake manually , press
the b rake peda l and press the button~ at the
same time. The parking b ra ke only releases
a ut omat ica lly if the d river 's sa fe ty belt is fas
tened.
Ill Parking brake!
If the DI indicator lig ht turns on and th is
message appears, there is a parking brake
malfu nction . D rive to your authorized Audi
deal er or qualified workshop immediately to
have the malfun ct io n corrected.
-L Engine cooling system malfunction
A malfunction in the engine cooling system
must be repaired as soon as possible .
• Switch off engine and check coolant lev el liJI,
Page 39 of 292
@ Tips
If your vehicle has been standing for an ex
tended period, please note the follow ing:
- The proximity sensors are deactivated af-
ter a few days to save power. You then
have to pull on the door handle once to
unlock the vehicle and a second time to
open the veh icle.
- To prevent the battery from being dis
charged and to preserve your veh icle's
ability to start for as long as possible,
the energy management system gradu
ally switches off unnecessary conven i ence funct ions. It is possible that you
will not be able to unlock your vehicle us
i ng these conven ien ce f unctions.
- Fo r De clarat ion of Compliance to United
Sta tes FCC and Indus try Canada regula
tions
¢page 276.
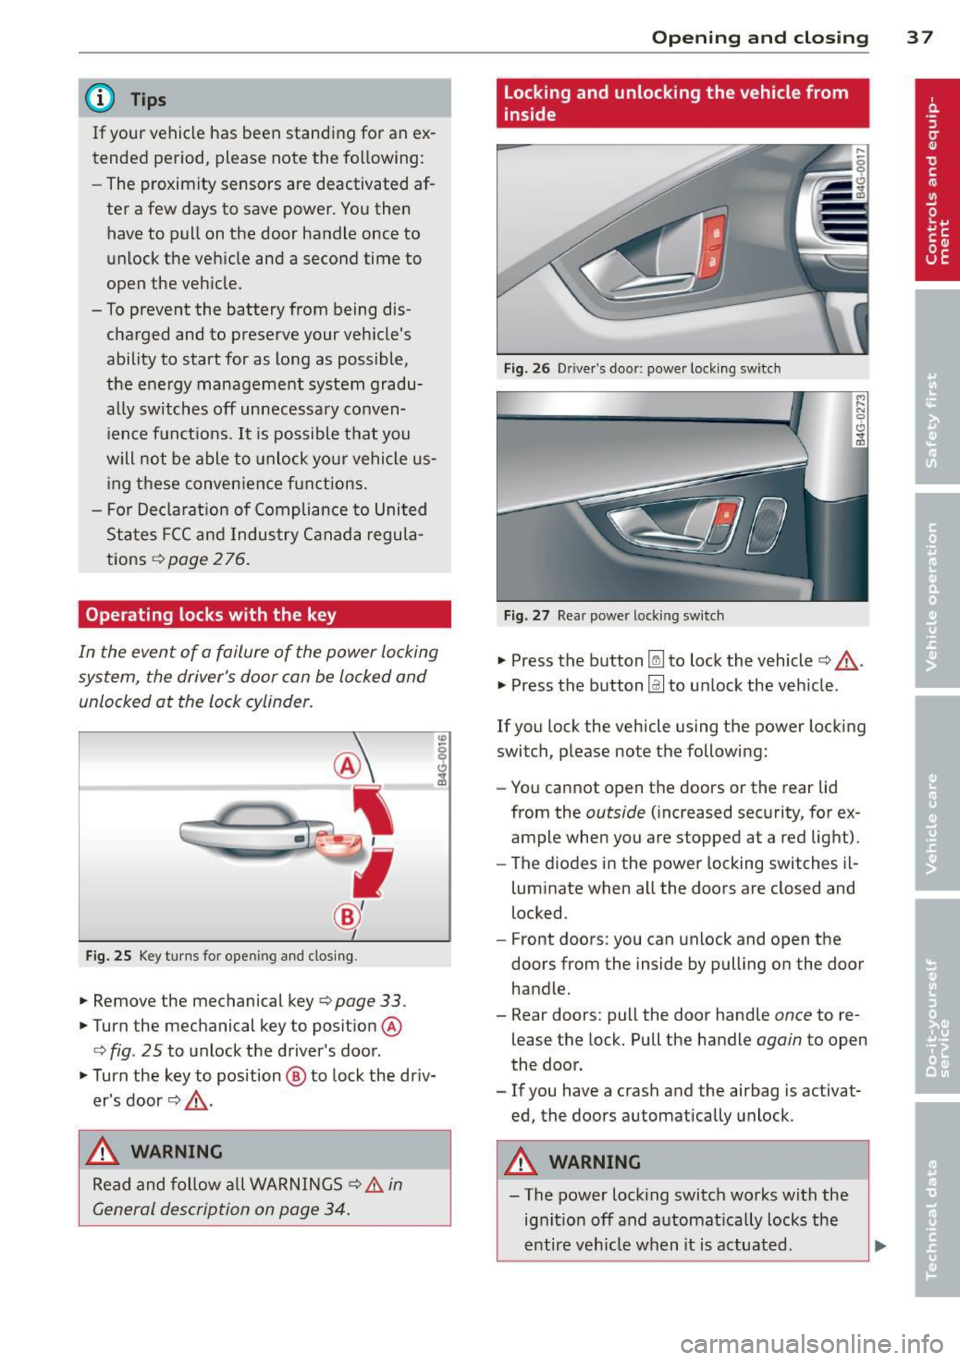
Operating locks with the key
In the event of a failure of the power locking
system, the driver's door can be locked and unlocked at the lock cylinder.
Fig. 25 Key turns for opening and clos ing .
... Remove the mechanical key¢ page 33.
... Turn the mechanical key to position @
¢ fig. 25 to unlock the driver's door.
... Turn the key to position @ to lock the dr iv
er's door¢ &,.
,& WARNING
Read and follow a ll WARNINGS ¢ & in
General description on page 34.
Op enin g an d clos ing
Locking and unlocking the vehicle from
inside
Fig . 26 Dr ive r's door: power locking switch
Fig. 27 Rear power locking switch
... Press the button~ to lock the vehicle¢&, .
.,. Press the button
Im to unlock the vehicle.
If you lock the vehicle using the power locking
switch, p lease note the following:
- You cannot open the doors or the rear lid
from the
outside ( increased security, for ex
ample when you are stopped at a red light).
- The d iodes in the power locking switches il-
luminate when all the doors are closed and
locked.
- Front doors: you can unlock and open the
doors from the inside by pulling on the door
handle .
- Rear doors: pull the door handle
once to re
lease the lock. Pull the handle
again to open
the door .
- If you have a crash and the airbag is activat
ed the doors automatically unlock .
,
A WARNING
-The power lock ing switch works with the
ig nit ion off and automat ica lly locks the
enti re veh icle when it is actuated.
3 7
Page 43 of 292
![AUDI RS7 SPORTBACK 2014 Owners Manual .. To activate the child safety lock for the left/
right rear door, press the left/right button
Ii]
in the drivers door ¢ fig. 33. The light in the
button w ill turn on.
.. To AUDI RS7 SPORTBACK 2014 Owners Manual .. To activate the child safety lock for the left/
right rear door, press the left/right button
Ii]
in the drivers door ¢ fig. 33. The light in the
button w ill turn on.
.. To](/manual-img/6/57649/w960_57649-42.png)
.. To activate the child safety lock for the left/
right rear door, press the left/right button
Ii]
in the driver's door ¢ fig. 33. The light in the
button w ill turn on.
.. To deactivate the child safety lock for the
left/right rear door, press the left/r ight but
ton
1±1 in the driver's door. The light in the
button turns off.
The follow ing features are switched off:
- The interior door handles in the rear doors,
- The power windows in the rear doors.
I n order to activate the child safety lock on
the left and the right s ide, press the two safe
ty buttons
Ii] in succession.
Power windows
Controls
The driver can control all power windows.
Fig. 34 Section of the driver 's doo r: Cont rols
l(l 0 0 0
"' m
All power window switches are provided with
a two-position function :
Opening the windows
.. Press the switch to the first stop and hold it
until the window reaches the desired posi
tion.
.,. Press the switch br iefly to the
second stop
to automatically open the window.
Closing the windows
.. Pull the switch to the first stop and hold it
until the window reaches the desired posi
t ion.
.. Pull the switch briefly to the
second stop to
automatically close the window .
Opening and closing 41
Power window switches
@ Driver's door
® Passenger's door
© Left rear door
@ Right rear door
.,&_ WARNING
-When you leave your vehicle - even if on
ly briefly - always take the ignit ion key
with you. This applies particularly when children remain in the vehicle. Otherwise
the children could start the engine or op
erate electrical equipment (e.g. power
windows). The power windows are func
tional until the driver's door or passeng
er's doo r has been opened.
- Be careful when closing the w indows.
Check to see that no one is in the way, or
serio us injury could result!
- When locking the vehicle from outside,
the vehicle must be unoccupied since the
windows can no longer be opened in an
emergency .
{D Tips
-When you open the doors, the windows
automatically lower abo ut 10 mm.
- When the window in the driver's or pas
senger's door is complete ly open, it will
raise approximately 25 mm when the
door is opened. The window will lower
again when you close the door.
- After the ignition has been switched off,
the windows can sti ll be opened or
closed for about 10 minutes. The power
windows are not switched off until the
dr iver's door or passenger's door has
been opened .
What to do after a malfunction
The one-touch open and close function must
be reactivated if the battery has been discon
nected.
.. Pull and ho ld the power window switch until
the window is fully closed. .-
Page 76 of 292
7 4 On the road
column will continue moving as long as you
are pressing the switch.
There must be at least 10 inc hes (25 cm) be
tween you r chest and the center of the steer
ing whee l.
If you cannot sit more than 10 in
ches (25 cm) from the steering whee l, see if
adaptive equipment is available to help you reach the pedals and increase the distance
from the steer ing wheel.
F or detai led information on how to adjust the
driver's seat, see
<::> page 54 .
In vehicles with the memory f unction* , the
steering column settings are stored together
with the seat position.
A WARNING
Improper use of steering wheel adjust
ment and improper seating position can
cause se rious personal injury.
- Adjust the steer ing whee l column on ly
when the vehicle is not moving to pre
vent loss of veh icle control.
-
- Adjust the driver's seat or steering wheel
so that the re is a min imum of 10 inches
(25 cm) between your chest and the
steering wheel ¢
page 124, fig. 146. If
you can not maintain this min imum dis
tan ce, the airbag system cannot protect
yo u properly.
- If phys ica l limi tations prevent you from
sitting 10 in ches (25 cm) o r more from
the steering wheel, check with yo ur au
tho rized Aud i dealer to see if adaptive
equipment is availab le .
- If the steering wheel is aligned with you r
face, the supp lemental drive r's airbag
cannot provide as much protect ion in an
acc ident. A lways make sure that the
steering wheel is aligned with your
chest.
- Always hold the steering wheel with your
hands at the 9 o'clock and 3 o'clock posi
t ions to reduce the risk of pe rsonal injury
if the d river 's airbag deploys.
- Never hold the steering whee l at the 12
o'clock posit ion or w ith your hands i nside the steering wheel rim or on the steering
wheel hub. Hold
ing the steer ing wheel
the wrong way can cause serious injuries
to the hands, arms and head if the driv
er 's airbag deploys.
Easy entry feature
Applies to vehicles: with electrically adjustable steering
wheel
The easy entry feature makes it easier to en
ter and exit the vehicle by automatically ad
justing the steering wheel.
.. Select in the MM I: ICARI function button>
(Car )* sys tem s control b utton > V ehicle set
ting s
> Seats > D rive r's seat > Easy entry >
On .
When the easy ent ry feature is turned on, the
steering wheel moves up to the park position
when you switch
off the ignition. After you en
ter the veh icle, the steering wheel moves to
the stored position as soon as you sw itch on
the ignit ion.
Starting and stopping
the engine
Starting the engine
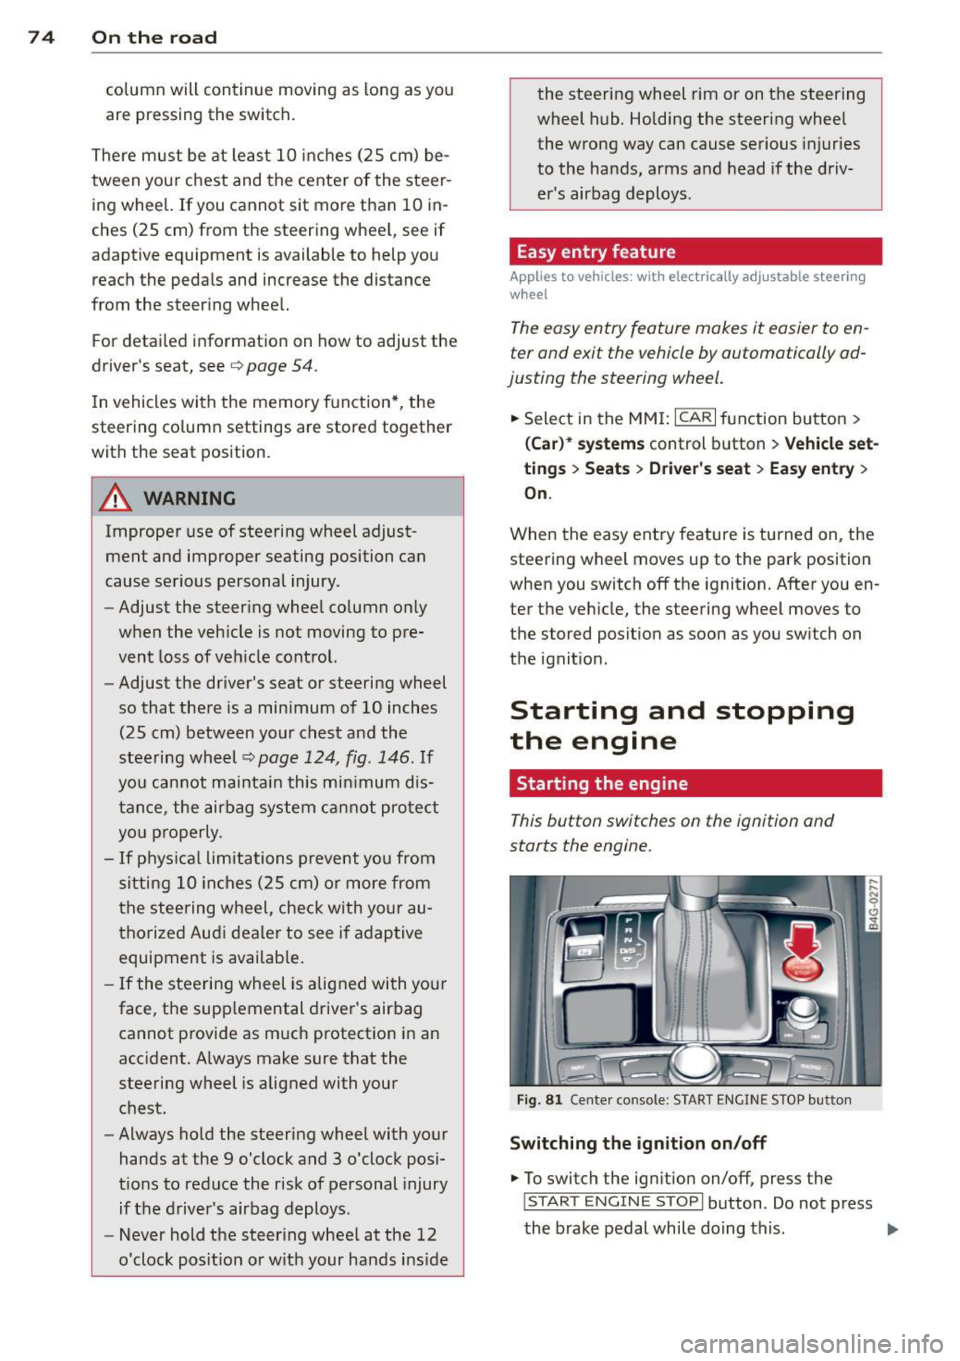
This button switches on the ignition and
starts the engine.
Fig . 81 Center console: S TART ENGINE S TOP butto n
Switching the ign ition on /off
.. To switch the ign ition on/off, press the
I STAR T ENGINE ST OPI button . Do not press
the brake pedal while doing this . .,.
Page 77 of 292
Starting th e engin e
"'Press the brake peda l r::!> _&..
"'Press the I START ENGINE STOP I button
r::!> fig. 81. The engine will start .
If the engine should not sta rt immediately ,
the sta rting process is automatically stopped
after a short time. Repeat starting procedure .
A WARNING
-Never allow the engine to run in confined
spaces -danger of asphyxiation .
- Never t urn off the engine unti l the vehi
cle has come to a complete stop.
- The brake booster and power steering
only work when the engine is running . If
the engine is off, you have to use more
force when steering or braking. Because
you cannot steer and brake as you usua l
ly would, this could lead to crashes and
ser ious injur ies .
(D Note
-Avoid high engine rpm, full throttle and
heavy engine loads unti l the engine has
reached operating temperature -other
wise yo u risk eng ine damage.
- The eng ine cannot be started by pushing
or tow ing the veh icle.
(D Tips
- After a cold engine is started, there may
be a brief period of increased noise be
ca use oil pressure mus t fi rst bu ild up in
the hyd raulic valve adjusters . This is nor
mal and not a ca use for concern.
- If you leave the vehicle with the ignit ion
switched on, the ignition will switch off
after a certai n pe riod of time. P lease
note tha t electr ica l equipment s uch as
exterior lights wi ll switch off as well
when that happens.
Stopping the engine
"' Bring your vehicle to a complete stop.
"' Move the selector lever to the P or N po si
t ion.
On th e ro ad 75
"'Press the I START ENGINE ST OP I button
r::!>poge 74, fig . 81.
Ste ering lock
T he s teering locks when yo u tur n the engine
off using t he
I S TA RT ENGINE STO P! bu tton
and open the d river 's doo r. The locked steer
ing helps prevent vehicle theft.
Emergency off
If necessary, the engine can be switched off
with the selector lever in the R or D/S posi
t ion. The engine stops if you press the
I S TAR T ENG IN E ST OP I button at speeds below
6 mph (10 km/ h) .
A WARNING
- Never turn off the engine until the vehi
cle has come to a complete stop.
- The brake booster and power stee ring
only work when the eng ine is r unning . If
the engine is off, you have to use more
force when steering or braking. Because
you cannot steer and brake as you usual
ly would, this co uld lead to crashes and
serious injuries .
- For safety reasons , you should a lways
pa rk your vehicle w it h the selector lever
in P. Otherwise, the vehicle could inad
ver ten tly roll away.
- After the eng ine has been switched off,
the radiator fa n can cont in ue to run for
up to 10 minu tes -even with the ignition
sw itche d off . It can also sw itch on again
after some time i f th e coolant tempera
ture rises as the result of a heat b uildup
or if the engine is hot and the engine
compartment is additionally heated by
the sun's rays.
(U) Note
Do not stop the engine immediately after
hard o r extended driving. Keep the engine
running for approximate ly two minutes to
prevent excess ive heat bu ild-up .
Page 78 of 292
76 On the road
Driver message in the instrument
cluster display
Turn off ignition befor e le a v ing car
This message appears and a warning tone
sounds if yo u open the dr iver's door when the
ignition is switched on.
Press brake p edal to start engin e
This message appears if you press the
I STAR T ENGINE ST OP ! button to start the en
g ine and do not depress the brake pedal. The
engine can on ly be started if the brake pedal
is depressed.
!I I s ke y in th e vehicle?
If the indicator light turns on and the mes
sage appears, the remote control key was re
moved from the vehicle while the engine was
running. If the ignit ion key is not in the vehi
cle you w ill not be able to sw itch on the ign i
tion or resta rt the engine after it has been
switched off. You w ill also not be ab le to lock
the veh icle from the outside.
Shift to P , oth erwise vehicl e can roll away.
Doors do not lo ck if lever i s not in P .
This message appears for safety reasons
along w ith an audib le warn ing tone if the P
selecto r lever posit io n is not engaged when
stopping the engine with the
I STAR T ENGINE ST OP ! button. Select the P se
lector lever pos it ion. Othe rwise the veh icle
could ro ll and it cannot be locked.
(I Key is n ot recogn iz e d . Ho ld b ack o f key
ag ain st marked ar ea . Se e owner's manual.
If the indicator light tu rns on and th is mes
sage appears, there is a malfunction
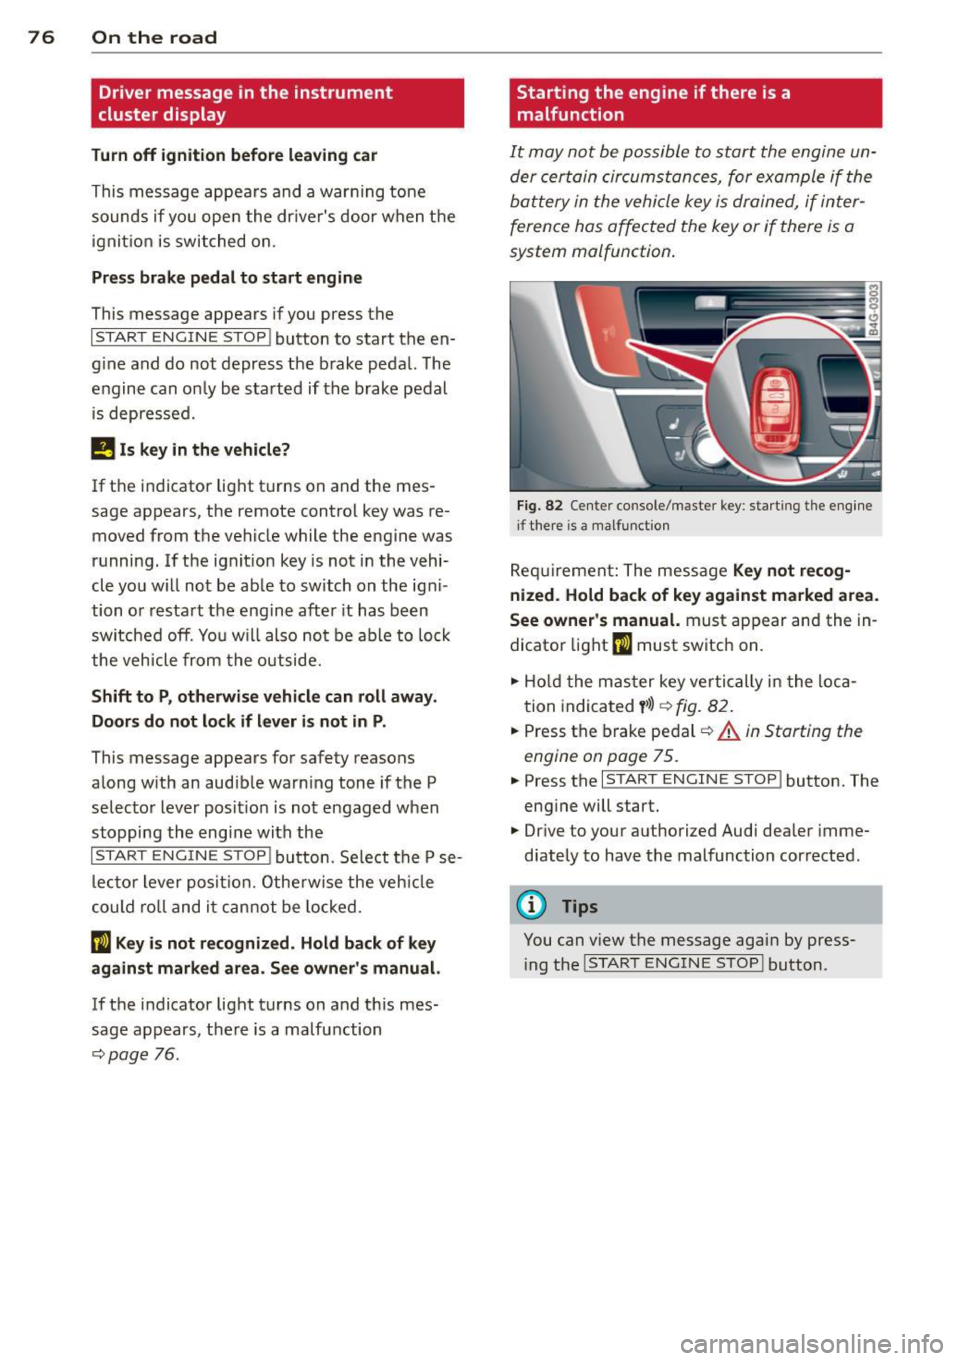
c::>page 76. Starting the engine if there is a
malfunction
It may not be possible to start the engine un
der certain circumstances, for example if the
battery in the vehicle key
is drained, if inter
ference has affected the key or if there
is a
system malfunction .
Fig . 82 Center console/master key: starting the eng ine
i f there is a malfunction
Req uirement: The message Ke y not r ecog
ni ze d. H old back of key aga inst ma rked are a.
Se e owne r's manual.
must appear and the in
dicator
light (I must switch on.
.,.. Ho ld the mas ter key vertically in the loca
tion indicated
y >l) r=:>fig. 82.
.,.. Press the brake pedal c::> A in Starting the
engine on page 75.
.,.. Press the I START ENGINE S T OP ! button. The
eng ine will start.
.,.. Dr ive to your authorized Audi dealer imme
diately to have the malfunction corrected.
(D Tips
You can v iew the message again by press
i ng the
I STAR T ENGINE STOP I button.
Page 90 of 292

88 Audi adaptive cruise control and braking guard
stopped vehicle or stationary obstacle (end of a traffic jam or vehicle that has
broken down in traffic).
- Always remember that the radar sensor
for the braking guard works only within
defined detection and range limits that
may prevent the proper detection of oth
er vehicles.
- The radar sensor's function and range
can be reduced by rain, snow and heavy
spray . Moving vehicles up ahead may not
be promptly detected or may not be de
tected at all.
- Reflective surfaces including crash barri
ers or tunnel entrances may impair the
function of the radar sensor.
({) Tips
-You can cancel the braking with increas
ing force that is initiated by the system
by braking yourself, by accelerating no
ticeably or by swerving.
- Braking guard error messages
¢page 88.
- Keep in mind that braking guard can
brake unexpectedly . Always secure any
cargo or objects that you are transport
ing to reduce the risk of damage or in
jury.
Settings in the MMI
Applies to vehicles: with Audi adaptive cruise co ntrol
.. Select : I CARI function button > (Car)* sys
tems
control button > Driver assist > Audi
braking guard.
System -
Switch braking guard On and Off.
When you switch the ignition on, the message
Audi braking guard off appears if the system
is switched off.
Early warning -The distance and approach
warnings in the display can be switched
On/
Off.
(D Tips
- Your settings are automatically stored
and assigned to the remote control key being used at the time the settings are
made.
- If you restrict or switch off the ESC, the
braking guard also switches itself off
¢page 191.
- Switch braking guard off when you are
loading the vehicle onto a vehicle carrier,
train, ship or other type of transporta
tion. This can prevent undesired warn
ings from the braking guard system.
Messages
Applies to vehicles: with Aud i adapt ive cru ise contro l
Braking guard: off
This driver message appears if the system is
turned off via the infotainment. Otherwise , if
the system is turned off, the information ap
pears every time shortly after the start of the
trip.
The driver message also appears if the system
is not available due to a malfunction or if the
ESC is not switched on
¢ page 191. If this is
the case, the system will not provide warnings about a possible collision.
Braking guard: activated
This driver message appears if sharp brake
pressure was applied due to an acute warning.
ACC: Unavailable!
ACC and Audi braking guard: not available
The system cannot detect moving vehicles up
ahead correctly and is switched off. The sen
sors have been displaced or are not working
properly. The Audi pre sense functions may al
so be affected . Drive to your authorized Audi
dealer or authorized Audi service facility im
mediately to have the malfunction corrected.
ACC: currently unavailable. No sensor vision
ACC and braking guide: currently unavaila
ble. No sensor vision
This message appears if the sensor view is ob
structed, for example by leaves, snow, heavy
spray or dirt. Clean the sensors¢
page 81,
rg.86. ~
Page 99 of 292
(dynamic). The goal is a high level of agility
and ability to accelerate on curves. The vehicle
is very responsive to steering.
Curve light*
The curve light adapts to driving on curves.
The pivoting action and the lighting are also
adapted to the mode.
Adaptive cruise control*
The behavior when accelerating can be adjust
ed from comfo rtable to sporty, depending on
the drive se lect mode . Adaptive cruise control
also responds to the driving behavior of the
vehicle ahead in a more conservative or sporty
manner .
Engine sound
The sound of the engine is adapted to these
l ected mode and ranges from subtle to sporty.
(D Note
-Make sure there is enough clearance
above and below the vehicle when park
in g. The height of the vehicle can change
once it is parked due to temperature
fluctuations, changes to the load condi
tions and changes to the driving modes,
which can affect clearance.
- When transporting the vehicle on a car
carrier, train, ship or by other means, on
ly tie the veh icle down at the running
surface of the tires, which is the outer
circumference. Securing the vehicle at
the axle components, suspension struts
or tow ing eyes is not permitted because
the pressure in the air suspension struts
can change during transport. The vehicle
may not be secured sufficiently if this
happens.
(D} Tips
- In some models, the maximum vehicle
speed can only be reached in the
Auto
and Dynamic modes.
- Se lecting the
Dynamic mode results in
spo rty shifting characteristics. The S
gear position engages automatically .
Audi drive select 97
-In vehicles that have dynamic steering*,
operating noise is heard when starting or
stopping the engine. This does not indi
cate a problem.
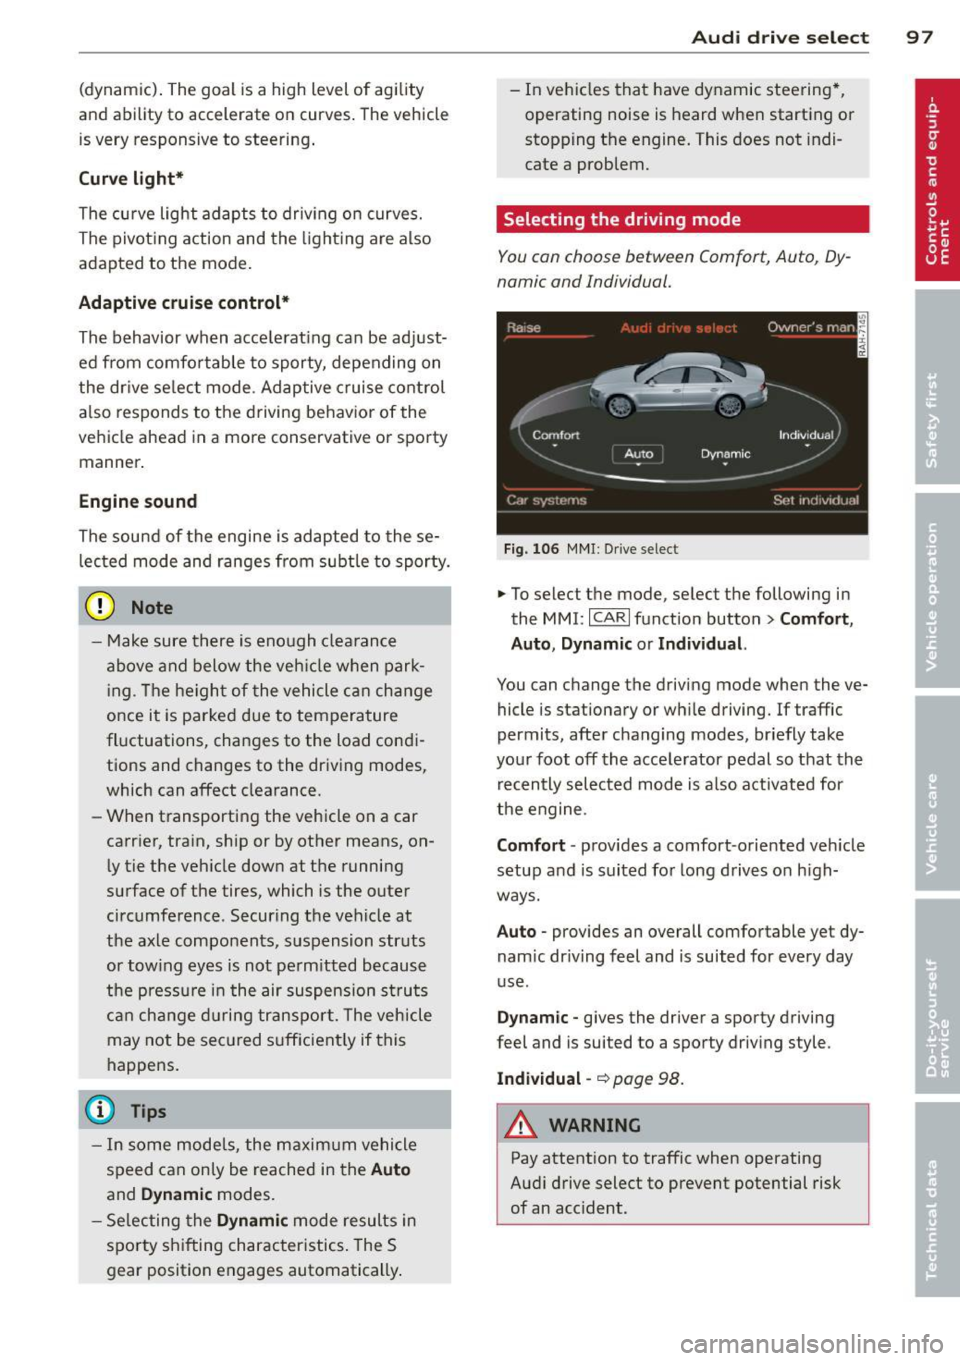
Selecting the driving mode
You can choose between Comfort, Auto, Dy
namic and Individual.
Fig. 106 MMI: Drive select
.,. To select the mode, select the following in
the
MMI: ICARI function button> Comfort,
Auto, Dynamic or Individual.
You can change the driving mode when the ve
hicle is stationary or wh ile driving. If traffic
permits, after changing modes, briefly take
your foot off the accelerator pedal so that the
recently selected mode is also activated for
the engine.
Comfort · provides a comfort-oriented veh icle
setup and is suited for long drives on h igh
ways.
Auto · provides an overall comfortable yet dy
nam ic dr iving feel and is suited for every day
use .
Dynamic -gives the driver a sporty driving
feel and is suited to a sporty driving style.
Individual -~page 98.
&_ WARNING
Pay attention to traffic when operating
Audi drive select to prevent potential risk
of an acc ident.
-