2014 AUDI RS7 SPORTBACK height
[x] Cancel search: heightPage 30 of 292
28 Instruments and warning/indicator lights
Head-up Display
Applies to vehicles: with Head-up Display
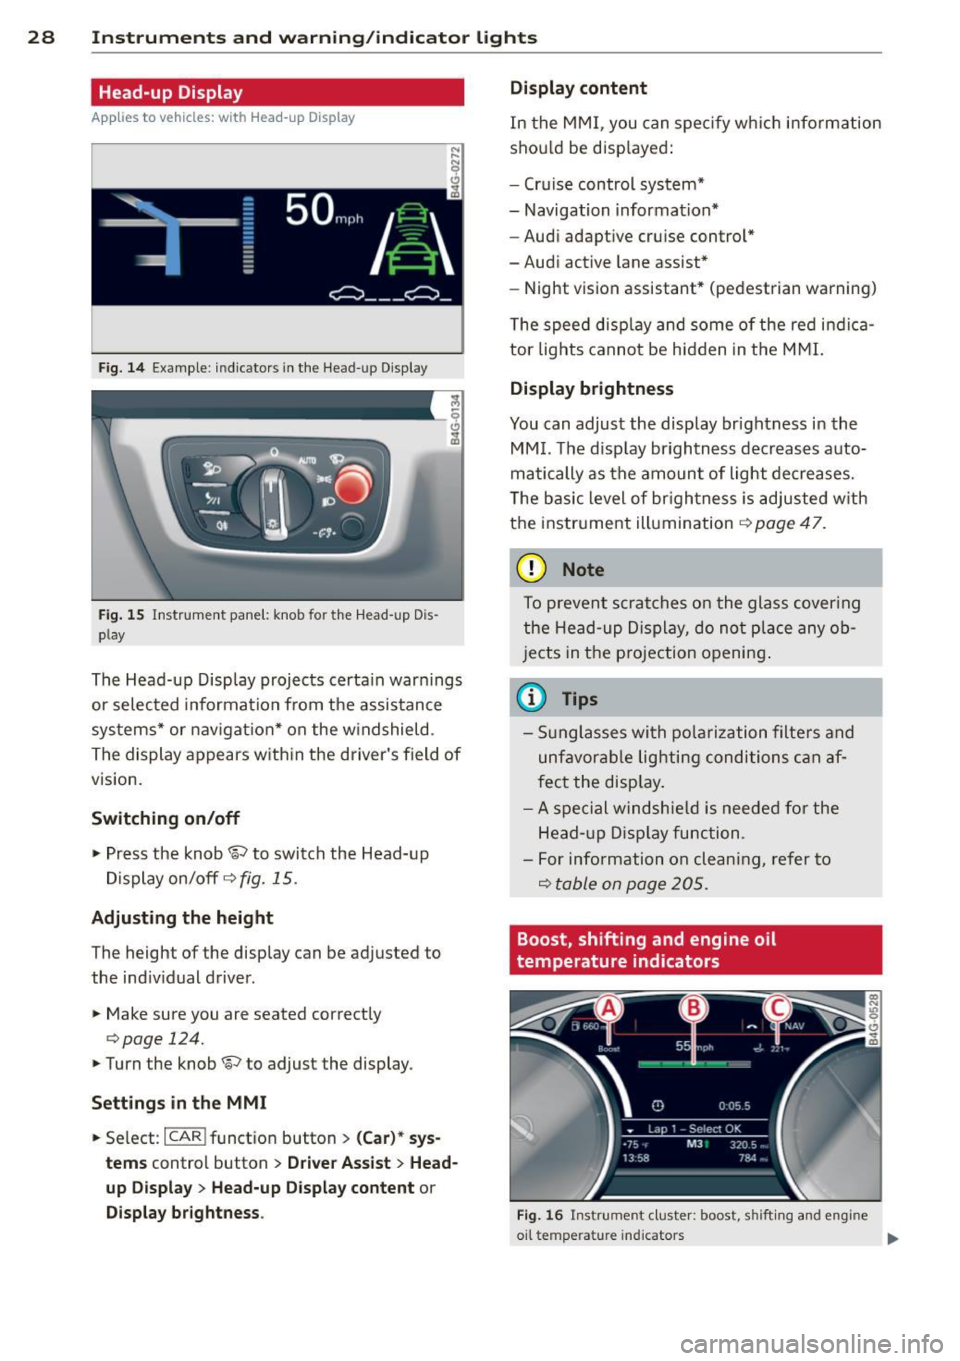
Fig. 14 Example: indicators in the Head-up Disp lay
Fig. 15 Instrument panel: knob fo r the Head -up Dis
p lay
The Head-up Display projects certain warnings
or selected information from the assistance
systems* or navigation* on the windshield .
The display appears with in the driver's field of
vision.
Switching on/off
,.. Press the knob~ to switch the Head-up
Display on/off
c::> fig. 15.
Adjusting the height
The height of the display can be adjusted to
the indiv idual driver .
,.. Make sure you are seated correctly
c:> page 124.
,. Turn the knob ~ to adjust the display .
Settings in the MMI
,.. Se lect : I CAR ! funct ion button > (Car)* sys
tems
control button > Driver Assist > Head
up Display
> Head-up Display content or
Display brightness . Display content
In
the MMI, you can spec ify which information
shou ld be disp layed:
- Cruise control system*
- Navigation information*
- Audi adaptive cruise control*
-Audi active lane assist*
- Night vision assistant* (pedestrian warning)
The speed disp lay and some of the red indica
tor lights cannot be hidden in the MMI.
Display brightness
You can adjust the display brightness in the
MMI. The d isp lay brightness decreases auto
matically as the amount of light decreases.
T he basic level of brigh tness is adjusted with
the instrument illumination
c::> page 47.
(D Note
To prevent scratches on the glass cover ing
the Head-up Display, do not place any ob
jects in the projection opening.
(D Tips
-Sunglasses with polarization filters and
unfavorable lighting conditions can af
fect the disp lay.
- A spe cial windshie ld is needed for the
Head- up Display function .
- For info rmat ion on clean ing, refer to
Q table on page 205.
Boost, shifting and engine oil
temperature indicators
Fig. 16 Instrumen t cluster: boost, shi fti ng and eng ine
oil te mp erat ure in dicators .,..
Page 40 of 292
38 Openin g and clo sing
- On a vehicle locked from the outsid e the
power locking system switch is inopera
t ive.
- locked doors make it more difficult for
emergency workers to get into the vehi
cle, which puts lives at risk. Do not leave
anyone beh ind in the vehicle, especially
children.
(D Tips
Your vehicle is locked automatically at a
speed of 9 mph (15 km/h)
c> page 34 . You
can unlock the vehicle again us ing the
open ing function in the power lock ing sys
t e m sw itch .
Emergency locking
Each door must be locked separately if the
power locking system fails .
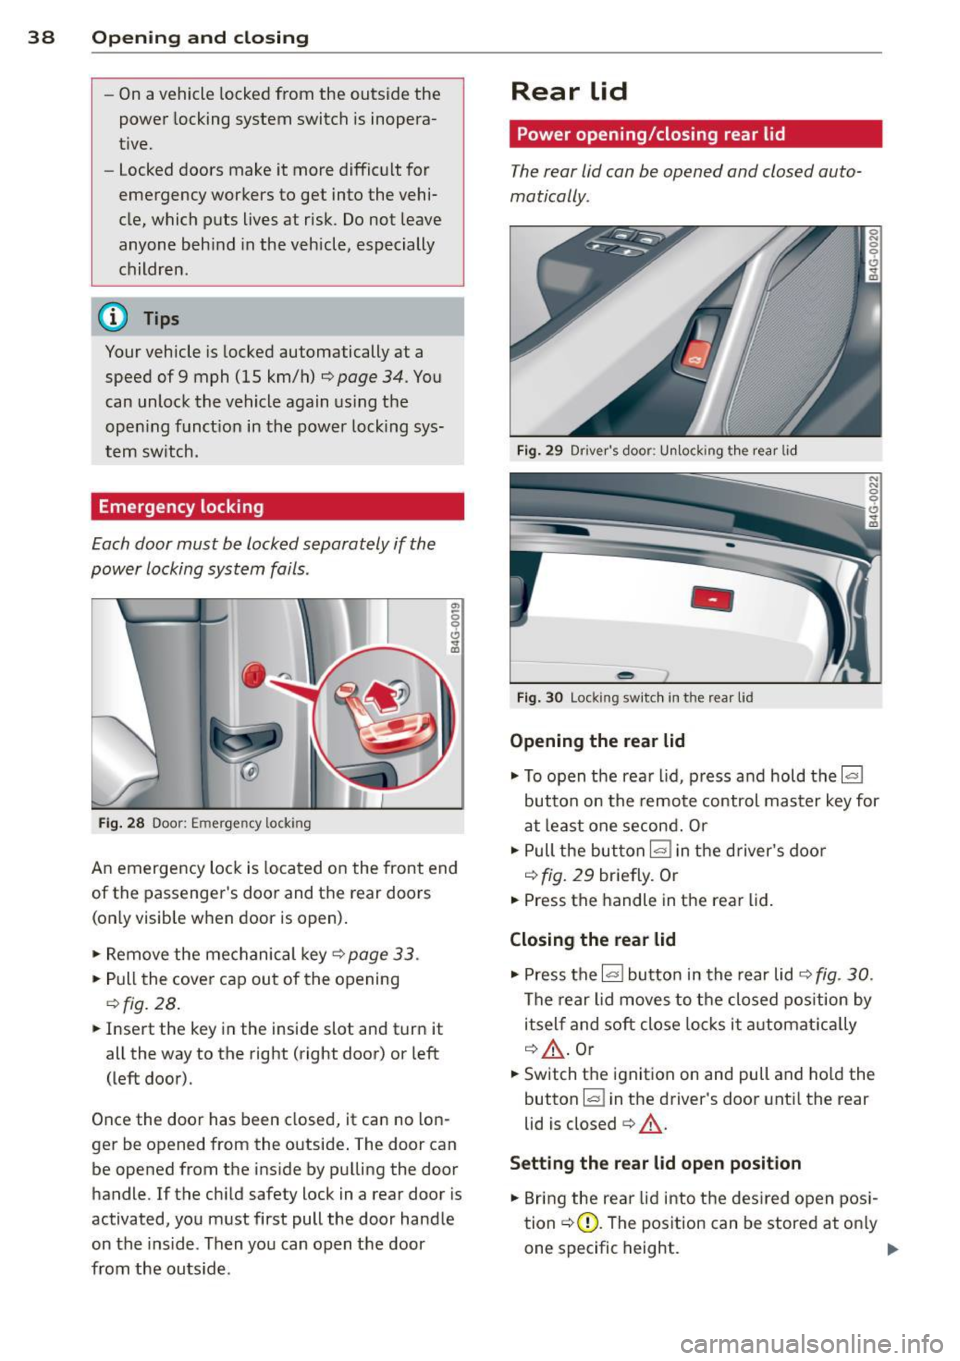
Fig. 2 8 Door: Emer gen cy lock ing
"' 0 0 0 .., (D
An emergency loc k is located on the front end
of the passenger's doo r and the rear doors
(on ly visible when doo r is open) .
.,. Remove the mechanical key
c> pag e 33 .
... Pu ll the cover cap out of the opening
i=> fig. 28.
... Insert the key in the inside slot and turn it
all the way to the r ight (right door) or left
(left door).
Once the door has been closed, it can no lon
ger be opened from the outside . T he door can
be opened from the ins ide by pu lling the door
handle. If the ch ild sa fe ty lock in a re ar door i s
act ivated, you must first pull the door hand le
on the inside . Then you can open the door
from the outs ide .
Rear lid
Power opening/closing rear lid
The rea r lid can be opened and closed auto
matically .
Fig. 2 9 Drive r's doo r: Unlock ing th e rea r lid
-
Fi g. 30 Lock ing sw it ch in t he r ear lid
Opening the rear lid
.,. To open t he rea r lid, p ress and hold the lal
button on the remote control master key for
at least one se cond. Or
.,. Pull the but ton
l=I i n the d river's doo r
c> fig. 29 brie fly . Or
... Press th e handle in the rear lid .
Closing the rear lid
"" Press the l=I butto n in the rear lid c> fig . 30 .
The rear lid m oves to t he closed pos ition by
itself and soft close locks it a utomat ically
¢ A .or
... Switch t he ignit ion on and pull and ho ld the
button
l a ! in the driver's door unt il the rear
lid is closed
c> A .
Setting the rear lid open position
... Bring the rea r lid into the des ired open pos i
tion
c> Q). The pos ition can be stored at o nly
one specific height . .,.
Page 55 of 292

Seats and storage
General recommen
dations
Why is your seat adjustment so important?
The safety belts and the airbag system can
only provide maximum protection if the front
seats are correctly adjusted.
There are various ways of adjusting the front
seats to provide safe and comfortable support
for the driver and the front passenger. Adjust
your seat properly so that :
- you can easily and quick ly reach all the
switches and controls in the instrument
panel
- your body is properly supported thus reduc ing physical stress and fatigue
- the safety belts and airbag system can offe r
maximum protection
¢ page 142.
In the following sections, you will see exactly
how you can best adjust your seats .
There are special regulations and instructions
for installing a child seat on the front pas
senger's seat. Always fo llow the information
regarding chi ld safety provided in
¢ page 168, Child Safety .
A WARNING
Incorrect seating position of the driver and
all other passengers can result in serious
personal injury.
- Always keep your feet on the f loor when
the vehicle is in motion -never put your
feet on top of the instrument panel, out
of the window or on top of the seat cush
ion. This applies especially to the passen
gers . If your seating position is incorrect,
you increase the r isk of injury in the case
of sudden braking or an acc ident. If the
airbag inflates and the seating position
is incorrect, this could result in persona l
injury or even death.
- It is important for both the driver and
front passenger to keep a distance of at
S eat s an d sto rage 53
least 10 inches (25 cm) between them
selves and the steering wheel and/or in
strument panel. If you're s itting any
closer than this, the airbag system can not protect you properly. In addition, the
front seats and head restraints must be
adjusted to your body height so that they
can give you maximum protect ion.
- Always try to keep as much distance as
possible between yourself and the s teer
ing wheel o r instrument pane l.
- Do not adjust the driver's or front pas
senger's seat whi le the vehicle is moving.
Your sea t may move unexpected ly, caus
ing sudden loss of vehicle cont rol and
personal injury . If you adjust yo ur seat
while the veh icle is moving, yo u are out
of posit ion.
Driver's seat
The correct seat position is important for safe
and relaxed driving.
We recommend that you adjus t the dr iver's
seat in the fo llowing manner:
.,. Adjust the seat in fore and aft direction so
that you can easily push the peda ls to the
floor wh ile keeping your knees s lightly bent
i:::> A in Why is your seat adjustment so im
portant? on page 53.
.,. Adjust the backrest so that when you sit
w ith your back against the backrest, you can
still grasp the top of the steering wheel.
.,. For adjustable head restra ints: adjust the
head restra int so the upper edge is as even
as poss ible with the top of your head . If that
is not poss ible, try to adjust the head re
straint so that it is as close to this position
as possible ¢
page 56. Move the head re
straint so that it is as close to the back of
the head as possib le .
A WARNING
-Never place any objects in the dr iver's foot-
well. An object could get into the pedal
area and interfere with pedal funct ion . In
Page 56 of 292
54 Seat s and storage
case of sudden braking or an accident, you
would not be ab le to brake or acce lerate.
Front passenger's seat
Always move the front passenger seat into
the rearmost position.
To avo id contact with the airbag wh ile i t is de
p loying, do not sit a ny closer to the inst ru
ment panel than necessary and always wear
the three-point safety belt provided adjusted
correctly. We recommend that you adjust the
passenger's seat in the following manner:
"' Bring the backrest up to an (almost) upright
position . Do not ride with the seat reclined.
"' For adjustable head restraints: adjust the
head restraint so the upper edge is as
even
as possible w ith the top of your head . If that
is not possible, try to adjust the head re
stra int so that it is as close to th is position
as possible ¢
page 56. Move t he head re
stra int so that it is as close to the back of
the head as possible.
"' Place your feet on the floor in front of the
passenger's seat .
Front seats
Controls
Moving the seat forward or bock and adjust
ing the height, backrest angle and seat an
gle.
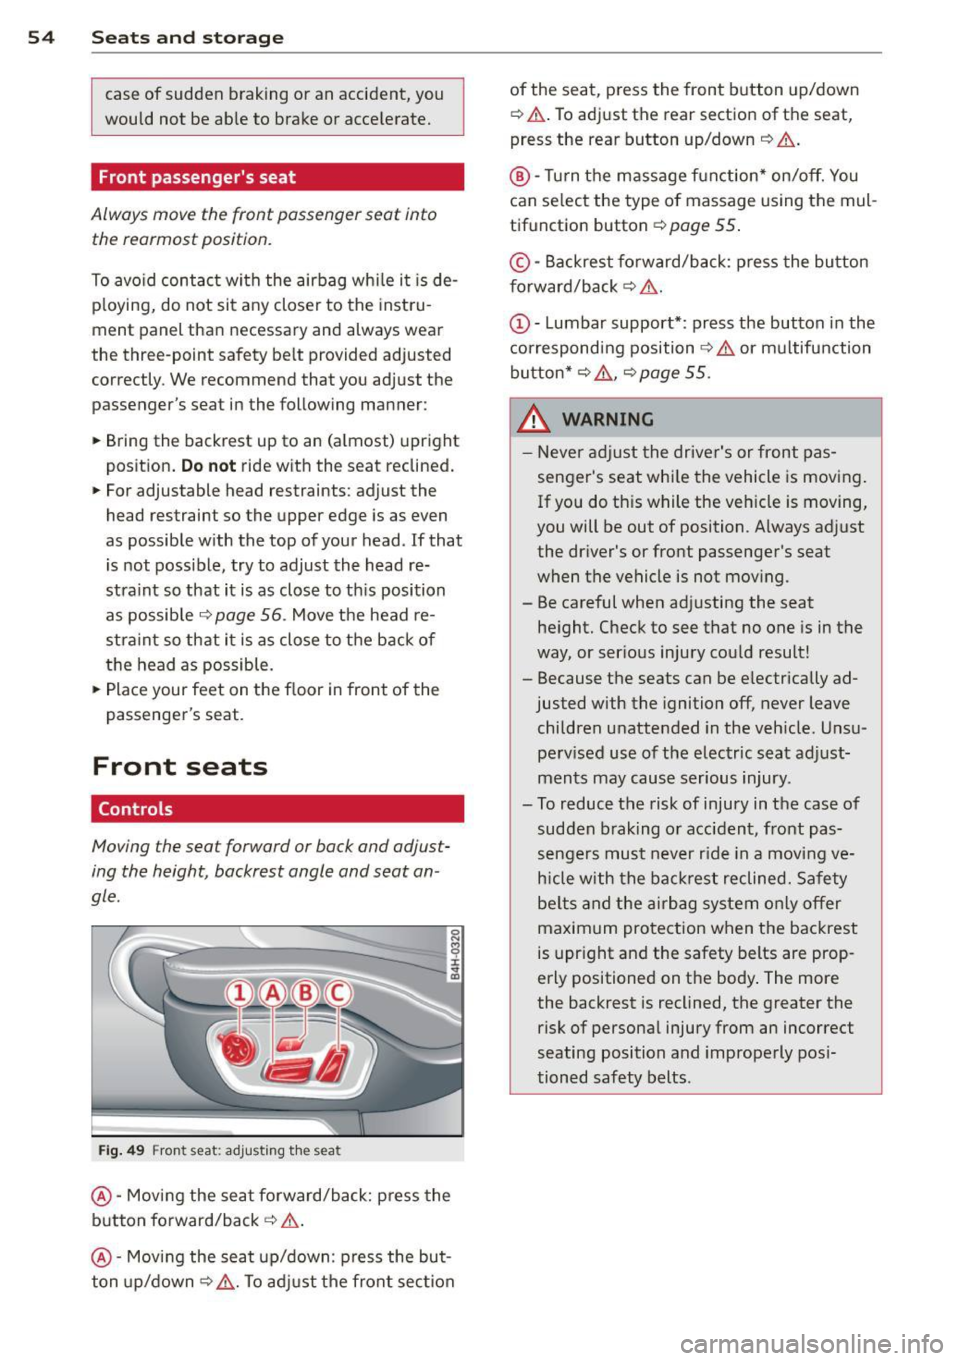
F ig. 49 Front seat: adjusting t he seat
@ -Moving the seat forward/back: press the
button fo rward/back
c:> .&. .
@ -Mov ing the seat up/down: press the but
ton up/down~ _&.. To ad just the fron t sec tion of the seat, press the front button up/down
¢
.&. .To adjust the rear sectio n of the seat
,
press the rear button up/down ¢ &..
®-Turn the massage function * on/off. You
can select the type of massage using the mul
tif unction button ¢
page 55 .
© -Backrest fo rward/back: p ress the bu tton
f orward/back
c:> &. .
c:> &. or multifunction
button*
c:> &. , c:> page 55 .
_& WARNING -
-Never adjust the driver's or front pas -
senger's seat whi le the vehicle is moving .
If you do th is while the veh icle is moving,
you will be out of position. A lways adjust
the driver's or front passenger's seat
when the ve hicle is not mov ing.
- Be careful when adj usting the seat
he ight. Check to see that no one is in t he
way, or ser ious injury cou ld result!
- Because the seats can be e lectrically ad
justed with the ignition off,
never leave
children unattended in the veh icle. Unsu
pe rv ised use of the electric seat adjust
ments may cause serious injury .
- To reduce the risk of injury in the case of sudden b raking or accident, front pas
sengers mus t never r ide in a moving
ve
h icle with the ba ck res t reclined. Safety
be lts and the airbag system o nly offer
maxim um protection when the backrest
is upr ight and the safety belts are prop
erly positioned on the body . The more
the backrest is reclined, the greater the risk of persona l injury from an incorrect
seating position and improperly pos i
tioned safety belts.
Page 58 of 292

56 Seats and storage
Armrest
There is a storage compartment under the
armrest.
Fi g. 51 Cockp it: center armrest
Adjusting th e armrest
• To ad just the angle, raise the armrest from
the start ing pos ition detent by detent.
• To bring the armrest back into its original
position, lift it above the top position and
then fold it back down.
Opening th e storage compartment
• Press the button -arrow-upward.
Please note that the driver's arm movements
may be restr icted w ith the armrest fo lded
down. Fo r th is reason, the armrest should not
be folded down when driving in c ity traffic.
Head restraints
Front head restraints
App lies to vehicles: with adjustable head restrain ts
Head restraints that are adjusted according
to body size, along with the seat belt, offer
effective protection.
F ig . 52 Front seat: Adjust ing the head restra int
Adjust the head restraint so the upper edge is
as even as possible with the top of your head.
If that is not possible, try to adjust the head
restraint so that it is as close to this position
as possible. Move the head restraint so that it
is as close to the back of the head as possib le .
• To move the head restraint up or forward,
slide it until it locks into place.
• To move the head restraint down or back,
press the side button -arrow -
c::> fig. 52 and
slide the head restraint unt il it locks into
p lace.
Refer to
c::> page 12 7, Proper adjustment of
head restraints
for guidelines on how to ad
just the height of the front head restraints to
su it the occupant's body size.
_& WARNING
- Dr iving w ithou t head rest rain ts or with
head restra ints tha t a re not properly ad
justed increases the risk of ser ious or fa
tal neck injury dramatica lly.
- Read and heed all WARN INGS
c::> page 12 7, Proper adjustment of head
restraints.
(D Tips
Cor rect ly adjusted head restr aints and
safety be lts are an extreme ly effe ctive
combination of safety features.
-
Page 75 of 292

On the road
Steering
Manually adjustable steering wheel
Applies to vehicles: with manu ally adjustable steering
w hee l
The height and reach of the steering wheel
can be adjusted .
Fig. 79 Leve r on t he steer ing co lumn
" Pull the lever¢ fig. 79 -arrow -¢_&..
"Move the steer ing whee l to the desired posi
t ion.
" Push the lever aga inst the steeri ng column
u ntil it locks.
There must be at least 10 inc hes (25 cm) be
tween your chest and the cente r of the steer
in g wheel.
If you cannot sit more than 10 in
ches (25 cm) from the s teer ing whee l, see if
adaptive eq uipment is available to help you
reach the peda ls and increase the distance
from the steer ing whee l.
F or deta iled informa tion on how to adjus t the
d river's seat, see
Q page 54.
_& WARNING
Improper use of steering wheel adjust
ment and improper seating position can
cause se rious personal injury .
- Adjust the steer ing whee l co lumn on ly
when the veh icle is not moving to pre
vent loss of veh icle cont rol.
-
- Adjust the driver's seat or steering wheel
so that there is a min imum of 10 inches
(25 cm) between your chest and the
steering wheel¢
page 124 , fig . 146. If
yo u cannot mai ntai n this min imum dis-
On the road 73
tance, the a irbag system cannot protect
you proper ly.
- If physical limitations prevent you from
sitting 10 inches (25 cm) or more from
the steering wheel, check with your au
thorized A udi dealer to see if adaptive
equ ipment is ava ilable .
- If the steer ing wheel is aligned with your
face , the suppleme nta l dr iver's a irbag
cannot provide as much protection in an
accident . Always make sure that the
steer ing whee l is a ligned with your
ches t.
- Always hold the ste ering whee l w ith your
hands at the 9 o'clock and 3 o'clock posi
tions to reduce the ris k of persona l injury
if the driver's airbag dep loys .
-Never hold the stee ring wheel at the 12
o' clock posi tion or wi th your hands ins ide
the stee rin g wheel rim or on t he steering
wheel hub . Holding the steering whee l
the wrong way can cause se rious injuries
to the hands, arms and head if the driv
er's airbag deploys.
Electrically adjustable steering wheel
App lies to vehicles: wi th electrica lly ad justable stee ring
w heel
The steering wheel position can be electrically
adjusted for height and reach.
F ig . 8 0 Switc h fo r steeri ng w hee l adju stment
"To adjust the height, p ress the switch up/
down. The steer ing column w ill cont inue
moving as long as you are press ing the
switch .
" To
move th e steering wheel forwa rd or back,
press the switch forward/back. The steering
I),-
Page 99 of 292
(dynamic). The goal is a high level of agility
and ability to accelerate on curves. The vehicle
is very responsive to steering.
Curve light*
The curve light adapts to driving on curves.
The pivoting action and the lighting are also
adapted to the mode.
Adaptive cruise control*
The behavior when accelerating can be adjust
ed from comfo rtable to sporty, depending on
the drive se lect mode . Adaptive cruise control
also responds to the driving behavior of the
vehicle ahead in a more conservative or sporty
manner .
Engine sound
The sound of the engine is adapted to these
l ected mode and ranges from subtle to sporty.
(D Note
-Make sure there is enough clearance
above and below the vehicle when park
in g. The height of the vehicle can change
once it is parked due to temperature
fluctuations, changes to the load condi
tions and changes to the driving modes,
which can affect clearance.
- When transporting the vehicle on a car
carrier, train, ship or by other means, on
ly tie the veh icle down at the running
surface of the tires, which is the outer
circumference. Securing the vehicle at
the axle components, suspension struts
or tow ing eyes is not permitted because
the pressure in the air suspension struts
can change during transport. The vehicle
may not be secured sufficiently if this
happens.
(D} Tips
- In some models, the maximum vehicle
speed can only be reached in the
Auto
and Dynamic modes.
- Se lecting the
Dynamic mode results in
spo rty shifting characteristics. The S
gear position engages automatically .
Audi drive select 97
-In vehicles that have dynamic steering*,
operating noise is heard when starting or
stopping the engine. This does not indi
cate a problem.
Selecting the driving mode
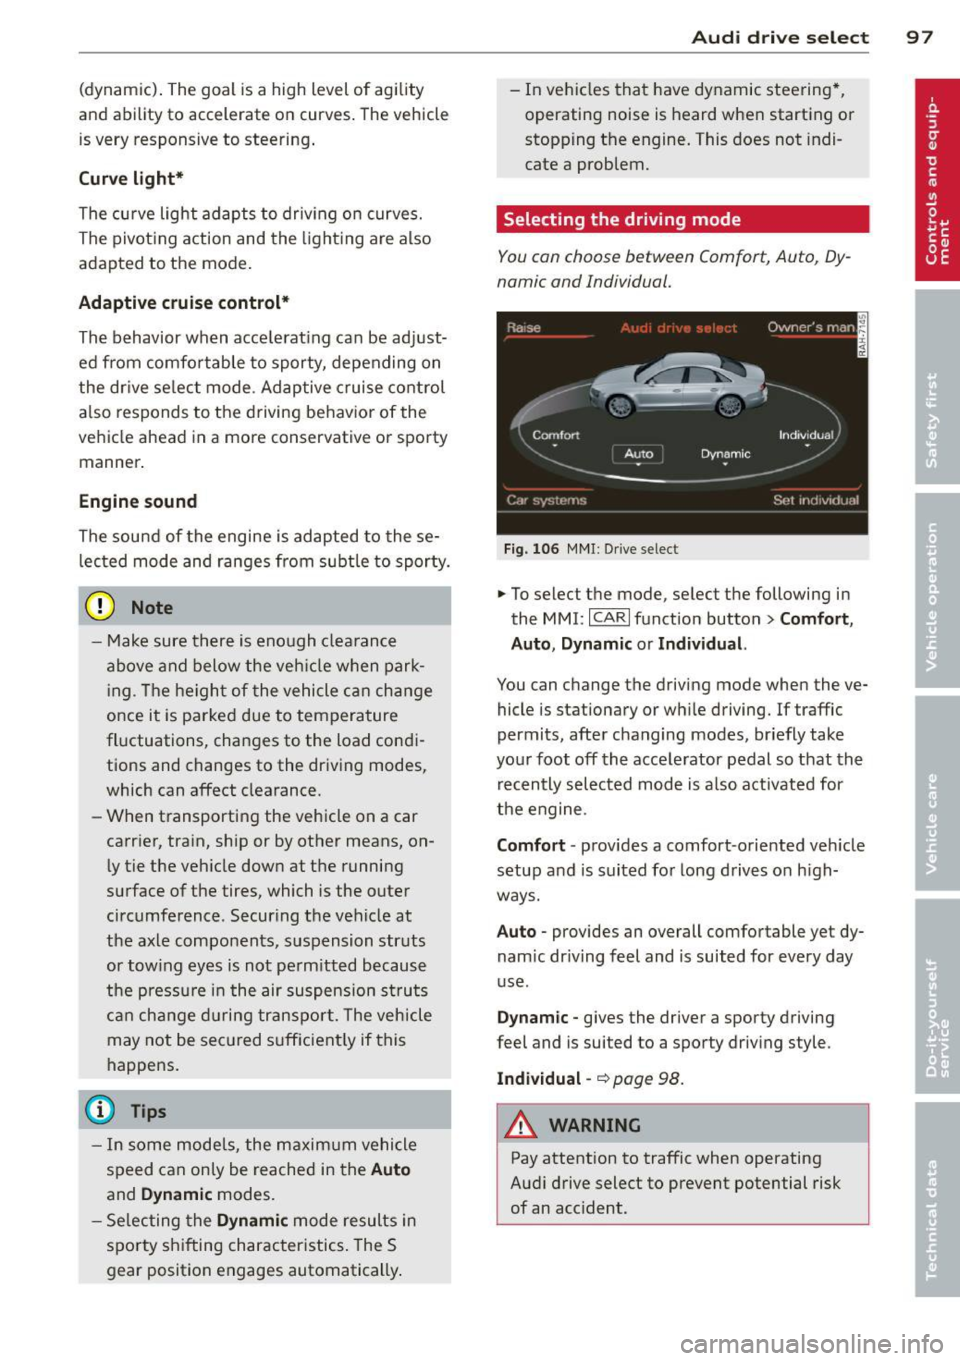
You can choose between Comfort, Auto, Dy
namic and Individual.
Fig. 106 MMI: Drive select
.,. To select the mode, select the following in
the
MMI: ICARI function button> Comfort,
Auto, Dynamic or Individual.
You can change the driving mode when the ve
hicle is stationary or wh ile driving. If traffic
permits, after changing modes, briefly take
your foot off the accelerator pedal so that the
recently selected mode is also activated for
the engine.
Comfort · provides a comfort-oriented veh icle
setup and is suited for long drives on h igh
ways.
Auto · provides an overall comfortable yet dy
nam ic dr iving feel and is suited for every day
use .
Dynamic -gives the driver a sporty driving
feel and is suited to a sporty driving style.
Individual -~page 98.
&_ WARNING
Pay attention to traffic when operating
Audi drive select to prevent potential risk
of an acc ident.
-
Page 125 of 292
Driving Safely
General notes
Safe driving habits
Please remember -safety first!
This chapter contains important information,
tips, instructions and warnings that you need
to read and observe for your own safety, the
safety of your passengers and others. We have
summarized here what you need to know
about safety belts, airbags, child restraints as
well as child safety. Your safety is for us
priori
ty number 1.
Always observe the information
and warnings in this section - for your own
safety as well as that of your passengers.
The information in this section applies to all
model versions of your vehicle. Some of the
features described in this sections may be
standard equipment on some models, or may
be optional equipment on others. If you are
not sure, ask your authorized Audi dealer.
A WARNING
-Always make sure that you follow the in
structions and heed the WARNINGS in
this Manual. It is in your interest and in
the interest of your passengers.
- Always keep the complete Owner's Liter
ature in your Audi when you lend or sell
your vehicle so that this important infor
mation will always be available to the
driver and passengers.
- Always keep the Owner's literature handy
so that you can find it easily if you have
questions.
Safety equipment
The safety features are part of the occupant
restraint system and work together to help
reduce the risk of injury in a wide variety of
accident situations.
Your safety and the safety of your passengers
should not be left to chance. Advances in
technology have made a variety of features
available to help reduce the risk of injury in an
Driving Safely 123
accident. The following is a list of just a few of
the safety features in your Audi:
- sophisticated safety belts for driver and all
passenger seating positions,
- safety belt pretensioners,
- safety belt force limiters for the front seats,
- safety belt height adjustment systems for the front seats,
- front airbags,
- knee airbags for the front seats*
- side airbags in the front seats and outer rear
seats*,
- side curtain airbags,
- special LATCH anchorages for child re-
straints,
- head restraints for each seating position,
- adjustable steering column.
These individual safety features, can work to
gether as a system to help protect you and
your passengers in a wide range of accidents.
These features cannot work as a system if
they are not always correctly adjusted and cor
rectly used.
Safety is everybody's responsibility!
Important things to do before driving
Safety is everybody's job! Vehicle and occu
pant safety always depends on the informed and careful driver.
Fo r your safety and the safety of your passen
gers,
before driving always:
.. Make sure that all lights and signals are op
erating correctly.
.,. Make sure that the tire pressure is correct .
.. Make sure that all windows are clean and af
ford good visibility to the outside.
.,. Secure all luggage and other items carefully
I::!) page 64, I::!) page 61.
.. Make sure that nothing can interfere with
the pedals.
.. Adjust front seat, head restraint and mirrors
correctly for your height.
.. Instruct passengers to adjust the head re-
straints according to the ir height. .,.. •
•