2014 Acura MDX wheel
[x] Cancel search: wheelPage 4 of 343
3Quick Reference Guide
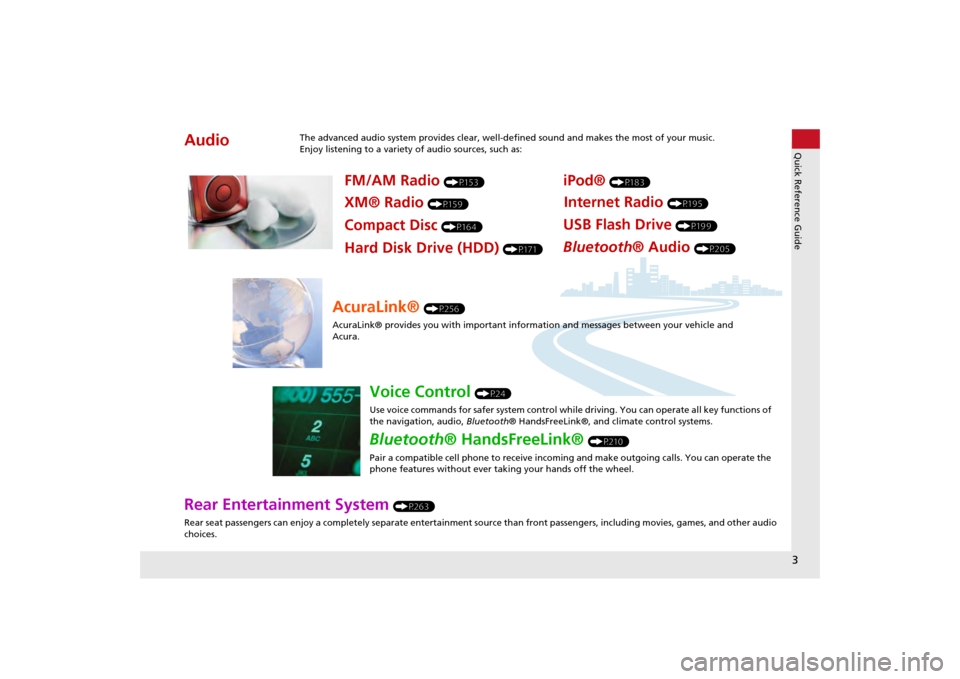
Rear Entertainment System
(P263)
Rear seat passengers can enjoy a completely separate entertainment source than front passengers, including movies, games, and other audio
choices.
Audio
The advanced audio system provides clear, well-defined sound and makes the most of your music.
Enjoy listening to a variety of audio sources, such as:
FM/AM Radio
(P153)
XM® Radio
(P159)
Compact Disc
(P164)
iPod®
(P183)
USB Flash Drive
(P199)
Bluetooth® Audio
(P205)
Hard Disk Drive (HDD)
(P171)
Internet Radio
(P195)
AcuraLink®
(P256)
AcuraLink® provides you with important info rmation and messages between your vehicle and
Acura.
Voice Control
(P24)
Use voice commands for safer system control while driving. You can operate all key functions of
the navigation, audio, Bluetooth® HandsFreeLink®, and climate control systems.
Bluetooth® HandsFreeLink®
(P210)
Pair a compatible cell phone to receive incoming and make outgoing calls. You can operate the
phone features without ever taking your hands off the wheel.
Page 5 of 343

4Quick Reference Guide
System Controls
REAR
REAR
AUDIO
FRONT
AUDIO
NAV
FFFFAAAAAAAAA
REARAUDIO
FRONTFFFAAAUDIOAAAAAAA
REARNAV
Navigation
Audio
Rear Entertainment System
Voice Control
Bluetooth
® HandsFreeLink
®
1 PHONE Button
(P212)
li AUDIO ButtonModels without RES
9 FRONT AUDIO Button
0 REAR AUDIO Button
(P278)
lbREAR
9
(Power) Button
Models with RES
lcMicrophone
(P24)
lf h (Pick-Up) Button
(P210)
lg J (Hang-Up/Back)
Button
(P210)
lh d (Talk) Button
(P5)
ld Left Selector
Wheel
(P148)
leSOURCE Button
(P148)
2NAV Button
(P88)
3BACK Button
4 a (Display Mode)
Button
(P74)
5 Interface Dial/ENTER
Button
(P7)
6INFO Button
7 MENU Button
8 SETTINGS Button
On Demand Multi-Use
Display
TM
Navigation Screen
Page 25 of 343
24System Setup
Voice Control SystemYour vehicle has a voice control system that allows hands-free operation of most of
the navigation system functions.
The voice control system uses the d (Talk) and J (Hang-Up/Back) buttons on
the steering wheel and a microphone near the map lights on the ceiling.
A “Getting Started” feature provides a tuto rial that explains how to use the voice
control system.
2Getting Started Tutorial
P. 16
Command InputIf the system does not understand a command or you wait too long to give a
command, the system asks y ou to repeat the command.
When you give a command, the system ge nerally either repeats the command as a
confirmation or asks you for further informa tion. If you do not wish to hear this
feedback, you can turn it off. However, list ening to the feedback will help familiarize
you with the way the system ex pects commands to be phrased.
If the system cannot perform a command or the command is not appropriate for the
screen you are on, the system beeps.
On character input screens, a list of possi ble characters is displayed if the system
does not recognize your command.
You can find out which voice commands are available for a particular screen using
the d “Voice Help” command. The system will display and read the list of available
commands to you.
2Voice Help
P. 16
1 d (Talk) Button
When you press the d (Talk) button, the system
prompts you to say a voice command and gives
examples. Press and release the d (Talk) button
again to bypass this prompt and give a
command.1 Command Input
The audio system is muted while using the voice
control system.
Page 142 of 343
141
Audio
This section describes how to operate the audio system. You can play
music from a wide array of media s ources, and control the audio system
using the audio buttons, the Interface Dial, or voice control.
Audio System .................................................. 142
About Your Audio System .............................. 142
USB Port ........................................................ 143
Auxiliary Input Jack ......... .......................... ..... 144
Audio System Theft Protection ....................... 145
Setting Audio Shortcuts ................................. 146
Audio Remote Controls .................................. 148
Steering Wheel Controls ................................ 148
Audio Settings ................................................. 149
Adjusting the Sound ...................................... 151
Playing FM/AM Radio ..................................... 153
Selecting FM/AM Mode.................................. 153
Audio Screen Control ..................................... 153
Audio Menu .................................................. 155
Playing XM® Radio ......................................... 159
Selecting XM® Mode..................................... 159
Audio Screen Control ..................................... 159
Audio Menu .................................................. 161 XM® Radio Service......................................... 163
Playing a Disc ................................................... 164
Selecting Disc Mode ....................................... 164
Audio Screen Control ..................................... 165
Audio Menu ................................................... 166
Recommended CDs ........................................ 169
Playing Hard Disc Drive (HDD) Audio ............ 171
Selecting HDD Mode ...................................... 171
Recording a Music CD to HDD........................ 172
Audio Screen Control ..................................... 173
Audio Menu ................................................... 174
Playing an iPod® ............................................. 183
Selecting iPod® Mode .................................... 184
Audio Screen Control ..................................... 185
Audio Menu ................................................... 187
Song By Voice
TM (SBV) .................................... 190
Playing Internet Radio ..................................... 195
Selecting Internet Radio Mode........................ 195 Pandora® Menu ............................................ 196
Aha
TM Radio Menu ......................................... 197
Playing a USB Flash Drive ............................... 199
Selecting USB Mode....................................... 200
Audio Screen Control..................................... 201
Audio Menu .................................................. 202
Playing Bluetooth ® Audio............................. 205
Selecting Bluetooth ® Audio Mode ................ 205
Audio Screen Control..................................... 206
Page 149 of 343
148Audio
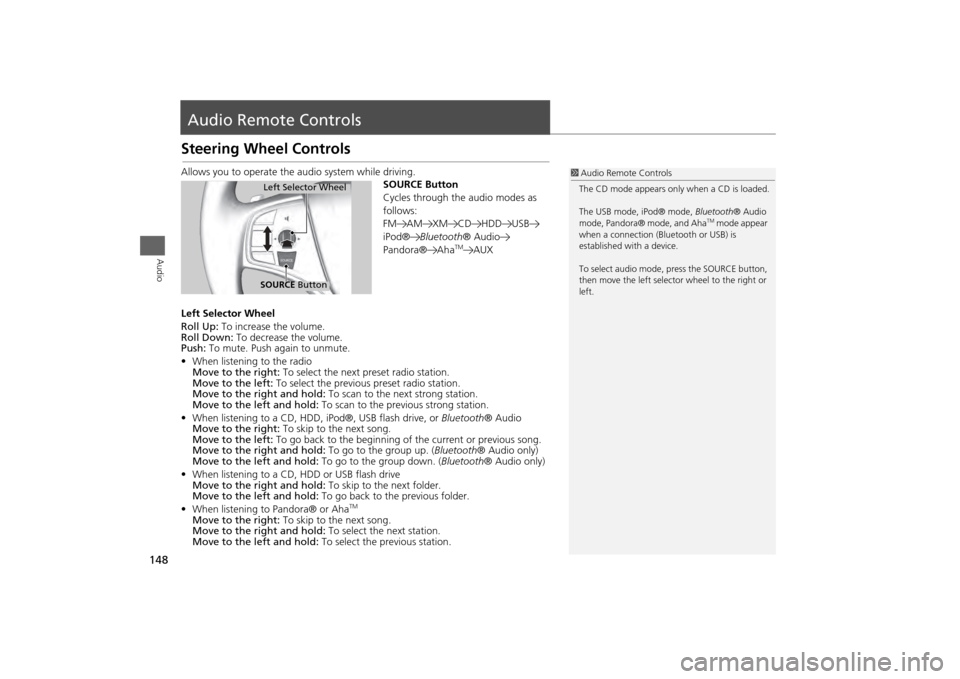
Audio Remote ControlsSteering Wheel ControlsAllows you to operate the audio system while driving.
SOURCE Button
Cycles through the audio modes as
follows:
FM AM XM CD HDD USB
iPod®Bluetooth ® Audio
Pandora® Aha
TM
AUX
Left Selector Wheel
Roll Up: To increase the volume.
Roll Down: To decrease the volume.
Push: To mute. Push again to unmute.
• When listening to the radio
Move to the right: To select the next preset radio station.
Move to the left: To select the previous preset radio station.
Move to the right and hold: To scan to the next strong station.
Move to the left and hold: To scan to the previous strong station.
• When listening to a CD, HDD, iPod®, USB flash drive, or Bluetooth® Audio
Move to the right: To skip to the next song.
Move to the left: To go back to the beginning of the current or previous song.
Move to the right and hold: To go to the group up. (Bluetooth® Audio only)
Move to the left and hold: To go to the group down. (Bluetooth® Audio only)
• When listening to a CD, HDD or USB flash drive
Move to the right and hold: To skip to the next folder.
Move to the left and hold: To go back to the previous folder.
• When listening to Pandora® or Aha
TM
Move to the right: To skip to the next song.
Move to the right and hold: To select the next station.
Move to the left and hold: To select the previous station.
1Audio Remote Controls
The CD mode appears only when a CD is loaded.
The USB mode, iPod® mode, Bluetooth® Audio
mode, Pandora® mode, and Aha
TM mode appear
when a connection (Bluetooth or USB) is
established with a device.
To select audio mode, pr ess the SOURCE button,
then move the left selector wheel to the right or
left.
Left Selector WheelSOURCE Button
Page 151 of 343

150
Audio Settings
Steering Wheel Controls
Audio
•Update Gracenote Album Info (CD or HDD mode): Updates the Gracenote®
Album Info (Gracenote® Media Database) from CD or from USB.
2
Updating Gracenote® Album Info
P. 181
• DVD Auto Play (DVD mode): Turns the auto play feature on or off.
• Audio Language (DVD mode): Selects a language for the audio that is available
on the DVD.
• Subtitle Language (DVD mode): Selects a language for the subtitle that is
available on the DVD.
• Menu Language (DVD mode): Selects a language for the DVD menu that is
available on the DVD.
• Angle Mark (DVD mode): Sets whether to display the angle symbol.
• Dynamic Range (DVD mode): Sets whether to control the range of the loud and
low sounds.
• Delete all HDD Data (HDD mode): Resets all the menu and customized settings,
and delete all music data on the HDD.
• Default: Cancels/Resets all cu stomized items in the Audio Settings group as
default.
Page 192 of 343
191
Playing an iPod®
Song By Voice
TM (SBV)
Audio
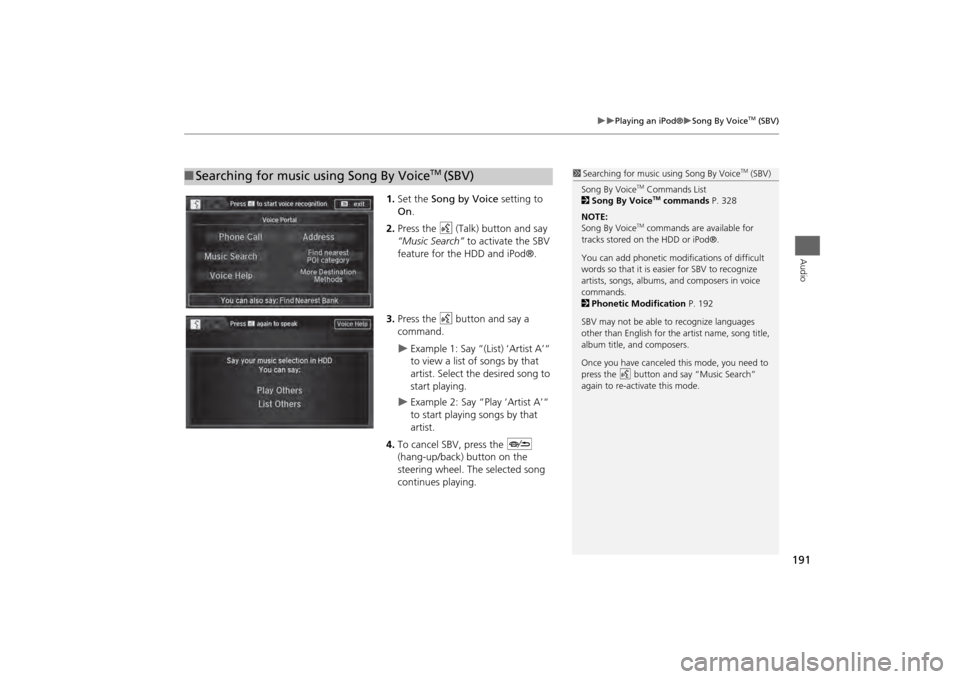
1.Set the Song by Voice setting to
On .
2. Press the d (Talk) button and say
“Music Search” to activate the SBV
feature for the HDD and iPod®.
3. Press the d button and say a
command.
Example 1: Say “(List) ‘Artist A’“
to view a list of songs by that
artist. Select the desired song to
start playing.
Example 2: Say “Play ‘Artist A’“
to start playing songs by that
artist.
4. To cancel SBV, press the J
(hang-up/back) button on the
steering wheel. The selected song
continues playing.
■ Searching for music using Song By Voice
TM
(SBV)
1 Searching for music using Song By Voice
TM (SBV)
Song By Voice
TM Commands List
2 Song By VoiceTM commands P. 328
NOTE:
Song By Voice
TM commands are available for
tracks stored on the HDD or iPod®.
You can add phonetic modifications of difficult
words so that it is easier for SBV to recognize
artists, songs, albums, and composers in voice
commands.
2 Phonetic Modification P. 192
SBV may not be able to recognize languages
other than English for the artist name, song title,
album title, and composers.
Once you have canceled this mode, you need to
press the
d button and say “Music Search”
again to re-activate this mode.
Page 211 of 343
210Bluetooth® HandsFreeLink®
Bluetooth® HandsFreeLink®Bluetooth® HandsFreeLink® (HFL) allows you to place and receive phone calls using
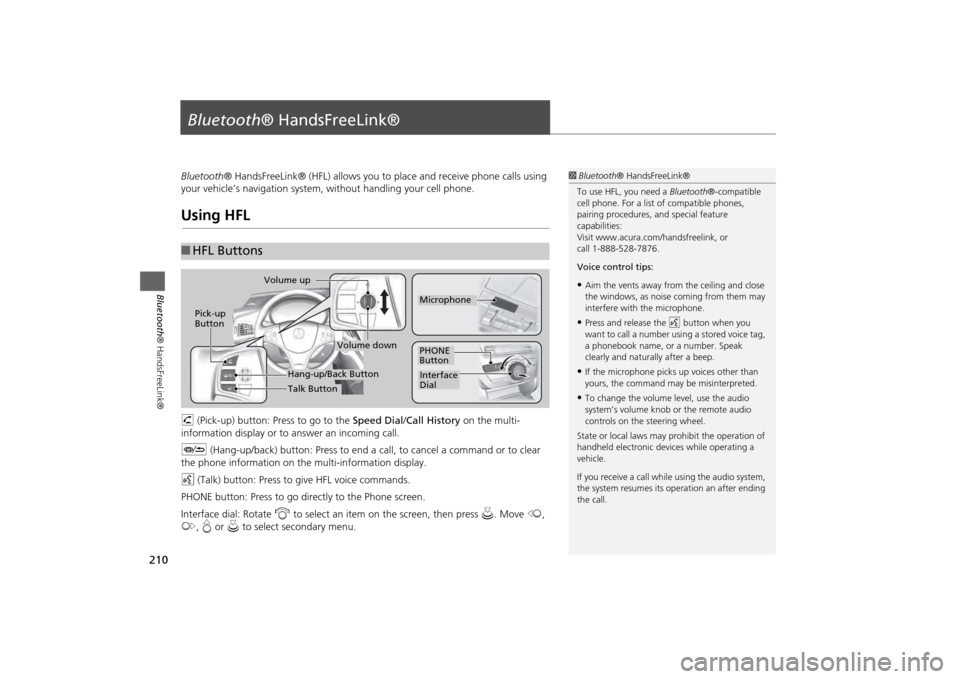
your vehicle’s navigation system, without handling your cell phone.Using HFLh (Pick-up) button: Press to go to the Speed Dial/Call History on the multi-
information display or to answer an incoming call.
J (Hang-up/back) button: Press to end a call, to cancel a command or to clear
the phone information on th e multi-information display.
d (Talk) button: Press to give HFL voice commands.
PHONE button: Press to go dire ctly to the Phone screen.
Interface dial: Rotate i to select an item on the screen, then press u. Move w,
y , e or u to select secondary menu.■HFL Buttons
1 Bluetooth ® HandsFreeLink®
To use HFL, you need a Bluetooth®-compatible
cell phone. For a list of compatible phones,
pairing procedures, and special feature
capabilities:
Visit www.acura.com/ handsfreelink, or
call 1-888-528-7876.
Voice control tips:•Aim the vents away from the ceiling and close
the windows, as noise coming from them may
interfere with the microphone.•Press and release the d button when you
want to call a number using a stored voice tag,
a phonebook name, or a number. Speak
clearly and naturally after a beep.•If the microphone picks up voices other than
yours, the command may be misinterpreted.•To change the volume level, use the audio
system’s volume knob or the remote audio
controls on the steering wheel.
State or local laws may pr ohibit the operation of
handheld electronic devices while operating a
vehicle.
If you receive a call whil e using the audio system,
the system resumes its operation an after ending
the call.
Volume down
Volume up
Pick-up
Button
PHONE
ButtonInterface
DialMicrophone
Hang-up/Back ButtonTalk Button