Page 87 of 343

86System Setup
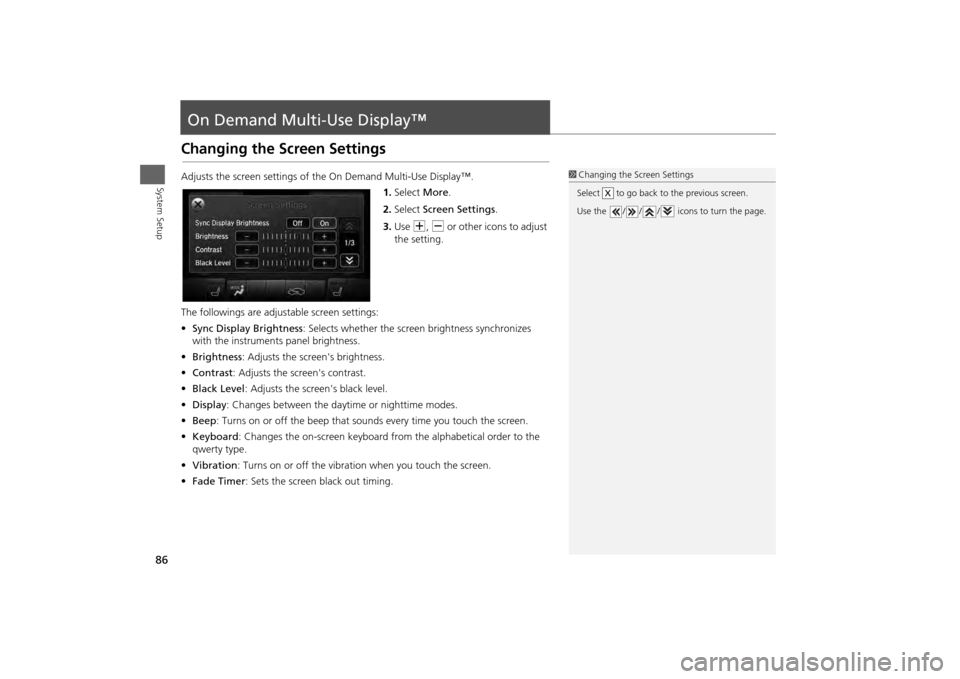
On Demand Multi-Use Display™Changing the Screen SettingsAdjusts the screen settings of the On Demand Multi-Use Display™.1.Select More.
2. Select Screen Settings .
3. Use N, B or other icons to adjust
the setting.
The followings are adju stable screen settings:
• Sync Display Brightness : Selects whether the screen brightness synchronizes
with the instruments panel brightness.
• Brightness : Adjusts the screen's brightness.
• Contrast : Adjusts the screen's contrast.
• Black Level : Adjusts the screen's black level.
• Display : Changes between the daytime or nighttime modes.
• Beep : Turns on or off the beep that sounds every time you touch the screen.
• Keyboard : Changes the on-screen keyboard fro m the alphabetical order to the
qwerty type.
• Vibration : Turns on or off the vibration when you touch the screen.
• Fade Timer : Sets the screen black out timing.
1Changing the Screen Settings
Select to go back to the previous screen.
Use the / / / icons to turn the page.
X
Page 88 of 343

87
Navigation
This section describes how to enter a destination, select a route to take,
and follow the route to your destination. It also describes how to change your route or destination along the way.
Entering a Destination........................... 88
Address ................................................. 90
Address Book ......................................... 96
Previous Destination ............................... 97
Place Category ....................................... 98
Local Search ......................................... 100
Place Name .......................................... 102
Place Phone Number ............................ 105
ZAGAT................................................. 105
Download POI ...................................... 108
Scenic Route ........................................ 109
Intersection .......................................... 110
Map Input............................................ 111
Coordinate .......................................... 113 Calculating the Route
............................114
Viewing the Routes ...............................115
Driving to Your Destination .................116
Viewing the Route ................................116
Listening to Voice Guidance ..................120
Reaching a Waypoint ............................121
Map Menu ..............................................122
Displaying the Map Menu .....................122
Directions .............................................124
Traffic Rerouting™................................126
Changing Your Route ............................128
Pausing the Route .................................129
Canceling the Route .............................129
Adding Waypoints ................................130 Editing the Destination List ................... 134
Taking a Detour ................................... 136
Avoiding Streets ................................... 136
Changing Your Destination ................. 137
Find Nearest Place ................................ 137
Selecting a Destination on the Map ...... 138
Entering a New Destination .................. 139
Resuming Your Trip .............................. 140
Page 89 of 343
88Navigation
Entering a DestinationHMENU button (on map)
This section describes how to enter a destination for route guidance. Rotate i to select an item. Press u .
Select More Search Methods to
display additional menu entries.
The following item s are available:
• Address : Sets a destination by entering an address.
2Address
P. 90
• Address Book : Sets a destination by selecting an address stored in your Address
Book.
2 Address Book
P. 96
• Previous Destination : Sets a destination by select ing a previous destination.
2Previous Destination
P. 97
1Entering a Destinationd
“Display Destination” ,
d
“Display
Navigation”
If you press the MENU button when en route,
the Route Option screen is displayed.
2 Changing Your Route P. 128
Prior to departure, you can set areas along your
route to avoid.
2 Avoiding Streets P. 136
Page 91 of 343
90
Entering a Destination
Address
Navigation
AddressHMENU button
Address
Enter an address to use as th e destination. The state or pr ovince you are currently in
is displayed (e.g., California).
Rotate i to select an item. Press u .
The following item s are available:
• City : Selects your destination city.
2Selecting a City
P. 92
• Street : Selects your destination street.
2Selecting a Street
P. 93
• House Number: Enters the house number to select the street.
2 Selecting a Street by House Number
P. 95
• ZIP Code : Enters the zip code to select the city.
2Selecting a City by Zip Code
P. 91
• Change State : Selects the state or province.
2Selecting the State or Province
P. 91
Page 93 of 343

92
Entering a Destination
Address
Navigation
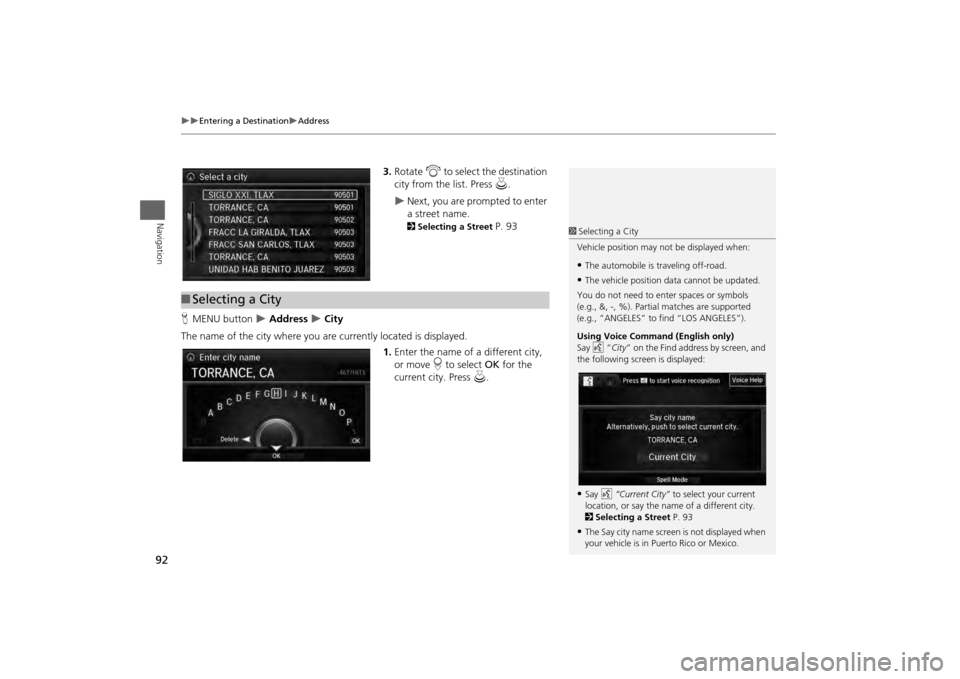
3.Rotate i to select the destination
city from the list. Press u.
Next, you are prompted to enter
a street name. 2Selecting a Street
P. 93
H MENU button
Address
City
The name of the city where you are currently located is displayed. 1.Enter the name of a different city,
or move r to select OK for the
current city. Press u.
■Selecting a City
1 Selecting a City
Vehicle position may not be displayed when:•The automobile is traveling off-road.•The vehicle position data cannot be updated.
You do not need to enter spaces or symbols
(e.g., &, -, %). Partia l matches are supported
(e.g., “ANGELES” to find “LOS ANGELES”).
Using Voice Command (English only)
Say d “City ” on the Find address by screen, and
the following screen is displayed:•Say d “Current City” to select your current
location, or say the name of a different city.
2 Selecting a Street P. 93•The Say city name screen is not displayed when
your vehicle is in Puerto Rico or Mexico.
Page 94 of 343

93
Entering a Destination
Address
Navigation
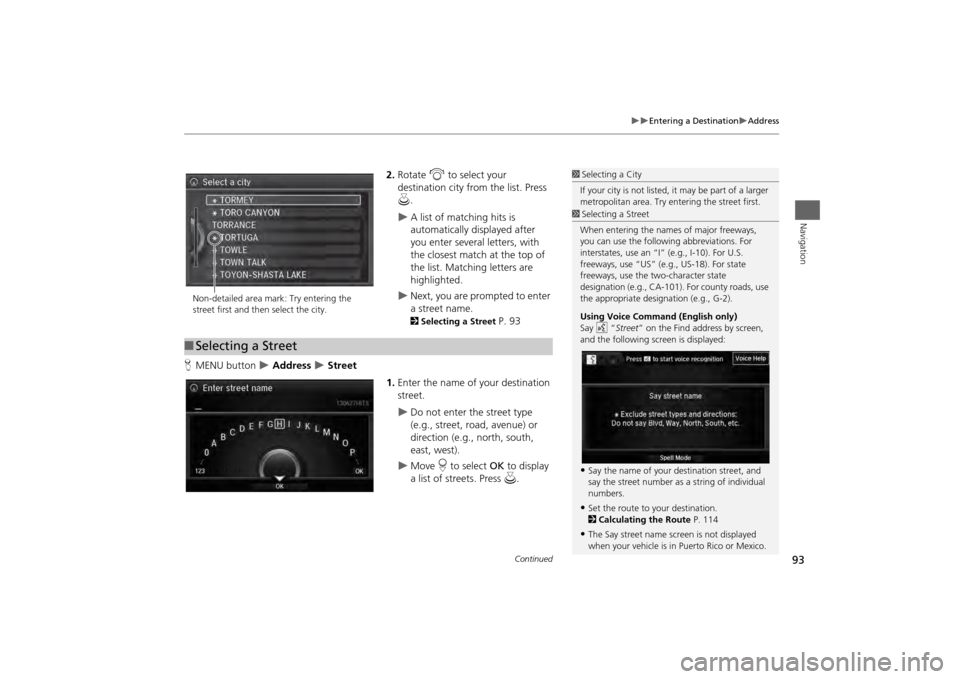
2.Rotate i to select your
destination city fr om the list. Press
u .
A list of matching hits is
automatically displayed after
you enter several letters, with
the closest match at the top of
the list. Matching letters are
highlighted.
Next, you are prompted to enter
a street name. 2Selecting a Street
P. 93
H MENU button
Address
Street
1.Enter the name of your destination
street.
Do not enter the street type
(e.g., street, road, avenue) or
direction (e.g., north, south,
east, west).
Move r to select OK to display
a list of streets. Press u.
1Selecting a City
If your city is not listed, it may be part of a larger
metropolitan area. Try entering the street first.
Non-detailed area mark: Try entering the
street first and then select the city.■ Selecting a Street
1 Selecting a Street
When entering the names of major freeways,
you can use the following abbreviations. For
interstates, use an “I ” (e.g., I-10). For U.S.
freeways, use “US” (e.g., US-18). For state
freeways, use the two-character state
designation (e.g., CA-101). For county roads, use
the appropriate desi gnation (e.g., G-2).
Using Voice Command (English only)
Say d “Street ” on the Find address by screen,
and the following screen is displayed:•Say the name of your destination street, and
say the street number as a string of individual
numbers.•Set the route to your destination.
2 Calculating the Route P. 114•The Say street name screen is not displayed
when your vehicle is in Puerto Rico or Mexico.
Continued
Page 95 of 343
94
Entering a Destination
Address
Navigation
2.Rotate i to select your
destination street from the list.
Press u.
A list of matching hits is
automatically displayed after
you enter several letters, with
the closest match at the top of
the list. Matching letters are
highlighted.
3. Enter the street number.
Only valid street numbers can be
entered.
4. Move r to select OK. Press u.
5. Set the route to your destination.
2 Calculating the Route
P. 114
1Selecting a Street
If you did not select a city first and there is more
than one city with the specified street, a list of
cities is displayed.
Rotate i to select the desired city from the list.
Press u.
Page 97 of 343
96
Entering a Destination
Address Book
Navigation
Address BookHMENU button
Address Book
Select an address stored in your addr ess book to use as the destination.
1.Rotate i to select your
destination from the list. Press u.
2. Set the route to your destination.
2 Calculating the Route
P. 114
Move w or y to display only
the entries in the categories you
have created. 2 Selecting an Address Book
Category
P. 42
1 Address Book
If you have PIN-protec ted your address book,
enter your PIN when prompted. Press u to
select OK. PINs are optional.
2 PIN Numbers P. 47
Move r and rotate i to select the following
items:•Add New Address : Adds an entry to the
address book.
2 Adding an Address Book Entry P. 39•Sort: Selects Sort by Name or Sort by
Distance .•Delete All : Deletes all entries in the address
book.•Driver 1 or Driver 2: Displays the address
book for the selected user.