2014 Acura MDX light
[x] Cancel search: lightPage 119 of 343

118
Driving to Your Destination
Viewing the Route
Navigation
When driving on verified streets, the route line is light blue. The route line display
changes when driving on unverified streets:
•If Unverified Routing is Off , the
route line uses verified streets only
(when possible). If Straight Line
Guide is set to On, a pink “vector
line” pointing directly towards your
destination is displayed.
2 Straight Line Guide
P. 77
• If Unverified Routing is On , the
route line changes to a blue-pink
line to indicate that the route line
uses unverified streets.
■ Route Line
1 Route Line
You can set Unverified Routing to Off to
follow your own route to the destination. If
Unverified Routing is On, be aware that
unverified streets ma y not be displayed
accurately.
2 Unverified Routing P. 56
You can always view the entire route by simply
saying d “Display entire route.”
The route line may also c onsist of red, orange, or
green segments when traffic information is
displayed.
2 AcuraLink Real-Time Traffic™ P. 14
2 Traffic Rerouting™ P. 126
Straight line guide
Blue-pink route line
Page 144 of 343

143
Audio System
USB Port
Audio
USB Port
Install the iPod® or iPhone® dock
connector or the USB flash drive to
the USB port.
1 USB Port
• Do not leave the iPod® or USB flash drive in
the vehicle. Direct sunlight and high
temperatures may damage it.
• Do not connect the iPod® or USB flash drive
using a hub.
• Do not use a device such as a card reader or
hard disk drive, as the device or your files may
be damaged.
• We recommend backing up your data before
using the device in your vehicle.
• Displayed messages may vary depending on
the device model a nd software version.
If the audio system does not recognize the
iPod®, try reconnecting it a few times or reboot
the device. To reboot, fo llow the manufacturer’s
instructions provided wi th the iPod® or visit
www.apple.com/ipod.
Page 171 of 343

170
Playing a Disc
Recommended CDs
Audio
■Protecting CDs
Follow these precautions when handling or storing CDs:
• Store a CD in its case when it is not being played.
• When wiping a CD, use a soft clean clot h from the center to the outside edge.
• Handle a CD by its edge. Never touch either surface.
• Never insert foreign obje cts into the CD player.
• Keep CDs out of direct sunlight and extreme heat.
• Do not place stabilizer rings or labels on the CD.
• Avoid fingerprints, liquids, and felt-tip pens on the CD.
1Protecting CDs
Do not insert a damaged CD. It may be stuck
inside and damage the audio unit.NOTICEExamples:•Damaged CDs Bubbled/
Wrinkled
With Label/
Sticker Using
Printer Label
Kit
Sealed With Plastic Ring
•Poor quality
CDs
Chipped/
Cracked Warped Burrs
•Small CDs
3-inch
(8-cm)
CD•Bubbled, wrinkled, labeled, and
excessively thick CDs
Page 172 of 343

171Audio
Playing Hard Disc Drive (HDD) AudioThe Hard Disc Drive (HDD) Audio function plays tracks from music CDs that have
been recorded onto the built-in HDD. You ca n arrange the tracks in playlists or play
the tracks using various search methods.Selecting HDD Mode1. Press the MENU button. (in AUDIO mode)
2. Rotate i to select Change Source. Press u.
3. Rotate to select HDD. Press to play tracks stored on the HDD.
Title information is displayed if found in the Gracenote® Album Info
(Gracenote® Media Database) stored on the HDD.
The HDD has two types of playlists: original playlists and user playlists. An
original playlist is automatically creat ed for each album when a music CD is
recorded. You can customize up to six us er playlists provided on the HDD by
adding tracks from your original playlists.
1. Select Audio Source .
2. Select the HDD icon to play tracks stored on the HDD.
1Playing Hard Disc Drive (HDD) Audio
You can control the HDD audio using voice
commands.
2 Voice Control Operation P. 5
2 Song By Voice
TM (SBV) P. 190
Music tracks recorded on HDD cannot be
recorded onto CDs or other devices.
Tracks are recorded at four times the playback
speed using ultra-efficient compression
technology; therefore, sound quality may vary
slightly from the original.
If the HDD is ever replaced, all music data is lost
and cannot be recovered.
If there is a problem, you may see an error
message on the display.
2 Hard Disc Drive (HDD) Audio P. 302
Interface DialOn Demand Multi-Use Display
TM
Page 259 of 343

258
AcuraLink®
Security Features
AcuraLink®
Security FeaturesYour subscribed telematics service provider can track your vehicle’s location, remotely
lock or unlock doors, and help you find your vehicle.
To use these features, you need your user ID and personal identification number (PIN).
■ Stolen vehi cle tracking
This feature searches and tracks down your ve hicle position even if it is on the move.
If you believe that your vehicle has been stolen, contact the pol ice as well as the
provider.
■ Remote door lock/unlock
The provider can remotely lock or unlock doors upon your request.
■ Vehicle finder
This feature is convenient to use when try ing to locate your vehicle in large areas,
such as a crowded parking lot. If you ca nnot locate your vehicle after using the
remote transmitter’s answerback function , you can contact the provider which can
then flash your vehicle’s exterior lights and sound the horn.
■ Security ala rm notification
If the security system in your vehicle dete cts an abnormal condition, such as someone
tampering with the lock on your vehicle, the provider notifies you by your preferred
method.
1 Security Features
The contact information of your provider, your
user ID and PIN will be given when you subscribe
to AcuraLink. If you forget any of the above,
contact a dealer or go to owners.acura.com.
You can also activate the remote door lock/
unlock and vehicle finder features from the
Internet or using your smartphone app. Ask a
dealer or visit owners.acura.com for details.1Vehicle finder
The lights will stop fl ashing and horn will stop
sounding under the following conditions:•When 30 seconds have elapsed.•You unlock the doors using the remote
transmitter.•You unlock the doors us ing the keyless access
system.•You unlock the doors using the built-in key.•The power mode is set to ACCESSORY or ON.
Page 285 of 343

284
Wireless Headphones
Replacing the Batteries
Rear Entertainment System
Replacing the Batteries
1.Insert a coin in the slot and twist it
slightly to pry the cover away from
the earpiece.
2. Pull the cover outward, and pivot it
out of the way.
3. Remove the battery.
4. Install the new battery in the
earpiece as shown in the diagram
next to the battery slot.
Battery Type: AAA battery
5. Slide the cover back into place on
the earpiece, then press down on
the back edge to lock it in place.
1Replacing th e Batteries
The battery is under the cover on the left
earpiece.
An improperly disposed of battery can hurt the
environment. Always c onfirm local regulations
for battery disposal.
If static is heard in th e headphones, try replacing
the battery.
Coin
Cover
Battery
Page 291 of 343

290Other Features
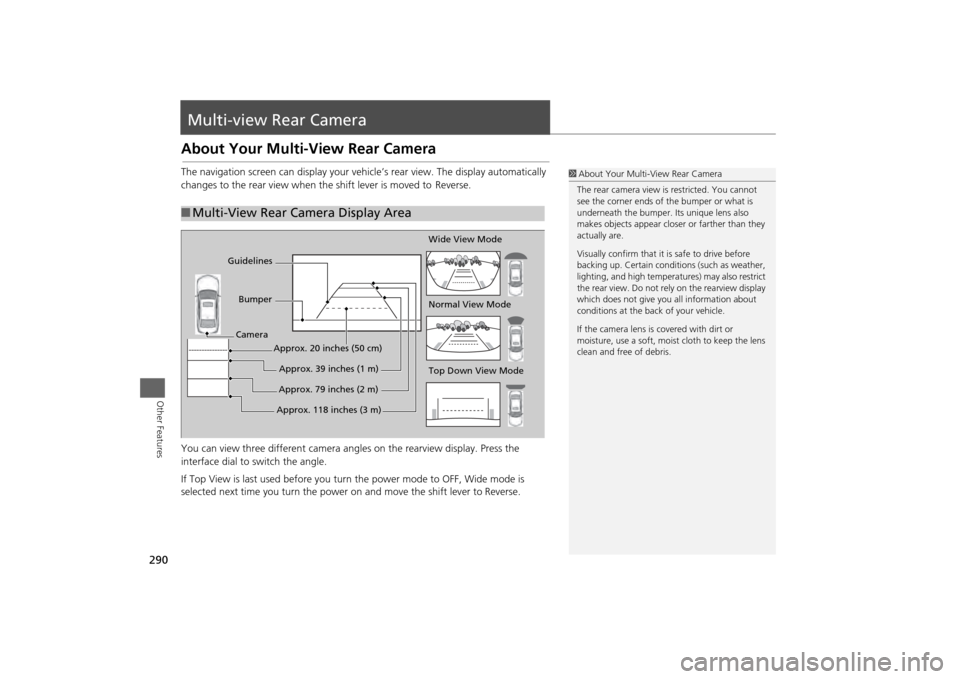
Multi-view Rear CameraAbout Your Multi-View Rear CameraThe navigation screen can display your vehi cle’s rear view. The display automatically
changes to the rear vi ew when the shift leve r is moved to Reverse.
You can view three different camera angl es on the rearview display. Press the
interface dial to switch the angle.
If Top View is last used before you turn the power mode to OFF, Wide mode is
selected next time you turn the power on and move the shift lever to
Reverse.
■Multi-View Rear Camera Display Area
1 About Your Multi- View Rear Camera
The rear camera view is restricted. You cannot
see the corner ends of the bumper or what is
underneath the bumper. Its unique lens also
makes objects appear closer or farther than they
actually are.
Visually confirm that it is safe to drive before
backing up. Certain conditi ons (such as weather,
lighting, and high temperat ures) may also restrict
the rear view. Do not rely on the rearview display
which does not give you all information about
conditions at the back of your vehicle.
If the camera lens is covered with dirt or
moisture, use a soft, moist cloth to keep the lens
clean and free of debris.
Top Down View Mode Normal View Mode Wide View Mode
Guidelines
Bumper
Camera
Approx. 118 inches (3 m)Approx. 79 inches (2 m)Approx. 39 inches (1 m)
Approx. 20 inches (50 cm)
Page 298 of 343

297
Troubleshooting
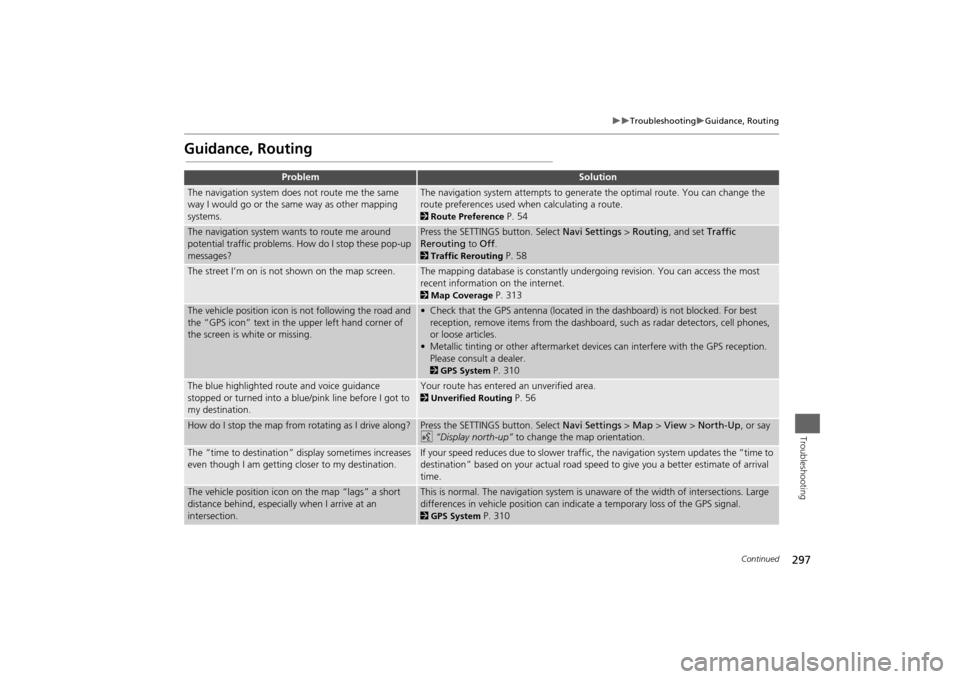
Guidance, Routing
Troubleshooting
Guidance, Routing
Problem
Solution
The navigation system does not route me the same
way I would go or the same way as other mapping
systems.
The navigation system attempts to generate the optimal route. You can change the
route preferences used when calculating a route. 2Route Preference
P. 54
The navigation system wants to route me around
potential traffic problems. How do I stop these pop-up
messages?
Press the SETTINGS button. Select Navi Settings > Routing , and set Traffic
Rerouting to Off . 2Traffic Rerouting
P. 58
The street I’m on is not shown on the map screen.
The mapping database is constantly undergoing revision. You can access the most
recent information on the internet. 2Map Coverage
P. 313
The vehicle position icon is not following the road and
the “GPS icon” text in th e upper left hand corner of
the screen is white or missing.
• Check that the GPS antenna (located in the dashboard) is not blocked. For best reception, remove items from the dashboard, such as radar detectors, cell phones,
or loose articles.
• Metallic tinting or other aftermarket devi ces can interfere with the GPS reception.
Please consult a dealer. 2 GPS System
P. 310
The blue highlighted route and voice guidance
stopped or turned into a blue/pink line before I got to
my destination.
Your route has entered an unverified area. 2Unverified Routing
P. 56
How do I stop the map from rotating as I drive along?
Press the SETTINGS button. Select Navi Settings > Map > View > North-Up , or say
d “Display north-up” to change the map orientation.
The “time to destination” display sometimes increases
even though I am getting closer to my destination.
If your speed reduces due to slower traffic, the navigation system updates the “time to
destination” based on your actual road speed to give you a better estimate of arrival
time.
The vehicle position icon on the map “lags” a short
distance behind, especially when I arrive at an
intersection.
This is normal. The navigation system is un aware of the width of intersections. Large
differences in vehicle position can indicate a temporary loss of the GPS signal. 2 GPS System
P. 310
Continued