2014.5 VAUXHALL CORSA display
[x] Cancel search: displayPage 16 of 177

16Introduction
Example: Avoid road settingsWith touch screen:
Tap on the - or + screen button beside
a setting to adjust this setting.With multifunction knob:
Same operating steps as described in
"Example: Audio settings".Example: Display settingsWith touch screen:
Tap on a menu item to switch to
another setting option.
Notice
The dots below a setting indicate
how many options are available for that setting.With multifunction knob: 1. Turn the multifunction knob clockwise or anti-clockwise to
select a menu item.
2. Press the multifunction knob to switch to another setting option.Notice
In subsequent chapters the
operating steps for switching to
another setting option via touch
screen or multifunction knob will
simply be described as
"...set...to...'option name'...".Example: System settingsWith touch screen:
Tap on a menu item, e.g. Touch
Click , to switch the setting to On or
Off .
Page 18 of 177
18Introduction
or
■ if an audio main menu is currently active, e.g. the FM1 or CD menu,
press the multifunction knob.
Notice
The Audio screen button in the
SETUP menu is not selectable,
when the volume is set to zero.
To adjust the degree of volume
adaptation: set Speed vol. to a value
between 0 and 5.
0 : no enhancement of volume with
increasing vehicle speed.
5 : maximum enhancement of volume
with increasing vehicle speed.
Adjusting the volume of AUX input
sources
(see image of AUDIO SETUP menu
above)
To adjust the relative volume level for external audio sources, e.g. a CD
player: set AUX Level to Quiet ,
Medium or Loud .Adjusting the volume of voice
commands (navigation)
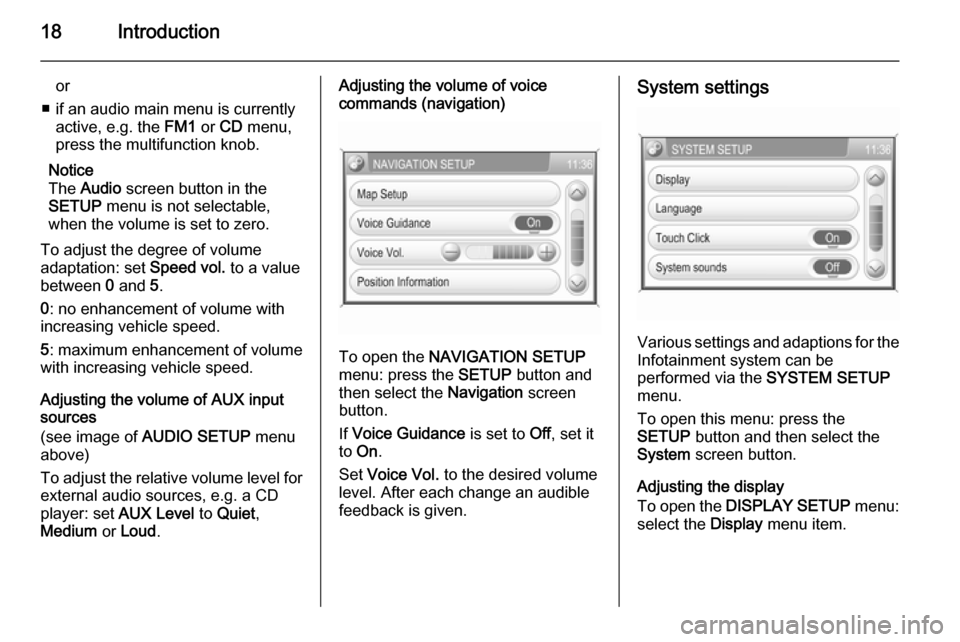
To open the NAVIGATION SETUP
menu: press the SETUP button and
then select the Navigation screen
button.
If Voice Guidance is set to Off, set it
to On .
Set Voice Vol. to the desired volume
level. After each change an audible
feedback is given.
System settings
Various settings and adaptions for the Infotainment system can be
performed via the SYSTEM SETUP
menu.
To open this menu: press the
SETUP button and then select the
System screen button.
Adjusting the display
To open the DISPLAY SETUP menu:
select the Display menu item.
Page 19 of 177
Introduction19
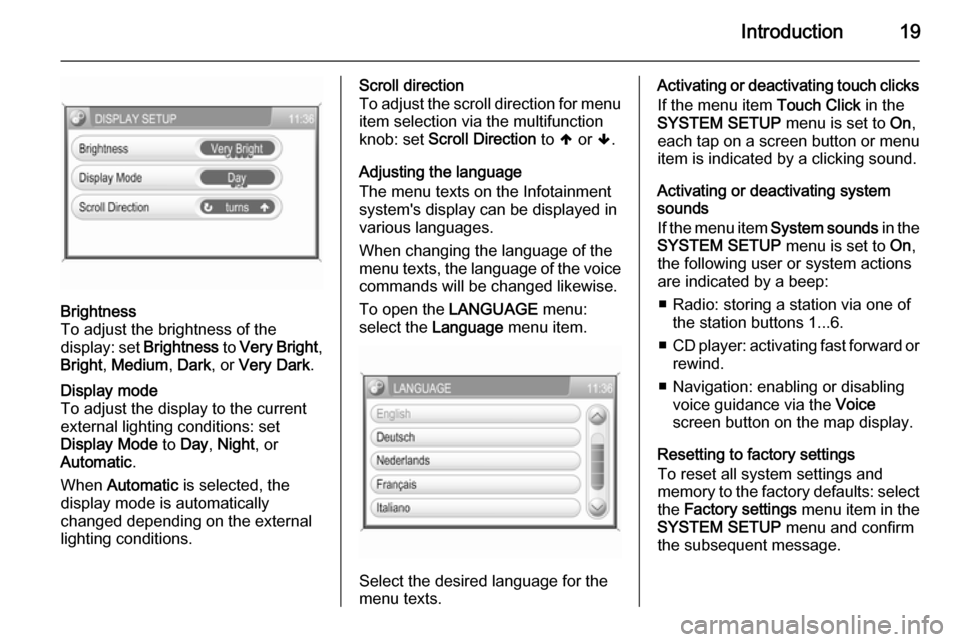
Brightness
To adjust the brightness of the
display: set Brightness to Very Bright ,
Bright , Medium , Dark , or Very Dark .Display mode
To adjust the display to the currentexternal lighting conditions: set
Display Mode to Day , Night , or
Automatic .
When Automatic is selected, the
display mode is automatically changed depending on the external
lighting conditions.Scroll direction
To adjust the scroll direction for menu
item selection via the multifunction
knob: set Scroll Direction to [ or ].
Adjusting the language
The menu texts on the Infotainment
system's display can be displayed in
various languages.
When changing the language of the
menu texts, the language of the voice commands will be changed likewise.
To open the LANGUAGE menu:
select the Language menu item.
Select the desired language for the
menu texts.
Activating or deactivating touch clicks
If the menu item Touch Click in the
SYSTEM SETUP menu is set to On,
each tap on a screen button or menu
item is indicated by a clicking sound.
Activating or deactivating system
sounds
If the menu item System sounds in the
SYSTEM SETUP menu is set to On,
the following user or system actions
are indicated by a beep:
■ Radio: storing a station via one of the station buttons 1...6.
■ CD player: activating fast forward or
rewind.
■ Navigation: enabling or disabling voice guidance via the Voice
screen button on the map display.
Resetting to factory settings
To reset all system settings and
memory to the factory defaults: select
the Factory settings menu item in the
SYSTEM SETUP menu and confirm
the subsequent message.
Page 20 of 177

20RadioRadioUsage.......................................... 20
Station search .............................. 21
Radio data system (RDS) ............22Usage
Notice
Within the radio menus you can only use the touch screen to select/
activate the screen buttons at the
bottom of the menus.
Activating the radio Press the FM-AM button to open the
radio main menu.
The station last played will be
received.
If the currently played station is an
RDS station 3 22, the station name
and programme related information
are displayed.
Selecting the waveband Press the FM-AM button once or
several times to select the desired
waveband.
The station last played in that
waveband will be received.
If the waveband is changed from
FM1 to FM2 or vice versa, the
currently received station will remain
active.
If the currently received station is
stored on one of the station buttons
1...6, the corresponding button
number, e.g. P3, is displayed beside
the waveband name in the top line of
the menu.
Notice
There are two FM waveband menus
available to enable you to store 12
FM stations on the station buttons 1...6.
Page 21 of 177
Radio21
Enabling or disabling traffic
announcements (TA) Select the TA screen button to enable
or disable the reception of traffic
announcements.
Further details on the TA function
3 22.
Station search Automatic station search
Briefly press the l or m button. A
search is made for the next station that can be received and it is played
automatically.
If no other receivable station is found,
the last station played will be received again.
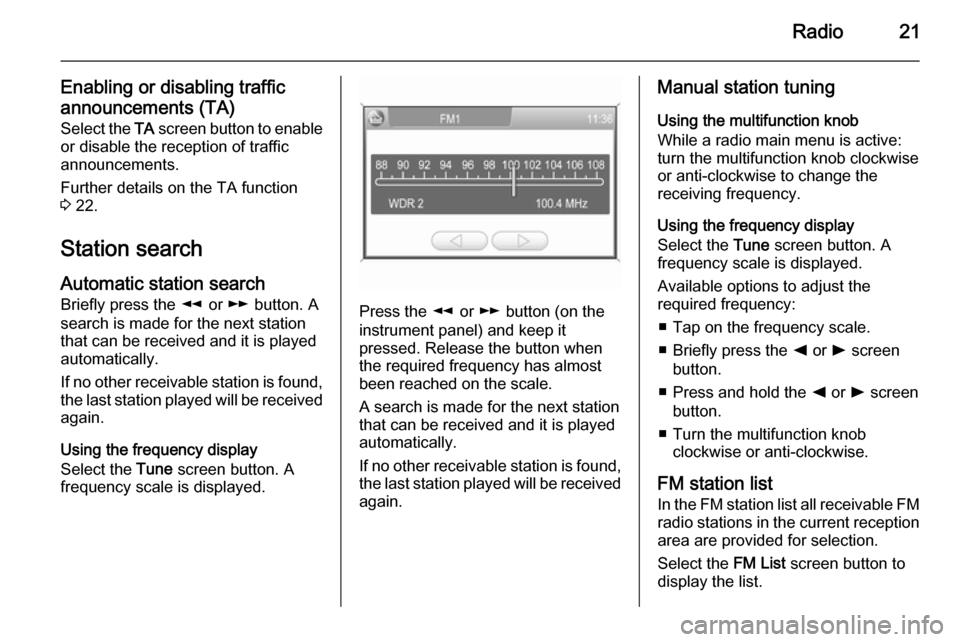
Using the frequency display
Select the Tune screen button. A
frequency scale is displayed.
Press the l or m button (on the
instrument panel) and keep it
pressed. Release the button when
the required frequency has almost
been reached on the scale.
A search is made for the next station that can be received and it is played
automatically.
If no other receivable station is found,
the last station played will be received
again.
Manual station tuning
Using the multifunction knob
While a radio main menu is active:
turn the multifunction knob clockwise
or anti-clockwise to change the
receiving frequency.
Using the frequency display
Select the Tune screen button. A
frequency scale is displayed.
Available options to adjust the
required frequency:
■ Tap on the frequency scale.
■ Briefly press the k or l screen
button.
■ Press and hold the k or l screen
button.
■ Turn the multifunction knob clockwise or anti-clockwise.
FM station list
In the FM station list all receivable FM radio stations in the current reception area are provided for selection.
Select the FM List screen button to
display the list.
Page 22 of 177

22Radio
The list entry of the currently played
FM station is highlighted in red.
If a station is stored on one of the
station buttons 1...6, the
corresponding waveband name and
the button number are displayed in
the list, e.g. FM1-P3.
Select the list entry of the FM station
to be played.
Notice
The dual tuner of the Infotainment
system continuously updates the FM
station list in the background.
This ensures that, e.g., the station
list always contains the FM stations
that can be received in the local area during a long motorway journey.
As the automatic updating takes a certain amount of time, not all
stations that can be received may be
available at once in the station list at a sudden change in reception area.
Station buttons 1...6
In each waveband (AM, FM1 and
FM2) six radio stations can be stored
on the station buttons 1...6.
Storing a station 1. Select the desired waveband.
2. Tune to the desired station or select it from the FM station list.
3. Press and hold one of the station buttons until you hear a beep.
The corresponding button
number, e.g. P3, is displayed
beside the waveband name in the
top line of the menu.
The currently received radio station is stored and can be retrieved via the
station button in future.Notice
If no beep can be heard when storing
a station, system sounds are
deactivated. Activation of system
sounds 3 11.
Retrieving a station
Select the desired waveband and
then briefly press a station button to
retrieve the corresponding radio
station.
Radio data system (RDS) The RDS is a system through which
encoded digital information is
transmitted in addition to the normal
FM radio broadcasts. The RDS
provides information services such as station name, traffic information and
radio text.
RDS Regional mode At certain times some RDS stations
broadcast regionally different
programmes on different frequencies.
The Infotainment system always
tunes into the best receivable
frequency of the currently played RDS station.
Page 23 of 177
Radio23
If RDS Regional mode is activated,
only frequencies of the currently
received RDS station with the same
regional programme are considered.
If RDS Regional mode is deactivated,
also frequencies of the currently
received RDS station with different
regional programmes are considered.
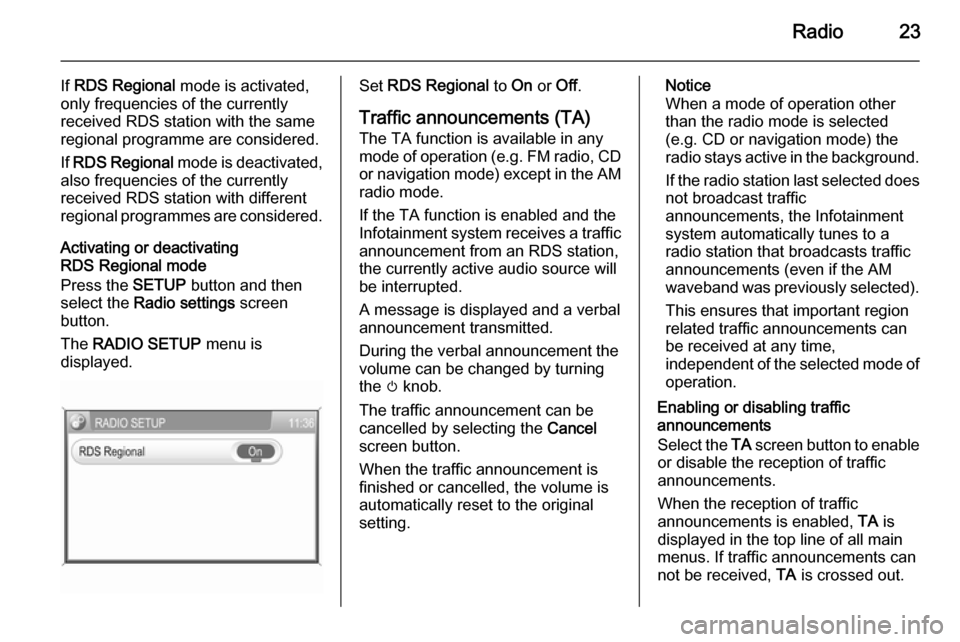
Activating or deactivating
RDS Regional mode
Press the SETUP button and then
select the Radio settings screen
button.
The RADIO SETUP menu is
displayed.Set RDS Regional to On or Off.
Traffic announcements (TA)
The TA function is available in any
mode of operation ( e.g. FM radio, CD
or navigation mode) except in the AM
radio mode.
If the TA function is enabled and the
Infotainment system receives a traffic announcement from an RDS station,
the currently active audio source will
be interrupted.
A message is displayed and a verbal
announcement transmitted.
During the verbal announcement the
volume can be changed by turning
the m knob.
The traffic announcement can be
cancelled by selecting the Cancel
screen button.
When the traffic announcement is
finished or cancelled, the volume is
automatically reset to the original
setting.Notice
When a mode of operation other
than the radio mode is selected
(e.g. CD or navigation mode) the
radio stays active in the background.
If the radio station last selected does
not broadcast traffic
announcements, the Infotainment
system automatically tunes to a
radio station that broadcasts traffic
announcements (even if the AM
waveband was previously selected).
This ensures that important region
related traffic announcements can
be received at any time,
independent of the selected mode of operation.
Enabling or disabling traffic
announcements
Select the TA screen button to enable
or disable the reception of traffic
announcements.
When the reception of traffic
announcements is enabled, TA is
displayed in the top line of all main
menus. If traffic announcements can
not be received, TA is crossed out.
Page 25 of 177
CD Player25CD PlayerGeneral information.....................25
Usage .......................................... 26General information
The Infotainment system's CD player
can replay audio CDs and MP3/WMA CDs.Caution
Under no circumstances place
DVDs, single-CDs with a diameter
of 8 cm or shaped CDs in the audio
player.
You must not put any stickers on
CDs. These discs can get jammed
in the CD drive and ruin the drive.
An expensive replacement of the
device will then be necessary.
Important information about
audio CDs and MP3/WMA CDs ■ The following CD formats can be used:
CD, CD-R and CD-RW.
■ The following file formats can be used:
ISO9660 Level 1, Level 2, (Romeo,
Joliet).
MP3 and WMA files written in any
format other than listed above may
not play correctly, and their file names and folder names may not
be displayed correctly.
■ Audio CDs with copy protection, which are not in compliance with
the audio CD standard, may not
play correctly or not at all.
■ Self-recorded CD-Rs and CD-RWs
are more vulnerable to mishandling than prerecorded CDs. Correct
handling, especially in the case of
self-recorded CD-Rs and CD-RWs,
must be ensured; see below.
■ Self-recorded CD-Rs and CD-RWs
may not play correctly or not at all.
■ On mixed mode CDs (combinations
of audio and data, e.g. MP3), only
the audio tracks will be detected and played.
■ Avoid leaving fingerprints when you
change CDs.
■ Put CDs back in their sleeves immediately after removing them
from the audio player in order to
protect them from damage and dirt.