2013 YAMAHA SUPERJET hood open
[x] Cancel search: hood openPage 30 of 78

Equipment operation
24
EJU40333
Equipment EJU31056Hood
The hood is removable.
Remove the hood to access the engine com-
partment.
To remove the hood:
(1) Lift the steering pole and support it withthe lock pin. (2) Turn the latch knob to the “OPEN” posi-
tion, and then pull up on the hood latch to
unlatch the hood.
(3) Grasp the hood using the handgrips pro- vided at the front and rear of the hood. Lift
the hood up and to the rear to remove it.
1Steering pole
1 Lock pin
1Hood latch
2 Hood latch knob
1 Handgrip
LOC KOPEN
1
2
UF2F75E0.book Page 24 Thursday, July 5, 2012 8:50 AM
Page 31 of 78

Equipment operation
25
To install the hood:
(1) Position the hood on the deck so that thetwo projections at the front of the hood fit
under the two stays on the deck.
(2) Push down on the hood latch, and then turn the knob to the “LOCK” position to
securely lock the hood in place.
(3) While holding the steering pole, move the lock pin to the stowed position, and then
lower the steering pole.
EJU36002Bow rope hole
The bow rope hole is used to attach a rope to
the watercraft when transporting, mooring, or towing it in an emergency. (See page 68 for
information on towing the watercraft.)
EJU36011Stern rope hole
The stern rope hole is used to attach a rope to
the watercraft when mooring it.
EJU31675Storage pouch
The storage pouch is located on the bottom of
the hood.
Use the storage pouch to store the own-
er’s/operator’s manual, tool kit, and other
small items. The storage pouch is not de-
signed to be waterproof. If you carry objects
that must be kept dry, put them in a water-
proof bag.
To remove the storage pouch:
(1) Remove the hood. (See page 24 for hood
removal and installation procedures.)
LOCKOPEN
1 Bow rope hole
1 Stern rope hole
UF2F75E0.book Page 25 Thursday, July 5, 2012 8:50 AM
Page 32 of 78

Equipment operation
26
(2) Unfasten the bands, and then remove thestorage pouch.
To install the storage pouch:
(1) Bend the owner’s/operator’s manual slightly to insert it into the storage pouch,
and then add the tool kit and any other
small items. Fold the pouch, and then
wrap the strap around it.
(2) Install the storage pouch on the hood and secure it with the bands.
(3) Securely install the hood in its original po- sition.
EJU41003Fire extinguisher container
The fire extinguisher container is located on
the hood. To open the fire extinguisher container:
(1) Lift the steering pole and support it with
the lock pin.
(2) Grasp the tab, pull the band to the rear, and then pull it up.
(3) Lift the fire extinguisher container about 30 degrees from the storage position.
NOTICE: Do not force the fire extin-
guisher container up more than 30 de-
grees from the storage position,
otherwise the container and hood
could be damaged.
[ECJ00401]
1 Storage pouch
2 Band
1 Strap
1Steering pole
2 Lock pin
1 Fire extinguisher container
2 Ta b
UF2F75E0.book Page 26 Thursday, July 5, 2012 8:50 AM
Page 35 of 78

Operation and handling requirements
29
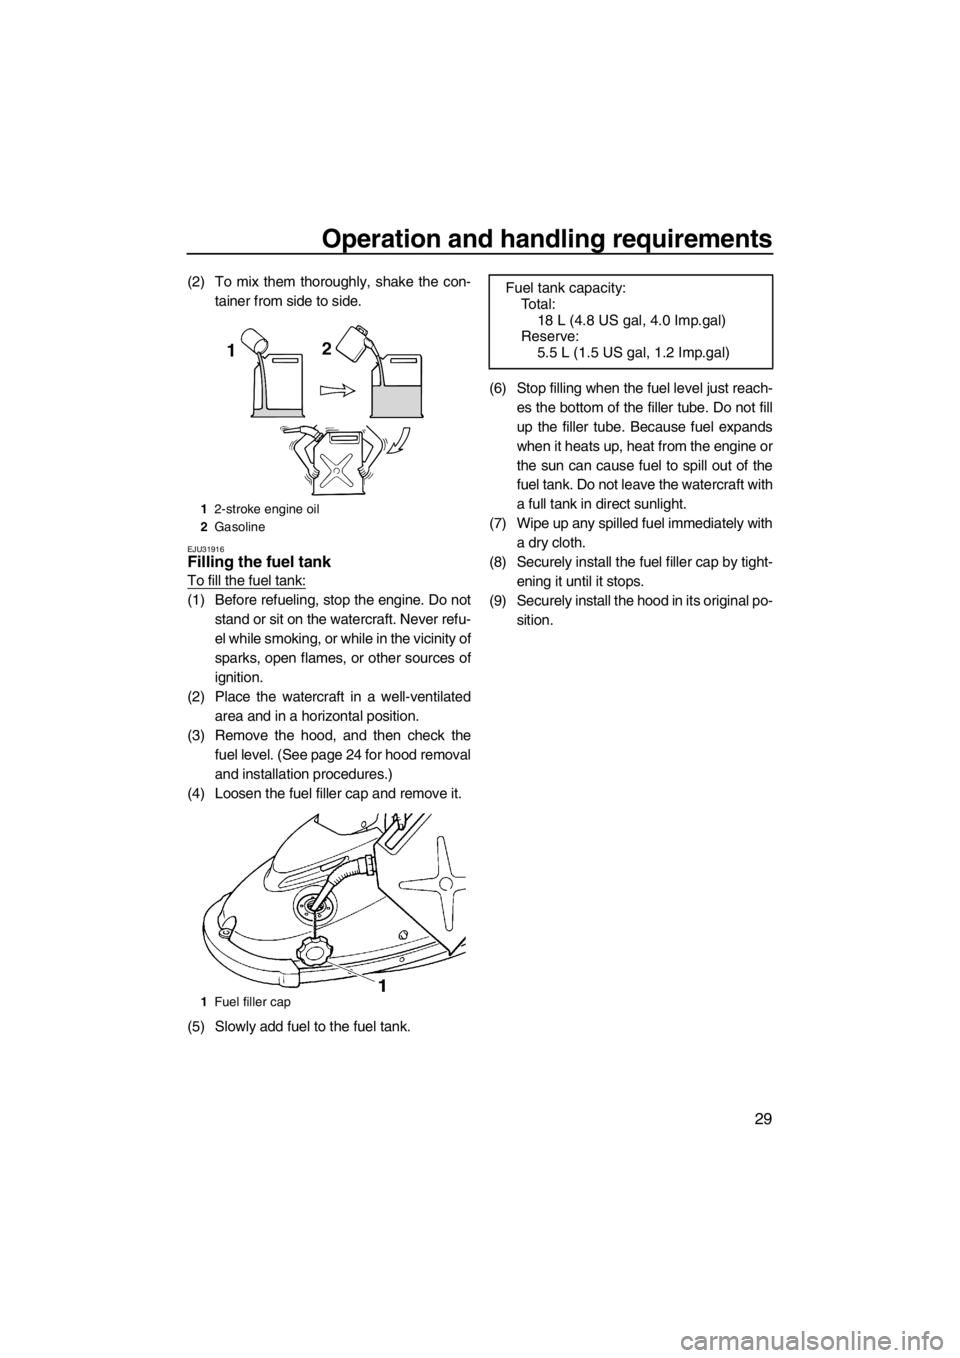
(2) To mix them thoroughly, shake the con-tainer from side to side.
EJU31916Filling the fuel tank
To fill the fuel tank:
(1) Before refueling, stop the engine. Do notstand or sit on the watercraft. Never refu-
el while smoking, or while in the vicinity of
sparks, open flames, or other sources of
ignition.
(2) Place the watercraft in a well-ventilated area and in a horizontal position.
(3) Remove the hood, and then check the fuel level. (See page 24 for hood removal
and installation procedures.)
(4) Loosen the fuel filler cap and remove it.
(5) Slowly add fuel to the fuel tank. (6) Stop filling when the fuel level just reach-
es the bottom of the filler tube. Do not fill
up the filler tube. Because fuel expands
when it heats up, heat from the engine or
the sun can cause fuel to spill out of the
fuel tank. Do not leave the watercraft with
a full tank in direct sunlight.
(7) Wipe up any spilled fuel immediately with a dry cloth.
(8) Securely install the fuel filler cap by tight- ening it until it stops.
(9) Securely install the hood in its original po- sition.
12-stroke engine oil
2 Gasoline
1 Fuel filler cap
Fuel tank capacity:
To t a l :
18 L (4.8 US gal, 4.0 Imp.gal)
Reserve: 5.5 L (1.5 US gal, 1.2 Imp.gal)
UF2F75E0.book Page 29 Thursday, July 5, 2012 8:50 AM
Page 41 of 78

Pre-operation checks
35
EJU32281
Pre-operation check points EJU40685Pre-launch checks
Perform the pre-launch checks in the pre-op-
eration checklist while the watercraft is on
land.
To perform the pre-launch checks:
(1) Remove the hood. (See page 24 for hoodremoval and installation procedures.)
(2) Perform the checks and make sure that there are no malfunctioning items or oth-
er problems.
(3) After completing these checks, install the hood in its original position.
EJU32333Engine compartment check
WARNING
EWJ00461
Failure to ventilate the engine compart-
ment could result in a fire or explosion. Do
not start the engine if there is a fuel leak.
Ventilate the engine compartment. Leave the
engine compartment open for a few minutes
to allow any fuel vapors to escape.
Make sure that there is no damage inside the
engine compartment.
EJU34207Fuel system checks
WARNING
EWJ00381
Leaking fuel can result in fire or explosion.
●Check for fuel leakage regularly.
●If any fuel leakage is found, the fuel sys-
tem must be repaired by a qualified me-
chanic. Improper repairs can make the
watercraft unsafe to operate.
Make sure that there is no damage, leakage,
or other problem in the fuel system.
Check:
●Carburetor for leakage
●Fuel filler cap and seal for damage
●Fuel in fuel tank for water and dirt
●Fuel tank for damage and leakage
●Fuel hoses and joints for damage and leak-
age
●Fuel filter for leakage
●Fuel cock for leakage
●Fuel tank breather hose for damage and
leakage
Releasing the pressure in the fuel tank
Release the pressure in the fuel tank before
each use.
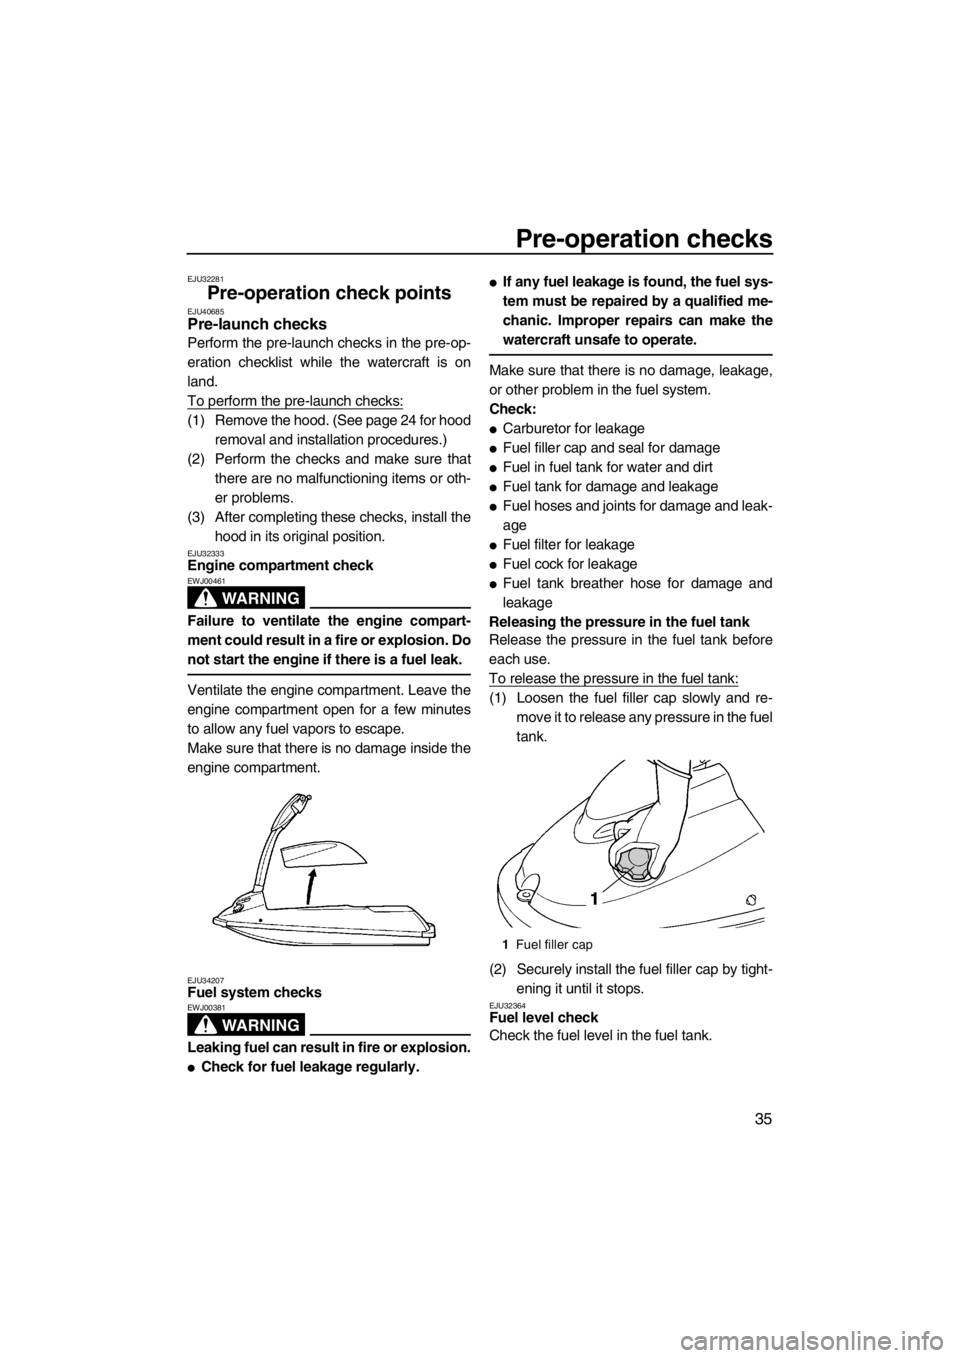
To release the pressure in the fuel tank:
(1) Loosen the fuel filler cap slowly and re- move it to release any pressure in the fuel
tank.
(2) Securely install the fuel filler cap by tight- ening it until it stops.
EJU32364Fuel level check
Check the fuel level in the fuel tank.
1Fuel filler cap
UF2F75E0.book Page 35 Thursday, July 5, 2012 8:50 AM
Page 74 of 78

Trouble recovery
68
(4) Open the fuse holder and replace thefuse with one of the correct amperage.
WARNING! Do not use fuses of a dif- ferent amperage than recommended.
Substitution with a fuse that has an
improper rating can cause extensive
electrical system damage and possi-
ble fire.
[EWJ00802]
(5) Insert the fuse holder into the electrical box.
(6) Securely install the cap by tightening it until it stops.
(7) Securely install the hood in its original po- sition.
EJU34704Towing the watercraft
WARNING
EWJ00811
●The operator of the towing boat must
keep speed to a minimum and avoid traf-
fic or obstacles which could be a hazard
to the operator on the watercraft.
●The towline should be long enough so
that the watercraft will not collide with
the towing boat when slowing down.
If the watercraft becomes inoperative in the
water, it can be towed to shore.
To tow the watercraft:
Use a towline that is three times the combined
length of the towing boat and the watercraft.
(1) Securely attach the towline to the bowrope hole of the watercraft being towed.
(2) Ride the watercraft with your body weight supported on the riding tray. Hold on to
the handlebars in order to balance the
watercraft and keep the bow up out of the
water. NOTICE: The bow must be kept
up out of the water during towing, oth-
erwise water could flood the engine
compartment or water could flow back
into the engine, causing severe en-
gine damage.
[ECJ01330]
Tow the watercraft at 8 km/h (5 mph) or less.
NOTICE: Tow the watercraft at 8 km/h (5
mph) or less, otherwise water could flood
the engine compartment or water could
flow back into the engine, causing severe
engine damage.
[ECJ01321]
EJU34734
Submerged watercraft
If the watercraft is submerged or flooded with
water, drain the bilge water from the engine
1 Fuse holder
2 Electrical box
3 Fuse
4 Cap
Fuse amperage:
Battery fuse:10 A
1Bow rope hole
UF2F75E0.book Page 68 Thursday, July 5, 2012 8:50 AM