Page 169 of 684

169
2-1. Driving procedures
2
When driving
CAUTION
■
If you get a flat tire while driving
A flat or damaged tire may cause the following situations. Hold the steering
wheel firmly and gradually press the brake pedal to slow down the vehicle.
●It may be difficult to control your vehicle.
● The vehicle will make abnormal sounds.
● The vehicle will behave abnormally.
Replace a flat tire with a new one. ( P. 591)
NOTICE
■When driving the vehicle
●Do not depress the accelerator and brake pedals at the same time during
driving, as this may restrain driving torque.
● Do not use the accelerator pedal or depress the accelerator and brake
pedals at the same time to hold the vehicle on a hill.
■ When parking the vehicle
Always put the shift lever in P. Failure to do so may cause the vehicle to
move or the vehicle may accelerate suddenly if the accelerator pedal is acci-
dentally depressed.
■ Avoiding damage to vehicle parts
●Do not turn the steering wheel fully in either direction and hold it there for
an extended period of time.
Doing so may damage the power steering motor.
● When driving over bumps in the road, drive as slowly as possible to avoid
damaging the wheels, underside of the vehicle, etc.
Page 173 of 684
173
2-1. Driving procedures
2
When driving
■
Steering lock release
■ If the engine does not start
The engine immobilizer system may not have been deactivated. ( P. 113)
■ When the “ENGINE START STOP” sw itch indicator flashes in amber
The system may be malfunctioning. Have the vehicle inspected by your
Toyota dealer immediately.
■ Auto power off function
If the vehicle is left in ACCESSORY mode for more than an hour with the
shift lever in P, the “ENGINE START STOP” switch will automatically turn off.
■ Key battery depletion
P. 4 2
■ When the electronic key battery is discharged
P. 540
■ Conditions affecting operation
P. 4 0
■ Note for the entry function
P. 4 2
Make sure that the steering wheel lock is
released.
To release the steering wheel lock, gently
turn the wheel left or right while pressing
the “ENGINE START STOP” switch.
When the steering wheel lock is not
released, the “ENGINE START STOP”
switch indicator will flash in green.
Page 175 of 684
175
2-1. Driving procedures
2
When driving
Engine (ignition) switch (vehicles without smart key system)
■Starting the engine
Check that the parking brake is set.
Check that the shift lever is set in P.
Sit in the driver’s seat and firmly depress the brake pedal.
Turn the engine switch to the “START” position and start
the engine.
■ Changing engine switch position
“LOCK”
The steering wheel is locked
and the key can be removed.
(The key can be removed only
when the shift lever is in P.)
“ACC”
Some electrical components
such as the audio system can
be used.
“ON”
All electrical components can
be used.
“START”
For starting the engine.
STEP1
STEP2
STEP3
STEP4
Page 176 of 684

176 2-1. Driving procedures
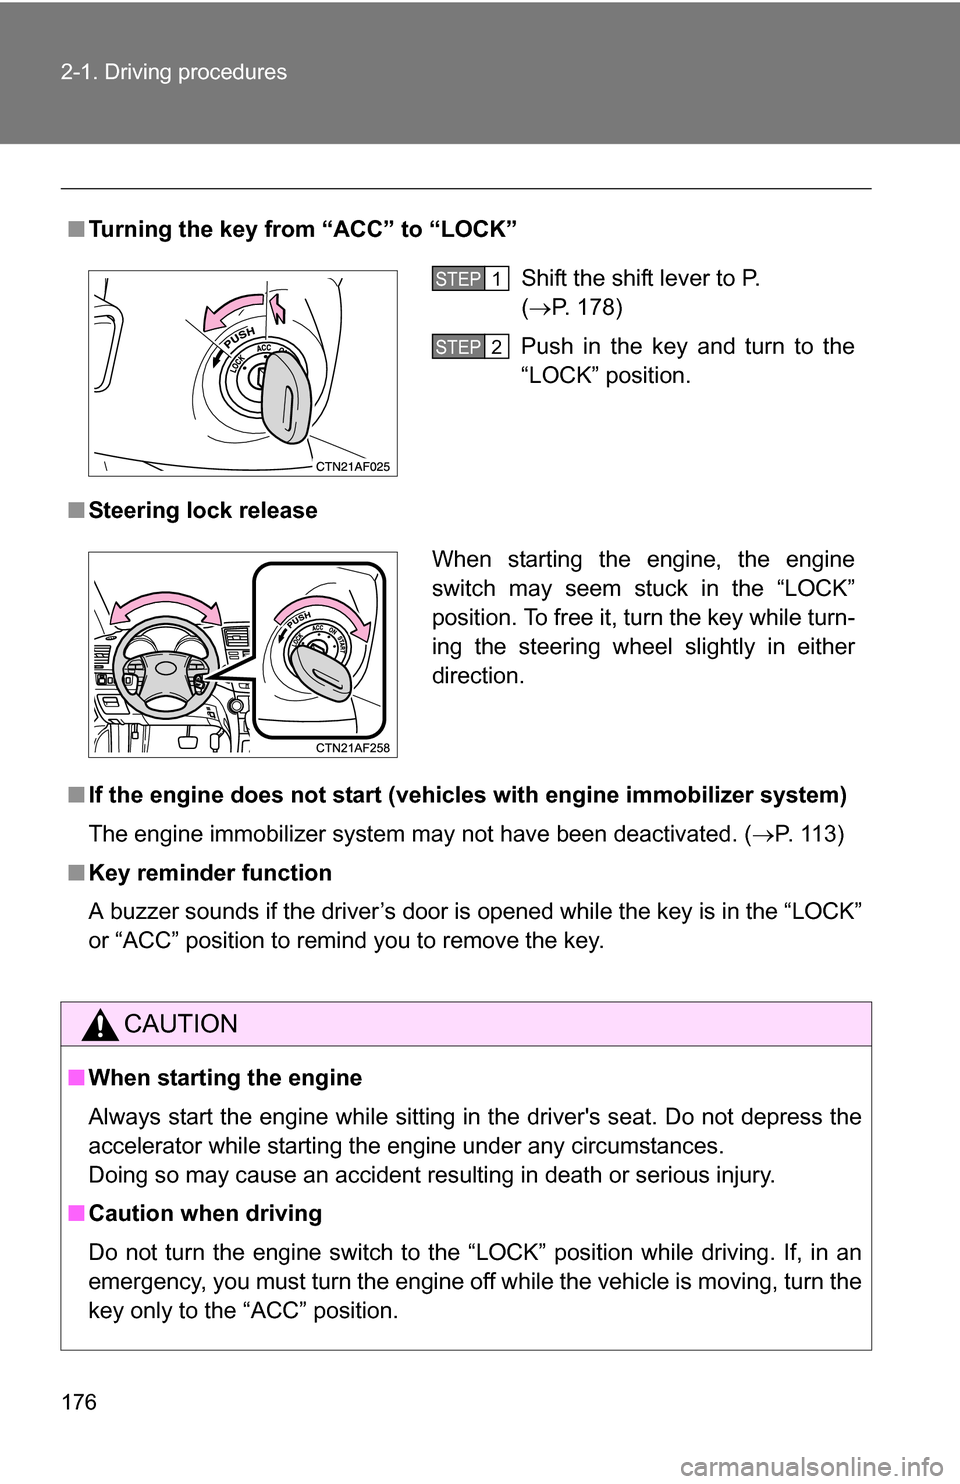
■Turning the key from “ACC” to “LOCK”
■ Steering lock release
■ If the engine does not start (vehic les with engine immobilizer system)
The engine immobilizer system may not have been deactivated. ( P. 113)
■ Key reminder function
A buzzer sounds if the driver’s door is opened while the key is in the “LOCK”
or “ACC” position to remind you to remove the key.
CAUTION
■When starting the engine
Always start the engine while sitting in the driver's seat. Do not depress the
accelerator while starting the engine under any circumstances.
Doing so may cause an accident resulting in death or serious injury.
■ Caution when driving
Do not turn the engine switch to the “LOCK” position while driving. If, in an
emergency, you must turn the engine off while the vehicle is moving, turn the
key only to the “ACC” position.
Shift the shift lever to P.
(P. 178)
Push in the key and turn to the
“LOCK” position.STEP1
STEP2
When starting the engine, the engine
switch may seem stuck in the “LOCK”
position. To free it, turn the key while turn-
ing the steering wheel slightly in either
direction.
Page 185 of 684
185
2-1. Driving procedures
2
When driving
Hor n
■After adjusting the steering wheel
Make sure that the steering wheel is securely locked.
The horn may not sound if the steering wheel is not securely locked.
(P. 94)
To sound the horn, press on or
close to the mark.
Page 194 of 684
194 2-2. Instrument cluster
Trip informationPush the “DISP” button on the
steering wheel to display trip
information.
Display items can be switched
by pressing the “DISP” button.
■ Average fuel consumption after refueling
Displays the average fuel consumption since the vehicle was last
refueled.
Use the displayed average fuel consumption as a reference.
■Instantaneous fuel consumption
Displays the instantan eous fuel consumption.
●Warning messages
( P. 584)
Automatically displayed when
a malfunction occurs in one of
the vehicle’s systems.
Page 195 of 684

195
2-2. Instrument cluster
2
When driving
■
Cruising range
Displays the estimated maximum di stance that can be driven with
the quantity of fuel remaining.
• This distance is computed based on your average fuel consumption.
As a result, the actual distance that can be driven may differ from
that displayed.
• Vehicles without smart key system: When only a small amount of fuel is added to the tank, the display may not be updated.
When refueling, turn the engine switch OFF. If the vehicle is refueled
without turning the engine switch OFF, the display may not be
updated.
• Vehicles with smart key system: When only a small amount of fuel is added to the tank, the display may not be updated.
When refueling, turn the “ENGINE START STOP” switch OFF. If the
vehicle is refueled without turning the “ENGINE START STOP”
switch OFF, the display may not be updated.
■Driving distance
Displays the driving distance since the engine was started.
■ Average fuel consumption
Displays the average fuel cons umption since the function was
reset.
• This function can be reset by pressing the “DISP” button on the
steering wheel for longer than one second when the average fuel
consumption is displayed.
When the function is reset, the previous five average fuel consump-
tion values will automatically be displayed for six seconds.
• Use the displayed average fuel consumption as a reference.
■ Average fuel consumption history
Displays the previous five av erage fuel consumption values.
Page 196 of 684
196 2-2. Instrument cluster
Setting up the displaysDisplay the set up screen on the
multi-information display when
the vehicle is stopped.
Press and hold the “DISP” button
on the steering wheel to display
the set up screen.
Select the desired item on the
menu screen.
Press and hold the “DISP” button
on the steering wheel to enter the
setting mode.
■Setting the clock
Select “CLOCK” on the menu screen. Press and hold the
“DISP” button on the steering wheel until the display changes.
Press the “DISP” button on the
steering wheel to adjust the
hours.
After adjusting the hours, wait 5
seconds to allow the hours to be
automatically input.
STEP1
STEP2
STEP1
STEP2