2013 SUBARU TRIBECA battery
[x] Cancel search: batteryPage 163 of 420
3-32Instruments and controls/Parking light switch
Parking light switch
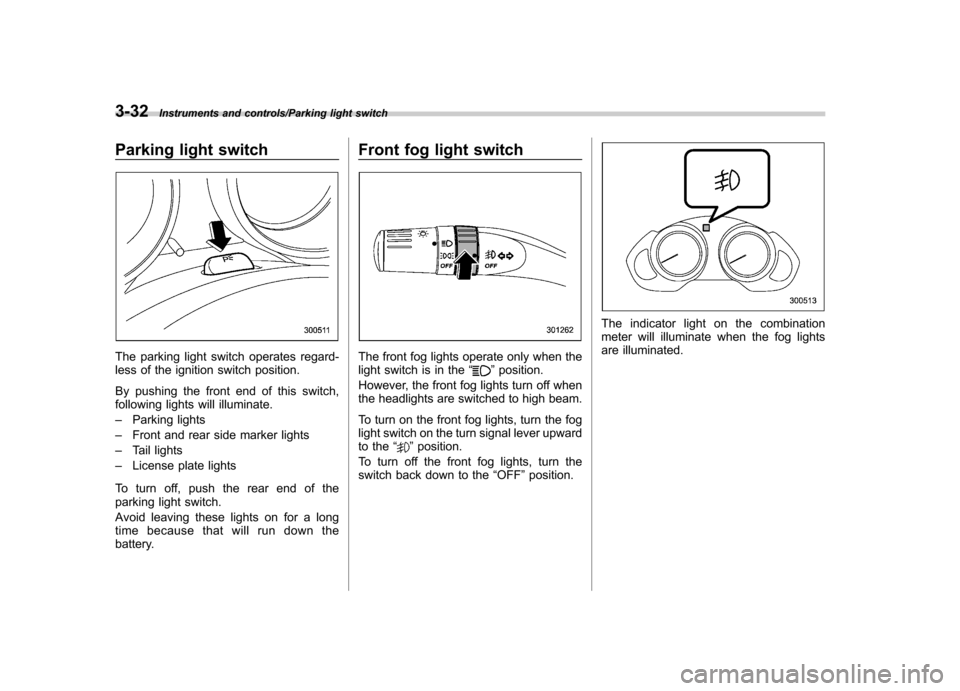
The parking light switch operates regard-
less of the ignition switch position.
By pushing the front end of this switch,
following lights will illuminate. –Parking lights
– Front and rear side marker lights
– Tail lights
– License plate lights
To turn off, push the rear end of the
parking light switch.
Avoid leaving these lights on for a long
time because that will run down the
battery. Front fog light switchThe front fog lights operate only when the
light switch is in the
“”position.
However, the front fog lights turn off when
the headlights are switched to high beam.
To turn on the front fog lights, turn the fog
light switch on the turn signal lever upward
to the “
”position.
To turn off the front fog lights, turn the
switch back down to the “OFF ”position.
The indicator light on the combination
meter will illuminate when the fog lights
are illuminated.
Page 167 of 420
3-36Instruments and controls/Windshield wiper deicer
speed is low; shorter when the vehicle
speed is high).
When you subsequently move the select
lever of the automatic transmission to the“R ” position, the rear wiper will switch to
continuous operation. When you move the
select lever from the “R ”position to some
other position, the rear wiper will return to
intermittent operation. ! Washer
To wash the rear window while the rear
wiper is operating, turn the knob on the
end of the wiper control lever upward tothe “
”position. The washer fluid sprays
until you release the knob.
To wash the rear window when the rear
wiper is not in use, turn the knob on the
end of the wiper control lever downward tothe “
”position. The washer fluid sprays
and the wiper operates until you release
the knob. Windshield wiper deicer
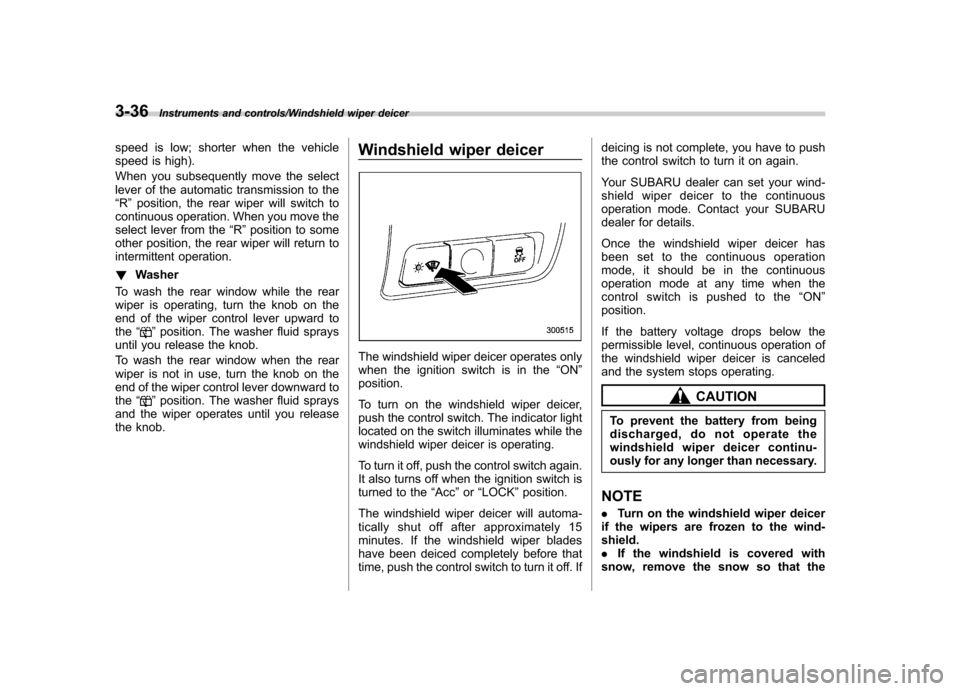
The windshield wiper deicer operates only
when the ignition switch is in the
“ON ”
position.
To turn on the windshield wiper deicer,
push the control switch. The indicator light
located on the switch illuminates while the
windshield wiper deicer is operating.
To turn it off, push the control switch again.
It also turns off when the ignition switch is
turned to the “Acc ”or “LOCK ”position.
The windshield wiper deicer will automa-
tically shut off after approximately 15
minutes. If the windshield wiper blades
have been deiced completely before that
time, push the control switch to turn it off. If deicing is not complete, you have to push
the control switch to turn it on again.
Your SUBARU dealer can set your wind-
shield wiper deicer to the continuous
operation mode. Contact your SUBARU
dealer for details.
Once the windshield wiper deicer has
been set to the continuous operation
mode, it should be in the continuous
operation mode at any time when the
control switch is pushed to the
“ON ”
position.
If the battery voltage drops below the
permissible level, continuous operation of
the windshield wiper deicer is canceled
and the system stops operating.
CAUTION
To prevent the battery from being
discharged, do not operate the
windshield wiper deicer continu-
ously for any longer than necessary.
NOTE . Turn on the windshield wiper deicer
if the wipers are frozen to the wind- shield.. If the windshield is covered with
snow, remove the snow so that the
Page 168 of 420
windshield wiper deicer works effec-
tively..While the windshield wiper deicer is
in the continuous operation mode, if
the vehicle speed remains at 9 mph (15
km/h) or less for 15 minutes, the wind-
shield wiper deicer automatically stopsoperating. Rear window defogger but- ton
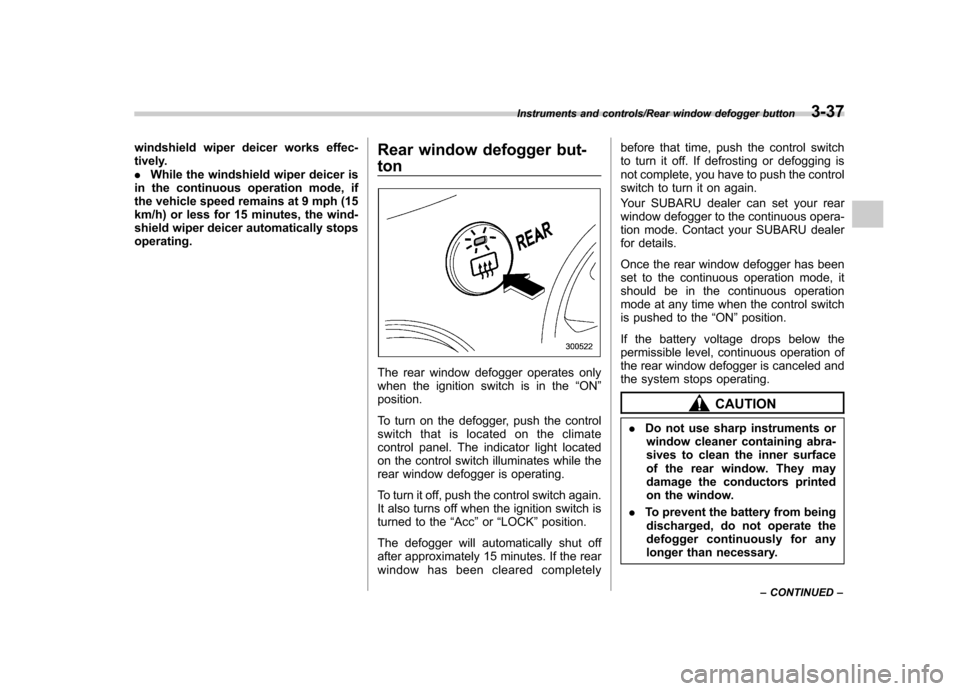
The rear window defogger operates only
when the ignition switch is in the
“ON ”
position.
To turn on the defogger, push the control
switch that is located on the climate
control panel. The indicator light located
on the control switch illuminates while the
rear window defogger is operating.
To turn it off, push the control switch again.
It also turns off when the ignition switch is
turned to the “Acc ”or “LOCK ”position.
The defogger will automatically shut off
after approximately 15 minutes. If the rear
window has been cleared completely before that time, push the control switch
to turn it off. If defrosting or defogging is
not complete, you have to push the control
switch to turn it on again.
Your SUBARU dealer can set your rear
window defogger to the continuous opera-
tion mode. Contact your SUBARU dealer
for details.
Once the rear window defogger has been
set to the continuous operation mode, it
should be in the continuous operation
mode at any time when the control switch
is pushed to the
“ON ”position.
If the battery voltage drops below the
permissible level, continuous operation of
the rear window defogger is canceled and
the system stops operating.
CAUTION
. Do not use sharp instruments or
window cleaner containing abra-
sives to clean the inner surface
of the rear window. They may
damage the conductors printed
on the window.
. To prevent the battery from being
discharged, do not operate the
defogger continuously for any
longer than necessary.
Instruments and controls/Rear window defogger button3-37
– CONTINUED –
Page 174 of 420
!Outside mirror defogger
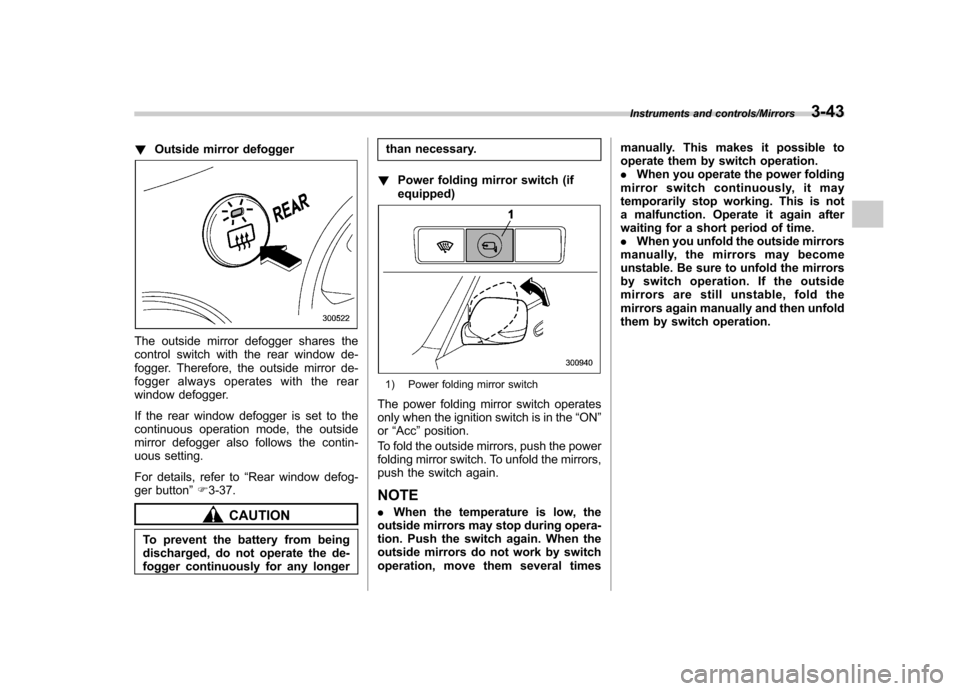
The outside mirror defogger shares the
control switch with the rear window de-
fogger. Therefore, the outside mirror de-
fogger always operates with the rear
window defogger.
If the rear window defogger is set to the
continuous operation mode, the outside
mirror defogger also follows the contin-
uous setting.
For details, refer to “Rear window defog-
ger button ”F 3-37.
CAUTION
To prevent the battery from being
discharged, do not operate the de-
fogger continuously for any longer than necessary.
! Power folding mirror switch (ifequipped)
1) Power folding mirror switch
The power folding mirror switch operates
only when the ignition switch is in the “ON ”
or “Acc ”position.
To fold the outside mirrors, push the power
folding mirror switch. To unfold the mirrors,
push the switch again.
NOTE . When the temperature is low, the
outside mirrors may stop during opera-
tion. Push the switch again. When the
outside mirrors do not work by switch
operation, move them several times manually. This makes it possible to
operate them by switch operation..
When you operate the power folding
mirror switch continuously, it may
temporarily stop working. This is not
a malfunction. Operate it again after
waiting for a short period of time.. When you unfold the outside mirrors
manually, the mirrors may become
unstable. Be sure to unfold the mirrors
by switch operation. If the outside
mirrors are still unstable, fold the
mirrors again manually and then unfold
them by switch operation.
Instruments and controls/Mirrors3-43
Page 196 of 420

NOTE
While you are holding down either side
of the“TUNE TRACK ”button, the
tuning frequency will not stop chan-
ging even if the frequency of a recei-
vable station is reached.
!Seek tuning
If you press the “
”or “”side of the
“ SEEK FLDR ”button (7), the radio will
automatically search for a receivable
station and stop at the first one it finds.
This function may not be available, how-
ever, when radio signals are weak. In such
a situation, perform manual tuning to
select the desired station.
!Automatic tuning (SCAN)
Press the “SCAN ”button (8) to change the
radio to the SCAN mode. In this mode, the
radio scans through the radio band until a
station is found. The radio will stop at the
station for 5 seconds while displaying the
frequency, after which scanning will con-
tinue until the entire band has been
scanned from the low end to the high
end. Press the “SCAN ”button again to
cancel the SCAN mode and to stop on any
displayed frequency.
Press the “
”or “”side of the “SEEK
FLDR ”button (7) again to cancel the scan
mode and to stop on any displayed frequency.
When the
“SCAN ”button is pressed for
automatic tuning, stations are scanned in
the direction of low frequencies to high
frequencies only.
Automatic tuning may not function prop-
erly if the station reception is weakened by
distance from the station or proximity to
tall buildings and hills.
!Selecting preset stations
Presetting a station with a preset button
(10) allows you to select that station in a
single operation. Up to six, AM, FM1 and
FM2 stations each may be preset.
!How to preset stations
1. Press the “FM AM ”button (2) to select
FM1, FM2, or AM reception.
2. Press the “SCAN ”button (8) or tune
the radio manually until the desired station
frequency is displayed.
3. Press and hold one of the preset
buttons (10) to store the frequency. If the
button is pressed briefly, the preceding
selection will remain in memory.
NOTE . If the connection between the radio
and battery is broken for any reason
such as vehicle maintenance or radio
removal, all stations stored in the preset buttons are cleared. If this
occurs, it is necessary to reset the
preset buttons..
If a cell phone is placed near the
radio, it may cause the radio to emit
noise when it receives calls. This noise
does not indicate a radio malfunction. ! Satellite radio mode (if equipped)
To receive satellite radio, it is necessary to
install the SUBARU genuine satellite
receiver (optional part) and to enter into
a contract with a satellite radio network
service such as “Sirius XM
TMsatellite
radio ”(for U.S.A. only) or “Sirius satellite
radio ”(for Canada only). For details,
please contact your SUBARU dealer.
!Sirius satellite radio (for Canadaonly)
Sirius satellite radio is a recent innovation
that allows the listener to experience
digital sound quality and to have a greater
variety of channels.
Use of satellite radio (Sirius) requires a
tuner, antenna and a service contract. For
details, please contact your SUBARU
dealer or visit Sirius Satellite Radio at
www.sirius.ca or call 1-888-539-7474 for
more information. Sirius, the Sirius dog
logo, channel names and logos are trade-
marks of SIRIUS Satellite Radio Inc.
Audio/Type A audio set5-7
– CONTINUED –
Page 198 of 420

buttons (10) to store the channel. If the
button is pressed briefly, the preceding
selection will remain in memory. NOTE
If the connection between the radio and
battery is broken for any reason such
as vehicle maintenance or radio re-
moval, all channels stored in the preset
buttons are cleared. If this occurs, it is
necessary to reset the preset buttons.!Display selection
Press the “AUDIO ”button (5) while receiv-
ing satellite radio to change the display asfollows.
! Rear seat entertainment
If your vehicle is equipped with a Rear
Seat Entertainment System, you can
enjoy audio outputs from the system
through the vehicle ’s speakers by press-
ing the “RSE AUX ”button (3). Press the
button again to return to the audio setsound. NOTE
If your vehicle is equipped with a Rear
Seat Entertainment System, refer to the
Owner
’s Manual supplement for the
Rear Seat Entertainment System for
further details.
Audio/Type A audio set5-9
– CONTINUED –
Page 207 of 420
5-18Audio/Type B audio set
NOTE
While you are holding down either side
of the TUNE/TRACK button, the tuning
frequency will not stop changing even
if the frequency of a receivable station
is reached.!Seek tuning (SEEK)
If you press the “
”or “”side of the
“ SEEK FLDR ”button (7), the radio will
automatically search for a receivable
station and stop at the first one it finds.
This function may not be available, how-
ever, when radio signals are weak. In such
a situation, perform manual tuning to
select the desired station.
!Scan tuning (SCAN)
Press the “SCAN ”button (8) to change the
radio to the SCAN mode. In this mode, the
radio scans through the radio band until a
station is found. The radio will stop at the
station for 5 seconds while displaying the
frequency, after which scanning will con-
tinue until the entire band has been
scanned from the low end to the high
end. Press the “SCAN ”button again to
cancel the SCAN mode and to stop on any
displayed frequency.
Press the “
”or “”side of the “SEEK
FLDR ”button (7) again to cancel the scan
mode and to stop on any displayed frequency.
When the
“SCAN ”button is pressed for
automatic tuning, stations are scanned in
the direction of low frequencies to high
frequencies only.
Automatic tuning may not function prop-
erly if the station reception is weakened by
distance from the station or proximity to
tall buildings and hills.
!Selecting preset stations
Presetting a station with a preset button
allows you to select that station in a single
operation. Up to six AM, FM1 and FM2
stations each may be preset.
!How to preset stations
1. Press the “FM AM ”button (2) to select
FM1, FM2 or AM reception.
2. Press the “SCAN ”button (8) or tune
the radio manually until the desired station
frequency is displayed.
3. Press and hold one of the preset
buttons to store the frequency. If the
button is pressed briefly, the preceding
selection will remain in memory.
NOTE . If the connection between the radio
and battery is broken for any reason
such as vehicle maintenance or radio
removal, all stations stored in the preset buttons are cleared. If this
occurs, it is necessary to reset the
preset buttons..
If a cell phone is placed near the
radio, it may cause the radio to emit
noise when it receives calls. This noise
does not indicate a radio malfunction. ! Satellite radio mode (if equipped)
To receive satellite radio, it is necessary to
install the SUBARU genuine satellite
receiver (optional part) and to enter into
a contract with a satellite radio network
service such as “Sirius XM
TMsatellite
radio ”(for U.S.A. only) or “Sirius satellite
radio ”(for Canada only). For details,
please contact your SUBARU dealer.
!Sirius satellite radio (for Canadaonly)
Refer to “Sirius satellite radio (for Canada
only) ”F 5-7.
! Sirius XM
TMSatellite Radio Acti-
vation (for U.S.A. only)
Refer to “Sirius XM
TMSatellite Radio
Activation (for U.S.A. only) ”F 5-8.
! Satellite radio reception
Refer to “Satellite radio reception ”F 5-8.
Page 208 of 420
!Displaying satellite radio ID of tuner
When you activate satellite radio, you
should have your satellite radio tuner ID
ready because each tuner is identified by
its unique satellite radio tuner ID.
The satellite radio ID will be needed when
you activate satellite radio and receive
satellite radio customer support.
The satellite radio ID can be found on the
audio display by tuning the channel to “0 ”.
Turn the “TUNE/TRACK ”button (4) to
select the satellite radio channel.
!Band selection button
Push the “SAT ”button (1) when the radio
is off to turn on the radio.
Push the “SAT ”button when the radio is
on to select SAT1, SAT2 or SAT3 recep- tion.
!Channel selection
Press “
”of the “TUNE TRACK ”button
(4) to select the next channel and press “
” of the button to select the previous
channel.
Keep pressing “
”of the button to
change to the next channel continuously
and keep pressing “
”of the button to
change to the previous channel continu-
ously. !
Category selection
Press “
”or “”of the “SEEK FLDR ”
button (7) to display the current category. Press “
”again to select the next
category, and press “”again to select
the previous category.
!Channel scan
Press the “SCAN ”button (8) to change the
radio to the SCAN mode. In this mode, the
radio scans through the channels until a
station is found. The radio will stop at the
station for 5 seconds while displaying the
channel number, after which scanning will
continue until the entire channel has been
scanned from the low end to the high end.
Also during the category selection, chan-
nel scan can be performed in that cate-
gory.
Press the “SCAN ”button again to cancel
the SCAN mode and to stop on any
displayed channel.
!Selecting preset channels
Presetting a channel with a preset button
(10) allows you to select that channel in a
single operation. Up to six, SAT1, SAT2
and SAT3 channels each may be preset.
!How to preset channels
1. Press the “SAT ”button (1) to select
SAT1, SAT2 and SAT3 reception. 2. Press the
“SCAN ”button (8) or the
“ TUNE TRACK ”button (4) to select the
channel.
3. Press and hold one of the preset
buttons (10) to store the channel. If the
button is pressed briefly, the preceding
selection will remain in memory.
NOTE
If the connection between the radio and
battery is broken for any reason such
as vehicle maintenance or radio re-
moval, all channels stored in the preset
buttons are cleared. If this occurs, it is
necessary to reset the preset buttons. !Display selection
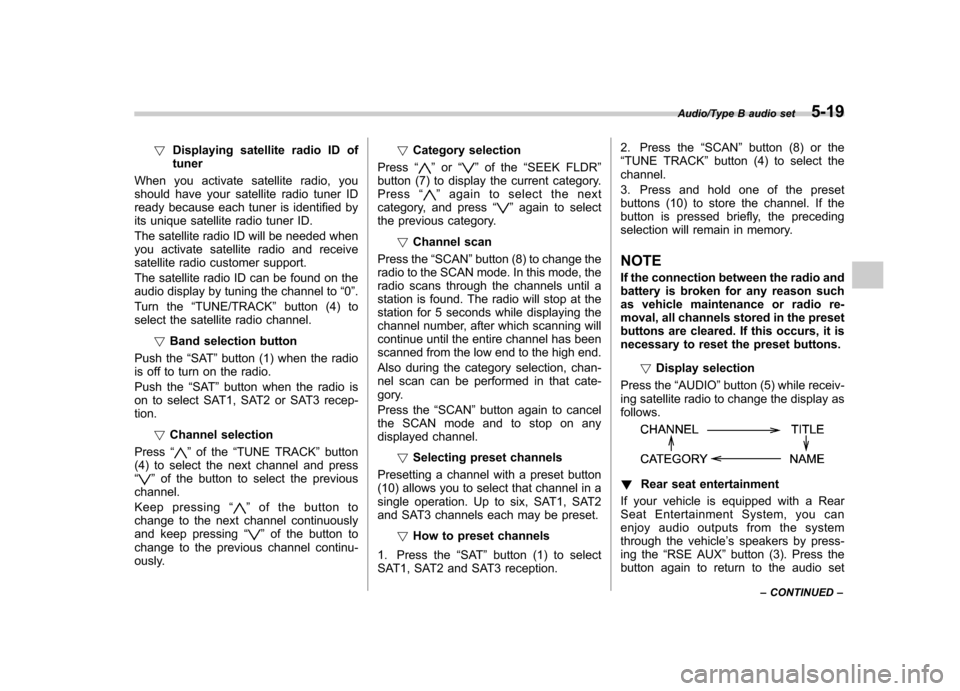
Press the “AUDIO ”button (5) while receiv-
ing satellite radio to change the display asfollows.
! Rear seat entertainment
If your vehicle is equipped with a Rear
Seat Entertainment System, you can
enjoy audio outputs from the system
through the vehicle ’s speakers by press-
ing the “RSE AUX ”button (3). Press the
button again to return to the audio set
Audio/Type B audio set5-19
– CONTINUED –