2013 SUBARU TRIBECA keyless
[x] Cancel search: keylessPage 116 of 420

different.
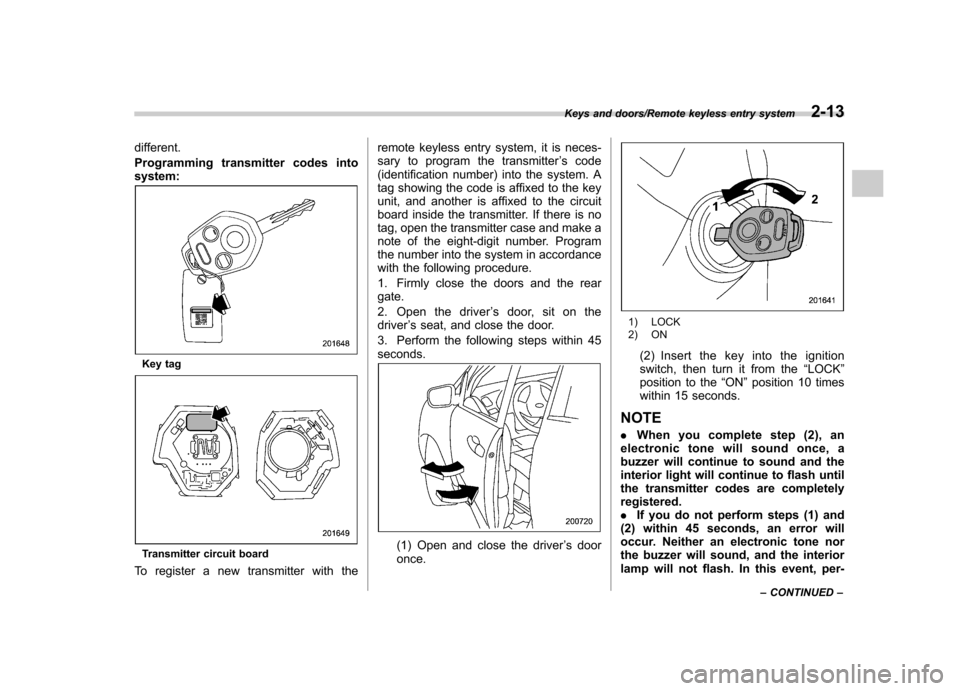
Programming transmitter codes into system:
Key tag
Transmitter circuit board
To register a new transmitter with the remote keyless entry system, it is neces-
sary to program the transmitter
’s code
(identification number) into the system. A
tag showing the code is affixed to the key
unit, and another is affixed to the circuit
board inside the transmitter. If there is no
tag, open the transmitter case and make a
note of the eight-digit number. Program
the number into the system in accordance
with the following procedure.
1. Firmly close the doors and the rear gate.
2. Open the driver ’s door, sit on the
driver ’s seat, and close the door.
3. Perform the following steps within 45 seconds.(1) Open and close the driver ’s door
once.
1) LOCK
2) ON
(2) Insert the key into the ignition
switch, then turn it from the “LOCK ”
position to the “ON ”position 10 times
within 15 seconds.
NOTE . When you complete step (2), an
electronic tone will sound once, a
buzzer will continue to sound and the
interior light will continue to flash until
the transmitter codes are completelyregistered.. If you do not perform steps (1) and
(2) within 45 seconds, an error will
occur. Neither an electronic tone nor
the buzzer will sound, and the interior
lamp will not flash. In this event, per-
Keys and doors/Remote keyless entry system2-13
– CONTINUED –
Page 117 of 420

2-14Keys and doors/Remote keyless entry system
form the whole procedure again begin-
ning with part 1.
4. Open and close the door once within
15 seconds. NOTE .When part 4 of the procedure is
completed, an electronic tone will
sound for 30 seconds.. If you do not perform the operations
in part 4 within 15 seconds, an error
will occur and the electronic tone will
not sound. In this event, perform the
registration steps again beginning with
part 3 of the procedure.
5. Before the electronic tone stops
sounding, push the “”side of the power
door locking switch the same number of
times as the leftmost digit of the transmit- ter code. For example, push the locking
switch eight times if the leftmost digit of
the code is 8. NOTE .
The electronic tone will stop sound-
ing when you start entering the num-
ber.. If you do not start entering the
number using the lock knob before
the electronic tone stops sounding, an
error will occur. In this event, perform
the registration steps again beginning
with part 3 of the procedure.. If the interval between one push of
the knob and the next exceeds 5
seconds, an error will occur. In this
event, perform the procedure again
beginning with part 4. If an error occurs
six times, perform the procedure again
starting with part 3.
6. When you have finished entering the
number, push the “”side of the locking
switch within 5 seconds. NOTE . An electronic tone will sound.
. If you push the “
”side of the
locking switch when more than 5
seconds have passed, an error will
occur. In this event, perform the proce-
dure again beginning with part 4. If an
error occurs six times, perform the
procedure again starting with part 3.
7. Perform parts 5 and 6 of the procedure
for each of the remaining digits of the
transmitter code beginning with the sec-
ond digit (counting from the left) and
finishing with the eighth digit.
Page 118 of 420

NOTE .When you finish entering the eighth
digit, an electronic tone will sound for
30 seconds.. If the interval between one push of
the switch and the next exceeds 5
seconds, an error will occur. In this
event, perform the procedure again
beginning with part 4. If an error occurs
six times, perform the procedure again
starting with part 3.
8. Before the electronic tone stops
sounding, use the power door locking
switch to reenter the transmitter code
beginning with the leftmost digit. NOTE
If you do not start entering the number
using the lock knob before the electro-
nic tone stops sounding, an error will
occur. In this event, perform the proce-
dure again beginning with part 3.
9. When you have finished entering the
code a second time, an electronic tone will
sound for 1 second and automatic door
locking and unlocking operation will take
place once to indicate completion of
registration, provided the code entered
the second time is identical to that entered
the first time. NOTE
If the code entered the second time is
not identical to the code entered the
first time, an error will occur. In this
event, perform the procedure again
beginning with part 5. If an error occurs
five times, perform the procedure again
starting with part 3.
10. If you wish to program another trans-
mitter code into the system (up to four
transmitter codes can be programmed into
the system), perform the procedure begin-
ning with part 4. When you have finished
programming all of the necessary trans-
mitter codes into the system, remove the
key from the ignition switch.
11. Test every registered transmitter to
confirm correct operation. !
Deleting old transmitter codes
The control unit of the remote keyless
entry system has four memory locations to
store transmitter codes, giving it the ability
to operate with up to four transmitters.
When you lose a transmitter, the losttransmitter ’s code remains in the memory.
For security reasons, lost transmitter
codes should be deleted from the mem-
ory.
To delete old transmitter codes, program
four transmitter codes into the system. If you have only one current transmitter,
program it four times. If you have two
current transmitters, program each one
twice. If you have three current transmit-
ters, program two of them once and the
third one twice. This process will leave
only current transmitter codes in thesystem
’s memory.
NOTE
Make sure no one else is operating
their keyless entry system within range
of your vehicle when programming
transmitters. If someone else were to
operate their remote transmitter while
you are programming your transmit-
ters, it is possible that their transmitter
code will be programmed into your
system, allowing them unauthorized
access to your vehicle.
Keys and doors/Remote keyless entry system2-15
Page 127 of 420

2-24Keys and doors/Rear gate
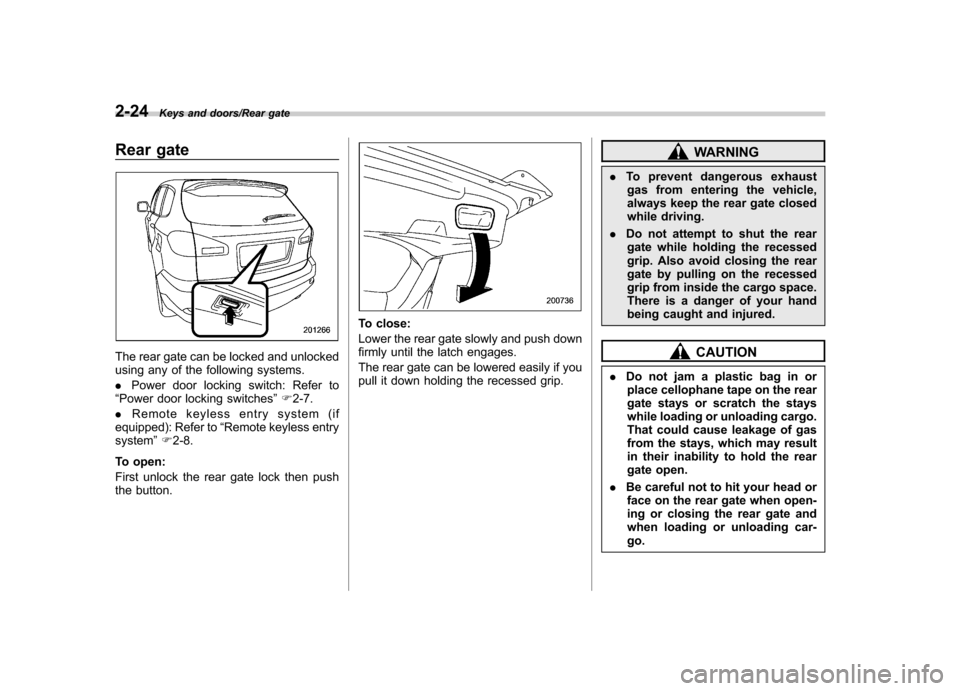
Rear gate
The rear gate can be locked and unlocked
using any of the following systems. .Power door locking switch: Refer to
“ Power door locking switches ”F 2-7.
. Remote keyless entry system (if
equipped): Refer to “Remote keyless entry
system ”F 2-8.
To open:
First unlock the rear gate lock then push
the button.
To close:
Lower the rear gate slowly and push down
firmly until the latch engages.
The rear gate can be lowered easily if you
pull it down holding the recessed grip.
WARNING
. To prevent dangerous exhaust
gas from entering the vehicle,
always keep the rear gate closed
while driving.
. Do not attempt to shut the rear
gate while holding the recessed
grip. Also avoid closing the rear
gate by pulling on the recessed
grip from inside the cargo space.
There is a danger of your hand
being caught and injured.
CAUTION
. Do not jam a plastic bag in or
place cellophane tape on the rear
gate stays or scratch the stays
while loading or unloading cargo.
That could cause leakage of gas
from the stays, which may result
in their inability to hold the rear
gate open.
. Be careful not to hit your head or
face on the rear gate when open-
ing or closing the rear gate and
when loading or unloading car-go.
Page 221 of 420

6-2Interior equipment/Interior light
Interior light
When leaving your vehicle, make sure the
lights are turned off to avoid batterydischarge. &Dome light
Models with Rear Seat Entertainment
Models without Rear Seat Entertainment
1) ON
2) DOOR
3) OFF
The dome light switch has the following
three positions. ON: The light remains on continuously.
OFF: The light remains off.
DOOR: The dome light illuminates auto-
matically in the following cases. . Any of the doors or the rear gate is
opened.. The doors or the rear gate are un-
locked using the remote keyless entry
transmitter. . The ignition switch is turned from the
“ Acc ”position to the “LOCK ”position. The automatically illuminated dome light
remains on for several seconds and then
gradually turns off after all doors and the
rear gate are closed. While the light is
illuminated, if any of the following opera-
tions are performed, the dome light turns
off immediately. .
The ignition switch is turned from the
“ LOCK ”position to “Acc ”or “ON ”position.
. All doors and the rear gate are locked
using the remote keyless entry transmitter.
The setting of the period for which the light
remains on (OFF delay timer) can be
changed by a SUBARU dealer. Contact
the nearest SUBARU dealer for details.
Page 223 of 420

6-4Interior equipment/Sun visors
(automatic illumination - ON).
. The doors are unlocked using the
remote keyless entry transmitter. . The ignition switch is turned from the
“ Acc ”position to the “LOCK ”position.
The automatically illuminated map lights
remain illuminated for several seconds
and then gradually turn off after all doors
are closed.
While the lights are illuminated, if any of
the following operations are performed,
the map lights turn off immediately. . The ignition switch is turned from the
“ LOCK ”position to the “Acc ”or “ON ”
position.. All doors and the rear gate are locked
using the remote keyless entry transmitter.
The setting of the period for which the light
remains illuminated (OFF delay timer) can
be changed by a SUBARU dealer. Con-
tact your SUBARU dealer for details.
NOTE
If any of the doors or the rear gate is
not completely closed, the map lights
will remain illuminated as a result.
However, the map lights are automati-
cally turned off by the battery drainage
prevention functi on to prevent the
battery from discharging. For details, refer to
“Battery drainage prevention
function ”F 2-6.
& Automatic ambient light for
center console area (if equipped)
The automatic ambient light illuminates
when the ignition switch is in the “ON ”
position and the light control switch is inthe “
”position or “”position. The
light dimly illuminates the area around the
center console. The light turns off when
the light control switch is in the “OFF ”
position. Also, the brightness of the light is
adjusted by the illumination brightness
control dial. Sun visors
To block out glare, swing down the visors.
To use the sun visor at a side window,
swing it down and move it sideways.
Page 236 of 420

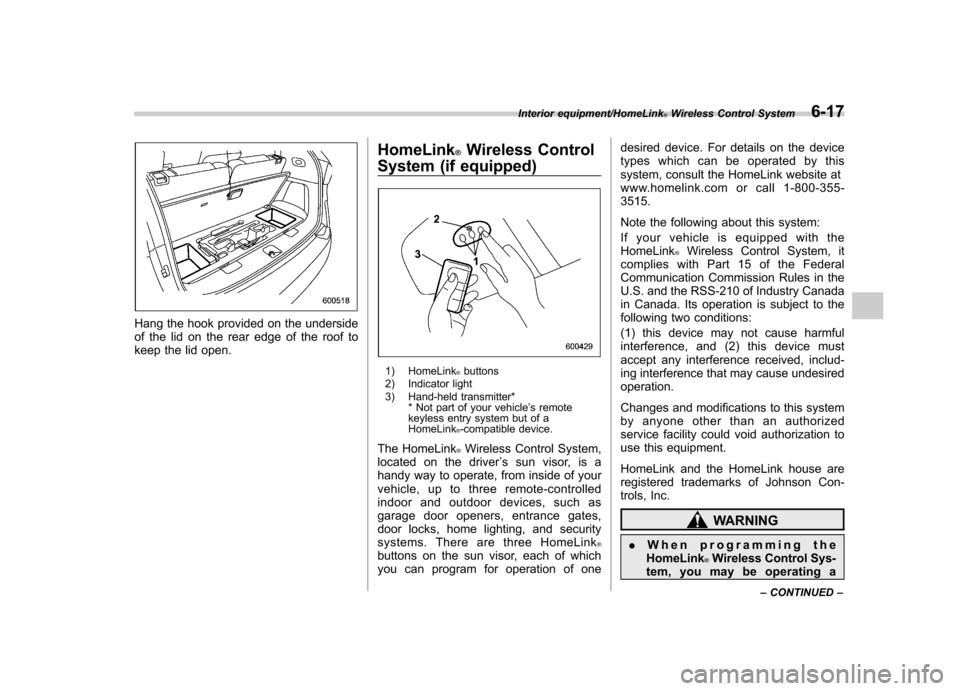
Hang the hook provided on the underside
of the lid on the rear edge of the roof to
keep the lid open.HomeLink
®Wireless Control
System (if equipped)
1) HomeLink®buttons
2) Indicator light
3) Hand-held transmitter* * Not part of your vehicle ’s remote
keyless entry system but of a HomeLink
®-compatible device.
The HomeLink
®Wireless Control System,
located on the driver ’s sun visor, is a
handy way to operate, from inside of your
vehicle, up to three remote-controlled
indoor and outdoor devices, such as
garage door openers, entrance gates,
door locks, home lighting, and security
systems. There are three HomeLink
®buttons on the sun visor, each of which
you can program for operation of one desired device. For details on the device
types which can be operated by this
system, consult the HomeLink website at
www.homelink.com or call 1-800-355-3515.
Note the following about this system:
If your vehicle is equipped with the HomeLink
®Wireless Control System, it
complies with Part 15 of the Federal
Communication Commission Rules in the
U.S. and the RSS-210 of Industry Canada
in Canada. Its operation is subject to the
following two conditions:
(1) this device may not cause harmful
interference, and (2) this device must
accept any interference received, includ-
ing interference that may cause undesiredoperation.
Changes and modifications to this system
by anyone other than an authorized
service facility could void authorization to
use this equipment.
HomeLink and the HomeLink house are
registered trademarks of Johnson Con-
trols, Inc.
WARNING
. When programming the
HomeLink
®Wireless Control Sys-
tem, you may be operating a
Interior equipment/HomeLink®Wireless Control System6-17
– CONTINUED –
Page 254 of 420

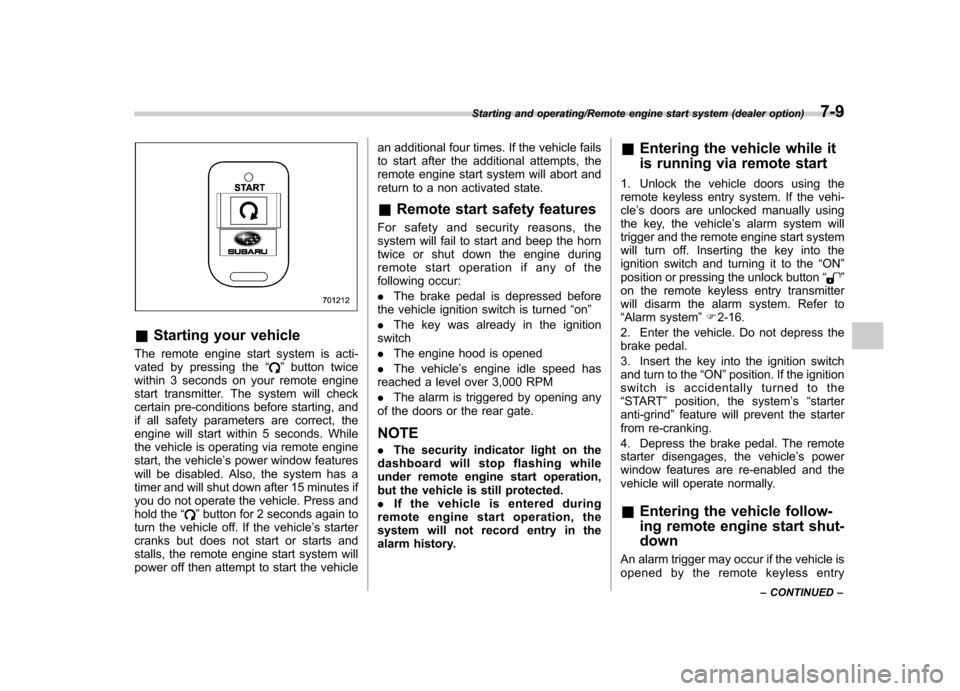
&Starting your vehicle
The remote engine start system is acti-
vated by pressing the “
”button twice
within 3 seconds on your remote engine
start transmitter. The system will check
certain pre-conditions before starting, and
if all safety parameters are correct, the
engine will start within 5 seconds. While
the vehicle is operating via remote engine
start, the vehicle ’s power window features
will be disabled. Also, the system has a
timer and will shut down after 15 minutes if
you do not operate the vehicle. Press and
hold the “
”button for 2 seconds again to
turn the vehicle off. If the vehicle ’s starter
cranks but does not start or starts and
stalls, the remote engine start system will
power off then attempt to start the vehicle an additional four times. If the vehicle fails
to start after the additional attempts, the
remote engine start system will abort and
return to a non activated state.
& Remote start safety features
For safety and security reasons, the
system will fail to start and beep the horn
twice or shut down the engine during
remote start operation if any of the
following occur: . The brake pedal is depressed before
the vehicle ignition switch is turned “on ”
. The key was already in the ignition
switch. The engine hood is opened
. The vehicle ’s engine idle speed has
reached a level over 3,000 RPM. The alarm is triggered by opening any
of the doors or the rear gate.
NOTE . The security indicator light on the
dashboard will stop flashing while
under remote engine start operation,
but the vehicle is still protected.. If the vehicle is entered during
remote engine start operation, the
system will not record entry in the
alarm history. &
Entering the vehicle while it
is running via remote start
1. Unlock the vehicle doors using the
remote keyless entry system. If the vehi-cle ’s doors are unlocked manually using
the key, the vehicle ’s alarm system will
trigger and the remote engine start system
will turn off. Inserting the key into the
ignition switch and turning it to the “ON ”
position or pressing the unlock button “
”
on the remote keyless entry transmitter
will disarm the alarm system. Refer to“ Alarm system ”F 2-16.
2. Enter the vehicle. Do not depress the
brake pedal.
3. Insert the key into the ignition switch
and turn to the “ON ”position. If the ignition
switch is accidentally turned to the“ START ”position, the system ’s “starter
anti-grind ”feature will prevent the starter
from re-cranking.
4. Depress the brake pedal. The remote
starter disengages, the vehicle ’s power
window features are re-enabled and the
vehicle will operate normally.
& Entering the vehicle follow-
ing remote engine start shut-down
An alarm trigger may occur if the vehicle is
opened by the remote keyless entry
Starting and operating/Remote engine start system (dealer option)7-9
– CONTINUED –