2013 SUBARU IMPREZA WRX change time
[x] Cancel search: change timePage 211 of 414
5-30Audio
iPod
®. It randomly repeats all of the
tracks on the iPod®.
. When an iPod®is connected, the
files are played back at random by the
shuffle function of the iPod
®. There-
fore, iPod®operation may be different
depending on the model of the con-
nected iPod
®.
. When an audiobook or a podcast is
playing, the mode does not change
even if you press and hold the
button.
To cancel the random playback mode,
press and hold the
button and select
CANCEL. The “RDM ”indication will turn
off, and the normal playback mode will resume. & SCAN (only when connecting
USB storage device)
Scan is operated in the same way as for a
CD. For details, refer to “Scan ”F 5-20.
NOTE
When an iPod
®is connected, you
cannot select the SCAN mode.
& Selecting category (only
when connecting iPod
®)
When the
button is pressed briefly,
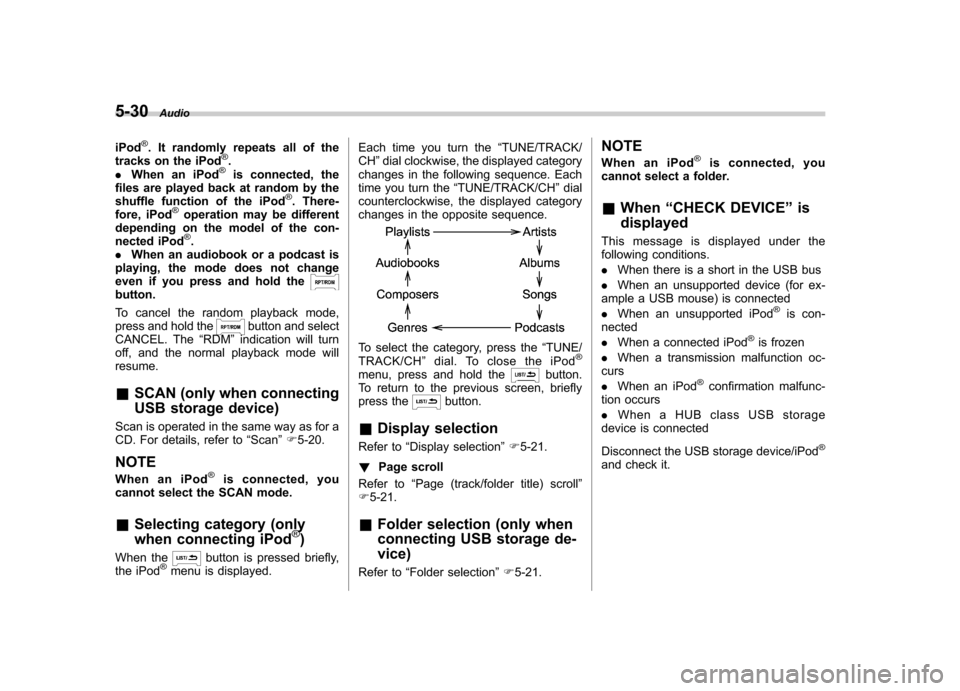
the iPod®menu is displayed. Each time you turn the
“TUNE/TRACK/
CH ”dial clockwise, the displayed category
changes in the following sequence. Each
time you turn the “TUNE/TRACK/CH ”dial
counterclockwise, the displayed category
changes in the opposite sequence.
To select the category, press the “TUNE/
TRACK/CH ”dial. To close the iPod®
menu, press and hold thebutton.
To return to the previous screen, briefly
press the
button.
& Display selection
Refer to “Display selection ”F 5-21.
! Page scroll
Refer to “Page (track/folder title) scroll ”
F 5-21.
& Folder selection (only when
connecting USB storage de- vice)
Refer to “Folder selection ”F 5-21. NOTE
When an iPod
®is connected, you
cannot select a folder. & When “CHECK DEVICE ”is
displayed
This message is displayed under the
following conditions. . When there is a short in the USB bus
. When an unsupported device (for ex-
ample a USB mouse) is connected. When an unsupported iPod
®is con-
nected . When a connected iPod
®is frozen
. When a transmission malfunction oc-
curs . When an iPod
®confirmation malfunc-
tion occurs. When a HUB class USB storage
device is connected
Disconnect the USB storage device/iPod
®
and check it.
Page 212 of 414
Audio control buttons
These buttons are located on the spokes
of the steering wheel. They allow the
driver to control audio functions without
taking his/her hands off the steeringwheel. &MODE button
Models without Hands-free system
Models with Hands-free system
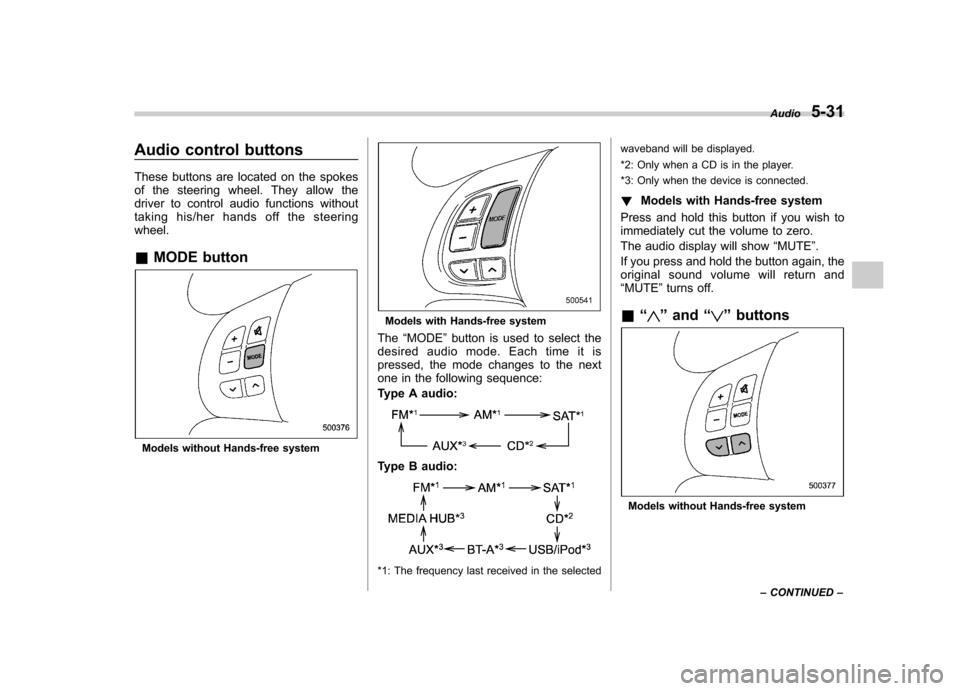
The “MODE ”button is used to select the
desired audio mode. Each time it is
pressed, the mode changes to the next
one in the following sequence:
Type A audio:
Type B audio:
*1: The frequency last received in the selected waveband will be displayed.
*2: Only when a CD is in the player.
*3: Only when the device is connected.
! Models with Hands-free system
Press and hold this button if you wish to
immediately cut the volume to zero.
The audio display will show “MUTE ”.
If you press and hold the button again, the
original sound volume will return and “ MUTE ”turns off.
& “
”and “”buttons
Models without Hands-free system Audio
5-31
– CONTINUED –
Page 215 of 414
5-34Audio
phone. –If you input the correct passkey,
“ PAIRED ”is displayed and the regis-
tering procedure is finished. – If you input an incorrect passkey,
“ FAILED ”is displayed, the registering
procedure was not successful and the
mode changes to the Bluetooth
®
audio setting mode.
! Selecting device
1. Select the “SELECT AUDIO ”menu.
– If no devices are registered,
“ EMPTY ”is displayed and the mode
changes to the Bluetooth
®audio
setting mode.
2. Select the “CONFIRM ”menu.
– If the device is connected, “SE-
LECTED ”is displayed and the select-
ing procedure is finished. – If the device cannot be connected,
“ FAILED ”is displayed and the select-
ing procedure was not successful.
! Setting passkey
1. Select the “SET PASSKEY ”menu.
– After the currently set passkey is
displayed, a new passkey can be entered.
2. Input the new passkey by operatingthe “TUNE/TRACK/CH ”dial. 3. Select the
“CONFIRM ”menu.
– The new passkey is displayed, the
passkey is changed and the mode
changes to the Bluetooth
®audio
setting mode.
! Deleting device
1. Select the “DELETE AUDIO ”menu.
– If no devices are registered,
“ EMPTY ”is displayed and the mode
changes to the Bluetooth
®audio
setting mode.
2. Select the “CONFIRM ”menu.
–“ DELETED ”is displayed and the
mode changes to the Bluetooth
®
audio setting mode.
& Bluetooth
®audio operation
NOTE
Depending on the connected device, it
may not activate as per the following
items or not work smoothly. ! How to play back
Press the
button and select the “BT-
A ”mode.
! To select a track from its beginning
Select a track in the same way as for a
CD. Refer to “To select a track from the
beginning ”F 5-18. !
Repeating
Repeating is operated in the same way as
for a CD. Refer to “Repeating ”F 5-19.
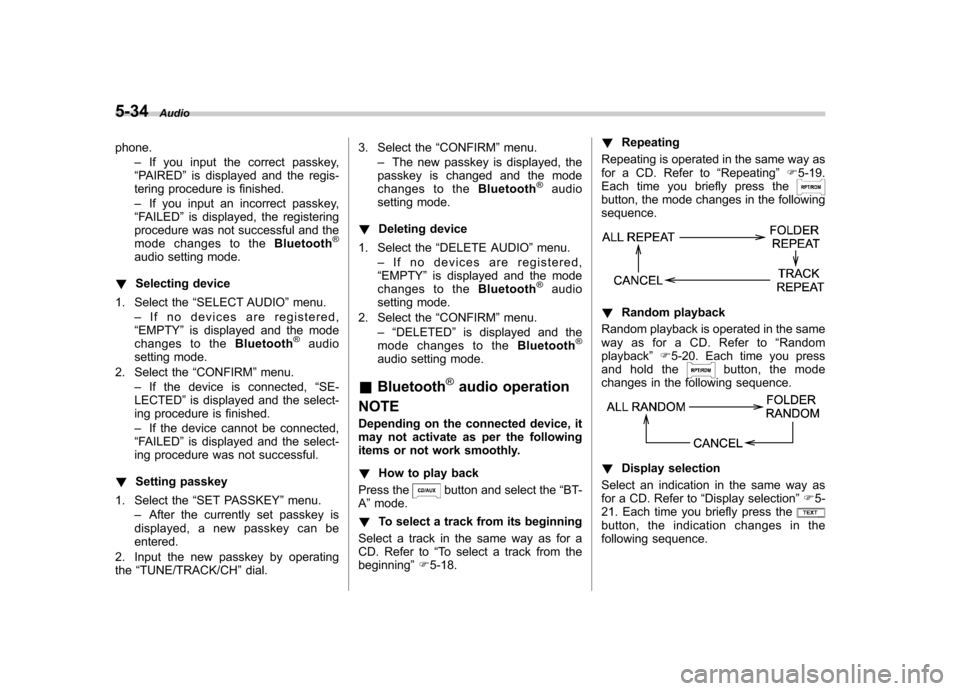
Each time you briefly press the
button, the mode changes in the following sequence.
! Random playback
Random playback is operated in the same
way as for a CD. Refer to “Random
playback ”F 5-20. Each time you press
and hold the
button, the mode
changes in the following sequence.
! Display selection
Select an indication in the same way as
for a CD. Refer to “Display selection ”F 5-
21. Each time you briefly press the
button, the indication changes in the
following sequence.
Page 217 of 414

5-36Audio
.When the ignition switch is turned to
the “LOCK ”position during a call, the
call may be disconnected or continued
on the cell phone depending on the
type of cell phone that is used. Note
that operation of the cell phone may be
necessary if the call is continued on the
cell phone. . Do not speak at the same time as the
other party during a call. If you and the
party speak at the same time, it may be
difficult for the other party to hear your
voice and vice versa. This is normal. . The receiver sound volume should
be set as low as possible. Otherwise,
the party you are calling may notice an
undesirable echo sound. . Speak clearly and loudly.
. Your voice may be difficult to be
heard by the party under the following conditions.
–Driving on a rough road.
– Driving at a high speed.
– Driving with a window open.
– When air from the ventilator
blows directly towards the micro-phone. – When the sound coming from the
ventilator is loud.– When the cell phone is too close
to the microphone. .
The sound quality may degrade due
to the influence of the cell phone that is
connected to the system or the circum-
stances of the Bluetooth network. . When another Bluetooth
®device is
simultaneously connected, noise may
be heard in the voice coming from the
hands-free phone. ! Corresponding profiles for the cell phone
. HFP (Hands Free Profile): Ver. 1.0
. OPP (Object Push Profile): Ver. 1.1
& Certification for the Hands-
free system
CAUTION
FCC WARNING
Changes or modifications not ex-
pressly approved by the party re-
sponsible for compliance could void
the user ’s authority to operate the
equipment.
NOTE
This device complies with Part 15 of
the FCC Rules and RSS-Gen of IC
Rules. Operation is subject to the
following two conditions: (1) this de- vice may not cause harmful interfer-
ence, and (2) this device must accept
any interference received, including
interference that may cause undesiredoperation. NOTE
This equipment has been tested and
found to comply with the limits for a
Class B digital device, pursuant to Part
15 of the FCC Rules. These limits are
designed to provide reasonable protec-
tion against harmful interference in a
residential installation. This equipment
may cause harmful interference to
radio communications, if it is not
installed and used in accordance with
the instructions. However, there is no
guarantee that interference will not
occur in a particular installation. If this
equipment does cause harmful inter-
ference to radio or television reception,
which can be determined by turning the
equipment off and on, the user is
encouraged to try to correct the inter-
ference by one or more of the followingmeasures. .
Reorient or relocate the receiving
antenna. . Increase the separation between the
equipment and receiver.. Connect the equipment into an out-
Page 231 of 414
6-2Interior equipment
Interior lights
When leaving your vehicle, make sure the
lights are turned off to avoid batterydischarge. &Dome light
1) ON
2) DOOR
3) OFF
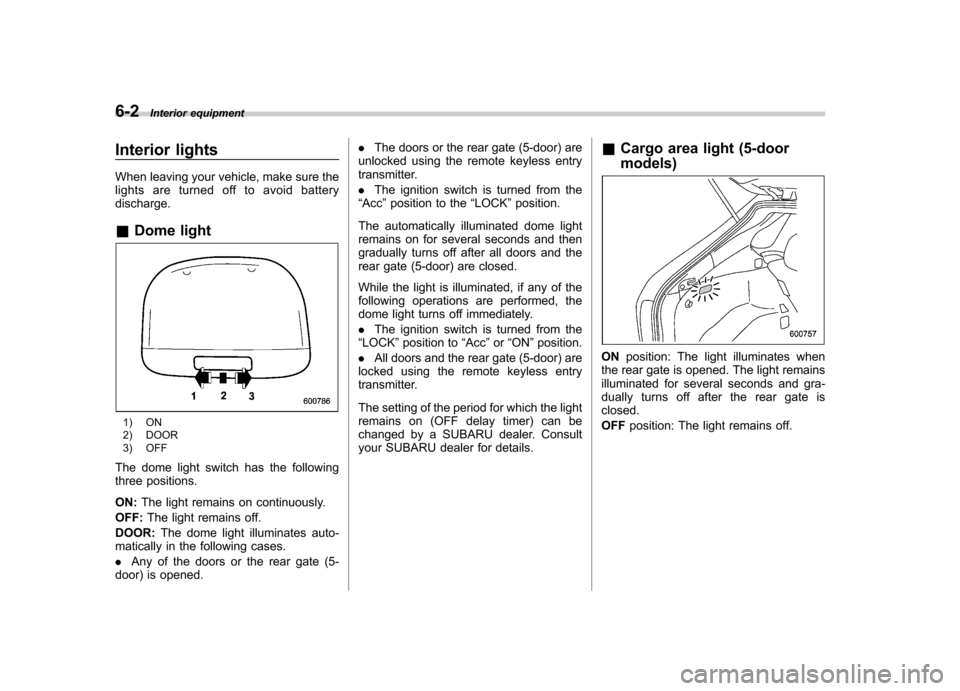
The dome light switch has the following
three positions. ON: The light remains on continuously.
OFF: The light remains off.
DOOR: The dome light illuminates auto-
matically in the following cases. . Any of the doors or the rear gate (5-
door) is opened. .
The doors or the rear gate (5-door) are
unlocked using the remote keyless entry
transmitter. . The ignition switch is turned from the
“ Acc ”position to the “LOCK ”position.
The automatically illuminated dome light
remains on for several seconds and then
gradually turns off after all doors and the
rear gate (5-door) are closed.
While the light is illuminated, if any of the
following operations are performed, the
dome light turns off immediately. . The ignition switch is turned from the
“ LOCK ”position to “Acc ”or “ON ”position.
. All doors and the rear gate (5-door) are
locked using the remote keyless entry
transmitter.
The setting of the period for which the light
remains on (OFF delay timer) can be
changed by a SUBARU dealer. Consult
your SUBARU dealer for details. &
Cargo area light (5-door models)
ON position: The light illuminates when
the rear gate is opened. The light remains
illuminated for several seconds and gra-
dually turns off after the rear gate isclosed. OFF position: The light remains off.
Page 232 of 414
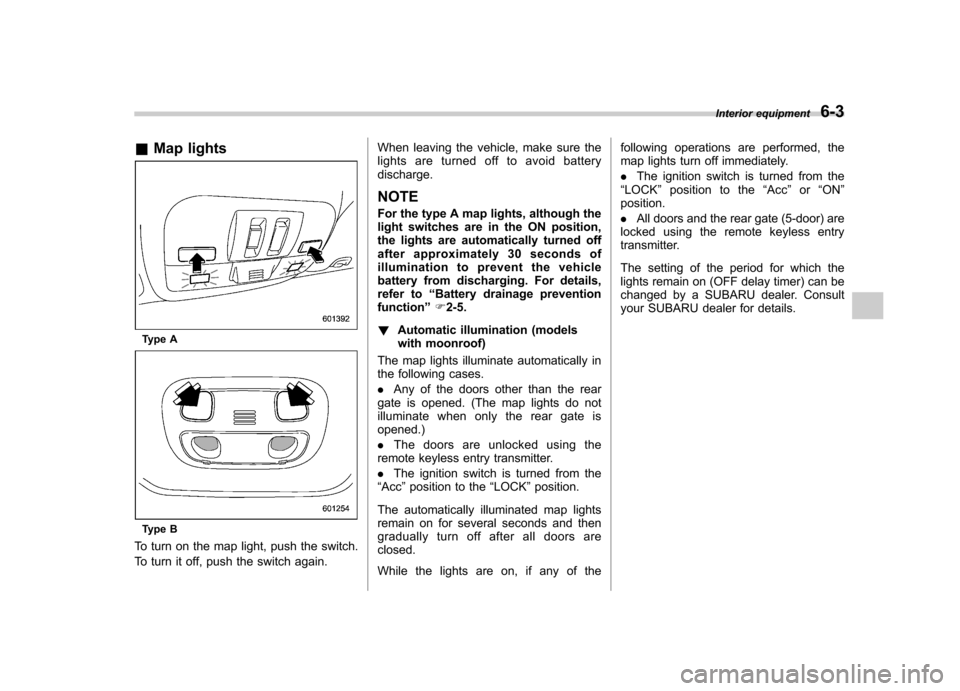
&Map lights
Type A
Type B
To turn on the map light, push the switch.
To turn it off, push the switch again. When leaving the vehicle, make sure the
lights are turned off to avoid batterydischarge.
NOTE
For the type A map lights, although the
light switches are in the ON position,
the lights are automatically turned off
after approximately 30 seconds of
illumination to prevent the vehicle
battery from discharging. For details,
refer to “Battery drainage prevention
function ”F 2-5.
! Automatic illumination (models
with moonroof)
The map lights illuminate automatically in
the following cases. . Any of the doors other than the rear
gate is opened. (The map lights do not
illuminate when only the rear gate isopened.) . The doors are unlocked using the
remote keyless entry transmitter.. The ignition switch is turned from the
“ Acc ”position to the “LOCK ”position.
The automatically illuminated map lights
remain on for several seconds and then
gradually turn off after all doors areclosed.
While the lights are on, if any of the following operations are performed, the
map lights turn off immediately. .
The ignition switch is turned from the
“ LOCK ”position to the “Acc ”or “ON ”
position.. All doors and the rear gate (5-door) are
locked using the remote keyless entry
transmitter.
The setting of the period for which the
lights remain on (OFF delay timer) can be
changed by a SUBARU dealer. Consult
your SUBARU dealer for details. Interior equipment
6-3
Page 265 of 414
7-22Starting and operating
SI-DRIVE (STI)
SI-DRIVE (SUBARU Intelligent Drive)
works to maximize engine performance,
control and efficiency.
This system consists of three modes:
Intelligent (I), Sport (S), and Sport Sharp
(S#). By adjusting the SI-DRIVE selector,
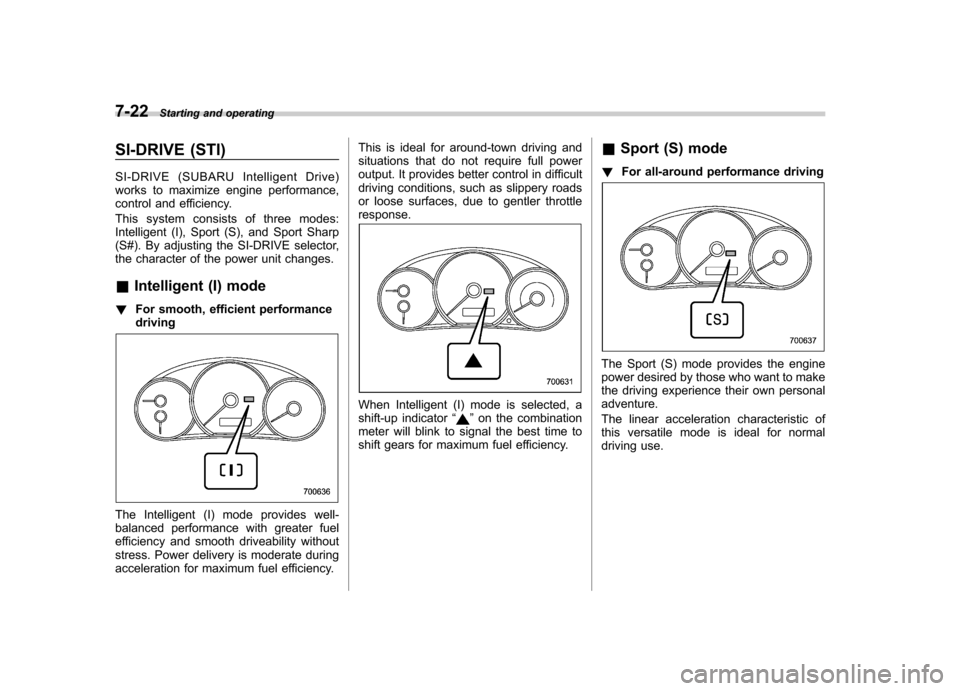
the character of the power unit changes. &Intelligent (I) mode
! For smooth, efficient performance driving
The Intelligent (I) mode provides well-
balanced performance with greater fuel
efficiency and smooth driveability without
stress. Power delivery is moderate during
acceleration for maximum fuel efficiency. This is ideal for around-town driving and
situations that do not require full power
output. It provides better control in difficult
driving conditions, such as slippery roads
or loose surfaces, due to gentler throttleresponse.
When Intelligent (I) mode is selected, a
shift-up indicator
“”on the combination
meter will blink to signal the best time to
shift gears for maximum fuel efficiency. &
Sport (S) mode
! For all-around performance driving
The Sport (S) mode provides the engine
power desired by those who want to make
the driving experience their own personaladventure.
The linear acceleration characteristic of
this versatile mode is ideal for normal
driving use.
Page 266 of 414
&Sport Sharp (S#) mode
! For maximum performance driving
For sports-minded drivers, the Sport
Sharp (S#) mode offers an exhilarating
level of engine performance and control.
The throttle becomes more responsive
regardless of the engine speed. Delivering
maximum driving enjoyment, this mode is
ideal for tackling twisting roads and for
merging or overtaking other vehicles on
the freeway with confidence. &
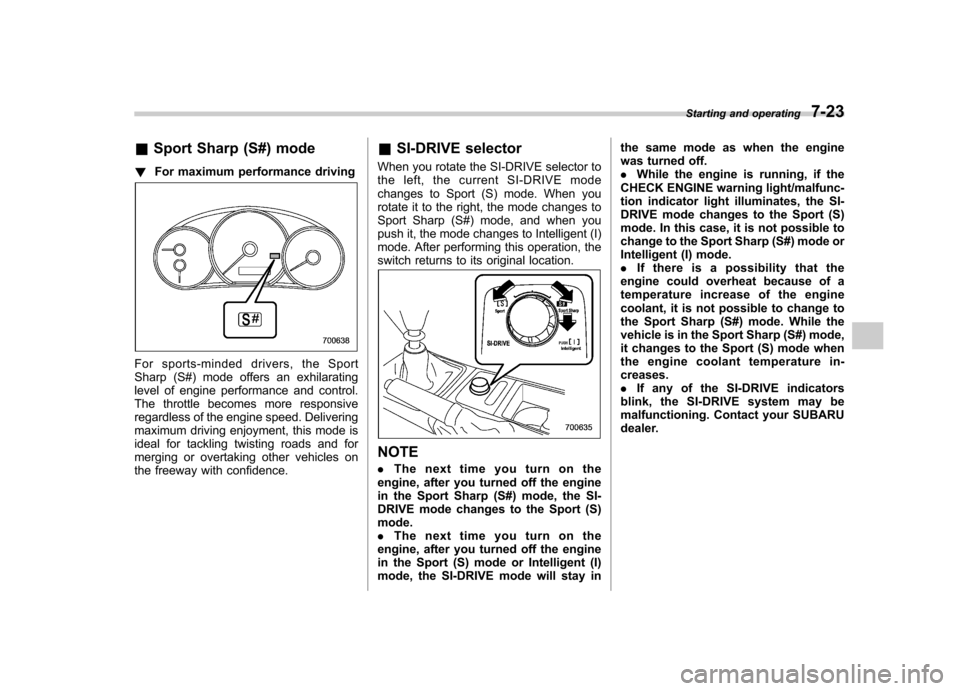
SI-DRIVE selector
When you rotate the SI-DRIVE selector to
the left, the current SI-DRIVE mode
changes to Sport (S) mode. When you
rotate it to the right, the mode changes to
Sport Sharp (S#) mode, and when you
push it, the mode changes to Intelligent (I)
mode. After performing this operation, the
switch returns to its original location.
NOTE . The next time you turn on the
engine, after you turned off the engine
in the Sport Sharp (S#) mode, the SI-
DRIVE mode changes to the Sport (S)mode.. The next time you turn on the
engine, after you turned off the engine
in the Sport (S) mode or Intelligent (I)
mode, the SI-DRIVE mode will stay in the same mode as when the engine
was turned off..
While the engine is running, if the
CHECK ENGINE warning light/malfunc-
tion indicator light illuminates, the SI-
DRIVE mode changes to the Sport (S)
mode. In this case, it is not possible to
change to the Sport Sharp (S#) mode or
Intelligent (I) mode.. If there is a possibility that the
engine could overheat because of a
temperature increase of the engine
coolant, it is not possible to change to
the Sport Sharp (S#) mode. While the
vehicle is in the Sport Sharp (S#) mode,
it changes to the Sport (S) mode when
the engine coolant temperature in- creases.. If any of the SI-DRIVE indicators
blink, the SI-DRIVE system may be
malfunctioning. Contact your SUBARU
dealer. Starting and operating
7-23