2013 SUBARU IMPREZA WRX change time
[x] Cancel search: change timePage 178 of 414
system. &Air conditioner compressor
shut-off when engine is
heavily loaded
To improve acceleration and gas mileage,
the air conditioner compressor is designed
to temporarily shut off during air condi-
tioner operation whenever the accelerator
is fully depressed such as during rapid
acceleration or when driving on a steepupgrade. & Refrigerant for your climate
control system
Your air conditioner uses ozone friendly
refrigerant HFC134a. Therefore, the meth-
od of adding, changing or checking the
refrigerant is different from the method for
CFC12 (freon). Consult your SUBARU
dealer for service. Repairs needed as a
result of using the wrong refrigerant are
not covered under warranty. Air filtration system
Replace the filter element according to the
replacement schedule as follows. This
schedule should be followed to maintain
the filter
’s dust collection ability. Under
extremely dusty conditions, the filter
should be replaced more frequently. It is
recommended that you have your filter
checked or replaced by your SUBARU
dealer. For replacement, use only a
genuine SUBARU air filter kit.
Replacement schedule: Every 12 months or 7,500 miles (12,000
km) whichever comes first
CAUTION
Contact your SUBARU dealer if the
following occurs, even if it is not yet
time to change the filter: . Reduction of the airflow through
the vents.
. Windshield gets easily fogged or
misted.
NOTE
The filter can influence the air condi-
tioning, heating and defroster perfor- mance if not properly maintained. &
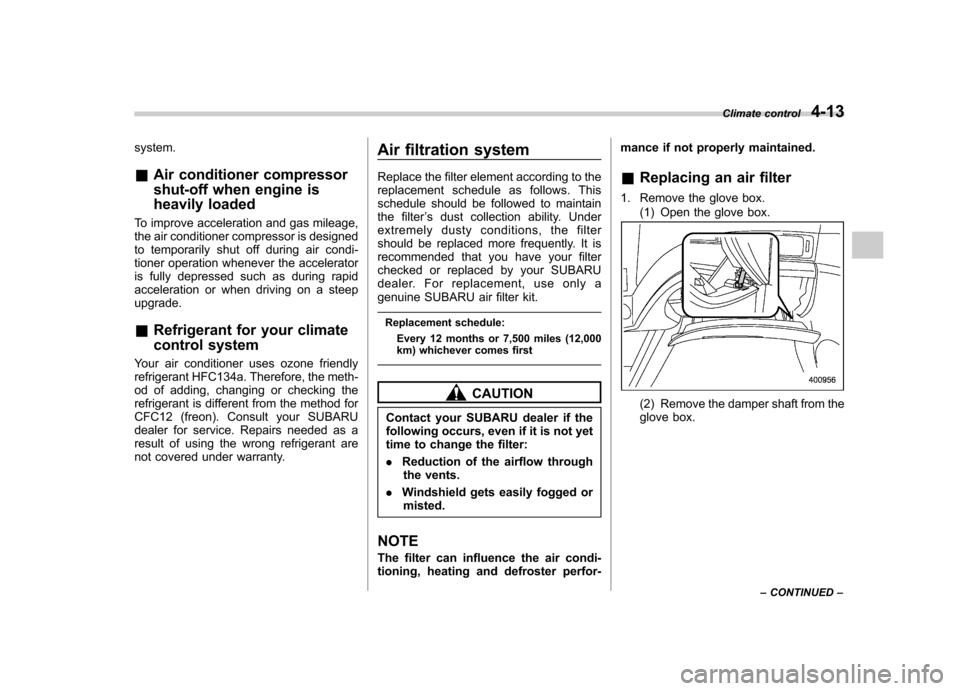
Replacing an air filter
1. Remove the glove box. (1) Open the glove box.(2) Remove the damper shaft from the
glove box. Climate control
4-13
– CONTINUED –
Page 191 of 414
5-10Audio
FM/AM radio operation &FM/AM selection
Type A audio
Type B audio
Press the “FM/AM ”button when the radio
is off to turn on the radio.
Press the “FM/AM ”button when the radio
is on to select the preferred reception mode.
Each brief press of the “FM/AM ”button
changes the radio in the following se-
quence starting from the last radio band
with you selected.
& Tuning
! Manual tuning
Type A audio
Type B audio
Turn the “TUNE/TRACK/CH ”dial clock-
wise to increase the tuning frequency and
turn the “TUNE/TRACK/CH ”dial counter-
clockwise to decrease it.
Each time the dial is turned, the frequency
interval can be changed between 10 kHz
in the AM mode and 0.2 MHz in the FMmode. ! Stereo indicator
The stereo indicator “ST ”will illuminate
when an FM stereo broadcast is received. !
Seek tuning (SEEK)
Type A audio:
Seek up
Seek down
Type B audio:
Seek up
Seek down
If you press the “”or “”side of the
“ SEEK ”button briefly, the radio will auto-
matically search for a receivable station
and stop at the first one it finds.
This function may not be available when
radio signals are weak. When this hap-
pens, perform manual tuning to select the
desired station.
Page 192 of 414
!Scan tuning (SCAN)
Type A audio
Type B audio
If you press the “SCAN ”button briefly, the
radio will switch to the scan mode. In this
mode, the radio scans through the radio
band until a station is found. The radio will
stop at the station for 5 seconds while
displaying the frequency, after which
scanning will continue until the entire band
has been scanned.
Press the “SCAN ”button again to cancel
the SCAN mode and to stop at any
displayed channel.
Automatic tuning may not function prop-
erly if the station reception is weakened by
distance from the station or proximity to
tall buildings and hills. !
PTY (Program type) group tuning
(only FM reception)
Type A audioType B audio
Press the “PTY/CAT ”button to change to
the PTY selection mode. At this time, the
PTY group that you are currently listening
to will be displayed for 10 seconds. In the
PTY selection mode, “PTY ”is displayed
on the screen. ! PTY (Program type) group selection
Type A audio:
PTY group up by
one step
PTY group down by
one step
Type B audio:
PTY group up by
one step
PTY group down by
one step
In the PTY selection mode, press the “ FOLDER/PTY/CAT ”button “”or “”to
change the PTY group by one step at a time.
This operation only changes the display. It
does not change the station that is
currently being received. ! Seek in PTY (Program type) group
Type A audio:
Seek up
Seek down
Type B audio:
Seek up
Seek down
In the PTY selection mode, when the
desired PTY group has been selected,
pressing the “SEEK ”button “
”or “”
Audio
5-11
– CONTINUED –
Page 199 of 414
5-18Audio
!Loading all the magazine (full disc
loading mode)
1. If you press and hold the
button,
the player will produce beep sound and
will enter the full disc loading mode.
2. When the disc number indicator
flashes and “ALL LOAD ”indicator illumi-
nates, insert a disc within 15 seconds. If a
disc is successfully loaded during this
period, the disc number indicator will stop
blinking and will steadily light.
3. When the loading of a disc is com-
plete, the next disc number indicator will
blink. Then repeat step 2.
4. When the magazine is filled with discs
by repeating steps 2 and 3, the player will
start playback of the discs, beginning with
the one inserted first.
If you fail to insert any disc during each 15
seconds interval, the full disc loading
mode will be canceled, and the player will
start playback of the disc inserted first.
& How to insert a CD (type B)
Hold the disc with a finger in the center
hole while gripping the edge of the disc,
then insert it into the slot (with the label
side up) and the player will automatically
pull the disc into position. NOTE
DO NOT INSERT TWO DISCS INTO THE
DISC INSERTION SLOT AT THE SAMETIME. &
How to play back a CD
! When there is no CD inserted
Properly insert a CD. Refer to “How to
insert a CD(s) (type A) ”F 5-17/ “How to
insert a CD (type B) ”F 5-18.
When a CD is loaded, the player will start
playback of the CD, beginning with the
first track. ! When there are CDs loaded (type A)
Press the preferred disc select button (from
to). If a disc is loaded
in any slot, the corresponding disc number
indicator will be constantly illuminated.
The player will then start playback of the
selected CD, beginning with the first track.
If a disc that the player cannot read has
been loaded, the player will display themessage “CHECK DISC ”.
! When CD is in the player (type B)
Each brief press of the
button
changes the modes in the following sequence.
When the CD mode is selected, the player
will start playback. & To select a track from the beginning
Type A audio
Type B audio
Turn the “TUNE/TRACK/CH ”dial clock-
wise to skip to the beginning of the next
track/file. Each time the dial is turned, the
indicated track/file number will increase.
Turn the “TUNE/TRACK/CH ”dial counter-
clockwise to skip to the beginning of the
current track/file. Each time the dial is
turned, the indicated track/file number will decrease.
Page 200 of 414
NOTE
With an MP3, WMA or AAC (type B audio): .Skipping past the last track/file will
take you back to the first track/file in
the folder.. Skipping past the first track/file will
take you to the last track/file in the
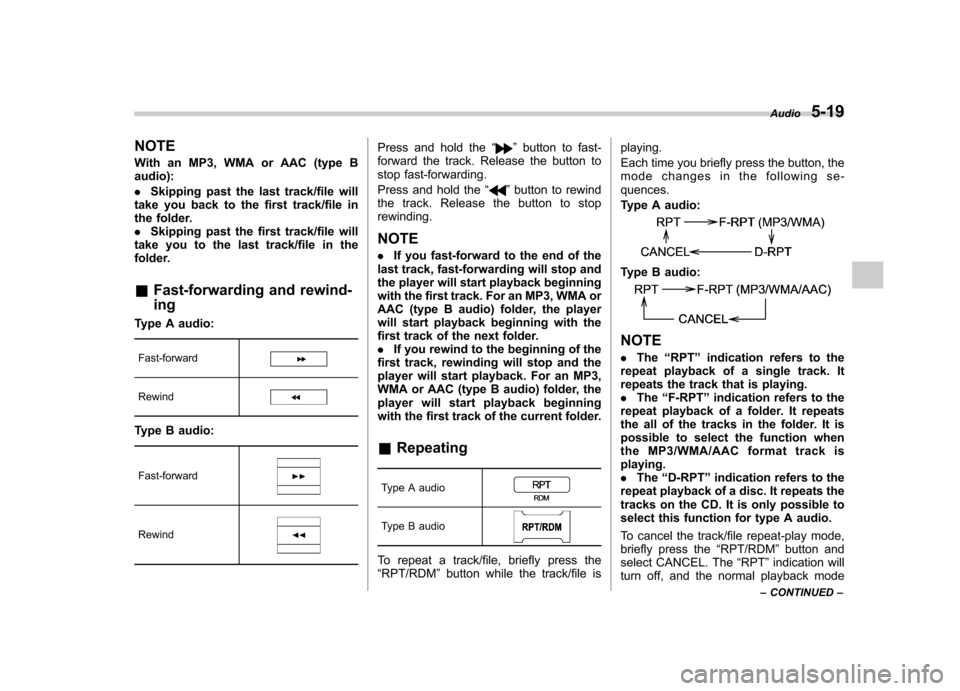
folder. & Fast-forwarding and rewind- ing
Type A audio:
Fast-forward
Rewind
Type B audio:
Fast-forward
Rewind
Press and hold the “”button to fast-
forward the track. Release the button to
stop fast-forwarding.
Press and hold the “
”button to rewind
the track. Release the button to stop rewinding. NOTE . If you fast-forward to the end of the
last track, fast-forwarding will stop and
the player will start playback beginning
with the first track. For an MP3, WMA or
AAC (type B audio) folder, the player
will start playback beginning with the
first track of the next folder.. If you rewind to the beginning of the
first track, rewinding will stop and the
player will start playback. For an MP3,
WMA or AAC (type B audio) folder, the
player will start playback beginning
with the first track of the current folder. & Repeating
Type A audio
Type B audio
To repeat a track/file, briefly press the “ RPT/RDM ”button while the track/file is playing.
Each time you briefly press the button, the
mode changes in the following se-quences.
Type A audio:
Type B audio:
NOTE .
The “RPT ”indication refers to the
repeat playback of a single track. It
repeats the track that is playing. . The “F-RPT ”indication refers to the
repeat playback of a folder. It repeats
the all of the tracks in the folder. It is
possible to select the function when
the MP3/WMA/AAC format track isplaying.. The “D-RPT ”indication refers to the
repeat playback of a disc. It repeats the
tracks on the CD. It is only possible to
select this function for type A audio.
To cancel the track/file repeat-play mode,
briefly press the “RPT/RDM ”button and
select CANCEL. The “RPT ”indication will
turn off, and the normal playback mode Audio
5-19
– CONTINUED –
Page 201 of 414
5-20Audio
will be resumed. NOTE
The repeat-play mode will be cancelled
if you perform any of the followingsteps. .Press the “
”button
. Press the disc select button (type A
audio) . Press the “SCAN ”button
. Press the “LOAD ”button when
there is free space in the CD magazine
(type A audio)
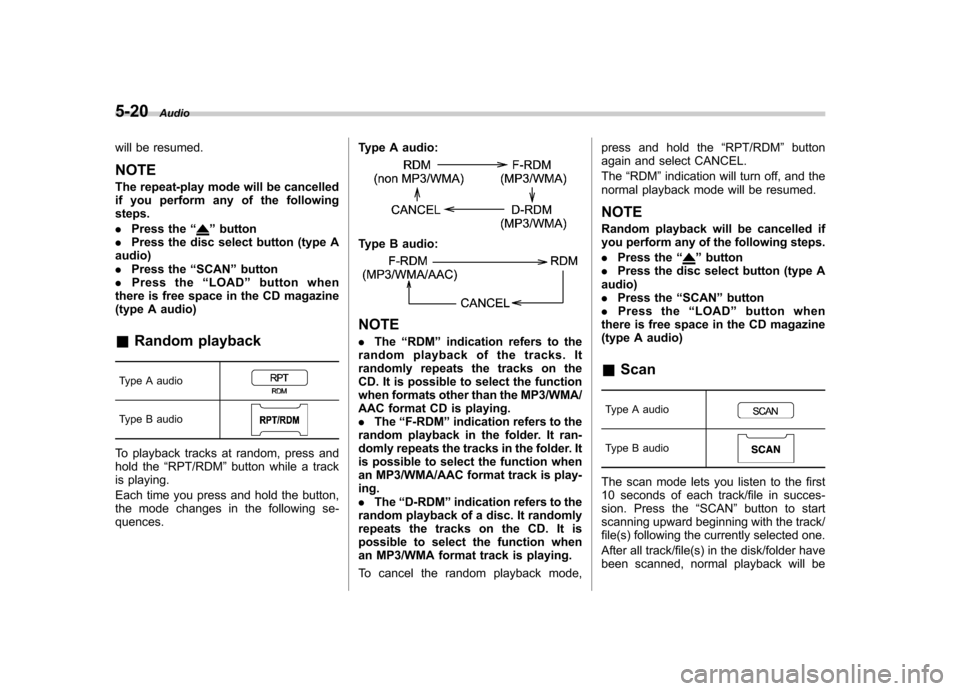
& Random playback
Type A audio
Type B audio
To playback tracks at random, press and
hold the “RPT/RDM ”button while a track
is playing.
Each time you press and hold the button,
the mode changes in the following se-quences. Type A audio:
Type B audio:
NOTE .
The “RDM ”indication refers to the
random playback of the tracks. It
randomly repeats the tracks on the
CD. It is possible to select the function
when formats other than the MP3/WMA/
AAC format CD is playing. . The “F-RDM ”indication refers to the
random playback in the folder. It ran-
domly repeats the tracks in the folder. It
is possible to select the function when
an MP3/WMA/AAC format track is play-ing.. The “D-RDM ”indication refers to the
random playback of a disc. It randomly
repeats the tracks on the CD. It is
possible to select the function when
an MP3/WMA format track is playing.
To cancel the random playback mode, press and hold the
“RPT/RDM ”button
again and select CANCEL. The “RDM ”indication will turn off, and the
normal playback mode will be resumed. NOTE
Random playback will be cancelled if
you perform any of the following steps. . Press the “
”button
. Press the disc select button (type A
audio) . Press the “SCAN ”button
. Press the “LOAD ”button when
there is free space in the CD magazine
(type A audio)
& Scan
Type A audio
Type B audio
The scan mode lets you listen to the first
10 seconds of each track/file in succes-
sion. Press the “SCAN ”button to start
scanning upward beginning with the track/
file(s) following the currently selected one.
After all track/file(s) in the disk/folder have
been scanned, normal playback will be
Page 209 of 414
5-28Audio
iPod
®cannot be operated using the
click wheel on the iPod®(except some
models). . When using an iPod
®by connecting
it to in-vehicle equipment, the order of
the list items displayed on the in-
vehicle equipment may be different
from that on the iPod
®. However, this
does not indicate a malfunction.. An iPod
®battery that is connected
to in-vehicle equipment will be charged
when the ignition switch is in the “ON ”
or “Acc ”position. However, activation
of the iPod
®may be delayed if the
battery charge of the iPod®is low.
. If an iPod®does not activate after
operation, disconnect the connection
cable from the iPod
®and reset it. For
the resetting procedure, see the User ’s
Guide of the iPod
®.
. If an iPod®and the connection cable
are connected improperly, the iPod®
cannot be powered on or will not be
recognized by in-vehicle equipment. In
this case, disconnect the connection
cable from the iPod
®, and then connect
it again.
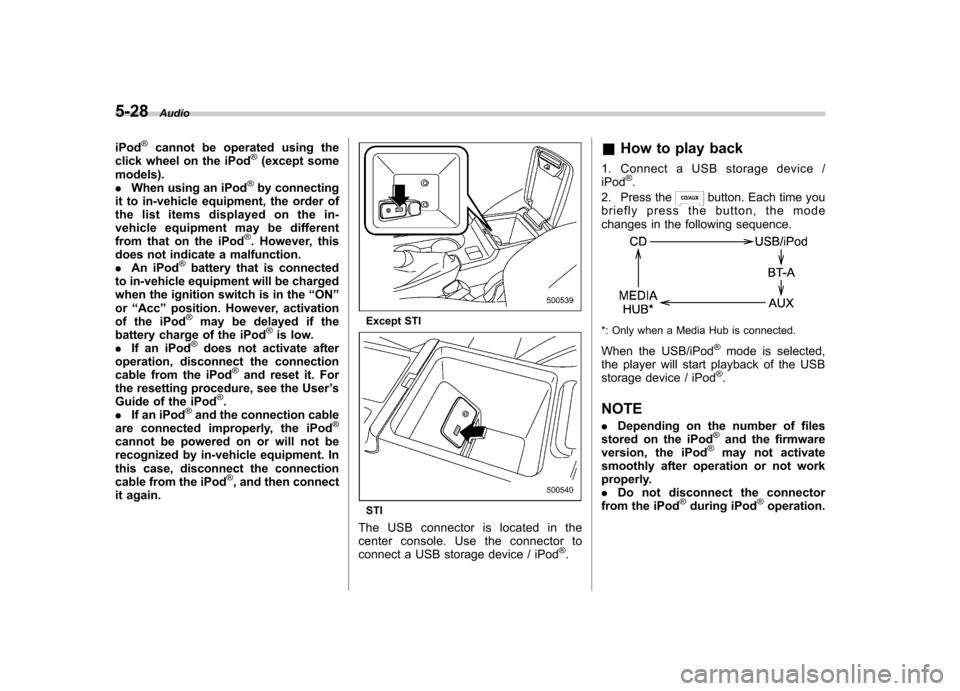
Except STI
STI
The USB connector is located in the
center console. Use the connector to
connect a USB storage device / iPod
®. &
How to play back
1. Connect a USB storage device /iPod
®.
2. Press the
button. Each time you
briefly press the button, the mode
changes in the following sequence.
*: Only when a Media Hub is connected.
When the USB/iPod
®mode is selected,
the player will start playback of the USB
storage device / iPod
®.
NOTE . Depending on the number of files
stored on the iPod
®and the firmware
version, the iPod®may not activate
smoothly after operation or not work
properly.. Do not disconnect the connector
from the iPod
®during iPod®operation.
Page 210 of 414
&To select a track from the beginning
Select a track in the same way as for a
CD. For details, refer to “To select a track
from the beginning ”F 5-18.
& To select a chapter from the
beginning when connectingiPod
®
When playing podcasts or audiobooks,
select a chapter in the same way as for a
CD. For details, refer to “To select a track
from the beginning ”F 5-18.
& Fast-forwarding and rewind- ing
Fast-forwarding and rewinding are oper-
ated in the same way as for a CD. For
details, refer to “Fast-forwarding and
rewinding ”F 5-19.
NOTE
When connecting iPod
®:
. When the end of a track is reached
while fast-forwarding, fast-forwarding
ends and play begins from the begin-
ning of the next track. .
When the beginning of a track is
reached while rewin ding, rewinding
ends and play begins from the begin-
ning of the track.
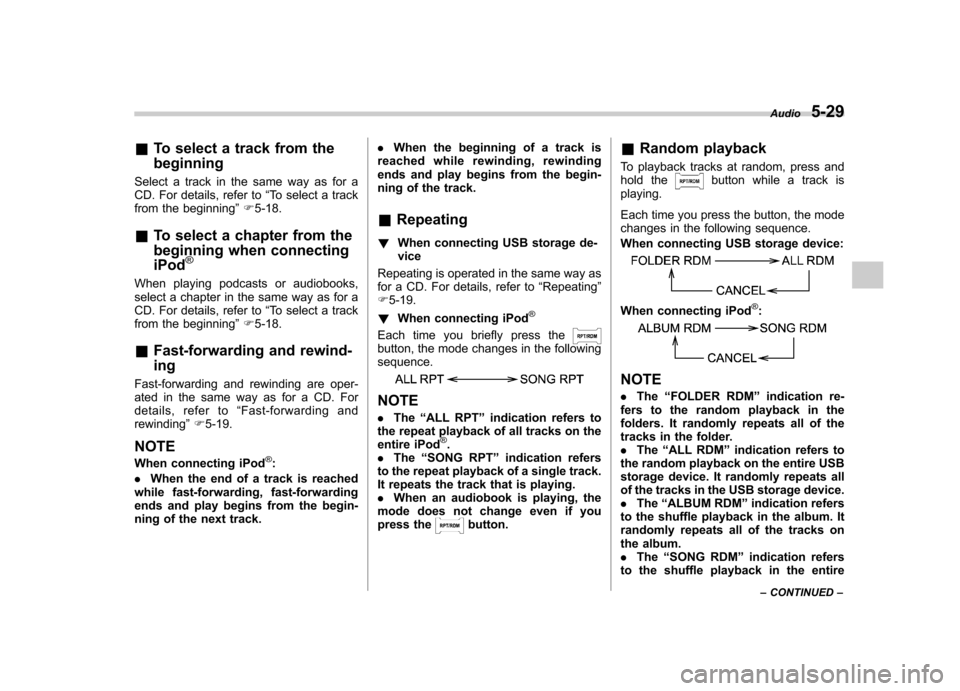
& Repeating
! When connecting USB storage de-vice
Repeating is operated in the same way as
for a CD. For details, refer to “Repeating ”
F 5-19.
! When connecting iPod
®
Each time you briefly press thebutton, the mode changes in the following sequence.
NOTE .The “ALL RPT ”indication refers to
the repeat playback of all tracks on the
entire iPod
®.
. The “SONG RPT ”indication refers
to the repeat playback of a single track.
It repeats the track that is playing. . When an audiobook is playing, the
mode does not change even if you
press the
button. &
Random playback
To playback tracks at random, press and
hold the
button while a track is
playing.
Each time you press the button, the mode
changes in the following sequence.
When connecting USB storage device:
When connecting iPod®:
NOTE . The “FOLDER RDM ”indication re-
fers to the random playback in the
folders. It randomly repeats all of the
tracks in the folder.. The “ALL RDM ”indication refers to
the random playback on the entire USB
storage device. It randomly repeats all
of the tracks in the USB storage device.. The “ALBUM RDM ”indication refers
to the shuffle playback in the album. It
randomly repeats all of the tracks on
the album.. The “SONG RDM ”indication refers
to the shuffle playback in the entire Audio
5-29
– CONTINUED –