Page 353 of 436
11-16Maintenance and service
3. Loosen the screw of the clamp and
pull the air intake boot out of the air
cleaner case.
4. Unsnap the two clips and open the air
cleaner case.
5. Remove the air cleaner element.
6. Clean the inside of the air cleaner case
with a damp cloth and install a new air
cleaner element.
7. If the rear air cleaner case has been
removed, insert the three projections on
the rear air cleaner case into the slits on
the front air cleaner case.
8. Install the removed parts in the reverse
order of removal. !
Turbo models
1. Use a screwdriver to undo the clips on
the air intake duct, then remove the air
intake duct.
1) Connector
2) Clip
Page 354 of 436
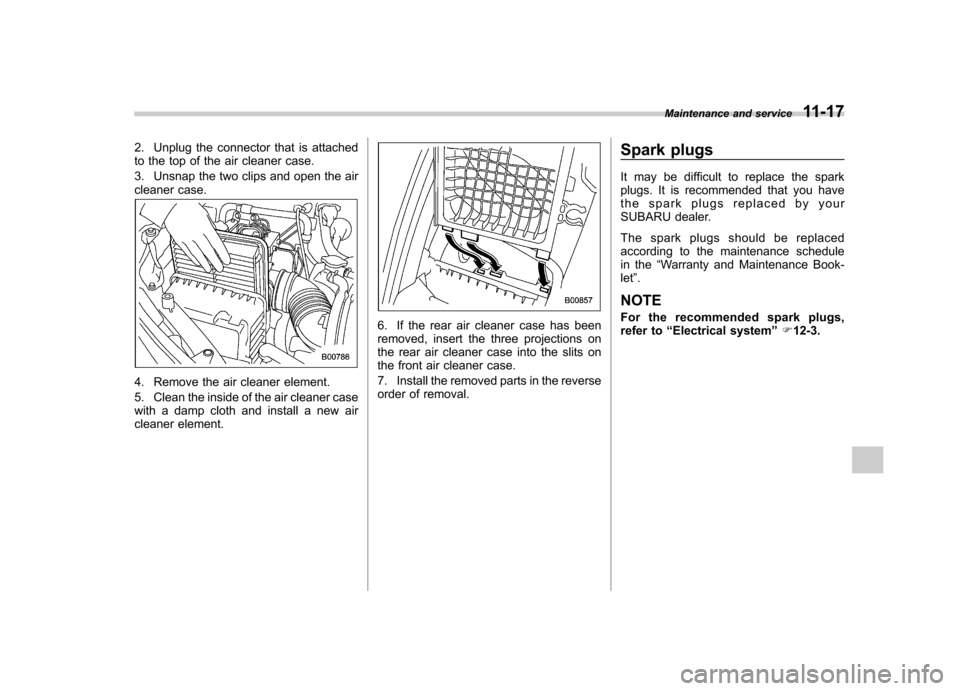
2. Unplug the connector that is attached
to the top of the air cleaner case.
3. Unsnap the two clips and open the air
cleaner case.
4. Remove the air cleaner element.
5. Clean the inside of the air cleaner case
with a damp cloth and install a new air
cleaner element.
6. If the rear air cleaner case has been
removed, insert the three projections on
the rear air cleaner case into the slits on
the front air cleaner case.
7. Install the removed parts in the reverse
order of removal.Spark plugs
It may be difficult to replace the spark
plugs. It is recommended that you have
the spark plugs replaced by your
SUBARU dealer.
The spark plugs should be replaced
according to the maintenance schedule
in the
“Warranty and Maintenance Book-
let ”.
NOTE
For the recommended spark plugs,
refer to “Electrical system ”F 12-3.
Maintenance and service
11-17
Page 355 of 436

11-18Maintenance and service
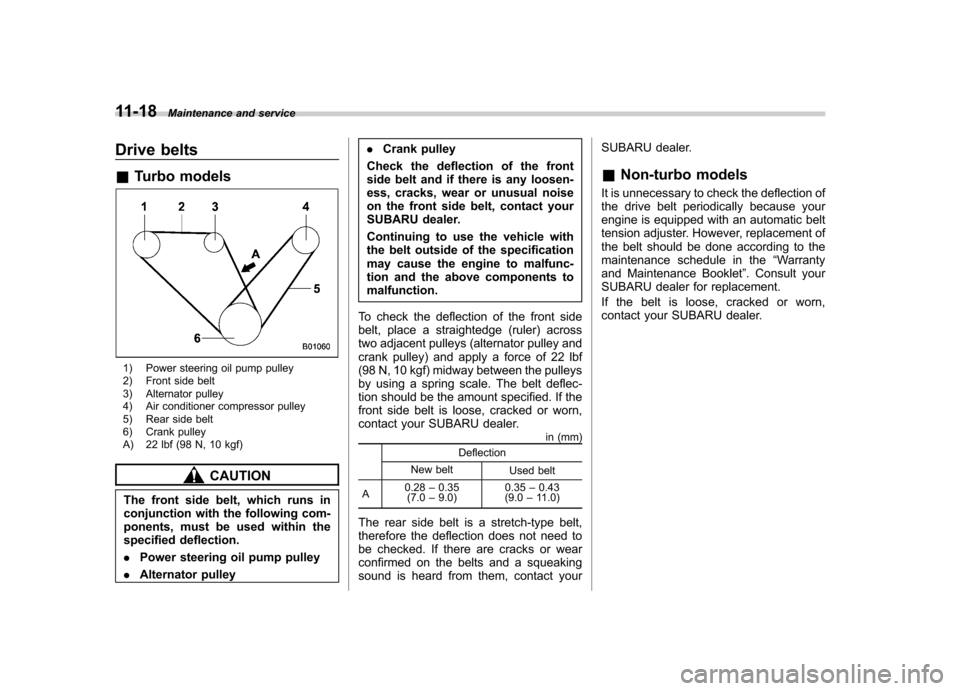
Drive belts &Turbo models
1) Power steering oil pump pulley
2) Front side belt
3) Alternator pulley
4) Air conditioner compressor pulley
5) Rear side belt
6) Crank pulley
A) 22 lbf (98 N, 10 kgf)
CAUTION
The front side belt, which runs in
conjunction with the following com-
ponents, must be used within the
specified deflection. . Power steering oil pump pulley
. Alternator pulley .
Crank pulley
Check the deflection of the front
side belt and if there is any loosen-
ess, cracks, wear or unusual noise
on the front side belt, contact your
SUBARU dealer.
Continuing to use the vehicle with
the belt outside of the specification
may cause the engine to malfunc-
tion and the above components tomalfunction.
To check the deflection of the front side
belt, place a straightedge (ruler) across
two adjacent pulleys (alternator pulley and
crank pulley) and apply a force of 22 lbf
(98 N, 10 kgf) midway between the pulleys
by using a spring scale. The belt deflec-
tion should be the amount specified. If the
front side belt is loose, cracked or worn,
contact your SUBARU dealer. in (mm)
Deflection
New belt Used belt
A 0.28
–0.35
(7.0 –9.0) 0.35
–0.43
(9.0 –11.0)
The rear side belt is a stretch-type belt,
therefore the deflection does not need to
be checked. If there are cracks or wear
confirmed on the belts and a squeaking
sound is heard from them, contact your SUBARU dealer. &
Non-turbo models
It is unnecessary to check the deflection of
the drive belt periodically because your
engine is equipped with an automatic belt
tension adjuster. However, replacement of
the belt should be done according to the
maintenance schedule in the “Warranty
and Maintenance Booklet ”. Consult your
SUBARU dealer for replacement.
If the belt is loose, cracked or worn,
contact your SUBARU dealer.
Page 356 of 436
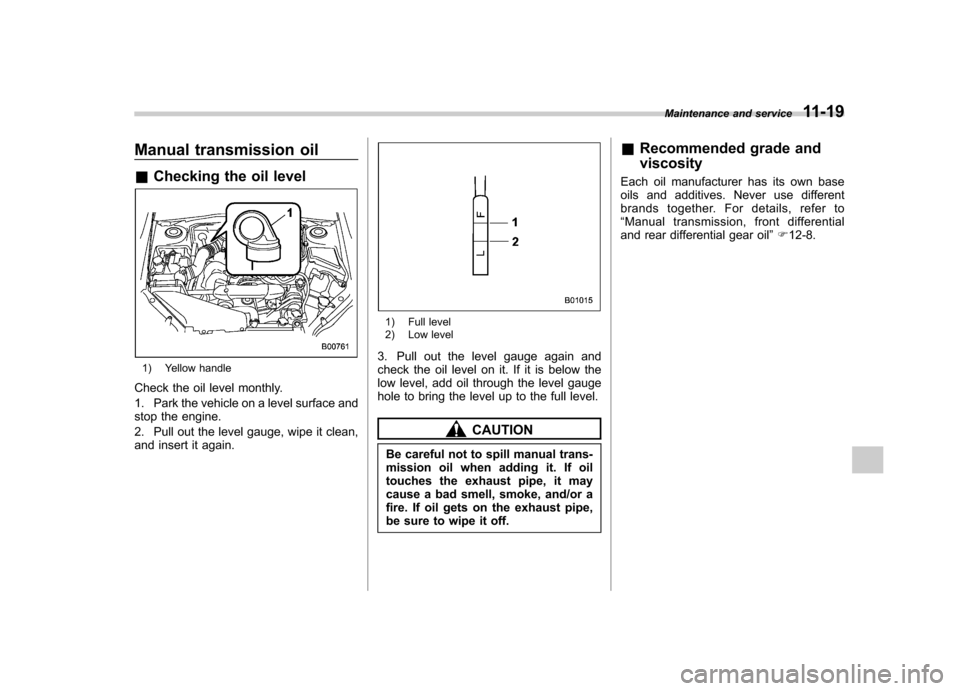
Manual transmission oil &Checking the oil level
1) Yellow handle
Check the oil level monthly.
1. Park the vehicle on a level surface and
stop the engine.
2. Pull out the level gauge, wipe it clean,
and insert it again.
1) Full level
2) Low level
3. Pull out the level gauge again and
check the oil level on it. If it is below the
low level, add oil through the level gauge
hole to bring the level up to the full level.
CAUTION
Be careful not to spill manual trans-
mission oil when adding it. If oil
touches the exhaust pipe, it may
cause a bad smell, smoke, and/or a
fire. If oil gets on the exhaust pipe,
be sure to wipe it off. &
Recommended grade and viscosity
Each oil manufacturer has its own base
oils and additives. Never use different
brands together. For details, refer to“ Manual transmission, front differential
and rear differential gear oil ”F 12-8.
Maintenance and service
11-19
Page 357 of 436

11-20Maintenance and service
Automatic transmission fluid &Checking the fluid level
The automatic transmission fluid expands
largely as its temperature rises; the fluid
level differs according to fluid temperature.
Therefore, there are two different scales
for checking the level of hot fluid and cold
fluid on the level gauge.
Though the fluid level can be checked
without warming up the fluid on the“ COLD ”range, it is recommended to
check the fluid level when the fluid is at
operating temperature. ! Checking the fluid level when the
fluid is hot
1. Drive the vehicle several miles to raise
the temperature of the transmission fluid
up to normal operating temperature; 158
to 176 8F (70 to 80 8C) is normal.
2. Park the vehicle on a level surface and
set the parking brake.
3. First shift the select lever in each
position. Then shift it in the “P ” position,
and run the engine at idling speed.
1) Yellow handle
1) HOT range
2) COLD range
3) Full level
4) Low level
4. Pull out the level gauge and check the fluid level on the gauge. If it is below the
low level on the
“HOT ”range, add the
recommended automatic transmission
fluid up to the full level.
NOTE
Do not fill the automatic transmission
fluid over the full level. ! Checking the fluid level when the
fluid is cold
When the fluid level has to be checked
without time to warm up the automatic
transmission, check that the fluid level is
between the low level and full level on the“ COLD ”range. If it is below that range,
add fluid up to the full level. Be careful not
to overfill.
CAUTION
Be careful not to spill automatic
transmission fluid when adding it.
If automatic transmission fluid
touches the exhaust pipe, it may
cause a bad smell, smoke, and/or a
fire. If automatic transmission fluid
gets on the exhaust pipe, be sure to
wipe it off.
Page 358 of 436
&Recommended fluid
Refer to “Fluids ”F 12-9.
NOTE
Using any non-specified type of auto-
matic transmission fluid could result in
damage inside the transmission. When
replacing the automatic transmission
fluid, be sure to use the specified type. Front differential gear oil (AT models) &
Checking the oil level
1) Yellow handle
1. Park the vehicle on a level surface and
stop the engine.
2. Pull out the level gauge, wipe it clean,
and insert it again.
1) Full level
2) Low level
3. Pull out the level gauge again and
check the oil level on it. If it is below the
low level, add oil to bring the level up to
the full level.
CAUTION
Be careful not to spill front differ-
ential gear oil when adding it. If oil
touches the exhaust pipe, it may
cause a bad smell, smoke, and/or a
fire. If oil gets on the exhaust pipe,
be sure to wipe it off. Maintenance and service
11-21
– CONTINUED –
Page 359 of 436

11-22Maintenance and service
&Recommended grade and viscosity
Each oil manufacturer has its own base
oils and additives. Never use different
brands together. For details, refer to“ Manual transmission, front differential
and rear differential gear oil ”F 12-8. Rear differential gear oil
There is no rear differential gear oil level
gauge. To check the rear differential gear
oil level, consult your SUBARU dealer forinspection. &
Recommended grade and viscosity
Each oil manufacturer has its own base
oils and additives. Never use different
brands together. For details, refer to“ Manual transmission, front differential
and rear differential gear oil ”F 12-8. Power steering fluid &
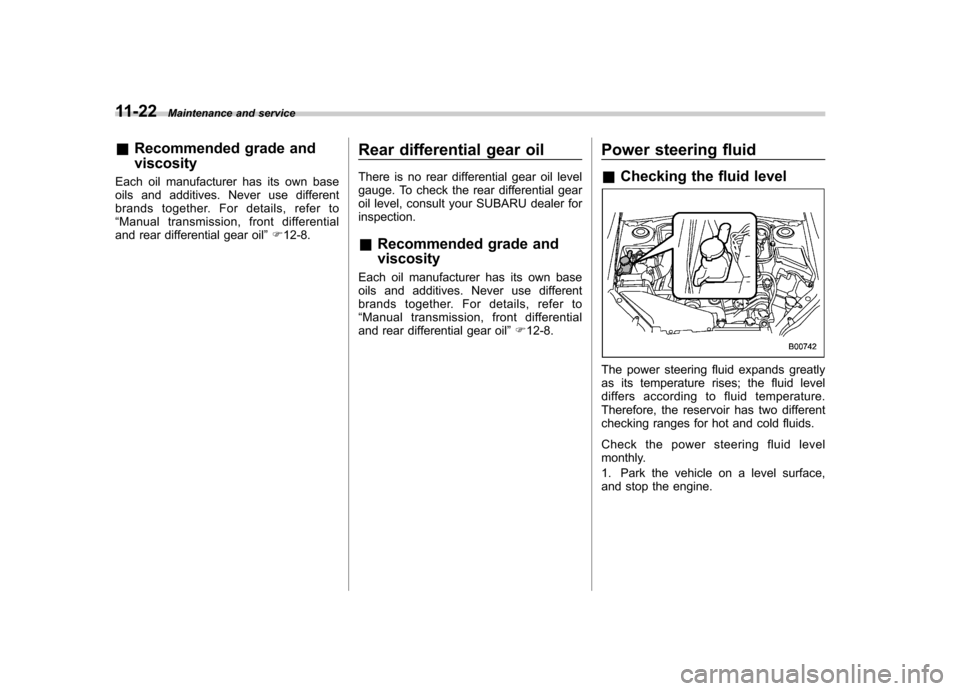
Checking the fluid level
The power steering fluid expands greatly
as its temperature rises; the fluid level
differs according to fluid temperature.
Therefore, the reservoir has two different
checking ranges for hot and cold fluids.
Check the power steering fluid level
monthly.
1. Park the vehicle on a level surface,
and stop the engine.
Page 360 of 436

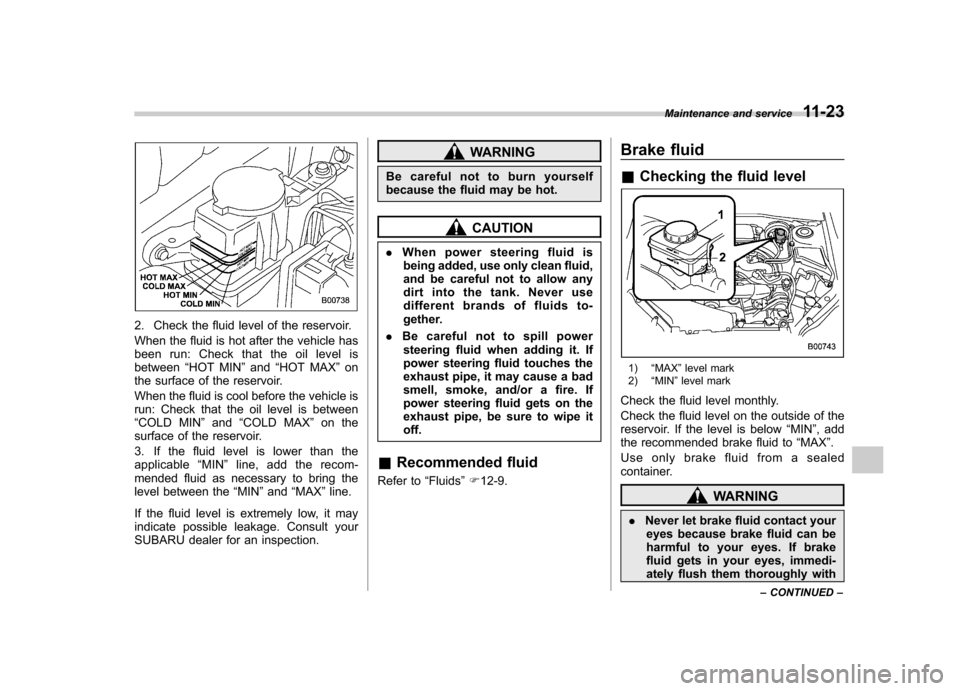
2. Check the fluid level of the reservoir.
When the fluid is hot after the vehicle has
been run: Check that the oil level isbetween“HOT MIN ”and “HOT MAX ”on
the surface of the reservoir.
When the fluid is cool before the vehicle is
run: Check that the oil level is between“ COLD MIN ”and “COLD MAX ”on the
surface of the reservoir.
3. If the fluid level is lower than the
applicable “MIN ”line, add the recom-
mended fluid as necessary to bring the
level between the “MIN ”and “MAX ”line.
If the fluid level is extremely low, it may
indicate possible leakage. Consult your
SUBARU dealer for an inspection.
WARNING
Be careful not to burn yourself
because the fluid may be hot.
CAUTION
. When power steering fluid is
being added, use only clean fluid,
and be careful not to allow any
dirt into the tank. Never use
different brands of fluids to-
gether.
. Be careful not to spill power
steering fluid when adding it. If
power steering fluid touches the
exhaust pipe, it may cause a bad
smell, smoke, and/or a fire. If
power steering fluid gets on the
exhaust pipe, be sure to wipe itoff.
& Recommended fluid
Refer to “Fluids ”F 12-9. Brake fluid &
Checking the fluid level
1) “MAX ”level mark
2) “MIN ”level mark
Check the fluid level monthly.
Check the fluid level on the outside of the
reservoir. If the level is below “MIN ”, add
the recommended brake fluid to “MAX ”.
Use only brake fluid from a sealed
container.
WARNING
. Never let brake fluid contact your
eyes because brake fluid can be
harmful to your eyes. If brake
fluid gets in your eyes, immedi-
ately flush them thoroughly with Maintenance and service
11-23
– CONTINUED –