Page 339 of 436

Maintenance and serviceTires and wheels .............................................. 11-29
Types of tires ................................................... 11-29
Tire pressure monitoring system (TPMS) (U.S.-spec. models) ........................................ 11-29
Tire inspection ................................................. 11-31
Tire pressures and wear ................................... 11-31
Wheel balance .................................................. 11-33
Wear indicators ................................................ 11-34
Tire rotation direction mark .............................. 11-34
Tire rotation ..................................................... 11-35
Tire replacement .............................................. 11-35
Wheel replacement ........................................... 11-36
Wheel covers (if equipped) ............................... 11-36
Aluminum wheels ............................................. 11-37
Windshield washer fluid .................................. 11-37 Replacement of wiper blades
......................... 11-39
Windshield wiper blade assembly.. ................... 11-39
Windshield wiper blade rubber ......................... 11-40
Rear window wiper blade assembly .................. 11-41
Rear window wiper blade rubber ... ................... 11-41
Battery .............................................................. 11-43
Fuses ................................................................ 11-44
Installation of accessories .............................. 11-45
Replacing bulbs ............................................... 11-45
Headlights (models with HID headlights) ........... 11-45
Headlights (models without HID headlights) ...... 11-46
Parking light .................................................... 11-48
Front turn signal light ...................................... 11-48
Rear combination lights ................................... 11-48
License plate light ........................................... 11-49
Dome light, map light, cargo area light and door step light ............................................... 11-50
Other lights on the vehicle ............................... 11-51
Page 351 of 436

11-14Maintenance and service
shortened to that of the mixing coolant.
. Do not splash the engine coolant
over painted parts. The alcohol
contained in the engine coolant
may damage the paint surface.
& Cooling fan, hose and con- nections
Your vehicle employs an electric cooling
fan which is thermostatically controlled to
operate when the engine coolant reaches
a specific temperature.
If the radiator cooling fan does not operate
even when the following conditions occur,
the cooling fan circuit may be defective. . The engine coolant temperature gauge
exceeds the normal operating range (if
equipped). Refer to “Temperature gauge
(models with type A combination meter) ”
F 3-11.
. The coolant temperature high warning
light blinks or illuminates in RED(if
equipped). Refer to “Coolant temperature
low indicator light/Coolant temperature
high warning light ”F 3-16.
Check the fuse and replace it if necessary.
If the fuse is not blown, have the cooling
system checked by your SUBARU dealer. Refer to
“Fuses ”F 11-44 and “Fuse panel
located in the engine compartment ”F 12-
13.
If frequent addition of coolant is neces-
sary, there may be a leak in the engine
cooling system. It is recommended that
the cooling system and connections be
checked for leaks, damage, or looseness.
& Engine coolant
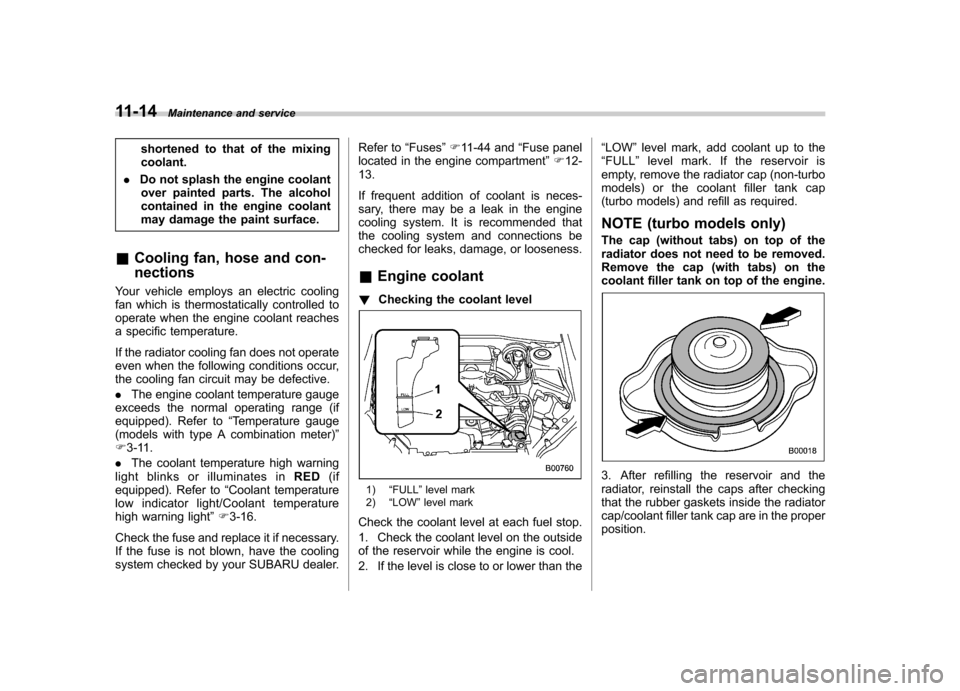
! Checking the coolant level
1) “FULL ”level mark
2) “LOW ”level mark
Check the coolant level at each fuel stop.
1. Check the coolant level on the outside
of the reservoir while the engine is cool.
2. If the level is close to or lower than the “
LOW ”level mark, add coolant up to the
“ FULL ”level mark. If the reservoir is
empty, remove the radiator cap (non-turbo
models) or the coolant filler tank cap
(turbo models) and refill as required.
NOTE (turbo models only)
The cap (without tabs) on top of the
radiator does not need to be removed.
Remove the cap (with tabs) on the
coolant filler tank on top of the engine.
3. After refilling the reservoir and the
radiator, reinstall the caps after checking
that the rubber gaskets inside the radiator
cap/coolant filler tank cap are in the properposition.
Page 365 of 436

11-28Maintenance and service
Replacement of brake pad
and lining
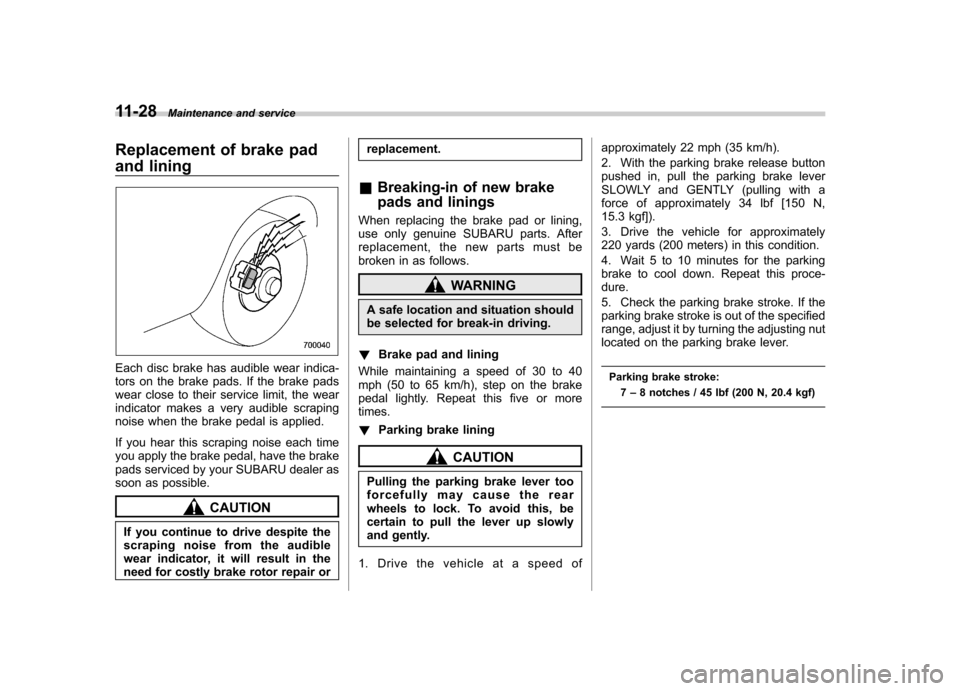
Each disc brake has audible wear indica-
tors on the brake pads. If the brake pads
wear close to their service limit, the wear
indicator makes a very audible scraping
noise when the brake pedal is applied.
If you hear this scraping noise each time
you apply the brake pedal, have the brake
pads serviced by your SUBARU dealer as
soon as possible.
CAUTION
If you continue to drive despite the
scraping noise from the audible
wear indicator, it will result in the
need for costly brake rotor repair or replacement.
& Breaking-in of new brake
pads and linings
When replacing the brake pad or lining,
use only genuine SUBARU parts. After
replacement, the new parts must be
broken in as follows.
WARNING
A safe location and situation should
be selected for break-in driving.
! Brake pad and lining
While maintaining a speed of 30 to 40
mph (50 to 65 km/h), step on the brake
pedal lightly. Repeat this five or moretimes. ! Parking brake lining
CAUTION
Pulling the parking brake lever too
forcefully may cause the rear
wheels to lock. To avoid this, be
certain to pull the lever up slowly
and gently.
1. Drive the vehicle at a speed of approximately 22 mph (35 km/h).
2. With the parking brake release button
pushed in, pull the parking brake lever
SLOWLY and GENTLY (pulling with a
force of approximately 34 lbf [150 N,
15.3 kgf]).
3. Drive the vehicle for approximately
220 yards (200 meters) in this condition.
4. Wait 5 to 10 minutes for the parking
brake to cool down. Repeat this proce-dure.
5. Check the parking brake stroke. If the
parking brake stroke is out of the specified
range, adjust it by turning the adjusting nut
located on the parking brake lever.
Parking brake stroke: 7–8 notches / 45 lbf (200 N, 20.4 kgf)
Page 371 of 436

11-34Maintenance and service
NOTE
The suspension system is designed to
hold each wheel at a certain alignment
(relative to the other wheels and to the
road) for optimum straight-line stability
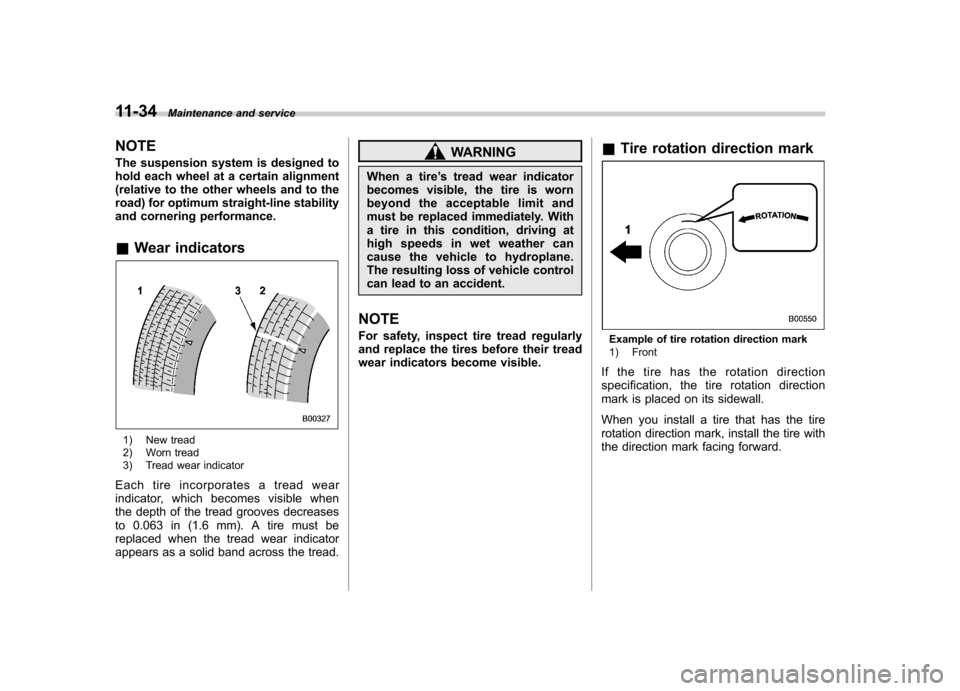
and cornering performance. &Wear indicators
1) New tread
2) Worn tread
3) Tread wear indicator
Each tire incorporates a tread wear
indicator, which becomes visible when
the depth of the tread grooves decreases
to 0.063 in (1.6 mm). A tire must be
replaced when the tread wear indicator
appears as a solid band across the tread.
WARNING
When a tire ’s tread wear indicator
becomes visible, the tire is worn
beyond the acceptable limit and
must be replaced immediately. With
a tire in this condition, driving at
high speeds in wet weather can
cause the vehicle to hydroplane.
The resulting loss of vehicle control
can lead to an accident.
NOTE
For safety, inspect tire tread regularly
and replace the tires before their tread
wear indicators become visible. &
Tire rotation direction mark
Example of tire rotation direction mark
1) Front
If the tire has the rotation direction
specification, the tire rotation direction
mark is placed on its sidewall.
When you install a tire that has the tire
rotation direction mark, install the tire with
the direction mark facing forward.