Page 203 of 484

203
2-3. Operating the lights and windshield wipers
2
When driving
■Daytime running light system
●Vehicles with an automatic transmission: To make your vehicle more visi-
ble to other drivers, the daytime running lights turn on automatically
whenever the engine is started, the select lever is shifted out of P and the
parking brake is released. Daytime running lights are not designed for
use at night.
●Vehicles with a manual transmission: To make your vehicle more visible
to other drivers, the daytime running lights turn on automatically when-
ever the engine is started and the parking brake is released. Daytime
running lights are not designed for use at night.
●Compared to turning on the headlights, the daytime running light system
offers greater durability and consumes less electricity, so it can help
improve fuel economy.
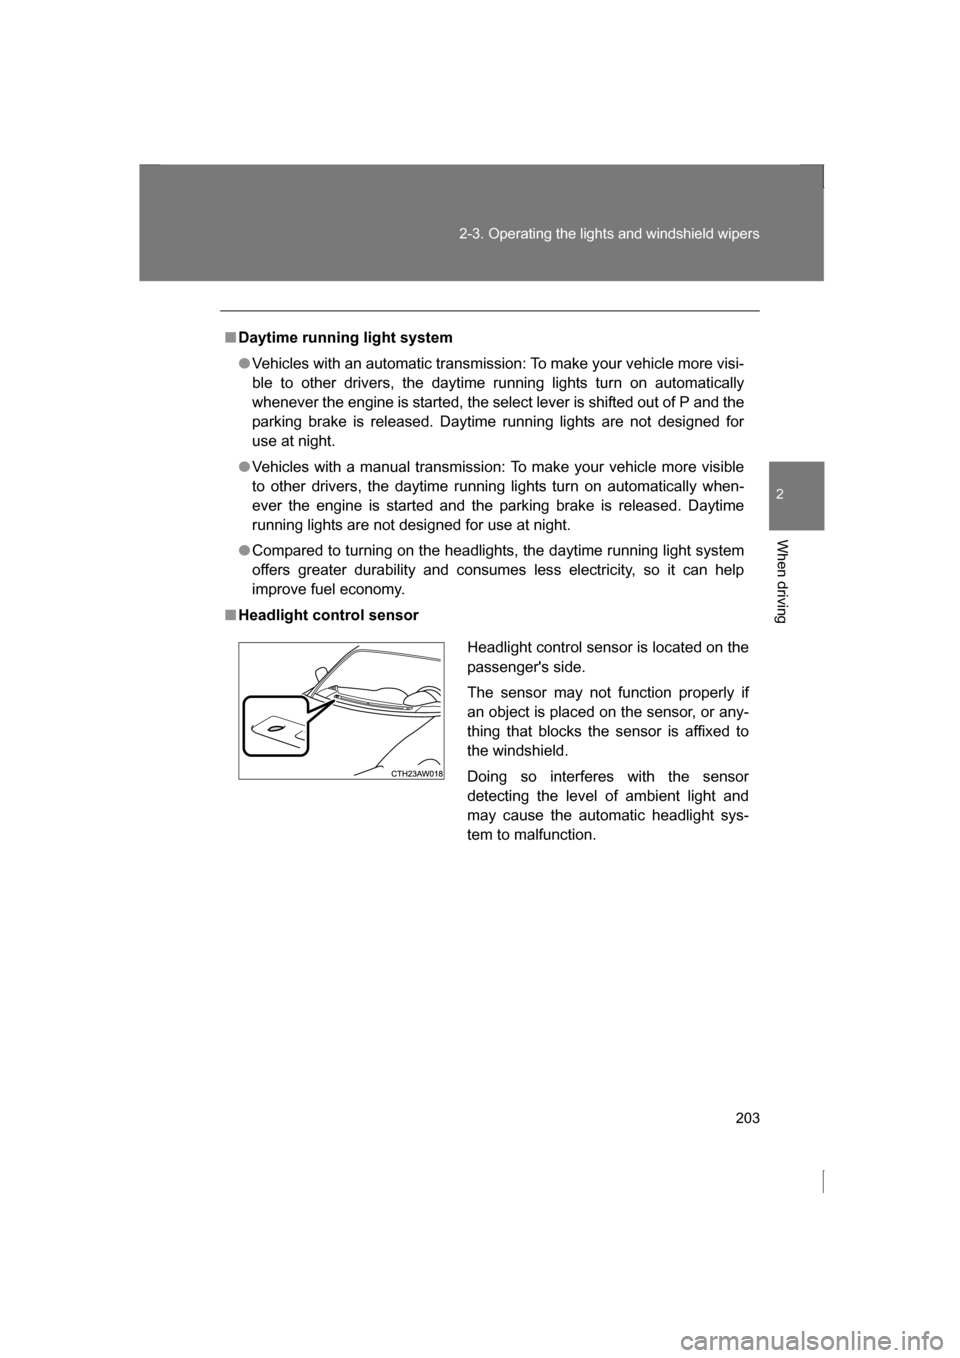
■Headlight control sensorHeadlight control sensor is located on the
passenger's side.
The sensor may not function properly if
an object is placed on the sensor, or any-
thing that blocks the sensor is affixed to
the windshield.
Doing so interferes with the sensor
detecting the level of ambient light and
may cause the automatic headlight sys-
tem to malfunction.
Page 212 of 484
212
2-4. Using other driving systems
■Cruise control can be set when
Vehicles with an automatic transmission
●The select lever is in D or M and the vehicle is in the 2nd
gear or higher.
●Vehicle speed is above approximately 25 mph (40 km/h).
Vehicles with a manual transmission
●The vehicle is in the 2 nd
gear or higher.
●Vehicle speed is above approximately 25 mph (40 km/h).
■Canceling and resuming the constant speed control
Pulling the lever toward you
cancels the constant speed
control.
The speed setting is also can-
celed when:
Page 214 of 484

214
2-4. Using other driving systems
WARNING
■Cruise control precaution (vehicles with an automatic transmission)
You can cancel the cruise control by shifting the select lever into the N posi-
tion. However, do not shift the lever into the N position while driving except in
case of emergency. If the select lever is shifted into the N position, the
engine brake will no longer work. This could result in an accident.
■To avoid operating the cruise control by mistake
Switch the cruise control off using the “ON-OFF” button when not in use.
■Situations unsuitable for cruise control
Do not use cruise control in any of the following situations.
Doing so may result in loss of control and could cause an accident resulting
in death or serious injury.
●In heavy traffic
●On roads with sharp bends
●On winding roads
●On slippery roads, such as those covered with rain, ice or snow
●On steep hills
Vehicle speed may exceed the set speed when driving down a steep hill.
●During emergency towing
Page 227 of 484

227
2-5. Driving information
2
When driving
●If a door is opened and closed when its side window is frozen,
the window safety device will operate and the side window
open/close function linked to door operation may not operate
correctly. If this occurs, perform the following after the ice has
melted.
Open the side window until it is approximately halfway open
with the door closed.
Fully close the window by pulling the switch up to the one-
touch closing position and continue holding the switch for 1
second or more after the window fully closes.
The window position is reset and the safety device operations will
be released.
■When driving the vehicle
Accelerate the vehicle slowly, keep a safe distance between you
and the vehicle ahead, and drive at a reduced speed suitable to
road conditions.
■When parking the vehicle (in the winter time or in the cold
latitudes)
Park the vehicle and move the select lever to P (automatic trans-
mission) or shift lever to 1 or R (manual transmission) without
setting the parking brake. The parking brake may freeze up, pre-
venting it from being released. If necessary, block the wheels to
prevent inadvertent sliding or creeping.
STEP 1
STEP 2
Page 269 of 484

269
3-5. Other interior features
3
Interior features
WARNING
Observe the following precautions.
Failure to do so may cause the driver's floor mat to slip, possibly interfering
with the pedals while driving. An unexpectedly high speed may result or it may
become difficult to stop the vehicle, leading to a serious accident.
■When installing the driver's floor mat
●Do not use floor mats designed for ot her models or different model year
vehicles, even if they are SUBARU Genuine floor mats.
●Only use floor mats designed for the driver's seat.
●Always install the floor mat securely using the retaining hooks (clips) pro-
vided.
●Do not use two or more floor mats on top of each other.
●Do not place the floor mat bottom-side up or upside-down.
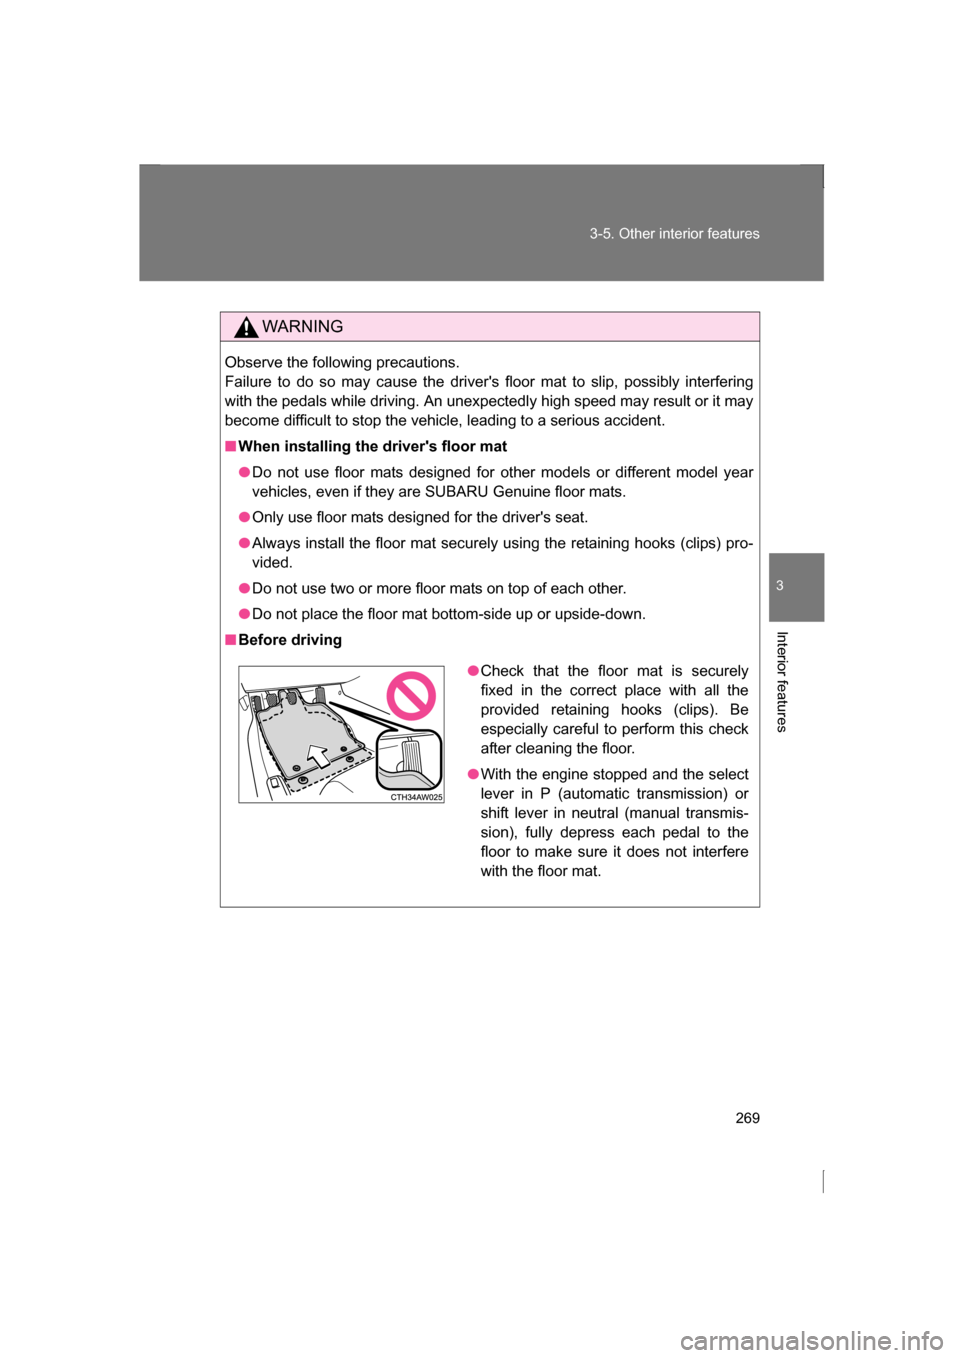
■Before driving
●Check that the floor mat is securely
fixed in the correct place with all the
provided retaining hooks (clips). Be
especially careful to perform this check
after cleaning the floor.
●With the engine stopped and the select
lever in P (automatic transmission) or
shift lever in neutral (manual transmis-
sion), fully depress each pedal to the
floor to make sure it does not interfere
with the floor mat.
Page 333 of 484

333
4-3. Do-it-yourself maintenance
4
Maintenance and care
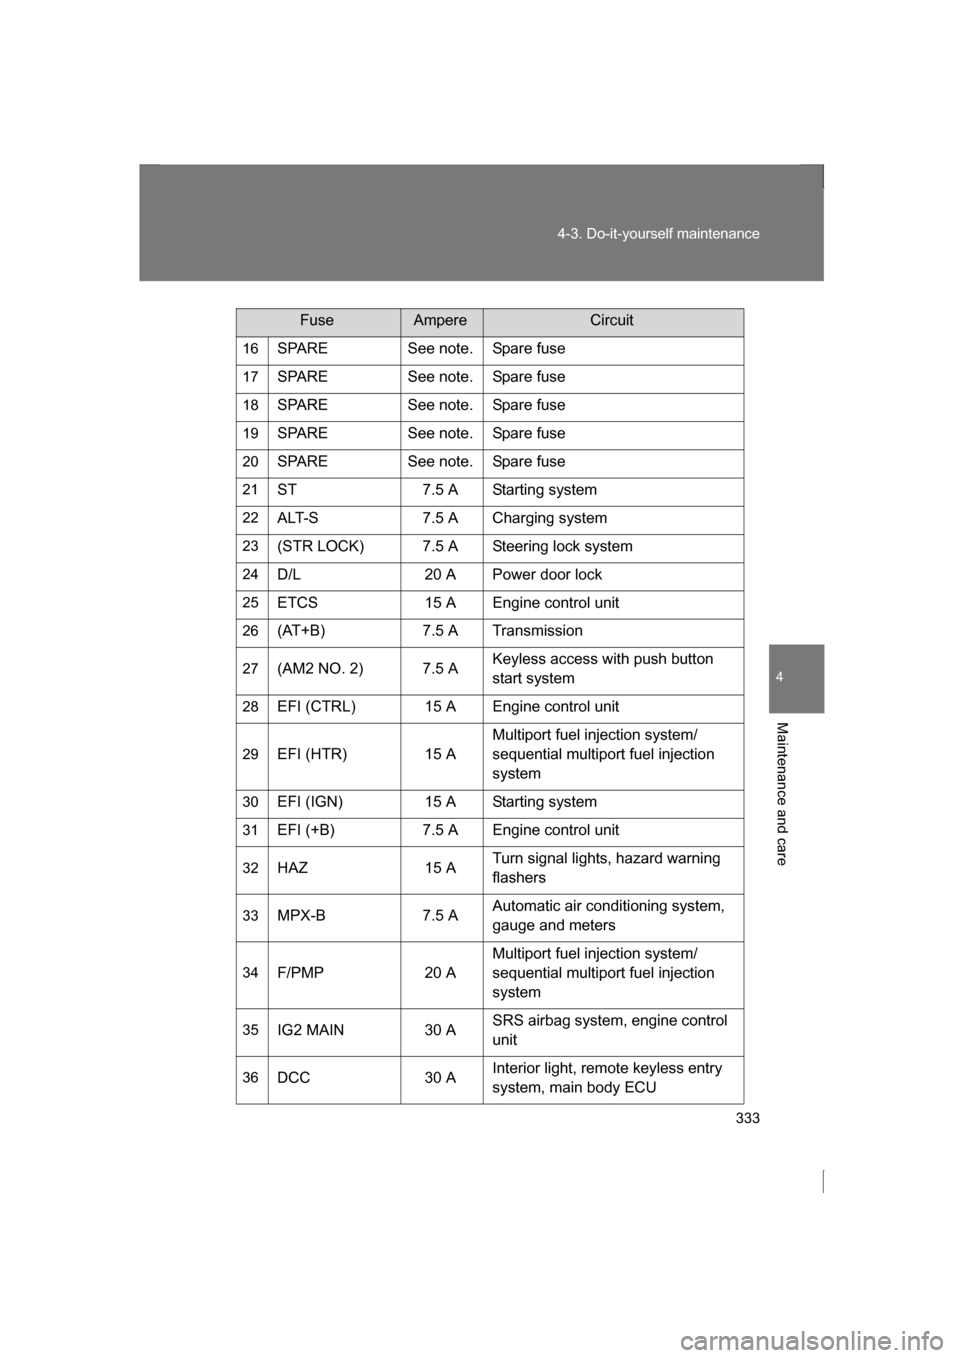
16SPARE See note. Spare fuse
17 SPARE See note. Spare fuse
18 SPARE See note. Spare fuse
19 SPARE See note. Spare fuse
20 SPARE See note. Spare fuse
21 ST 7.5 A Starting system
22 ALT-S 7.5 A Charging system
23 (STR LOCK) 7.5 A Steering lock system
24 D/L 20 A Power door lock
25 ETCS 15 A Engine control unit
26 (AT+B) 7.5 A Transmission
27 (AM2 NO. 2) 7.5 A Keyless access with push button
start system
28 EFI (CTRL) 15 A Engine control unit
29 EFI (HTR) 15 A Multiport fuel injection system/
sequential multiport fuel injection
system
30 EFI (IGN) 15 A Starting system
31 EFI (+B) 7.5 A Engine control unit
32 HAZ 15 A Turn signal lights, hazard warning
flashers
33 MPX-B 7.5 A Automatic air condi
tioning system,
gauge and meters
34 F/PMP 20 A Multiport fuel injection system/
sequential multiport fuel injection
system
35 IG2 MAIN 30 A SRS airbag system, engine control unit
36 DCC 30 A Interior light, remote keyless entry
system, main body ECU
FuseAmpereCircuit
Page 355 of 484

5
When trouble arises
355
5-1. Essential information
If your vehicle needs to be towed
Emergency towingIf a tow truck is not available in an emergency, your vehicle may be
temporarily towed using a cable or chain secured to the emergency
towing eyelet to move the vehicle to a safe location or to free a stuck
vehicle from sand or snow. This should only be attempted on hard
surfaced roads for short distances at low speeds.
A driver must be in the vehicle to steer and operate the brakes. The
vehicle's wheels, drive train, axles, steering and brakes must be in
good condition.
For vehicles with an automatic transmission, only the front towing
eyelet may be used. Towing eyelet
If towing is necessary, we recommend having your vehicle towed by
your SUBARU dealer or a commercial towing service, using a flat
bed truck.
The vehicle must be secured properly with safety chains. Each
safety chain should be equally tightened and care must be taken not
to pull the chains so tightly that the suspension bottoms out.
Page 356 of 484
356
5-1. Essential information
■Before emergency towingRelease the parking brake.
Shift the select lever to N (vehicles with an automatic transmission)
or shift lever to neutral (vehicles with a manual transmission).
Vehicles without a keyless access with push button start system:
Turn the engine switch to the “A CC” (engine off) or “ON” (engine
running) position.
Vehicles with a keyless access with push button start system: Turn
the push-button ignition switch to “ACC” (engine off) or “ON”
(engine running) mode.
WARNING
■Caution while towing
●Use extreme caution when towing the vehicle.
Avoid sudden starts or erratic driving maneuvers which place excessive
stress on the emergency towing eyelets and the cables or chains. Always
be cautious of the surroundings and other vehicles while towing.
●If the engine is not running, the power assist for the brakes and steering
will not function, making steering and braking more difficult.
STEP 1
STEP 2
STEP 3