2013 SMART FORTWO COUPE ELECTRIC DRIVE battery
[x] Cancel search: batteryPage 26 of 218
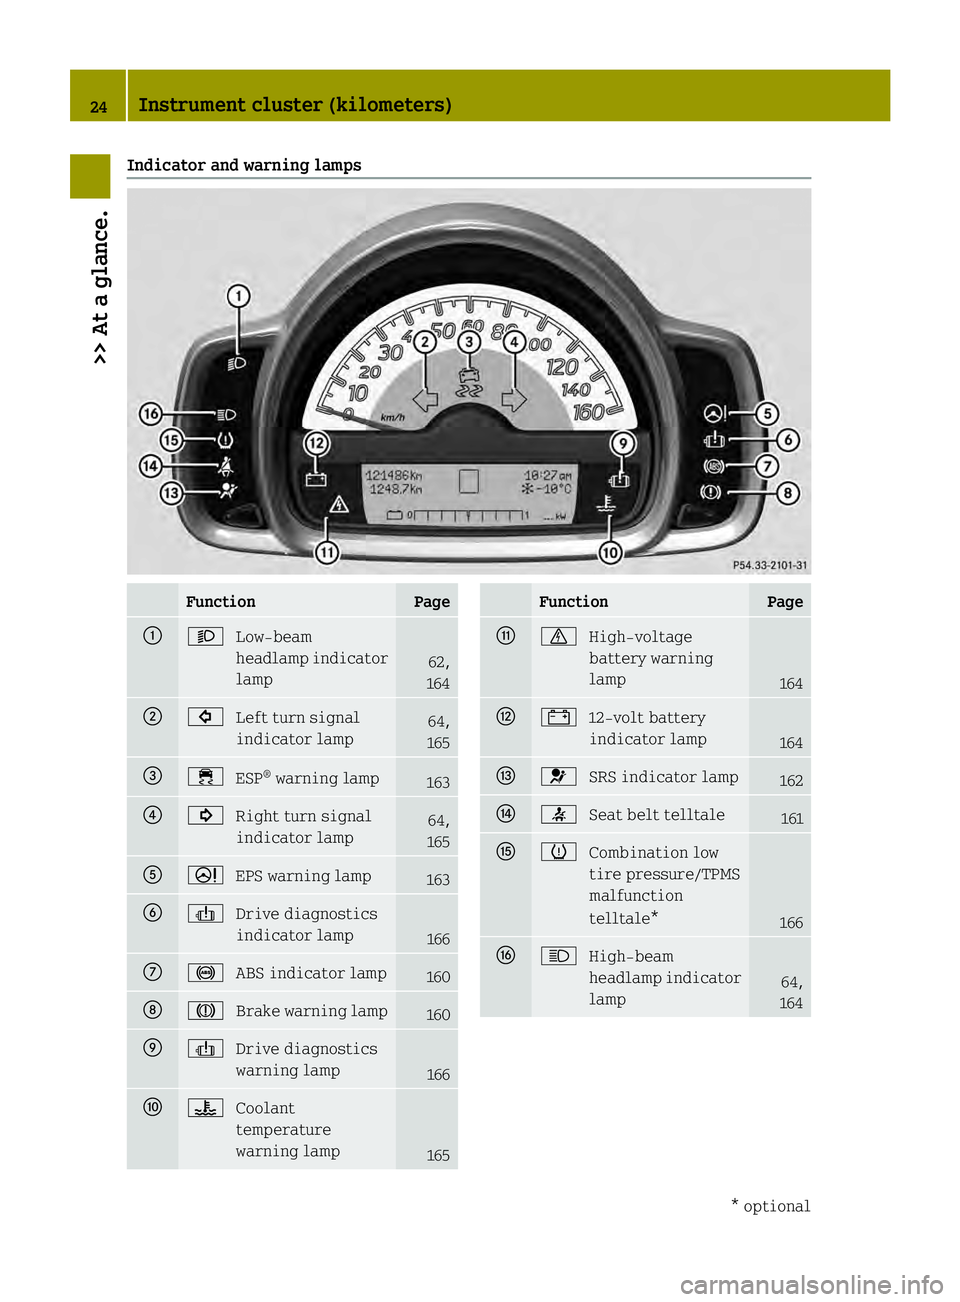
Indicator and warning lamps
Function Page
0002
0003
Low‑beam
headlamp indicator
lamp 62,
164 0003
0003
Left turn signal
indicator lamp 64,
165 002B
0004
ESP®
warning lamp 163
002A
0002
Right turn signal
indicator lamp 64,
165 0028
0002
EPS warning lamp 163
0029
0001
Drive diagnostics
indicator lamp 166
0018
0008
ABS indicator lamp 160
0019
0001
Brake warning lamp 160
001A
0001
Drive diagnostics
warning lamp 166
001B
0005
Coolant
temperature
warning lamp 165 Function Page
001D
0002
High-voltage
battery warning
lamp 164
001E
0004
12-volt battery
indicator lamp 164
0020
000A
SRS indicator lamp 162
0021
000B
Seat belt telltale 161
0022
0008
Combination low
tire pressure/TPMS
malfunction
telltale* 166
0023
0001
High‑beam
headlamp indicator
lamp 64,
164 24
Instrument cluster (kilometers)>> At a glance.
* optional
Page 46 of 218
2. this device must accept any
interference received, including
interference that may cause undesired
operation.
Any unauthorized modification to this
device could void the user’s authority to
operate the equipment.
The product label with FCC ID and IC
certification number can be foun
dinthe
battery case.
i Canada only:
This device complies with RSS‑210 of
Industr yCanada. Operation is subject to
the following two conditions:
1. This device may not cause
interference, and
2. this device must accept any
interference received, including
interference that may cause undesired
operation of the device.
Any unauthorized modification to this
device could void the user’s authority to
operate the equipment.
The product label with FCC ID and IC
certification number can be found in the
battery case. Driving safety systems
Introduction
G
WARNING
The following factors increase the risk of
accidents:
R Excessive speed, especially in turns
R Wet and slippery road surfaces
R Following another vehicle too closely
The driving safety systems described in
this section cannot reduce these risks or
prevent the natural laws of physics from
acting on the vehicle.
Always adapt your driving style to the
prevailing road and weather and traffic conditions and keep a safe distance to
other road users and objects on the street.
i In winter operation, the maximum
effectiveness of the ABS, the hydraulic
brake assistant, and the ESP ®
is only
achieved with winter tires (Y page 140)
or snow chains* as required. Antilock Brake System (ABS)
G
WARNING
Do not pump the brake pedal. Use firm,
steady brake pedal pressure instead.
Pumping the brake pedal defeats the
purpose of the ABS and significantly
reduces braking effectiveness.
The Antilock BrakeSystem (ABS) regulates
the brake pressure so that the wheels do not
lock during braking. This allows you to
maintain the ability to steer your vehicle.
On slippery road surfaces, the ABS will
respond even to light brake pressure.
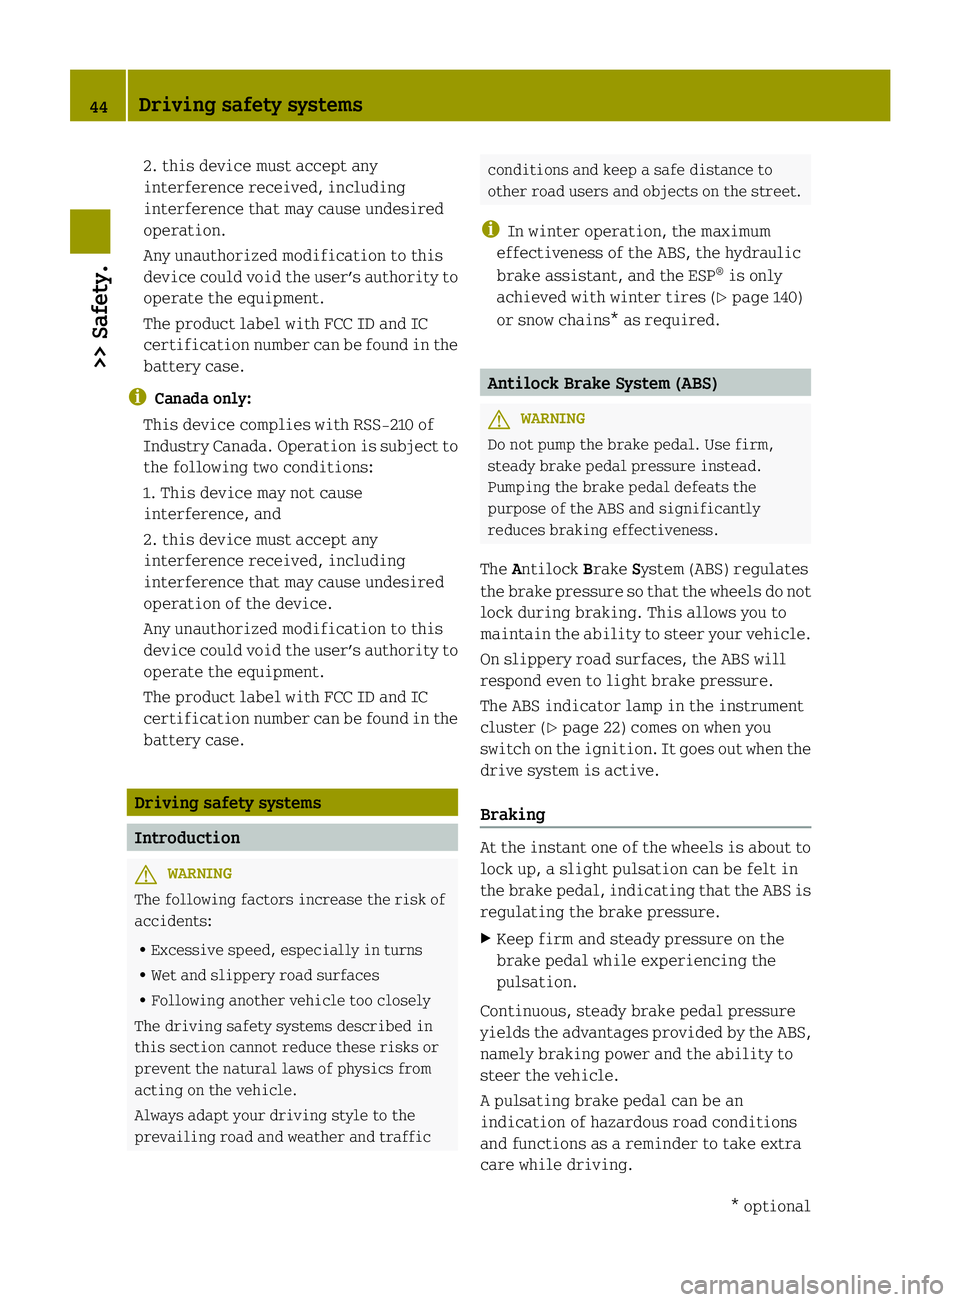
The ABS indicator lamp in the instrument
cluster (Y page 22) comes on when you
switch on the ignition. It goes out when the
drive system is active.
Braking At the instant one of the wheels is about to
lock up, a slight pulsation can be felt in
the brake pedal, indicating that the ABS is
regulating the brake pressure.
X
Keep firm and steady pressure on the
brake pedal while experiencing the
pulsation.
Continuous, steady brake pedal pressure
yields the advantages provided by the ABS,
namely braking power and the ability to
steer the vehicle.
A pulsating brake pedal can be an
indication of hazardous road conditions
and functions as a reminder to take extra
care while driving. 44
Driving safety systems>> Safety.
* optional
Page 52 of 218
Opening and closing
Key
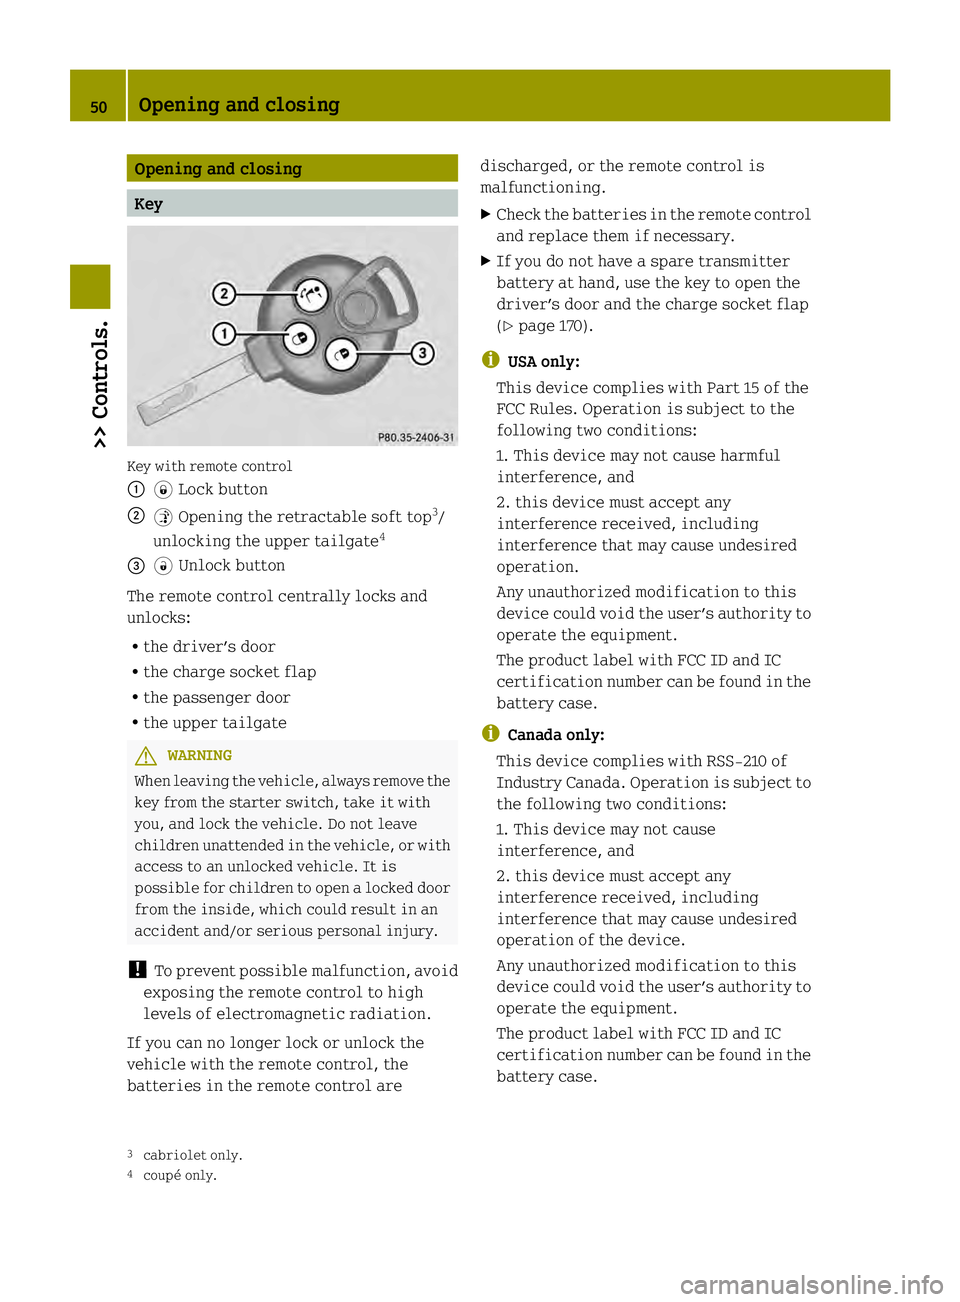
Key with remote control
0002
0004Lock button
0003 0005Opening the retractable soft top 3
/
unlocking the upper tailgate 4
002B 0006Unlock button
The remote control centrally locks and
unlocks:
R the driver’s door
R the charge socket flap
R the passenger door
R the upper tailgate G
WARNING
When leaving the vehicle, always remove the
key from the starter switch, take it with
you, and lock the vehicle. Do not leave
children unattended in the vehicle, or with
access to an unlocked vehicle. It is
possible for children to open a locked door
from the inside, which could result in an
accident and/or serious personal injury.
! To prevent possible malfunction, avoid
exposing the remote control to high
levels of electromagnetic radiation.
If you can no longer lock or unlock the
vehicle with the remote control, the
batteries in the remote control are discharged, or the remote control is
malfunctioning.
X
Check the batteries in the remote control
and replace them if necessary.
X If you do not have a spare transmitter
battery at hand, use the key to open the
driver’s door and the charge socket flap
(Y page 170).
i USA only:
This device complies with Part 15 of the
FCC Rules. Operation is subject to the
following two conditions:
1. This device may not cause harmful
interference, and
2. this device must accept any
interference received, including
interference that may cause undesired
operation.
Any unauthorized modification to this
device could void the user’s authority to
operate the equipment.
The product label with FCC ID and IC
certification number can be found in the
battery case.
i Canada only:
This device complies with RSS‑210 of
Industry Canada. Operation is subject to
the following two conditions:
1. This device may not cause
interference, and
2. this device must accept any
interference received, including
interference that may cause undesired
operation of the device.
Any unauthorized modification to this
device could void the user’s authority to
operate the equipment.
The product label with FCC ID and IC
certification number can be found in the
battery case.
3 cabriolet only.
4 coupé only. 50
Opening and closing>> Controls.
Page 60 of 218
X
Hold the backrest with one hand back.
X Pull adjustment lever 0003upwards and
unlock the seat backrest.
X Fold the seat backrest forward.
Folding back X
Pull adjustment lever 0003upwards and
unlock the seat backrest.
X Fold the seat backrest backward.
When you hear an audible click, the seat
backrest is again fixed into place.
X Check for proper engagement before
driving.
X Place the seat belt back in seat belt
guide 0002. G
WARNING
When folding the passenger seat backrest
back to its upright position, please make
sure
R nobody becomes trapped
R no obstacles are jammed in the lock
R the adjustment lever has audibly locked
into position
A properly engaged passenger seat
backrest will help to prevent stored
objects in the cargo compartment from
being thrown about and injuring vehicle
occupants during
R braking
R vehicle maneuvers
R an accident Seat heating*
The seat heating allows you to heat the
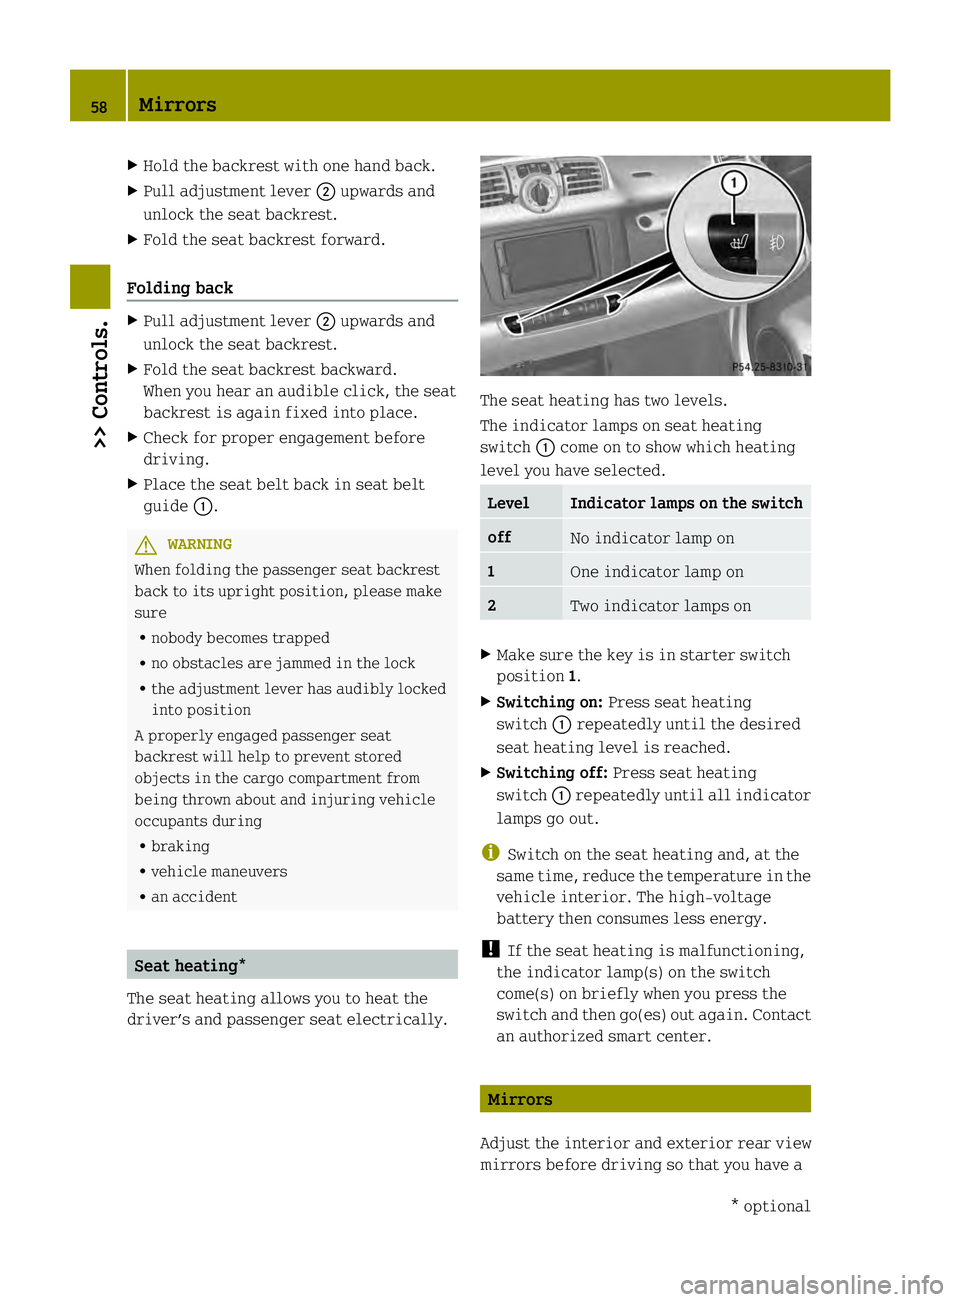
driver’s and passenger seat electrically. The seat heating has two levels.
The indicator lamps on seat heating
switch
0002come on to show which heating
level you have selected. Level Indicator lamps on the switch
off
No indicator lamp on
1
One indicator lamp on
2
Two indicator lamps on
X
Make sure the key is in starter switch
position 1.
X Switching on: Press seat heating
switch 0002repeatedly until the desired
seat heating level is reached.
X Switching off: Press seat heating
switch 0002repeatedly until all indicator
lamps go out.
i Switch on the seat heating and, at the
sam etime, reduce the temperature in the
vehicle interior. The high‑voltage
battery then consumes less energy.
! If the seat heating is malfunctioning,
the indicator lamp(s) on the switch
come(s) on briefly when you press the
switch and then go(es) out again. Contact
an authorized smart center. Mirrors
Adjust the interior and exterior rear view
mirrors before driving so that you have a 58
Mirrors>> Controls.
* optional
Page 68 of 218

X
Make sure the parking lamps or the
low‑beam headlamps are switched on.
X Switching on: Press switch0002.
The front fog lamps come on.
The indicator lamp in the switch comes
on.
X Switching off: Press switch0002once
more.
The front fog lamps go out.
The indicator lamp in the switch goes
out. Hazard warning flasher
The hazard warning flasher can be switched
on at all times, even with the key removed
from the starter switch. X
Switching on: Press hazard warning
flasher switch 0002.
All turn signal lamps are flashing.
X Switching off: Press hazard warning
flasher switch 0002once more. Interior lighting
The interior lamp comes on for a period of
time when you open the doors, or lock or
unlock the vehicle with the key.
It goes out
R immediately after switching off the
ignition with all doors closed
R after 30 seconds if the doors are not
opened R
after 15 seconds if all doors are closed
R after 10 minutes if at least one door is
open
The rocker switch can be set to three
different positions. 0002
Interior lamp
0003 Off
002B Switching on the automatic control
002A Continuous operation
Automatic control X
Set the rocker switch to position 002B.
The interior lamp comes on for a period
of time.
Switching off X
Set the rocker switch to position 0003.
The interior lamp is permanently
switched off.
Continuous operation X
Set the rocker switch to position 002A.
The interior lamp is permanently
switched on.
! When leaving the vehicle, make sure the
interior lamp is not set to continuous
operation and none of the doors is left
open for a long period of time.
Doing otherwise could result in a
discharged battery. 66
Lighting>> Controls.
Page 71 of 218
When loading, make sure no sharp objects
come into contact with the soft top or the
rear window.
Do not place any evenly distributed loads
with a weight of more than 165 lbs (75 kg)
on the rear soft top when folded down.
Make sure the high-mounted brake lamp
is not concealed.
! Do not block the soft top system’s
locking apertures.
Only place the side rails in the
designated storage space of the tailgate.
! Do not sit on the folded-down rear soft
top.
Do not fold down the rear soft top at
temperatures below 14¦ (-10¥).
Do not place any pointed, sharp-edged,
hot (above 176 ¦[80¥]), incandescent or
burning objects on the soft top’s lining.
Do not apply wax to the soft top fabric and
select only wax-free washing products
when using an automatic car wash.
Only drive with the retaining clips
closed, as exhaust fumes could otherwise
reach the vehicle’s interior.
! Please keep in mind that weather
conditions can sometimes change
rapidly. Make sure to close the
retractable soft top and the rear soft top
when leaving the vehicle. If water enters
the vehicle interior, vehicle
electronics could be damaged which is
not covered by the smart Limited
Warranty. Opening and closing the retractable
soft top
You can open and close the retractable soft
top when the vehicle is either stationary
or in motion. G
WARNING
Never operate the retractable soft top if
there is the possibility of anyone being
harmed by the opening or closing
procedure. G
WARNING
The retractable soft top is made out of
fabric. In the event of an accident, the
fabric may tear. This may result in an
opening in the roof.
In a vehicle rollover, occupants not
wearing their seat belts or not wearing
them properly may be thrown out of the
opening. Such an opening also presents a
potentia lfor injury for occupants wearing
their seat belts properly as entire body
parts or portions of them may protrude from
the passenger compartment. G
WARNING
When leaving the vehicle, always remove the
key from the starter switch, take it with
you, and lock the vehicle. Do not leave
children unattended in the vehicle, or with
access to an unlocked vehicle. A child’s
unsupervised access to a vehicle could
result in an accident and/or serious
personal injury.
! To avoid damaging the seals, do not
transport any objects with sharp edges
which can stick out of the retractable
soft top.
Do not open the retractable soft top if
there is snow or ice on the roof, as this
could result in malfunctions.
If you cannot open or close the
retractable soft top due to a malfunction
contact Roadside Assistance or an
authorized electric drive smart center.
i To avoid draining the battery, leave the
drive system running when opening and
closing the retractable soft top. Soft top system (cabriolet only)
69>> Controls. Z
Page 79 of 218
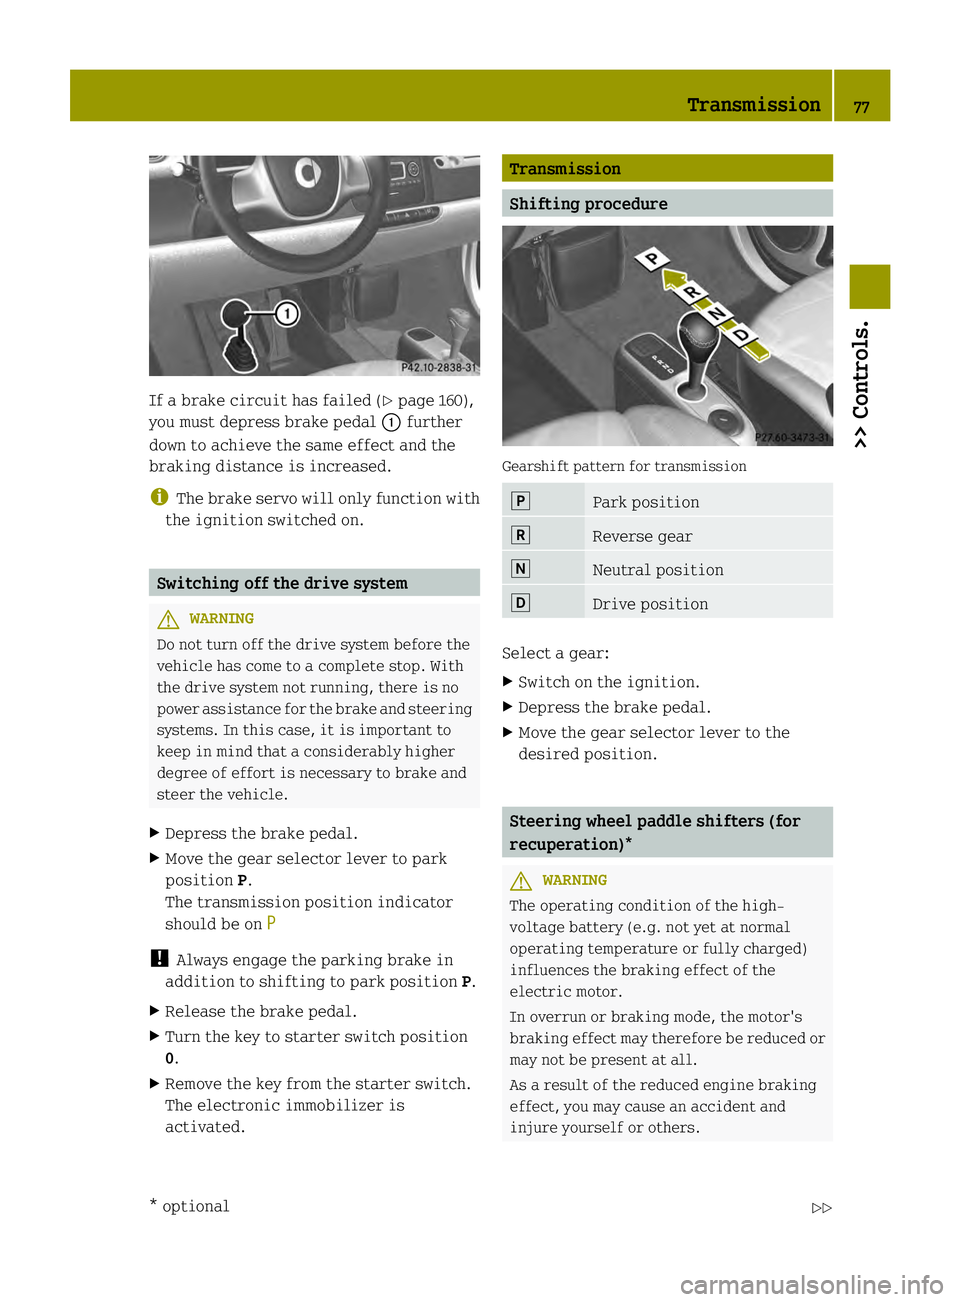
If a brake circuit has failed (Y
page 160),
you must depress brake pedal 0002further
down to achieve the same effect and the
braking distance is increased.
i The brake servo will only function with
the ignition switched on. Switching off the drive system
G
WARNING
Do not turn off the drive system before the
vehicle has come to a complete stop. With
the drive system not running, there is no
power assistance for the brake and steering
systems. In this case, it is important to
keep in mind that a considerably higher
degree of effort is necessary to brake and
steer the vehicle.
X Depress the brake pedal.
X Move the gear selector lever to park
position P.
The transmission position indicator
should be on P !
Always engage the parking brake in
addition to shifting to park position P.
X Release the brake pedal.
X Turn the key to starter switch position
0.
X Remove the key from the starter switch.
The electronic immobilizer is
activated. Transmission
Shifting procedure
Gearshift pattern for transmission
0010
Park position
0009
Reverse gear
000B
Neutral position
000F
Drive position
Select a gear:
X
Switch on the ignition.
X Depress the brake pedal.
X Move the gear selector lever to the
desired position. Steering wheel paddle shifters (for
recuperation)*
G
WARNING
The operating condition of the high-
voltage battery (e.g. not yet at normal
operating temperature or fully charged)
influences the braking effect of the
electric motor.
In overrun or braking mode, the motor's
braking effect may therefore be reduced or
may not be present at all.
As a result of the reduced engine braking
effect, you may cause an accident and
injure yourself or others. Transmission
77>> Controls.
* optional Z
Page 80 of 218
Compensate for the reduced engine braking
effect by pressing the brake pedal
accordingly, as required.
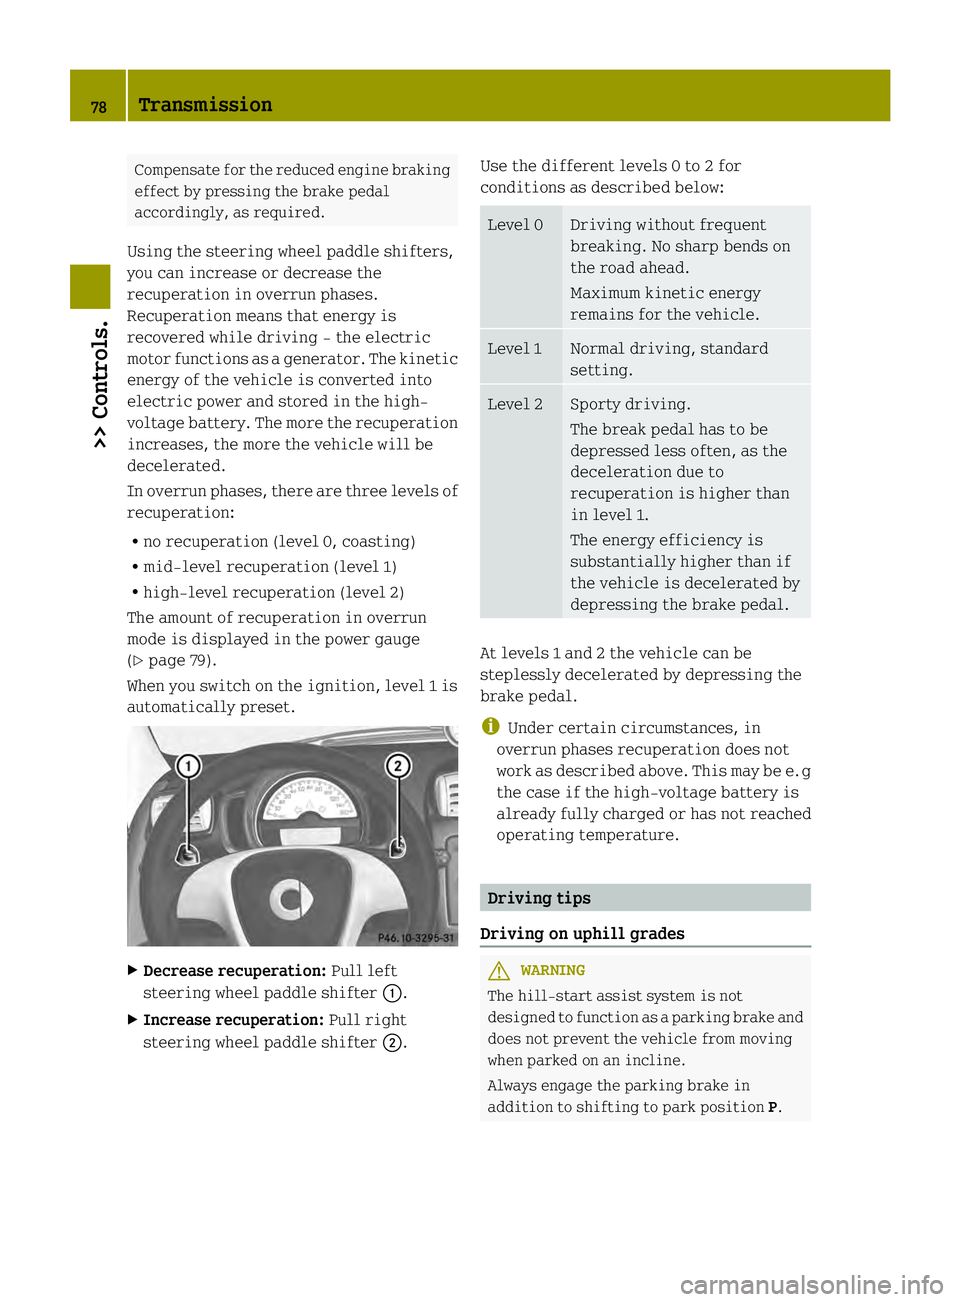
Using the steering wheel paddle shifters,
you can increase or decrease the
recuperation in overrun phases.
Recuperation means that energy is
recovered while driving - the electric
motor functions as a generator. The kinetic
energy of the vehicle is converted into
electric power and stored in the high-
voltage battery. The more the recuperation
increases, the more the vehicle will be
decelerated.
In overrun phases, there are three levels of
recuperation:
R no recuperation (level 0, coasting)
R mid-level recuperation (level 1)
R high-level recuperation (level 2)
The amount of recuperation in overrun
mode is displayed in the power gauge
(Y page 79).
When you switch on the ignition, level 1 is
automatically preset. X
Decrease recuperation: Pull left
steering wheel paddle shifter 0002.
X Increase recuperation: Pull right
steering wheel paddle shifter 0003.Use the different levels 0 to 2 for
conditions as described below: Level 0 Driving without frequent
breaking. No sharp bends on
the road ahead.
Maximum kinetic energy
remains for the vehicle.
Level 1 Normal driving, standard
setting.
Level 2 Sporty driving.
The break pedal has to be
depressed less often, as the
deceleration due to
recuperation is higher than
in level 1.
The energy efficiency is
substantially higher than if
the vehicle is decelerated by
depressing the brake pedal.
At levels
1and 2the vehicle can be
steplessly decelerated by depressing the
brake pedal.
i Under certain circumstances, in
overrun phases recuperation does not
work as described above. This may be e. g
the case if the high-voltage battery is
already fully charged or has not reached
operating temperature. Driving tips
Driving on uphill grades G
WARNING
The hill-start assist system is not
designed to function as a parking brake and
does not prevent the vehicle from moving
when parked on an incline.
Always engage the parking brake in
addition to shifting to park position P.78
Transmission>> Controls.