2013 SKODA OCTAVIA phone
[x] Cancel search: phonePage 17 of 90
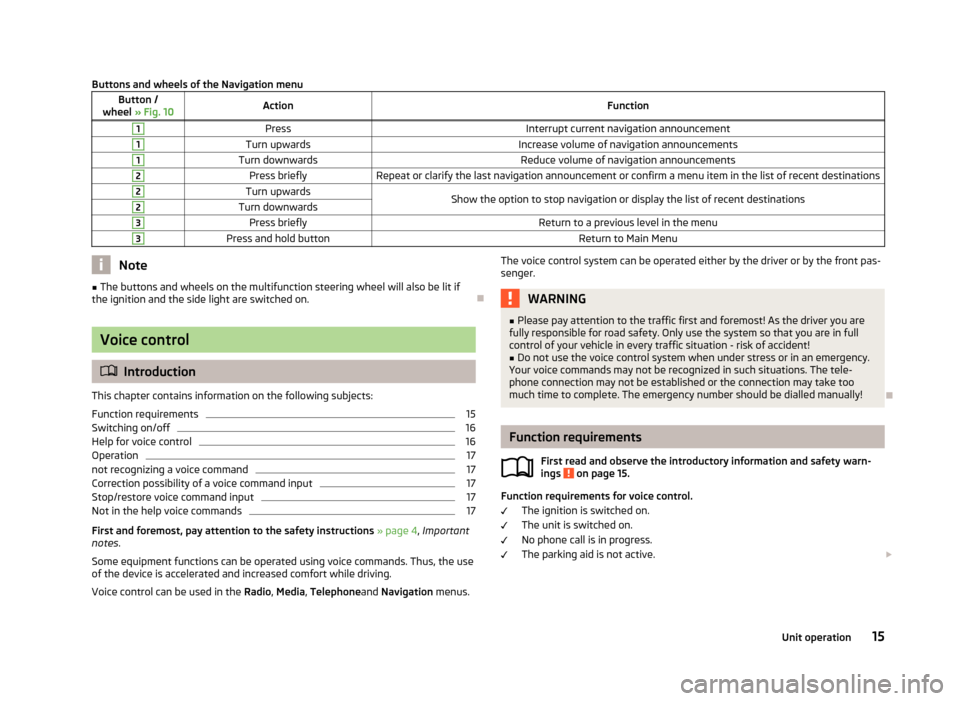
Buttons and wheels of the Navigation menuButton /
wheel » Fig. 10ActionFunction1PressInterrupt current navigation announcement1Turn upwardsIncrease volume of navigation announcements1Turn downwardsReduce volume of navigation announcements2Press brieflyRepeat or clarify the last navigation announcement or confirm a menu item in the list of recent destinations2Turn upwardsShow the option to stop navigation or display the list of recent destinations2Turn downwards3Press brieflyReturn to a previous level in the menu3Press and hold buttonReturn to Main MenuNote■
The buttons and wheels on the multifunction steering wheel will also be lit if
the ignition and the side light are switched on.
Voice control
Introduction
This chapter contains information on the following subjects:
Function requirements
15
Switching on/off
16
Help for voice control
16
Operation
17
not recognizing a voice command
17
Correction possibility of a voice command input
17
Stop/restore voice command input
17
Not in the help voice commands
17
First and foremost, pay attention to the safety instructions » page 4 , Important
notes .
Some equipment functions can be operated using voice commands. Thus, the use
of the device is accelerated and increased comfort while driving.
Voice control can be used in the Radio, Media , Telephone and Navigation menus.
The voice control system can be operated either by the driver or by the front pas-
senger.WARNING■ Please pay attention to the traffic first and foremost! As the driver you are
fully responsible for road safety. Only use the system so that you are in full
control of your vehicle in every traffic situation - risk of accident!■
Do not use the voice control system when under stress or in an emergency.
Your voice commands may not be recognized in such situations. The tele-
phone connection may not be established or the connection may take too
much time to complete. The emergency number should be dialled manually!
Function requirements
First read and observe the introductory information and safety warn-ings
on page 15.
Function requirements for voice control.
The ignition is switched on.
The unit is switched on.
No phone call is in progress.
The parking aid is not active.
15Unit operation
Page 21 of 90
Unit settings
Setup menu
Introduction
This chapter contains information on the following subjects:
Main menu
19
Sound settings
20
Screen settings
20
Time and date settings
21
Keyboard settings
21
Additional keypad language settings
21
Unit settings
21
Voice control settings
22
Restore factory settings
22
Bluetooth ®
settings
22
First and foremost, pay attention to the safety instructions » page 4 , Important
notes .
This chapter covers the basic settings of the device. Additional settings are described in the individual menus ■ Radio » page 27
■ Media » page 31
■ DVD video » page 39
■ Images » page 40
■ Telephone » page 43
■ Navigation » page 52
■ Vehicle system settings » page 74
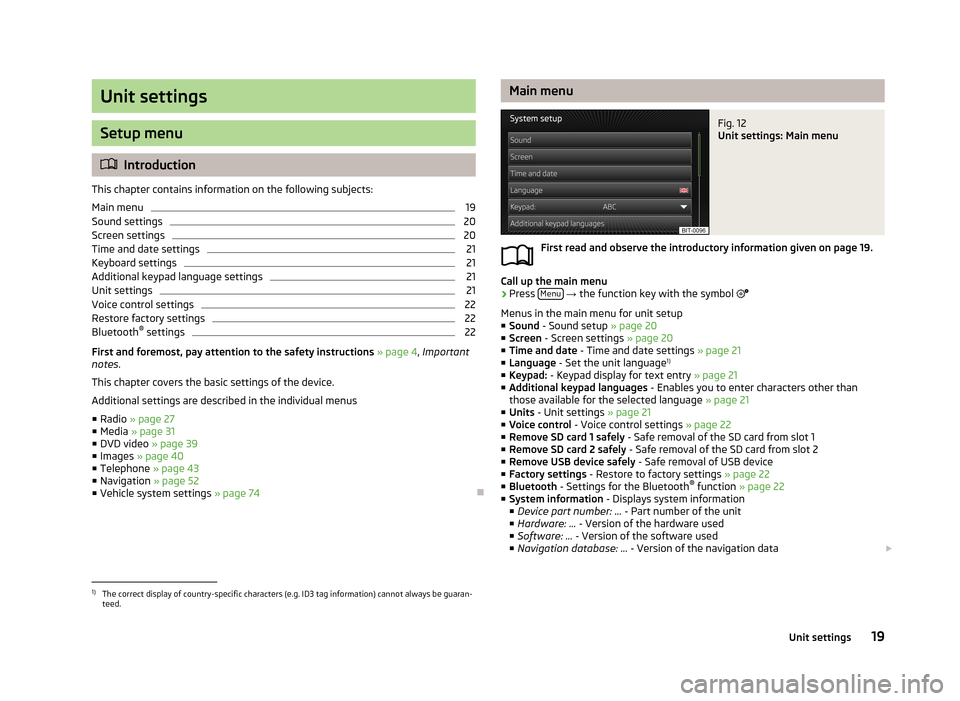
Main menuFig. 12
Unit settings: Main menu
First read and observe the introductory information given on page 19.
Call up the main menu
›
Press Menu
→ the function key with the symbol
Menus in the main menu for unit setup ■ Sound - Sound setup » page 20
■ Screen - Screen settings » page 20
■ Time and date - Time and date settings » page 21
■ Language - Set the unit language 1)
■ Keypad: - Keypad display for text entry » page 21
■ Additional keypad languages - Enables you to enter characters other than
those available for the selected language » page 21
■ Units - Unit settings » page 21
■ Voice control - Voice control settings » page 22
■ Remove SD card 1 safely - Safe removal of the SD card from slot 1
■ Remove SD card 2 safely - Safe removal of the SD card from slot 2
■ Remove USB device safely - Safe removal of USB device
■ Factory settings - Restore to factory settings » page 22
■ Bluetooth - Settings for the Bluetooth ®
function » page 22
■ System information - Displays system information
■ Device part number: ... - Part number of the unit
■ Hardware: ... - Version of the hardware used
■ Software: ... - Version of the software used
■ Navigation database: ... - Version of the navigation data
1)
The correct display of country-specific characters (e.g. ID3 tag information) cannot always be guaran-
teed.
19Unit settings
Page 22 of 90
■Gracenote database: ... - Multimedia database version
■ Media codec: ... - Media codec version
■ Update software - manual software upgrade
■ Copyright - Information on licences and copyrights are only available in English
Sound settings
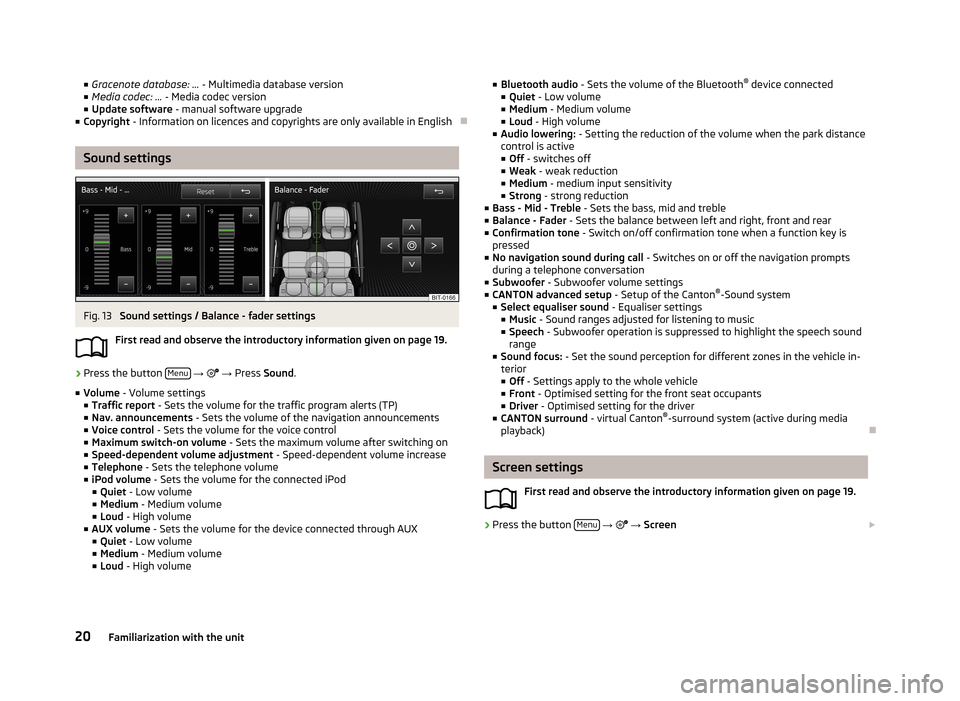
Fig. 13
Sound settings / Balance - fader settings
First read and observe the introductory information given on page 19.
›
Press the button Menu
→
→ Press Sound .
■ Volume - Volume settings
■ Traffic report - Sets the volume for the traffic program alerts (TP)
■ Nav. announcements - Sets the volume of the navigation announcements
■ Voice control - Sets the volume for the voice control
■ Maximum switch-on volume - Sets the maximum volume after switching on
■ Speed-dependent volume adjustment - Speed-dependent volume increase
■ Telephone - Sets the telephone volume
■ iPod volume - Sets the volume for the connected iPod
■ Quiet - Low volume
■ Medium - Medium volume
■ Loud - High volume
■ AUX volume - Sets the volume for the device connected through AUX
■ Quiet - Low volume
■ Medium - Medium volume
■ Loud - High volume
■
Bluetooth audio - Sets the volume of the Bluetooth ®
device connected
■ Quiet - Low volume
■ Medium - Medium volume
■ Loud - High volume
■ Audio lowering: - Setting the reduction of the volume when the park distance
control is active ■ Off - switches off
■ Weak - weak reduction
■ Medium - medium input sensitivity
■ Strong - strong reduction
■ Bass - Mid - Treble - Sets the bass, mid and treble
■ Balance - Fader - Sets the balance between left and right, front and rear
■ Confirmation tone - Switch on/off confirmation tone when a function key is
pressed
■ No navigation sound during call - Switches on or off the navigation prompts
during a telephone conversation
■ Subwoofer - Subwoofer volume settings
■ CANTON advanced setup - Setup of the Canton®
-Sound system
■ Select equaliser sound - Equaliser settings
■ Music - Sound ranges adjusted for listening to music
■ Speech - Subwoofer operation is suppressed to highlight the speech sound
range
■ Sound focus: - Set the sound perception for different zones in the vehicle in-
terior
■ Off - Settings apply to the whole vehicle
■ Front - Optimised setting for the front seat occupants
■ Driver - Optimised setting for the driver
■ CANTON surround - virtual Canton®
-surround system (active during media
playback)
Screen settings
First read and observe the introductory information given on page 19.
›
Press the button Menu
→
→ Screen
20Familiarization with the unit
Page 24 of 90
■Temperature: - Temperature units
■ ° - Degrees Celsius
■ ° - Degrees Fahrenheit
■ Volume: - Volume units
■ l - Litres
■ gal (US) - Gallons (US)
■ gal (UK) - Gallons (UK)
■ Consumption: - Consumption units
■ l/100km - Litres per 100 kilometres
■ km/l - Kilometres per litre
■ mpg (US) - Miles per gallon (US)
■ mpg (UK) - Miles per gallon (UK)
■ Gas consumption: - Gas consumption units
■ kg/100km - Kilograms per 100 km
■ km/kg - Kilometres per kilogram
■ m³/100km - Cubic metres per 100 kilometres
■ km/m³ - Kilometres per cubic metre
■ Pressure: - Pressure units for tyre pressure
■ kPa - Kilopascal
■ bar - bar
■ psi - Pounds per square inch
Voice control settings
First read and observe the introductory information given on page 19.
›
Press the button Menu
→
→ Voice control
■ Dialogue style: Setting the dialogue style
■ Long - Long dialogue (the system plays complete acoustic messages)
■ Short - Short dialogue (the system shortens some acoustic messages or sub-
stitutes them with an acoustic signal)
■ Display available commands - Switch on/off the menus containing basic voice
commands when voice control is activated
■ Voice control session start tone - Switch on/off the audible signal that is out-
put when voice control is activated
■ Voice control session end tone - Switch on/off the audible signal that is output
when voice control is ended
■ Input tone in voice dialogue - Switch on/off the audible signal that is output to
signal that voice control is waiting for a command
Restore factory settings
First read and observe the introductory information given on page 19.›
Press the button Menu
→ → Factory settings
■ Reset all settings and data
■ Restore factory settings - Reset all factory settings
■ Reset individual settings/data
■ Sound - Restore default settings for sound
■ Radio - Restore default settings for radio
■ Vehicle - Restore default settings for the vehicle systems
■ Telephone - Restore default settings for phone
■ Media - Restore default settings for media
■ Voice control - Restore default settings for voice control
■ Navigation - Restore default settings for navigation
■ System - Restore the system default settings
Bluetooth ®
settings
First read and observe the introductory information given on page 19.
›
Press the button Menu
→
→ Bluetooth
■ Bluetooth - Switch on/off Bluetooth ®
function
■ Visibility: - Switch on/off the visibility of the Bluetooth ®
device for other devices
■ Visible - Visibility is always on
■ Hidden - Visibility is off
■ At start-up - Turns on visibility for 5 minutes after switching on the ignition or
until the driving speed has exceeded 5 km/h
■ Name: - Open the input screen with keyboard - Chang the device name
■ Paired devices - Display the list of paired Bluetooth ®
devices; connect or delete
a paired device; delete the list of paired devices ■ Delete all - Delete all paired Bluetooth ®
devices
■ - Delete the paired Bluetooth ®
device
■ Find devices - Searches for available external devices with enabled Bluetooth ®
functions and activated visibility » page 45
■ Bluetooth audio (A2DP/AVRCP) - Switch on/off the connection option for Blue-
tooth ®
profiles A2DP and AVRCP 1)
22Familiarization with the unit
Page 31 of 90
Media
Operation
Introduction
This chapter contains information on the following subjects:
Main menu
29
Title / folder list
30
Track/folder database
30
Playback
31
Media settings
31
First and foremost, pay attention to the safety instructions » page 4 , Important
notes .
You can use the unit to play audio and video files in different formats » page 32,
connect different signal source types, or store audio files in the internal memory
of the Jukebox.
When the signal source has been connected, the device starts to automatically play audio files in alphabetical order.
Types of device operation » page 8 .
› On the device via the operating elements.
› Using the function keys on the device screen.
› Using the Maxi DOT display.
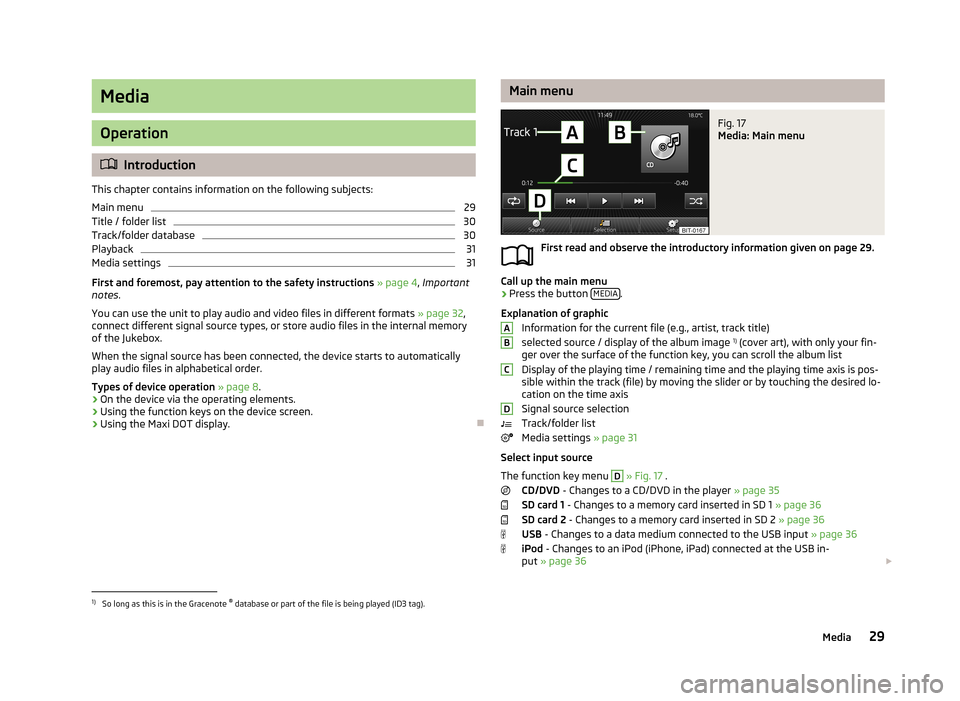
Main menuFig. 17
Media: Main menu
First read and observe the introductory information given on page 29.
Call up the main menu
›
Press the button
MEDIA.
Explanation of graphic Information for the current file (e.g., artist, track title)selected source / display of the album image 1)
(cover art), with only your fin-
ger over the surface of the function key, you can scroll the album list
Display of the playing time / remaining time and the playing time axis is pos- sible within the track (file) by moving the slider or by touching the desired lo-
cation on the time axis
Signal source selection
Track/folder list
Media settings » page 31
Select input source
The function key menu
D
» Fig. 17 .
CD/DVD - Changes to a CD/DVD in the player » page 35
SD card 1 - Changes to a memory card inserted in SD 1 » page 36
SD card 2 - Changes to a memory card inserted in SD 2 » page 36
USB - Changes to a data medium connected to the USB input » page 36
iPod - Changes to an iPod (iPhone, iPad) connected at the USB in-
put » page 36
ABCD1)
So long as this is in the Gracenote ®
database or part of the file is being played (ID3 tag).
29Media
Page 34 of 90

■Bluetooth - Settings for the Bluetooth ®
function » page 22
■ Video setup (files) - Set the parameters of the video being played back from a
file
■ Format: - Set the screen width/height ratio
■ Automatic - adjust the picture to the screen size
■ 16:9
■ 4:3
■ 14:9
■ 47:20
■ Video (DVD) settings - Set the parameters of the video being played back from
a DVD source » page 35
■ Traffic programme (TP) - Switches traffic programme on/off
■ External AUX device - Activate/deactivate the input of the external AUX audio
source
■ Reset codec to system settings - Codec default settings
■ Remove safely - safe removal of the source connected
■ Select device
■ SD card 1
■ SD card 2
■ USB 1
signal sources
Introduction
This chapter contains information on the following subjects:
Sources and file formats supported
32
Requirements and restrictions
33
Jukebox
34
Bluetooth ®
player
35
CD/DVD
35
SD memory card
36
USB-, AUX inputs
36
First and foremost, pay attention to the safety instructions » page 4 , Important
notes .
WARNING■
Never place external signal sources close to the airbags. Loose objects could
hit a deployed airbag and injure occupants – danger of death!■
Never place external signal sources on the console panel. Loose objects can
be thrown forward during a sudden manoeuvre or in case of an accident and can injure the occupants or other road users.
■
Do not hold external sources while driving in your hand or on your knees.
Loose objects can be thrown forward during a sudden manoeuvre or in case of
an accident and can injure the occupants or other road users.
■
Always route the connection cable of the external signal source such that is
does not restrict you when driving in any way.
CAUTION
We recommend that you do not save any important data to the Jukebox, to CD /
DVD media, Bluetooth ®
players, to SD memory cards or connected external signal
sources. The ŠKODA Partner is not responsible for damage due to the loss of data
stored on these storage devices.
Note
With some signal sources, the output level can be changed at source.
Sources and file formats supported
First read and observe the introductory information and safety warn-
ings
on page 32.
Supported signal sources
Signal
sources
SD memory cardSD, SDHC, SDXCUSB devicesUSB stick, USB MP3 player, HDD (without spe- cial software)Other external sourcesPortable player (e.g., iPod ®
, iPad ®
, iPhone ®
,
MTP player, Bluetooth ®
playerCD/DVD drive:Audio CD (up to 80 min), CD-R and CD-RW (with
a capacity of up to 700 MB), DVD ± R / RW; con-
ventional DVD, DVD video and DVD audio 32Audio/Video/Images
Page 37 of 90

Bluetooth®
player
First read and observe the introductory information and safety warn- ings
on page 32.
The device makes a wireless connection (pairing) to the Bluetooth ®
player possi-
ble.
›
Follow the same instructions as for pairing the device with a tele- phone » page 44 .
CAUTION
Do not connect an Apple device to the device via Bluetooth ®
and USB at the
same time, as this may result in a malfunction.
Note
■ We recommend adjusting the volume on the portable player to the maximum
level.■
The volume can also be adjusted by setting the input sensitivity of the unit for
Bluetooth ®
player » page 20 , Sound settings .
■
The supported media functions are dependent on the type of Bluetooth ®
player
used.
CD/DVD
Fig. 21
CD/DVD case
First read and observe the introductory information and safety warn-
ings on page 32.
The CDslot is located in the glove box on the front passenger side.
Inserting/ejecting a CD/DVD
›
Insert a CD/DVD into the CD slot with the label facing up until it is automatically
drawn in. The play function will start automatically.
›
Press the symbol button - the CD/DVD is ejected.
If the ejected medium is not taken out within 10 seconds, it will be retracted
again for safety reasons. However, the unit will not change to the CD/DVD source.
WARNING■ The CD/DVD player is a laser product.■On the manufacturing date, this unit was classified as a class 1 laser product
in accordance with the national/international standards DIN EN 60825-1:
2008-05 and DHHS Rules 21 CFR, Subchapter J classed as a class 1 laser prod-
uct. The laser used in this class 1 laser product is so weak that there is no risk
of danger when operated correctly.■
This product is designed such that the laser is restricted to the inside of the
unit. However, the installed laser could be classified in a higher class were the
housing to be removed. For this reason, never remove the housing of the unit.
CAUTION
■ Be sure to wait until the CD/DVD has been fully ejected before you try to insert
a new CD/DVD. Otherwise you can damage the drive inside the unit.■
Only insert in the CD/DVD drive original audio CDs/video DVDs or standard CD-
R/RWs or DVD±R/RWs.
■
Do not affix anything to the CD/DVDs!
■
Outside temperatures that are either too high or too low might cause the play-
back unit to turn off temporarily. The unit switches to the last active menu.
Note
■ After pressing the symbol key it takes a few seconds for the CD / DVD to be
ejected.■
Poor or unsealed road surfaces and severe vibrations may cause the CD to jump.
■
Damp (condensation) may affect the device in cold weather or after showers.
This can lead to playback jumps or impair the play function. Wait until the mois-
ture has evaporated if this happens.
35Media
Page 43 of 90

Phone
Communication
Telephones and two-way radio systems
Introduction
This chapter contains information on the following subjects:
Introductory information
41
Main menu
42
Problems with the Telephone function
42
Phonebox
43
Settings
43
The Telephone menu is available when the following conditions are met: The ignition is switched on.
The Bluetooth ®
function on the device is switched on.
After the device is switched on, the system attempts to connect to the most re- cently connected telephone 1)
.
If a telephone is connected to the device and the device is turned off, the connec- tion to the telephone is not lost. The connection is only lost after switching off
the ignition (for vehicles with the system KESSY after switching off the ignition
and opening the driver's door).
WARNING■ The national regulations for using a mobile phone in a vehicle must be ob-
served.■
If a mobile phone or a two-way radio system is operated in a vehicle without
an external aerial or an external aerial which has been installed incorrectly,
this can increase the strength of the electromagnetic field inside the vehicle.
■
Two-way radio systems, mobile phones or mounts must not be installed on
airbag covers or within the immediate deployment range of the airbags.
■
Never leave a telephone in the deployment area of an airbag, on a seat, on
the dash panel or in another area, from which it can be thrown during a sud- den braking manoeuvre, an accident or a collision - risk of injury. There are
storage compartments with lids and if necessary there is the multimedia stor-
age compartments to hold this » Vehicle owner's manual , chapter Practical
equipment.
■
Before transport of the vehicle by air, the Bluetooth ®
function must be
switched off by a specialist company.
CAUTION
■ In areas with no signal and possibly in tunnels, garages and subways a tele-
phone conversation can be interrupted and no telephone connection can be es-
tablished - not even in an emergency!■
The range of the Bluetooth ®
connection to the hands-free system is limited to
the vehicle interior. The range is dependent on local factors, e.g. obstacles be-
tween the devices and mutual interferences with other devices. If your telephone
is in a jacket pocket, for example, this can lead to difficulties when establishing a connection with the device or transferring data.
Introductory information
First read and observe the introductory information and safety warn-
ings
on page 41.
The device allows for a wireless connection to the telephone. Your telephone can
be operated from the device.
1)
With some phones, it is necessary to set the connection to the device as "authorised" in order for the
automatic connection to be successful. If this is not set, the system will prompt you for a confirma-
tion each time you attempt to connect to the telephone.
41Communication