2013 SKODA OCTAVIA buttons
[x] Cancel search: buttonsPage 8 of 30
Switching the device on/offFirst read and observe the introductory information given on page 5.›
Press the knob to switch the device on or off.
When the device is switched on, the audio source and operating mode that were active before switching off the device will be restored.
If the vehicle key is pulled out of the ignition lock while the unit is switched on,the unit will switch off automatically. After switching on the ignition, the unit is
turned on automatically.
If the device was switched off using the
knob, then the device will not switch
on automatically after switching on the ignition.
If your vehicle is fitted with the KESSY system, the device will switch off automat-
ically after the engine has been turned off and the door opened.
When the ignition is switched off, the system switches off automatically after ap-prox. half an hour (discharge protection of the vehicle battery).
Adjusting the volume
First read and observe the introductory information given on page 5.
Increase the volume
›
Turn the knob to the right.
Reduce the volume
›
Turn the knob to the left.
Muting
›
Press the MUTE button
or
›
Set the volume to 0 using the knob.
CAUTION
Car speakers may be damaged if playback is too loud or distorted.Note■
The change in volume is displayed on the device display screen.■The corresponding symbol appears in the display when the sound is muted. .■
Some connected sources allow the volume to be changed directly at the source.
■
Excessively high volumes can cause sound resonance in the vehicle.
■
The loudspeakers in the vehicle are designed for a device power output of 4 x
20 W.
Operating the device
Introduction
This chapter contains information on the following subjects:
Operating via the device screen
7
Operating using the buttons on the control lever
7
Operating using the buttons/dials on the multi-function steering wheel -
Audio menu
8
First and foremost, pay attention to the safety instructions » page 4 , Important
notes .
Some features of the device are also displayed in the Maxi DOT display 1)
. Depend-
ing on the vehicle equipment, these features can be operated as follows.
■ Using the buttons on the operating lever » page 7
■ Using the buttons/dials on the multi-function steering wheel » page 8
Note
If the ignition and the side light are switched on, the buttons and dials on the
multifunction steering wheel will also be illuminated.1)
Description of the display in the Maxi DOT display » Owner's Manual , chapter Information system
6Introductory information
Page 9 of 30
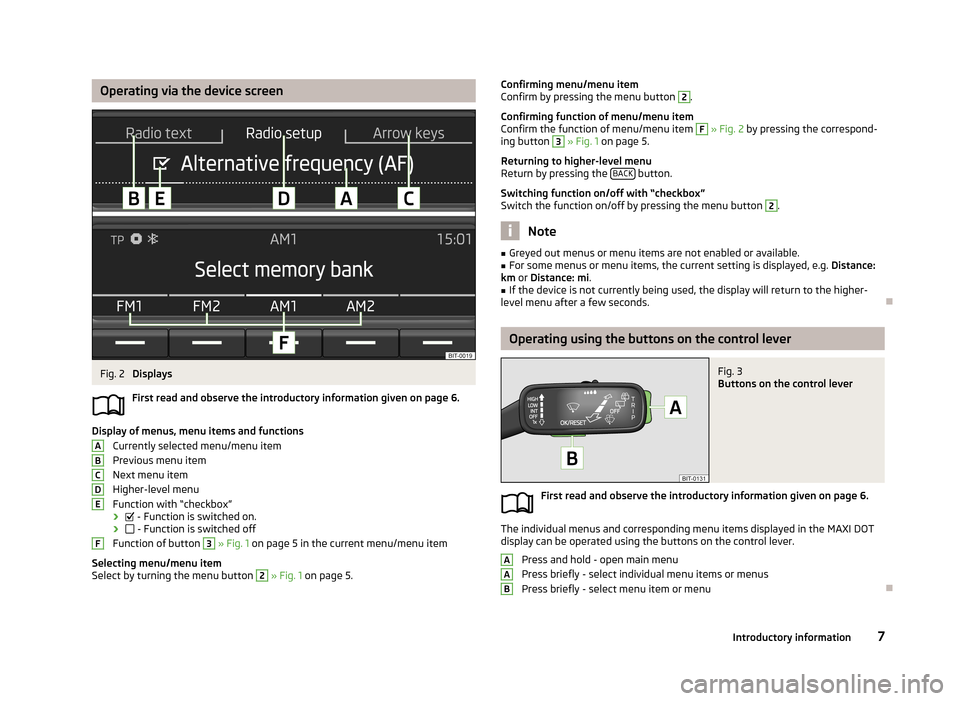
Operating via the device screenFig. 2
Displays
First read and observe the introductory information given on page 6.
Display of menus, menu items and functions Currently selected menu/menu item
Previous menu item
Next menu item
Higher-level menu
Function with “checkbox” ›
- Function is switched on.
›
- Function is switched off
Function of button
3
» Fig. 1 on page 5 in the current menu/menu item
Selecting menu/menu item
Select by turning the menu button
2
» Fig. 1 on page 5.
ABCDEFConfirming menu/menu item
Confirm by pressing the menu button 2.
Confirming function of menu/menu item
Confirm the function of menu/menu item F
» Fig. 2 by pressing the correspond-
ing button
3
» Fig. 1 on page 5.
Returning to higher-level menu
Return by pressing the BACK
button.
Switching function on/off with “checkbox” Switch the function on/off by pressing the menu button
2
.
Note
■ Greyed out menus or menu items are not enabled or available.■For some menus or menu items, the current setting is displayed, e.g. Distance:
km or Distance: mi .■
If the device is not currently being used, the display will return to the higher-
level menu after a few seconds.
Operating using the buttons on the control lever
Fig. 3
Buttons on the control lever
First read and observe the introductory information given on page 6.
The individual menus and corresponding menu items displayed in the MAXI DOT display can be operated using the buttons on the control lever.
Press and hold - open main menu
Press briefly - select individual menu items or menus
Press briefly - select menu item or menu
AAB7Introductory information
Page 10 of 30
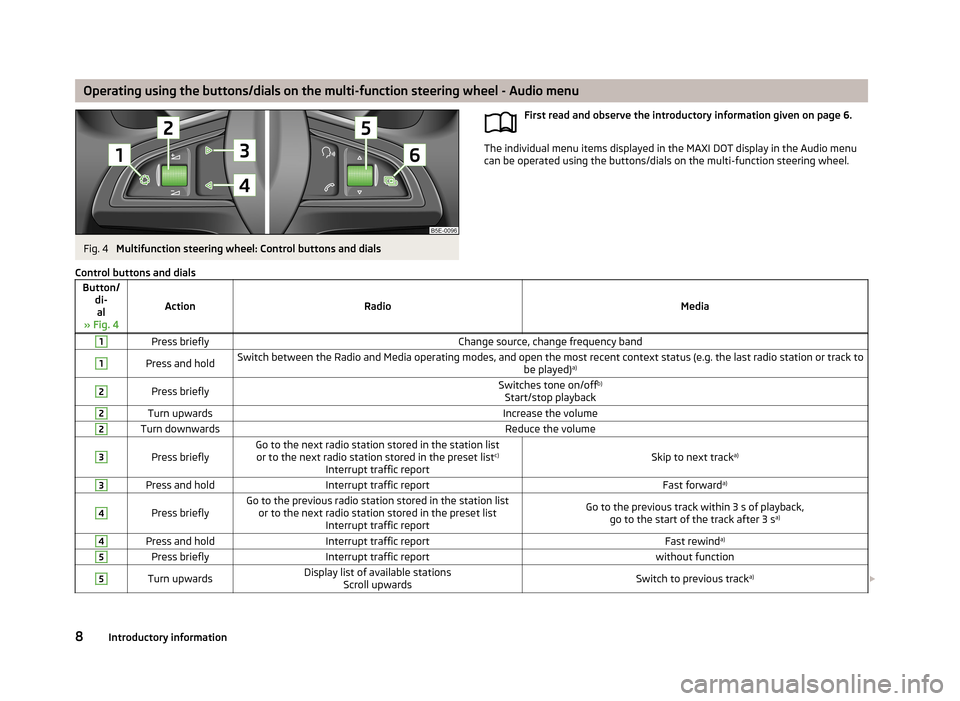
Operating using the buttons/dials on the multi-function steering wheel - Audio menuFig. 4
Multifunction steering wheel: Control buttons and dials
First read and observe the introductory information given on page 6.
The individual menu items displayed in the MAXI DOT display in the Audio menu
can be operated using the buttons/dials on the multi-function steering wheel.
Control buttons and dialsButton/
di-al
» Fig. 4
ActionRadioMedia
1Press brieflyChange source, change frequency band1Press and holdSwitch between the Radio and Media operating modes, and open the most recent context status (e.g. the last radio station or track to be played)a)2Press brieflySwitches tone on/off b)
Start/stop playback2Turn upwardsIncrease the volume2Turn downwardsReduce the volume3
Press brieflyGo to the next radio station stored in the station list or to the next radio station stored in the preset list c)
Interrupt traffic reportSkip to next track a)
3Press and holdInterrupt traffic reportFast forwarda)4
Press brieflyGo to the previous radio station stored in the station list
or to the next radio station stored in the preset list Interrupt traffic reportGo to the previous track within 3 s of playback,go to the start of the track after 3 s a)4Press and holdInterrupt traffic reportFast rewinda)5Press brieflyInterrupt traffic reportwithout function5Turn upwardsDisplay list of available stations
Scroll upwardsSwitch to previous track a)
8Introductory information
Page 11 of 30
Button/di-al
» Fig. 4
ActionRadioMedia
5Turn downwardsDisplay list of available stations Scroll downwardsSkip to next track a)6Press brieflyOpen the main menua)
Does not apply for AUX.
b)
The sound is turned on again by pressing or turning dial
2
.
c)
Context-dependent selection.
Note■
The buttons with the symbol for voice control and for the phone are not
supported by the device.
Device settings
Introduction
This chapter contains information on the following subjects:
Main menu
9
Sound settings
10
Radio settings
10
Media settings
10
Device system settings
11
First and foremost, pay attention to the safety instructions » page 4 , Important
notes .
Main menuFig. 5
Setup main menu
First read and observe the introductory information given on page 9.
Opening the main menu for unit setup
›
Press the button SETUP.
Menu items in the main menu for device setup
■ Sound - Sound settings » page 10
■ Radio setup - Radio settings » page 10
■ Media - Media settings » page 10
■ System - System settings » page 11
9Introductory information
Page 14 of 30
Audio
Radio
Introduction
This chapter contains information on the following subjects:
Main menu
12
Search for and save radio stations
12
Selecting a frequency band and radio station
13
Activating/deactivating traffic programme TP
14
First and foremost, pay attention to the safety instructions » page 4 , Important
notes .
The device allows you to receive a radio broadcast in the FM or AM frequency
bands and to receive additional information from the RDS station in the FM fre-
quency band.
Main menu
First read and observe the introductory information given on page 12.
Accessing radio mode in main menu
›
Press the RADIO button.
The most recently tuned radio station plays.
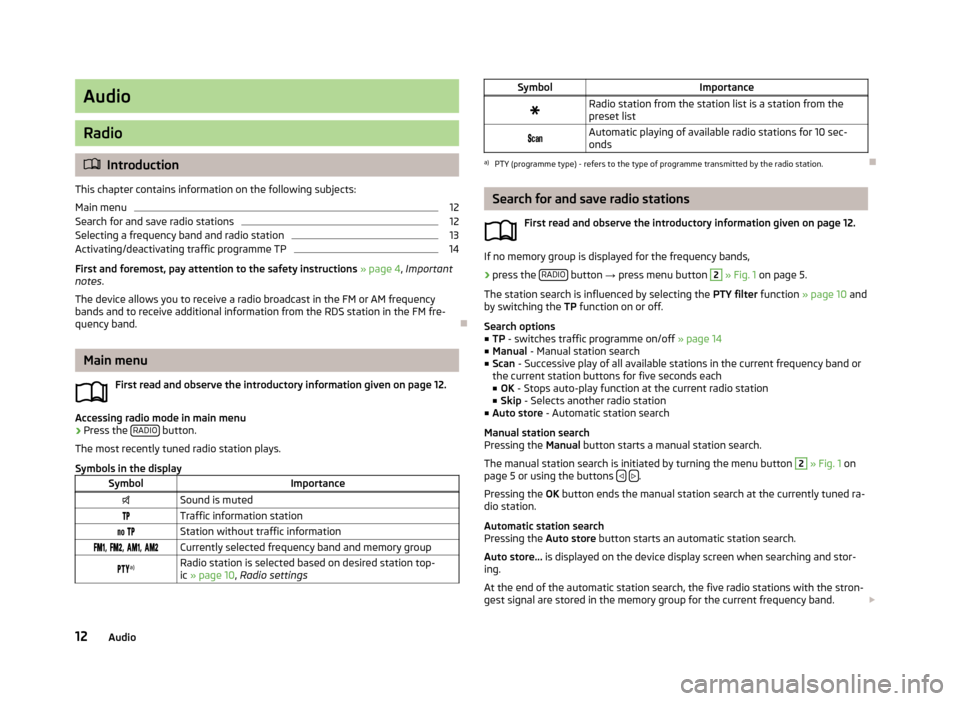
Symbols in the display
SymbolImportanceSound is mutedTraffic information station Station without traffic information , , , Currently selected frequency band and memory group a)Radio station is selected based on desired station top-
ic » page 10 , Radio settingsSymbolImportanceRadio station from the station list is a station from the
preset list Automatic playing of available radio stations for 10 sec-
ondsa)
PTY (programme type) - refers to the type of programme transmitted by the radio station.
Search for and save radio stations
First read and observe the introductory information given on page 12.
If no memory group is displayed for the frequency bands,
›
press the RADIO button
→ press menu button
2
» Fig. 1 on page 5.
The station search is influenced by selecting the PTY filter function » page 10 and
by switching the TP function on or off.
Search options
■ TP - switches traffic programme on/off » page 14
■ Manual - Manual station search
■ Scan - Successive play of all available stations in the current frequency band or
the current station buttons for five seconds each ■ OK - Stops auto-play function at the current radio station
■ Skip - Selects another radio station
■ Auto store - Automatic station search
Manual station search
Pressing the Manual button starts a manual station search.
The manual station search is initiated by turning the menu button
2
» Fig. 1 on
page 5 or using the buttons .
Pressing the OK button ends the manual station search at the currently tuned ra-
dio station.
Automatic station search
Pressing the Auto store button starts an automatic station search.
Auto store... is displayed on the device display screen when searching and stor-
ing.
At the end of the automatic station search, the five radio stations with the stron-
gest signal are stored in the memory group for the current frequency band.
12Audio
Page 15 of 30
If radio stations have already been stored under the preset buttons, then the sta-
tion keys will be overwritten with newly located stations after the automatic sta-
tion search.
Storing stations
Set the desired radio station and press and hold the corresponding button3
» Fig. 1 on page 5 until a beep is heard. The station is stored in the device
memory and its name appears above the corresponding button
3
.
Selecting a frequency band and radio station
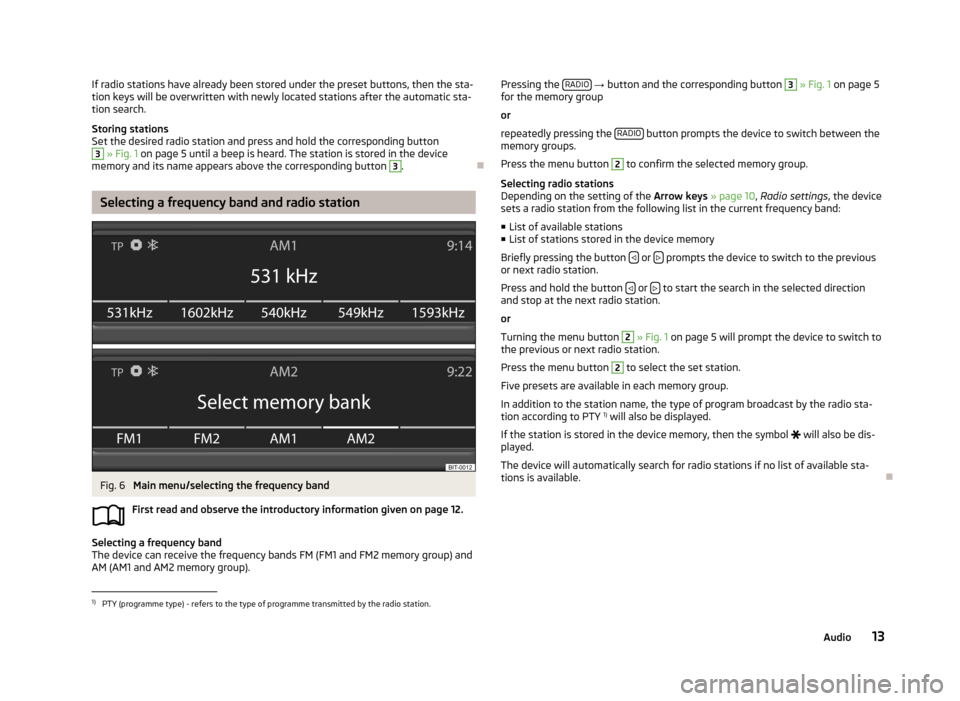
Fig. 6
Main menu/selecting the frequency band
First read and observe the introductory information given on page 12.
Selecting a frequency band
The device can receive the frequency bands FM (FM1 and FM2 memory group) and
AM (AM1 and AM2 memory group).
Pressing the RADIO
→ button and the corresponding button 3 » Fig. 1 on page 5
for the memory group
or
repeatedly pressing the RADIO
button prompts the device to switch between the
memory groups.
Press the menu button
2
to confirm the selected memory group.
Selecting radio stations
Depending on the setting of the Arrow keys » page 10 , Radio settings , the device
sets a radio station from the following list in the current frequency band:
■ List of available stations
■ List of stations stored in the device memory
Briefly pressing the button
or prompts the device to switch to the previous
or next radio station.
Press and hold the button
or to start the search in the selected direction
and stop at the next radio station.
or
Turning the menu button
2
» Fig. 1 on page 5 will prompt the device to switch to
the previous or next radio station.
Press the menu button
2
to select the set station.
Five presets are available in each memory group. In addition to the station name, the type of program broadcast by the radio sta-
tion according to PTY 1)
will also be displayed.
If the station is stored in the device memory, then the symbol
will also be dis-
played.
The device will automatically search for radio stations if no list of available sta- tions is available.
1)
PTY (programme type) - refers to the type of programme transmitted by the radio station.
13Audio
Page 18 of 30
The WMA files can only be played if they are not additionally copyrighted by DRM.
These kinds of WMA files are not supported by the device.
The more files, folders or playlists on one source, the longer it will take to read
the source. It is a good idea to create subfolders with files (e.g. by artist or album
names) in order to save time.
Source propertiesSpecifications for USB
sourcesUSB 1.x and 2.x or higher with USB 2.x support
(the maximum data transfer speed will then corre- spond to the USB 2.x speed)
Speed class of max. 480 Mb/sFile system for the USB
sourceFAT16, VFAT, FAT32
File properties
Bitratemax. 320 kb/sSampling ratemax. 48 kHz
Operation
First read and observe the introductory information and safety warn-
ings
on page 14.
The and buttons always affect the audio source currently being listened to,
regardless of the menu being used.
It is also possible to change tracks using the buttons
3
» Fig. 1 on page 5 from
within the menu of the audio source currently being played.
A list of buttons
3
is displayed in the menu of the audio source currently being
played after the menu button
2
is turned.
■ Play - Plays the current track
■ Up - Returns to a higher level
Press menu button
2
to start playback of the current track or to open the cur-
rent folder.
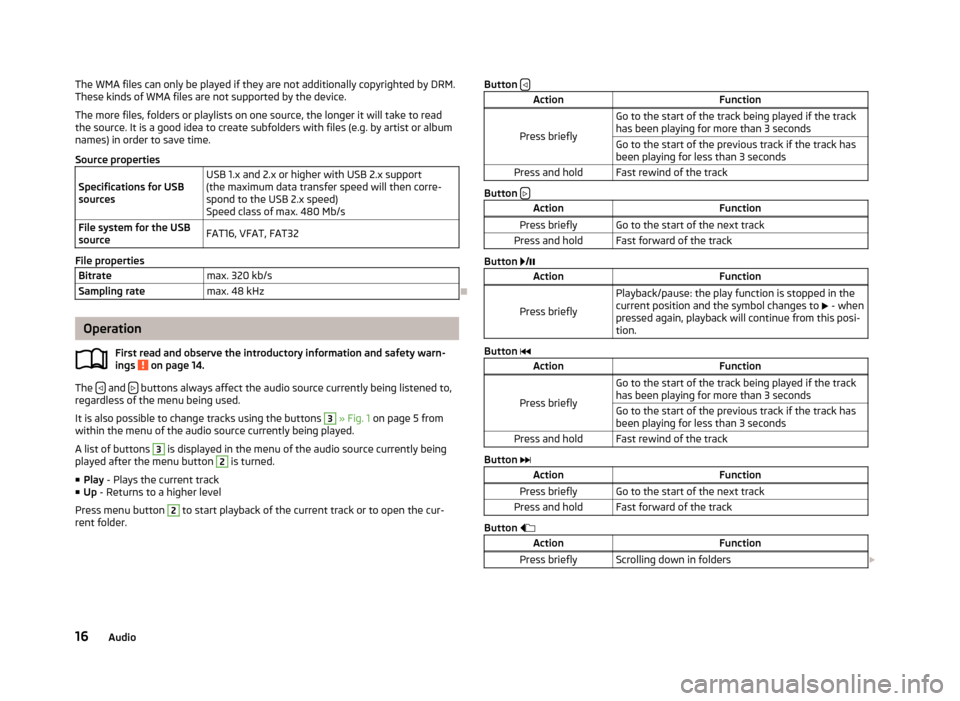
Button ActionFunction
Press briefly
Go to the start of the track being played if the track
has been playing for more than 3 secondsGo to the start of the previous track if the track has been playing for less than 3 secondsPress and holdFast rewind of the track
Button
ActionFunctionPress brieflyGo to the start of the next trackPress and holdFast forward of the track
Button
/
ActionFunction
Press briefly
Playback/pause: the play function is stopped in the
current position and the symbol changes to - when
pressed again, playback will continue from this posi-
tion.
Button
ActionFunction
Press briefly
Go to the start of the track being played if the track
has been playing for more than 3 secondsGo to the start of the previous track if the track has been playing for less than 3 secondsPress and holdFast rewind of the track
Button
ActionFunctionPress brieflyGo to the start of the next trackPress and holdFast forward of the track
Button
ActionFunctionPress brieflyScrolling down in folders 16Audio