2013 SKODA FABIA engine oil
[x] Cancel search: engine oilPage 148 of 223
General Maintenance
Car care
Service intervals
Introduction
This chapter contains information on the following subjects:
Overview of service intervals
145
Fixed service intervals QI1 - QI4
146
Variable service interval QI6
146
Information about the ŠKODA service
146
The Service Interval Display in the instrument cluster will remind you to have ev- ery service specified by the manufacturer at the right time so that you never for- get a service.
A timely and adequate performance of servicing works is one of the requirements for the settlement of possible warranty claims.
The completion of services can be verified through the confirmed service certifi-
cation and the corresponding receipts.
The service intervals are appropriate for normal operating conditions.
In case of difficult operating conditions, it is necessary to have some servicing
work performed before the date of the next service or between the service inter- vals stated. This applies mainly to the cleaning or the replacement of the air filter
insert in regions with heavy dust pollution as well as checking and replacing the
toothed belt, but also vehicles with diesel particle filter which can use the engine
oil more intensely.
These severe conditions are:
› fuel containing sulphur;
› frequent short trips;
› longer idling mode of the engine (e.g. taxi vehicles);
› operation in areas with heavy dust pollution;
› frequent trailer towing;
›
predominantly stop-and-go traffic as tends to occur in city driving, for example;
› operation predominantly during winter.
A service adviser at the specialist garage will tell you whether your vehicle's oper- ating conditions make it necessary for such work to be carried out between the
normal service intervals.
Different service charges may apply, depending on the scope of necessary works
as well as the model, features and condition of your vehicle.
Note
■ The customer is responsible for covering the cost of all services including
changing or replenishing the operating fluid, even during the warranty period, un-
less the ŠKODA AUTO a.s. warranty terms or other agreements state otherwise.■
You will be informed about the scope of the service with regard to a particular
service event by the specialist garage.
Overview of service intervals
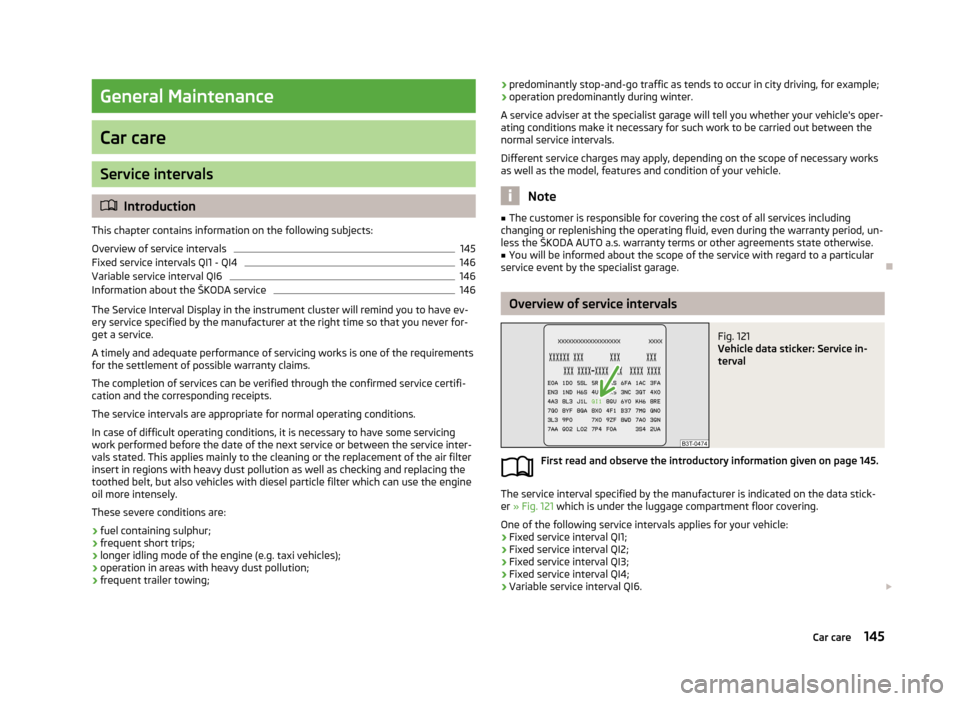
Fig. 121
Vehicle data sticker: Service in-
terval
First read and observe the introductory information given on page 145.
The service interval specified by the manufacturer is indicated on the data stick-
er » Fig. 121 which is under the luggage compartment floor covering.
One of the following service intervals applies for your vehicle: › Fixed service interval QI1;
› Fixed service interval QI2;
› Fixed service interval QI3;
› Fixed service interval QI4;
› Variable service interval QI6.
145Car care
Page 149 of 223

A vehicle must only be filled and topped up with the specified engine oil if it is
to be operated with a variable service interval.
If this engine oil is not available, the oil change is subject to a fixed service inter-
val. In this case, the vehicle must be changed to the fixed service interval.
Note
■
The corresponding motor oil specifications » page 164.■A specialist workshop is able to change the vehicle over from the variable serv-
ice interval to the fixed service interval, or from the fixed service interval to the variable service interval.
Fixed service intervals QI1 - QI4
First read and observe the introductory information given on page 145.
InspectionQI1 - QI4
First after 30,000 km or 2 years a)
, then every
30,000 km or every 1 year a)
.Every 15,000 km or every 1 year a)
(Applies to Rus-
sia).
Oil change service
QI1Every 5000 km or every 1 year a)
.QI2Every 7500 km or every 1 year a)
.QI3Every 10,000 km or every 1 year a)
.QI4After 15,000 km or every 1 year a)
.Brake fluid
change First change after 3 years, then every 2 years.a)
(Whichever comes first).
WARNINGThe brake fluid must always be changed after the first 3 years and then every
2 years. When the brake fluid becomes too old, vapour bubbles may form in
the brake system under heavy braking. The efficiency of the brakes could be
seriously affected – there is a risk of an accident.NoteThe engine oil change interval for operation using diesel fuels with a high sulphur
content will be every 7500 km. Please ask your specialist garage for information
on the countries where diesel fuel has a high sulphur content.
Variable service interval QI6
First read and observe the introductory information given on page 145.
The service intervals depend on how the vehicle is driven and the local conditions
in which the vehicle is used. For example, your vehicle is subjected to different
loads when driven over short distances than long distances. The service intervals
are also variable.
InspectionFirst after 30,000 km or 2 years a)
, then every 30,000 km or
every 1 year a)
.Oil change serviceAccording to the service interval display (at the latest after
30,000 km or every 2 years a)
).Brake fluid
changeFirst change after 3 years, then every 2 years.a)
(Whichever comes first).
WARNINGThe brake fluid must always be changed after the first 3 years and then every
2 years. When the brake fluid becomes too old, vapour bubbles may form in
the brake system under heavy braking. The efficiency of the brakes could be
seriously affected – there is a risk of an accident.
Information about the ŠKODA service
First read and observe the introductory information given on page 145.
There is an extensive servicing network of ŠKODA Service Partners at your dis-
posal to look after your vehicle.
146General Maintenance
Page 166 of 223

Engine compartment overviewFig. 125
Principle sketch: Engine compartment
First read and observe the introductory information and safety warn- ings
on page 160.
Coolant expansion reservoir
167
Windscreen washer fluid reservoir
163
Engine oil filler opening
166
Engine oil dipstick
165
Brake fluid reservoir
168
Vehicle battery
169
Note
The location of the inspection points in the engine compartment of petrol and
diesel engines is practically identical.
123456Radiator fan
First read and observe the introductory information and safety warn-
ings
on page 160.
The radiator fan is powered by an electric motor. Operation is controlled accord-
ing to the temperature of the coolant.
WARNINGThe fan can intermittently continue to run for approximately 10 minutes after
the ignition is switched off.
Windscreen washer system
Fig. 126
Engine compartment: Wind-
screen washer fluid reservoir
First read and observe the introductory information and safety warn- ings on page 160.
The windscreen washer fluid reservoir is located in the engine compartment and
contains the cleaning fluid for the windscreen and rear window and for the head- light cleaning system.
The filling level of the container is about 3.5 litres and about 5.4 litres on vehicles
that have a headlight washing system 1)
.
Clear water is not sufficient to intensively clean the windscreen and headlights. We recommend using clean washing water together with the screen cleaner from
the range of ŠKODA Original Accessories (in winter additionally with antifreeze)
which is capable of removing stubborn dirt.
1)
In some countries, 5.4 ltr. applies for both variants.
163Inspecting and replenishing
Page 167 of 223

The washing water should always be mixed with antifreeze in winter even if thevehicle has heated windscreen washer nozzles.
Under exceptional circumstances, methylated spirits can also be used if no screen
cleaner with antifreeze is available. The concentration of methylated spirits must
not be more than 15 %. The freeze protection at this concentration is sufficient only to -5 °C.
CAUTION
■ Under no circumstances must radiator antifreeze or other additives be added to
the windscreen washer fluid.■
If the vehicle is fitted with a headlight cleaning system, only cleaning products
which do not attack the polycarbonate coating of the headlights must be added
to the windscreen washer fluid.
■
Do not remove the filter from the windscreen washer fluid reservoir when re-
plenishing it with liquid otherwise the liquid transportation system can be conta-
minated, which can cause the windscreen washer system to malfunction.
Engine oil
Introduction
This chapter contains information on the following subjects:
Specifications and capacity
164
Checking the oil level
165
Replenishing
166
Changing
166
The engine has been factory-filled with a high-grade oil that can be use through-
out the year - except in extreme climate zones.
Engine oils are the subject of continuous further development. Thus the informa- tion stated in this Owner's Manual is only correct at the time of publication.
ŠKODA Service Partners are informed about the latest changes by the manufac-
turer. We therefore recommend that you have the oil changed by a ŠKODA Serv-
ice Partner.
The specifications (VW standards) stated in the following can be indicated sepa-
rately or together with other specifications on the bottle.
The oil capacities include oil filter change. Check the oil level when filling; do not
over fill. The oil level must be between the markings » page 165.WARNING■
The engine compartment of your car is a hazardous area. While working in
the engine compartment, be sure to observe the following warn-
ings » page 160 .■
Do not continue your journey if for some reason it is not possible to top
up the engine oil under the current conditions. Switch off the engine and seek
assistance from a specialist garage.
■
Do not drive on if the oil level is above range
A
» Fig. 127 on page 165.
Switch off the engine and seek assistance from a specialist garage.
CAUTION
Do not pour any additives into the engine oil – there is a risk of serious engine
damage.
Note
■ Before a long drive we recommend that you purchase and carry with you engine
oil which complies with the specification for your vehicle.■
We recommend that you use oils from ŠKODA Original Accessories.
■
You must wash yourself thoroughly if your skin has come into contact with oil.
Specifications and capacity
First read and observe the introductory information and safety warn-
ings
on page 164.
Specifications and capacity (in l) for vehicles with flexible service intervals
Petrol enginesSpecificationCapacity1.2 litres/44 kWVW 503 00, VW 504 002.81.2 litres/51 kWVW 503 00, VW 504 002.81.4 litres/63 kWVW 503 00, VW 504 003.21.4 litres/132 kW TSIVW 504 003.61.2 litres/63 kW TSIVW 504 003.91.2 litres/77 kW TSIVW 504 003.9 164General Maintenance
Page 168 of 223
Diesel enginesa)SpecificationCapacity1.2 litres/55 kW TDI CR DPFVW 507 004.31.6 litres/55 kW TDI CR DPFVW 507 004.31.6 litres/66 kW TDI CR DPFVW 507 004.31.6 litres/77 kW TDI CR DPFVW 507 004.3a)
Engine oil VW 505 01 can optionally be used in diesel engines
without a DPF.
Specifications and capacity (in l) for vehicles with fixed service intervals
Petrol enginesSpecificationCapacity1.2 litres/44 kWVW 501 01, VW 502 002.81.2 litres/51 kWVW 501 01, VW 502 002.81.4 litres/63 kWVW 501 01, VW 502 003.21.6 litres/77 kWVW 501 01, VW 502 003.61.4 litres/132 kW TSIVW 502 003.61.2 litres/63 kW TSIVW 502 003.91.2 litres/77 kW TSIVW 502 003.9
If the oils specified above are not available, oils according to ACEA A2 or ACEA A3
can be used once for refilling.
Diesel engines a)SpecificationCapacity1.2 litres/55 kW TDI CR DPFVW 507 004.31.6 litres/55 kW TDI CR DPFVW 507 004.31.6 litres/66 kW TDI CR DPFVW 507 004.31.6 litres/77 kW TDI CR DPFVW 507 004.3a)
Engine oil VW 505 01 can optionally be used in diesel engines
without DPF
If the oils specified above are not available, oils according to ACEA B3 or ACEA B4
can be used once for refilling.
CAUTION
Only the above-mentioned oils can be used on vehicles with flexible service inter- vals. We recommend always refilling with oil of the same specification since this
will maintain the properties of the oil. In exceptional cases, a maximum of 0.5 l ofspecification VW 502 00 (only for petrol engines) or specification VW 505 01 (only
for diesel engines) engine oil can be used to refill once. Other engine oils must not be used - there is risk of engine damage.
Checking the oil levelFig. 127
Dipstick
First read and observe the introductory information and safety warn-
ings on page 164.
The dipstick indicates the engine oil level » Fig. 127.
Checking the oil level
Ensure that the vehicle is positioned on a level surface and the engine has reached its operating temperature.
›
Switch off the engine.
Wait a few minutes until the engine oil flows back into the sump.
›
Open the bonnet.
›
Pull out the dipstick.
›
Wipe the dipstick with a clean cloth and insert it again to the stop.
›
Pull the dipstick out again and check the oil level.
Oil level within range
A
No oil must be refilled.
Oil level within range
B
Oil can be refilled. The oil level may lie in range
A
.
Oil level within range
C
The engine must be topped up with oil so that the oil level at least reaches range
B
.
The engine burns some oil. The oil consumption may be as much as 0.5 l/1 000 km depending on your style of driving and the conditions under which you operate
your vehicle. Consumption may be slightly higher than this during the first 5 000
kilometres.
165Inspecting and replenishing
Page 169 of 223

The oil level must be checked at regular intervals. We recommend it be checked
after each time you refuel or prior to making a long journey.
We recommend maintaining the oil level within the range A
, but not above , if
the engine has been operating at high loads, for example, during a lengthy motor-
way trip during the summer months, towing a trailer or negotiating a high moun- tain pass.
The warning light in the instrument cluster will indicate whether the oil level is too low » page 21 , Engine oil . Check the oil level using the dipstick as soon
as possible. Add oil accordingly.
CAUTION
■ Always check the oil level on vehicles with the 1.2 l/44 kW engine when the en-
gine is cold. Otherwise the measuring result is incorrect und oil could be incor-
rectly replenished - risk of engine damage!■
The oil level must never be above the
A
range » Fig. 127 – there is a risk of
damaging the exhaust system.
Note
Engine oil specifications » page 164.
Replenishing
First read and observe the introductory information and safety warn-
ings
on page 164.
›
Check the oil level » page 165.
›
Unscrew the cap of the engine oil filler opening.
›
Replenish the oil in portions of 0.5 litres in accordance with the correct specifi-
cations » page 164 .
›
Check the oil level » page 165.
›
Carefully screw on the oil filler opening cap and push the dipstick in fully.
Changing
First read and observe the introductory information and safety warn-ings
on page 164.
The engine oil must be changed at specified service intervals » page 145 or ac-
cording to the service interval display » page 16, Service Interval Display .
Coolant
Introduction
This chapter contains information on the following subjects:
Capacity
167
Checking the coolant level
167
Replenishing
168
The coolant consists of water with a concentration of coolant additive. This mix-
ture guarantees antifreeze protection, protects the cooling/heater system
against corrosion and prevents the formation of scale.
Vehicles exported to countries with a mild climate are already factory-filled with
a coolant which offers antifreeze protection down to about -25 ℃. In these coun-
tries the concentration of coolant additive should be at least 40 %.
Vehicles exported to countries with a cold climate are already factory-filled with a
coolant which offers antifreeze protection down to about -35 °C. In these coun-
tries the concentration of coolant additive should be at least 50 %.
If a higher concentration of antifreeze is required for climatic reasons, the amount
of coolant additive can only be increased up to a maximum of 60 % (antifreeze
protection down to approx. -40 °C).
When refilling, only use the same antifreeze identified on the coolant expansion vessel » Fig. 128 on page 167.
166General Maintenance
Page 185 of 223

WARNINGObserve the following instructions for raising the vehicle.■If the wheel has to be changed on a slope, first of all block the opposite
wheel with a stone or similar object to prevent the vehicle from unexpectedly
rolling away.■
Secure the base plate of the lifting jack with suitable means to prevent pos-
sible moving. A soft and slippery ground under the base plate may move the
lifting jack, causing the vehicle to fall down. It is therefore always necessary to
place the lifting jack on a solid surface or use a wide and stable base. Use a
non-slip base (e.g. a rubber foot mat) if the surface is smooth, such as cobbled
stones, tiled floor, etc.
■
Only attach the lifting jack to the attachment points provided for this pur-
pose.
■
Always raise the vehicle with the doors closed.
■
Never position any body parts, such as arms or legs under the vehicle, while
the vehicle is raised with a lifting jack.
■
Never start the engine with the vehicle sitting on the raised jack – there is a
risk of injury.
CAUTION
■ The tightening torque specified for the wheel bolts for steel and light alloy
wheels is 120 Nm.■
If the wheel bolts are fastened too tightly, this can cause damage to the anti-
theft wheel bolt or the adapter.
Note
■ The anti-theft wheel bolt set and adapter can be purchased from a ŠKODA Part-
ner.■
The national legal requirements must be observed when changing a wheel.
Preparation
First read and observe the introductory information and safety warn-
ings
on page 181.
Always change a wheel on a level surface as far as possible.
The following steps must be carried out before actually changing the wheel:
› Have
all the occupants get out. The passengers should not stand on the road
(instead they should remain behind a crash barrier, for instance) while the wheel is being changed.›
Switch off the engine.
›
Move the gearshift lever into Neutral or move the selector lever for the auto-
matic gearbox into position P.
›
Apply the handbrake firmly.
›
Uncouple any trailer.
›
Remove the vehicle tool kit » page 181 and the spare wheel » page 177 , Spare
wheel from the boot.
Changing a wheel
First read and observe the introductory information and safety warn-
ings
on page 181.
›
Remove the full wheel trim » page 178 or caps » page 178 .
›
In the case of light alloy wheel rims remove the wheel trim cap » page 178.
›
First of all slacken the anti-theft wheel bolt and then the other wheel
bolts » page 183 .
›
Jack up the vehicle until the wheel that needs changing is clear of the
ground » page 184 .
›
Unscrew the wheel bolts and place them on a clean surface (cloth, paper, etc.).
›
Remove the wheel carefully.
›
Attach the spare wheel and slightly screw on the wheel bolts.
›
Lower the vehicle.
›
Tighten the opposite wheel bolts alternately (cross-wise) with the wheel
wrench. Tighten the anti-theft wheel bolt last » page 183.
›
Reinstall the wheel trim/wheel trim cap or the caps.
Note
■
All bolts must be clean and must turn easily.■Under no circumstances grease or oil the wheel bolts!■
When fitting unidirectional tyres, ensure that the direction of rotation is cor-
rect » page 176 , Unidirectional tyres .
182Do-it-yourself
Page 192 of 223
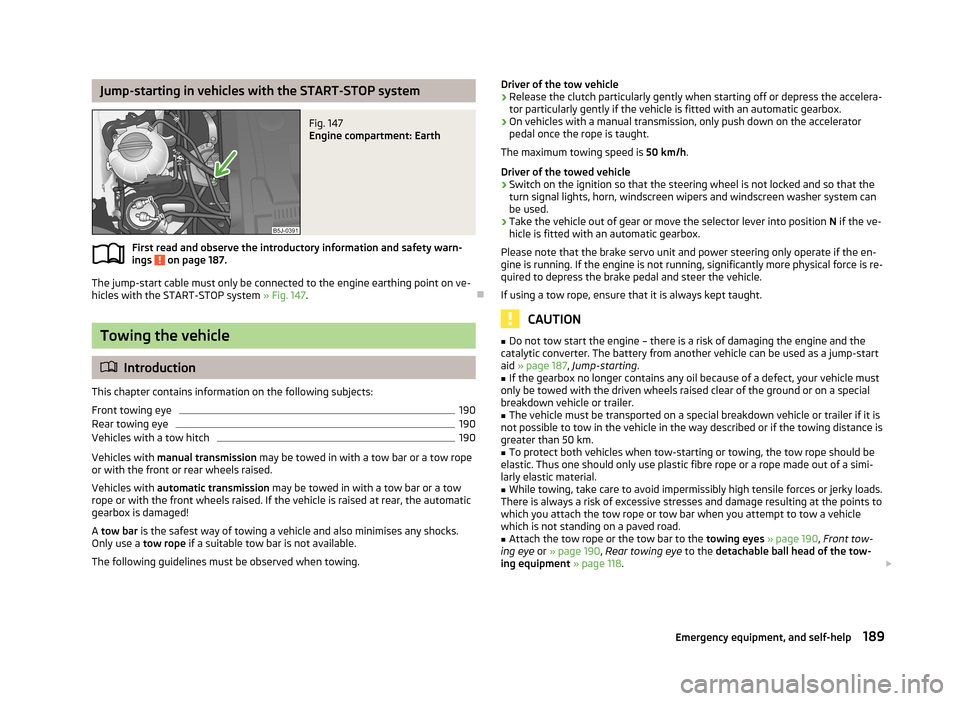
Jump-starting in vehicles with the START-STOP systemFig. 147
Engine compartment: Earth
First read and observe the introductory information and safety warn-ings on page 187.
The jump-start cable must only be connected to the engine earthing point on ve-
hicles with the START-STOP system » Fig. 147.
Towing the vehicle
Introduction
This chapter contains information on the following subjects:
Front towing eye
190
Rear towing eye
190
Vehicles with a tow hitch
190
Vehicles with manual transmission may be towed in with a tow bar or a tow rope
or with the front or rear wheels raised.
Vehicles with automatic transmission may be towed in with a tow bar or a tow
rope or with the front wheels raised. If the vehicle is raised at rear, the automatic
gearbox is damaged!
A tow bar is the safest way of towing a vehicle and also minimises any shocks.
Only use a tow rope if a suitable tow bar is not available.
The following guidelines must be observed when towing.
Driver of the tow vehicle›Release the clutch particularly gently when starting off or depress the accelera-
tor particularly gently if the vehicle is fitted with an automatic gearbox.›
On vehicles with a manual transmission, only push down on the accelerator pedal once the rope is taught.
The maximum towing speed is 50 km/h.
Driver of the towed vehicle
›
Switch on the ignition so that the steering wheel is not locked and so that the turn signal lights, horn, windscreen wipers and windscreen washer system can
be used.
›
Take the vehicle out of gear or move the selector lever into position N if the ve-
hicle is fitted with an automatic gearbox.
Please note that the brake servo unit and power steering only operate if the en-
gine is running. If the engine is not running, significantly more physical force is re-
quired to depress the brake pedal and steer the vehicle.
If using a tow rope, ensure that it is always kept taught.
CAUTION
■ Do not tow start the engine – there is a risk of damaging the engine and the
catalytic converter. The battery from another vehicle can be used as a jump-start
aid » page 187 , Jump-starting .■
If the gearbox no longer contains any oil because of a defect, your vehicle must
only be towed with the driven wheels raised clear of the ground or on a special
breakdown vehicle or trailer.
■
The vehicle must be transported on a special breakdown vehicle or trailer if it is
not possible to tow in the vehicle in the way described or if the towing distance is
greater than 50 km.
■
To protect both vehicles when tow-starting or towing, the tow rope should be
elastic. Thus one should only use plastic fibre rope or a rope made out of a simi-
larly elastic material.
■
While towing, take care to avoid impermissibly high tensile forces or jerky loads.
There is always a risk of excessive stresses and damage resulting at the points to
which you attach the tow rope or tow bar when you attempt to tow a vehicle
which is not standing on a paved road.
■
Attach the tow rope or the tow bar to the towing eyes » page 190 , Front tow-
ing eye or » page 190 , Rear towing eye to the detachable ball head of the tow-
ing equipment » page 118 .
189Emergency equipment, and self-help