2013 Seat Leon SC service
[x] Cancel search: servicePage 5 of 56

4IntroductionIntroductionBefore using the unit for the first timeBefore using the unit for the first time, carry out the following steps. Thiswill enable you to use the unit safely and make full use of the functions itprovides:Observe the basic safety notes .⇒ page 4.Familiarise yourself with the unit overview.⇒ page 6.Use suitable data media for Media mode.⇒ page 20.
Safety notes
WARNINGAccidents and injuries can occur if the driver is distracted. Operating theinfotainment system while driving can distract your attention from thetraffic.
●
Always drive carefully and responsibly.
●
Select volume settings that allow you to easily hear signals from out-side the vehicle at all times (e.g. emergency service sirens).
●
Setting the volume too high may damage your hearing. This also ap-plies if you are exposed to high volumes for short periods only.
WARNINGThe volume level may suddenly change when you switch audio source orconnect a new audio source.●
Reduce the base volume before switching audio source or connectinga new audio source ⇒ page 9.
WARNINGConnecting, inserting or removing a data medium while the vehicle is inmotion can distract you from the road and lead to accidents.WARNINGConnecting leads for external devices may obstruct the driver.●
Arrange the connecting leads so that they do not obstruct the driver.WARNINGExternal devices that are placed loose in the vehicle or not properly se-cured could be flung though the interior and cause injuries during a sud-den driving or braking manoeuvre, or in the event of an accident.
●
You should never position or attach an external device on a door, onthe windscreen or above or near to the areas marked “AIRBAG” on thesteering wheel, the dash panel and the seat backrests, or between theseareas and the vehicle occupants. External devices can cause serious in-jury in an accident, especially when the airbags inflate.
Page 14 of 56

13Audio modeFunction buttonEffect or Change between stored or available stations. Setup ofthe arrow buttons in the (FM,AM) ⇒ page 18 setupmenu.
SCANThe function button is displayed only when the SCANfunction is in operation ⇒ page 14.1... to 12...Stored station buttons, for storing stations ⇒ table onpage 14.UpdatingUpdate the list of stations (AM frequency band)⇒ page 14.
Information and possible icons
displayMeaning RDS radio data service deactivated or no RDS coverageavailable. RDS can be activated in the Setup (FM,AM)menu ⇒ page 18.
TPThe TP is active and receiving ⇒ page 16. The selected station does not broadcast traffic reports.
Stored station buttonsFig. 7
RADIO main menu
In the RADIO main menu you can store stations of the frequency band selec-ted at that time, using the 12 numbered function buttons. These functionbuttons are called "stored station buttons".
Activating a sta-tion using thestored stationbuttons
Press the stored stations button corresponding to therequired station. Activate a stored station using the stor-ed stations button only if it can be received in the placewhere you are at that moment.
Change thegroup of storedstations buttons
Press the function button, BAND ⇒ Fig. 7. The stored sta-tion buttons are displayed in groups with 4 function but-tons, respectively (from 1.. to 4.., 5.. to 8.. and 9.. to12..).
View the storedstation buttonsIf the radio text can be seen, but the stored station but-tons cannot, press radio text to display the stored sta-tion buttons again.
Storing stationsin stored stationbuttons
See: Store stations ⇒ table on page 14.
Page 16 of 56

15Audio modeStart stationscan functionBriefly press the setting knob.OR: Press the function button, Setup and then selectSCAN
End station scanfunctionPress the function button OFF to stop the scan functionon the station you are listening to.OR: Briefly press the setting knob. The scan function al-so ends when you manually select a station using thestored station buttons, or when a traffic report comes in.
Autostore (automatic station storing)
Hold the RADIO button down for approximately 5 seconds to carry out theautostore function for the stations that can be tuned in at the time of run-ning the Autostore. The stations are stored in the stored station buttons (on-ly the first bank of each frequency band is stored).
Note
This function can take several minutes, during which time the radio will re-main muted. In addition, any stored stations assigned previously will be de-leted.
Radio data services RDS
The RDS (Radio Data System) offers additional information in FM such as thevisualisation of the station name, automatic station tracking (AF), text emit-ted by radio (Radio Text ⇒ Fig. 5), traffic reports (TP) and programme type(PTY).
Not all units have RDS, nor do all FM stations offer this service.
Without RDS it is not possible to obtain radio data services.
Note●The broadcasting companies are responsible for the content broadcast.●
Due to infrastructure issues, RDS functions may be limited in certaincountries, and you may not be able to use traffic reports, automatic stationtracking (AF) or programme types (PTY).
●
In some cases the name of the station is too long. This text may beblocked/unblocked by pressing on the station name for 3 seconds. Twoicons will appear (wave + locked) on the right of the screen at mid height.
Station name and automatic station tracking
When the RDS is available, you can view the names of the stations provid-ing this service in the RADIO main menu and in the list of FM stations.
The FM stations send different content under one name (for example, Radio3) in various regional frequencies, provisionally or permanently ⇒ Fig. 5.
When driving, the automatic station tracking automatically changes to thefrequency that provides the best reception of the currently-selected station.However, this can interrupt the regional station currently tuned.
The automatic change of frequencies and automatic station tracking can belinked through the FM setup ⇒ page 18.
Page 19 of 56

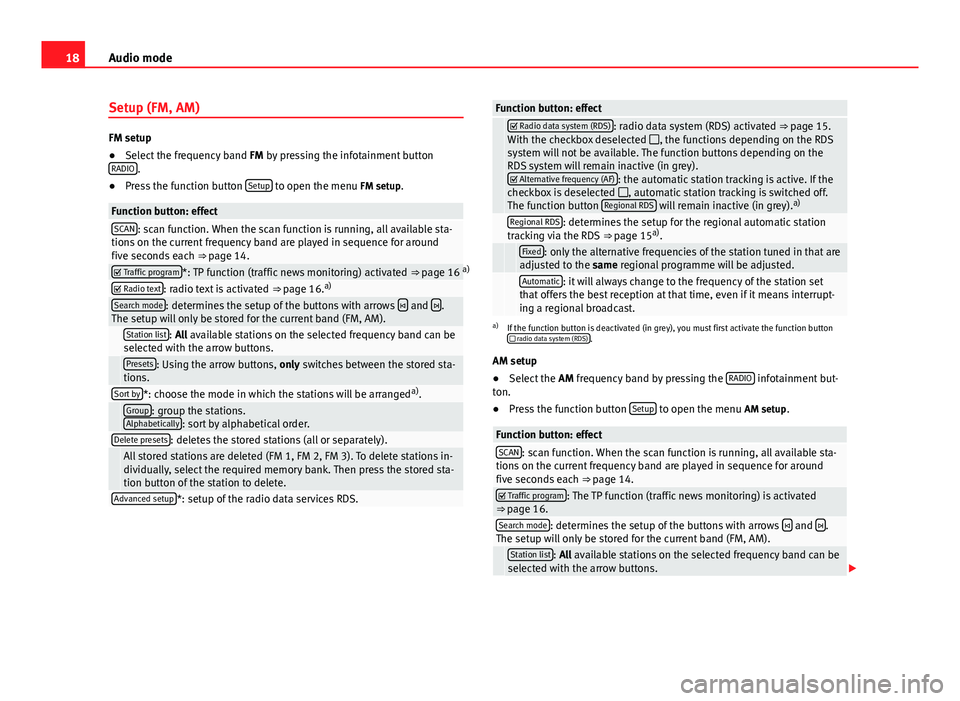
18Audio modeSetup (FM, AM)
FM setup
●
Select the frequency band FM by pressing the infotainment buttonRADIO.
●
Press the function button Setup to open the menu FM setup.
Function button: effectSCAN: scan function. When the scan function is running, all available sta-tions on the current frequency band are played in sequence for aroundfive seconds each ⇒ page 14.
Traffic program*: TP function (traffic news monitoring) activated ⇒ page 16 a) Radio text: radio text is activated ⇒ page 16.a)Search mode: determines the setup of the buttons with arrows and .The setup will only be stored for the current band (FM, AM). Station list: All available stations on the selected frequency band can beselected with the arrow buttons. Presets: Using the arrow buttons, only switches between the stored sta-tions.Sort by*: choose the mode in which the stations will be arrangeda). Group: group the stations.Alphabetically: sort by alphabetical order.Delete presets: deletes the stored stations (all or separately). All stored stations are deleted (FM 1, FM 2, FM 3). To delete stations in-dividually, select the required memory bank. Then press the stored sta-tion button of the station to delete.
Advanced setup*: setup of the radio data services RDS.Function button: effect Radio data system (RDS): radio data system (RDS) activated ⇒ page 15.With the checkbox deselected , the functions depending on the RDSsystem will not be available. The function buttons depending on theRDS system will remain inactive (in grey). Alternative frequency (AF): the automatic station tracking is active. If thecheckbox is deselected , automatic station tracking is switched off.The function button Regional RDS will remain inactive (in grey).a)
Regional RDS: determines the setup for the regional automatic stationtracking via the RDS ⇒ page 15a). Fixed: only the alternative frequencies of the station tuned in that areadjusted to the same regional programme will be adjusted. Automatic: it will always change to the frequency of the station setthat offers the best reception at that time, even if it means interrupt-ing a regional broadcast.
a)
If the function button is deactivated (in grey), you must first activate the function button radio data system (RDS).
AM setup
●
Select the AM frequency band by pressing the RADIO infotainment but-ton.
●
Press the function button Setup to open the menu AM setup.
Function button: effectSCAN: scan function. When the scan function is running, all available sta-tions on the current frequency band are played in sequence for aroundfive seconds each ⇒ page 14.
Traffic program: The TP function (traffic news monitoring) is activated⇒ page 16.Search mode: determines the setup of the buttons with arrows and .The setup will only be stored for the current band (FM, AM). Station list: All available stations on the selected frequency band can beselected with the arrow buttons.
Page 24 of 56

23Audio modeFunction buttons of the main menu MediaFunction but-tonEffect
MEDIA
Press to select another media source ⇒ page 23.CD: internal CD drive unit ⇒ page 23.SD card: SD memory card ⇒ page 24.Bluetooth audio: Bluetooth audio ⇒ page 25.USB: USB data medium ⇒ page 29.AUX: external audio source ⇒ page 29.
SELECTIONOpens the list of tracks ⇒ page 27. or Changes track in Media mode ⇒ page 26.Playback will stop. The function button changes to ⇒ page 26.Playback will continue. The function button changes to ⇒ page 26.SETTINGSOpens the menu Media setup ⇒ page 27.Repeat all the tracks.Repeat the current track.Random play.
SCAN
With the scan function running, all the tracks in the currentplaylist will be played for ten seconds each.The function button is displayed only when the scan func-tion is running. To start the scan function, press the settingknob or open the track list Selection and press the functionbutton SCAN or press the right knob.
or Change folder in media modeInformation and possible iconsdisplayMeaningA
⇒ Fig. 14
Display of the track information (CD text , ID3 tag inMP3 files). Audio CDs: Display of the track and number,in accordance with the play order on the data medium.Audio files: display of the artist name, album title andsong title.
B ⇒ Fig. 14Elapsed playing time.Time barEnables you to select the required playing position(function not available with Bluetooth® audio). RDS radio data service deactivated. The RDS can be acti-vated in the menu Setup (FM, AM) ⇒ page 18.TPThe TP is active and receiving ⇒ page 16. No traffic report station can be received.
Changing the media source
Fig. 15
Standard repre-sentation: menu MEDIA.
Page 26 of 56

25Audio mode⇒ Fig. 1 6Insert a compatible memory card into memory card slot with the cut-offcorner first and facing the right until it clicks into place.
Removing a memory card
The memory card inserted must be prepared before it is ejected.
●
Press the function button Setup to open the menu Media setup.
●
Press the function button, Eject SD card safely. After the system closes thememory card, a message will appear on the screen indicating that the cardcan be removed.
●
Press the memory card inserted. The memory card jumps to the eject po-sition.
●
Remove the memory card.
Unreadable memory card
If you insert a memory card containing data that cannot be read, the unitwill not change to memory card mode after loading. It will show the corre-sponding indication.
External media player connected via Bluetooth®
In Bluetooth audio mode, audio files from an external audio source that isconnected via Bluetooth®, for example a mobile phone (Bluetooth audioplayback), can be played over the vehicle speakers.
The Bluetooth audio source must be compatible with the Bluetooth A2DPprofile.
Starting sound transmission via Bluetooth
●
Reduce the base volume of the infotainment system.
●
Pair or connect the Bluetooth audio source with the Bluetooth interfacefrom the mobile preinstallation, according to the operating instructions.
Starting playback over the vehicle loudspeakers
In Media Setup, the default setup Bluetooth audio autoplay is deactivated. Af-ter making the connection with the Bluetooth audio source, Bluetooth audiomode must be selected manually.
●
If you require the system to change to Bluetooth audio automaticallyeach time the connection is established with the connected Bluetooth au-dio source, you can activate the setup Bluetooth audio autoplay in Media Set-up.
●
In the MEDIA main menu, press the function button, MEDIA ⇒ Fig. 15and select Bluetooth audio.
Once playback of the Bluetooth audio source has finished, the infotainmentsystem will remain in Bluetooth audio mode.
Controlling playback
The extent to which the Bluetooth audio source can be controlled via the in-fotainment system depends on the Bluetooth audio source connected.
Media players with the AVRCP Bluetooth profile, the playback of the Blue-tooth audio source can be started and stopped automatically when chang-ing to Bluetooth audio mode, or to another audio source. In addition, it ispossible to view or change the track via the infotainment system.
It is possible to connect a device as a player and another as hands-free atthe same time.
Note
●Due to the large number of different Bluetooth audio sources available,it is not possible to guarantee fault-free operation of all functions describedhere.
●
Deactivate the service and warning sounds of a connected Bluetooth au-dio source (for example, the key tones of the mobile phone) to avoid inter-ference noise and anomalies in the operation.
Page 32 of 56

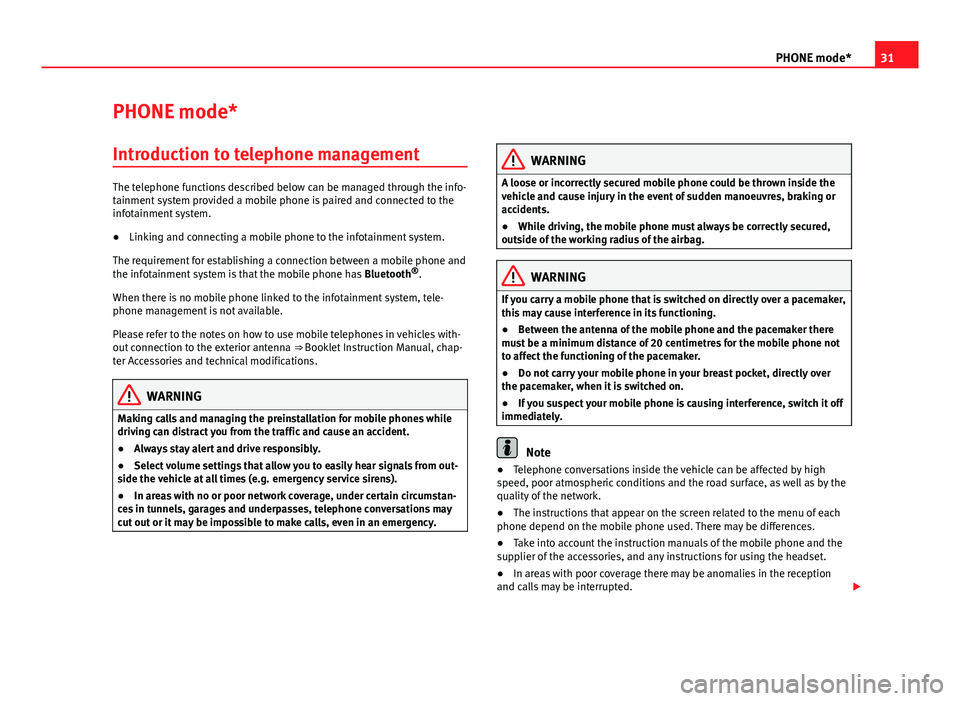
31PHONE mode*PHONE mode*Introduction to telephone management
The telephone functions described below can be managed through the info-tainment system provided a mobile phone is paired and connected to theinfotainment system.
●
Linking and connecting a mobile phone to the infotainment system.
The requirement for establishing a connection between a mobile phone andthe infotainment system is that the mobile phone has Bluetooth®.
When there is no mobile phone linked to the infotainment system, tele-phone management is not available.
Please refer to the notes on how to use mobile telephones in vehicles with-out connection to the exterior antenna ⇒ Booklet Instruction Manual, chap-ter Accessories and technical modifications.
WARNINGMaking calls and managing the preinstallation for mobile phones whiledriving can distract you from the traffic and cause an accident.●
Always stay alert and drive responsibly.
●
Select volume settings that allow you to easily hear signals from out-side the vehicle at all times (e.g. emergency service sirens).
●
In areas with no or poor network coverage, under certain circumstan-ces in tunnels, garages and underpasses, telephone conversations maycut out or it may be impossible to make calls, even in an emergency.
WARNINGA loose or incorrectly secured mobile phone could be thrown inside thevehicle and cause injury in the event of sudden manoeuvres, braking oraccidents.
●
While driving, the mobile phone must always be correctly secured,outside of the working radius of the airbag.
WARNINGIf you carry a mobile phone that is switched on directly over a pacemaker,this may cause interference in its functioning.●
Between the antenna of the mobile phone and the pacemaker theremust be a minimum distance of 20 centimetres for the mobile phone notto affect the functioning of the pacemaker.
●
Do not carry your mobile phone in your breast pocket, directly overthe pacemaker, when it is switched on.
●
If you suspect your mobile phone is causing interference, switch it offimmediately.
Note
●Telephone conversations inside the vehicle can be affected by highspeed, poor atmospheric conditions and the road surface, as well as by thequality of the network.
●
The instructions that appear on the screen related to the menu of eachphone depend on the mobile phone used. There may be differences.
●
Take into account the instruction manuals of the mobile phone and thesupplier of the accessories, and any instructions for using the headset.
●
In areas with poor coverage there may be anomalies in the receptionand calls may be interrupted.
Page 36 of 56

35PHONE mode*Description1)
The telephone manager described in these instructions is approved for useon the following networks: GSM 850, GSM 900, GSM 1800 and GSM 1900.
With the help of the telephone manager, up to 2 mobile telephones can beconnected to the infotainment system via the Bluetooth profiles (for exam-ple, one used as a Bluetooth-audio player and another as a hands-free tele-phone).
Note
●Using a mobile phone inside the vehicle may provoke noise in thespeakers.●
It is possible that some networks may not offer the characters of all lan-guages, nor certain services.
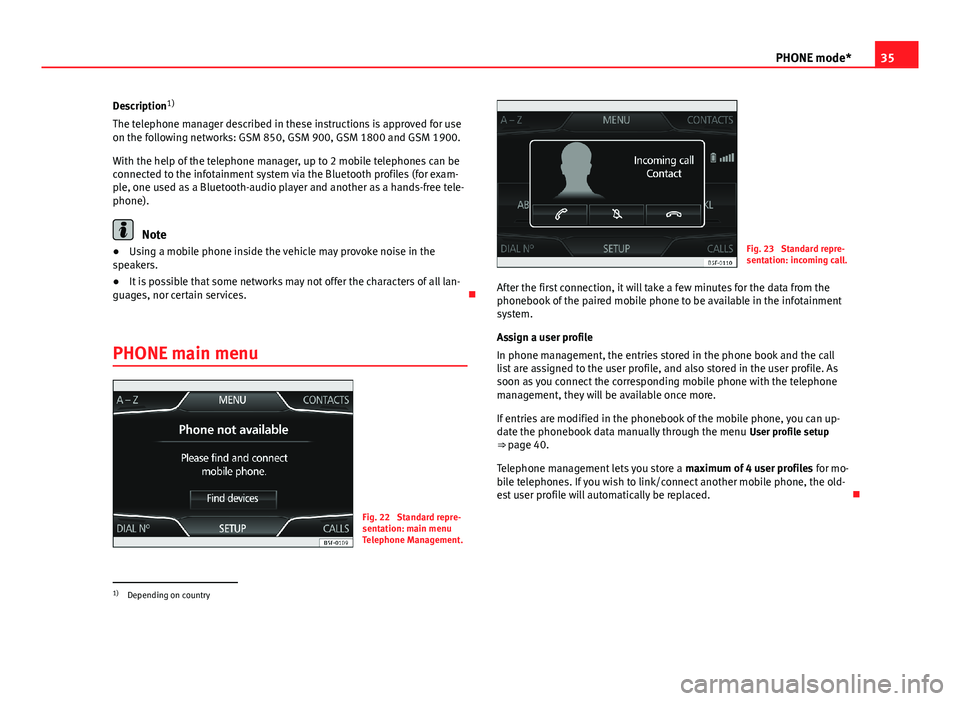
PHONE main menu
Fig. 22
Standard repre-sentation: main menuTelephone Management.
Fig. 23
Standard repre-sentation: incoming call.
After the first connection, it will take a few minutes for the data from thephonebook of the paired mobile phone to be available in the infotainmentsystem.
Assign a user profile
In phone management, the entries stored in the phone book and the calllist are assigned to the user profile, and also stored in the user profile. Assoon as you connect the corresponding mobile phone with the telephonemanagement, they will be available once more.
If entries are modified in the phonebook of the mobile phone, you can up-date the phonebook data manually through the menu User profile setup⇒ page 40.
Telephone management lets you store a maximum of 4 user profiles for mo-bile telephones. If you wish to link/connect another mobile phone, the old-est user profile will automatically be replaced.
1)
Depending on country