2013 Seat Ibiza 5D brake light
[x] Cancel search: brake lightPage 74 of 294

72Cockpit
Differential lock fault (EDL)*
The EDL operates along with the ABS in vehicles equipped
with the Electronic Stability Control (ESC)*
A malfunction in the EDL is indicated by the ABS control lamp . Take the
vehicle to a specialised workshop as soon as possible. For further informa-
tion on the EDL see ⇒ page 177, Electronic differential lock (EDL)*.
Traction control system (ASR)* /
The traction control system prevents the driven wheels from
spinning when the vehicle is accelerating
There are two warning lamps for the traction control system: and . Both
warning lamps light up together when the ignition is switched on and
should turn off after approximately 2 seconds. This is the time taken for the
function check.
The lamp has the following function:
● It flashes when the ASR is working if the vehicle is moving.
If the system is deactivated or if it has any fault, the warning lamp will re-
main lit. The warning lamp will also light up if a fault should occur in the
ABS because the ASR operates in conjunction with the ABS. For further in-
formation, see ⇒ page 174, Brakes.
The lamp provides information about the disconnection status of the
system:
● It stays lit when the ASR is disconnected when pressing the switch.
By pressing it again, the ASR function is reactivated and the warning lamp
switched off. Electronic Stability Control (ESC)* /
There are two warning lamps for the Electronic stability con-
trol. The lamp provides information concerning the func-
tion and the
provides information on the disconnection
status
Both warning lamps light up together when the ignition is switched on and
should turn off after approximately 2 seconds. This is the time taken for the
function check.
This programme includes the ABS, EDL and ASR. It also includes emergency
braking assistance (BAS).
The warning lamp has the following functions:
● It flashes whilst driving when the ASR/ESC is activated.
● It will light up continuously if there is a fault in the ESC.
● As the ESC operates in conjunction with the ABS, it will also light up if a
fault should occur in the ABS.
If the ESC control lamp lights up and stays on after the engine is started,
this may mean that the control system has temporarily switched off the ESC.
In this case the ESC can be reactivated by switching the ignition off and
then on again. If the control lamp goes out, this means the system is fully
functional.
The lamp provides information about the disconnection status of the
system:
● It stays lit when the ASR is disconnected when pressing the switch.
Page 75 of 294

73
Cockpit
Brake system*
This warning lamp lights up if the brake fluid level is too low
or if there is a fault in the system.
This warning lamp lights up if
● the brake fluid level is too low ⇒ page 219.
● there is a fault in the brake system.
This warning lamp can light up together with the ABS system warning lamp.
WARNING
● If the brake warning lamp does not go out, or if it lights up when driv-
ing, the brake fluid level ⇒ page 219, Brake fluid in the reservoir is too
low. Risk of accident. Stop the vehicle and do not drive on. Obtain techni-
cal assistance.
● If the brake warning lamp lights up together with the ABS warning
lamp , the control function of the ABS could be out of action. This could
cause the rear wheels to lock quickly when you brake. This could cause
the rear to break away. Risk of skidding. Stop the vehicle and seek tech-
nical assistance.
Cruise speed (Cruise control)*
The warning lamp comes on when the cruise control system
is switched on.
The warning lamp lights up when the cruise control system is switched
on. For further information on the cruise control system, see ⇒ page 171.Tyre pressure*
Fig. 40 Centre console:
tyre monitor system but-
ton
The tyre control lamp 1)
compares wheel revolutions and with it, the wheel
diameter of each wheel using the ESC. If the diameter of a wheel changes,
the tyre control lamp lights up. The wheel diameter changes when:
● Tyre pressure is insufficient.
● The tyre structure is damaged.
● The vehicle is unbalanced because of a load.
● The wheels of one axle are under more pressure (for example, driving
with a trailer or on extreme slopes).
● The vehicle is fitted with snow chains.
● The temporary spare wheel is fitted.
● The wheel on one axle is changed.
1)
Depending on the model version
Safety FirstOperating instructionsPractical TipsTechnical Specifications
Page 76 of 294

74Cockpit
Tyre pressure adjustment
Following the modification to tyre pressure or changing one or more wheels,
the button ⇒ Fig. 40 must be kept pressed while the ignition is on until an
audible warning is heard.
If the wheels are under excessive load (for example, driving with a trailer or
heavy load), the tyre pressure must be increased to the recommended value
for a full load (see the sticker on the inside of the fuel flap). If the tyre moni-
tor system button is pressed down, the new tyre pressures are confirmed.
The tyre pressure control lamp lights up
If the tyre pressure of a wheel is much lower than the value set by the driver,
then the tyre pressure control lamp ⇒
will light up.
WARNING
● When the tyre pressure control lamp lights up, reduce speed immedi-
ately and avoid any sudden manoeuvre or braking. Stop when possible,
and check the tyre pressure and status.
● The driver is responsible for maintaining correct tyre pressures. For
this reason, tyre pressure must be regularly checked.
● Under certain circumstances (for example, when driving in a sports-
like manner, in winter conditions or on a dirt track) the tyre control lamp
may light up or function incorrectly.
Note
If the battery is disconnected, the yellow warning lamp lights up after
turning the ignition on. This should turn off after a brief journey. Speed selector lever lock*
The brake pedal must be depressed when this warning lamp lights up. This
is necessary when the automatic gearbox* selector lever is moved out of the
positions
P or N.
Fuel level/reserve
This symbol lights up to indicate that the fuel tank is under
the reserve level.
It lights up when only 7 litres of fuel remain in the tank. Moreover, an audi-
ble warning* is heard. It reminds you to fuel up the fuel tank as soon as
possible ⇒ page 200.
Indicates that the doors are open*
This warning lamp lights up if one of the doors or the rear
lid is open. The warning light should go off when all the doors are closed correctly.
Rear lid open*
The warning lamp should switch off when the rear lid is fully closed.
Page 109 of 294

107
Lights and visibility
3. Switch the ignition off.
4. Apply the handbrake.
5. On a manual gearbox engage 1st gear. On an automatic gear- box, move the selector lever to P.
6. Use the warning triangle to draw the attention of other road users to your vehicle.
7. Always take the vehicle key with you when you leave the vehi- cle.
Switch on the hazard warning lights to warn other road users, for example:
● reaching the tail end of a traffic jam,
● there is an emergency
● your vehicle breaks down due to a technical fault,
● you are towing another vehicle or your vehicle is being towed.
All turn signals flash simultaneously when the hazard warning lights are
switched on. The two turn signal turn signal lamps and the turn signal
lamp in the switch will flash at the same time. The hazard warning lights
also work when the ignition is switched off.
WARNING
● The risk of an accident increases if your vehicle breaks down. Always
use the hazard warning lights and a warning triangle to draw the atten-
tion of other road users to your stationary vehicle.
● Never park where the catalytic converter could come into contact with
inflammable materials under the vehicle, for example dry grass or spilt
petrol. This could start a fire!
Note
● The battery will run down if the hazard warning lights are left on for a
long time, even if the ignition is switched off.
● The use of the hazard warning lights described here is subject to the rel-
evant statutory requirements.
Turn signal and main beam headlight lever
The turn signal and main beam lever also operates the park-
ing lights and the headlight flasher.
Fig. 62 Turn signal and
main beam headlight lev-
er
The turn signal and main beam headlight lever has the following
functions:
Switching on the turn signals
– Move the lever all the way up ⇒
Fig. 62 1
to indicate right, and
all the way down 2 to indicate left.
Safety FirstOperating instructionsPractical TipsTechnical Specifications
Page 130 of 294

128Seats and storage
Rear drink holder*
Fig. 87 Drink holder in
the centre console
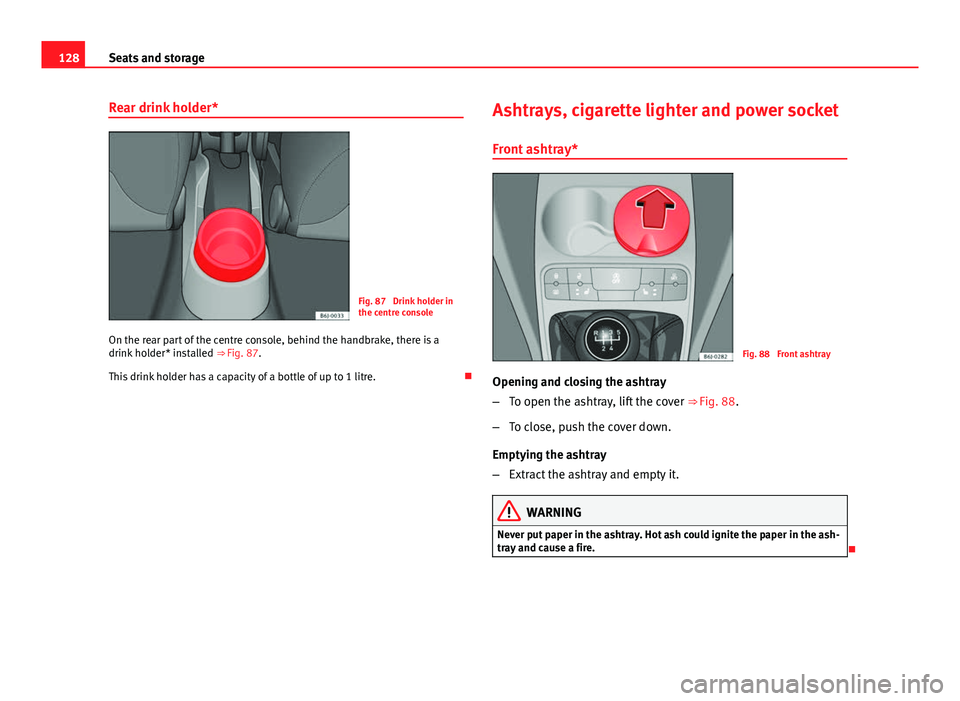
On the rear part of the centre console, behind the handbrake, there is a
drink holder* installed ⇒ Fig. 87.
This drink holder has a capacity of a bottle of up to 1 litre. Ashtrays, cigarette lighter and power socket
Front ashtray*
Fig. 88 Front ashtray
Opening and closing the ashtray
– To open the ashtray, lift the cover ⇒ Fig. 88.
– To close, push the cover down.
Emptying the ashtray
– Extract the ashtray and empty it.
WARNING
Never put paper in the ashtray. Hot ash could ignite the paper in the ash-
tray and cause a fire.
Page 154 of 294

152Driving
temperature increases due to the heat accumulated in the engine compart-
ment or due to its prolonged exposure to solar radiation.
WARNING
● Never switch the engine off until the vehicle is completely stationary.
● The brake servo works only when the engine is running. With the en-
gine switched off, more strength is needed to brake. As normal brake op-
eration cannot be performed, risk of accidents and serious injury may ex-
ist.
● The steering lock can be immediately blocked once the key is re-
moved from the ignition. The vehicle cannot be steered. Risk of accident.
CAUTION
When the engine has been running under a heavy load for a long period,
heat can accumulate in the engine compartment and cause engine damage.
For this reason, you should idle the engine for approx. 2 minutes before you
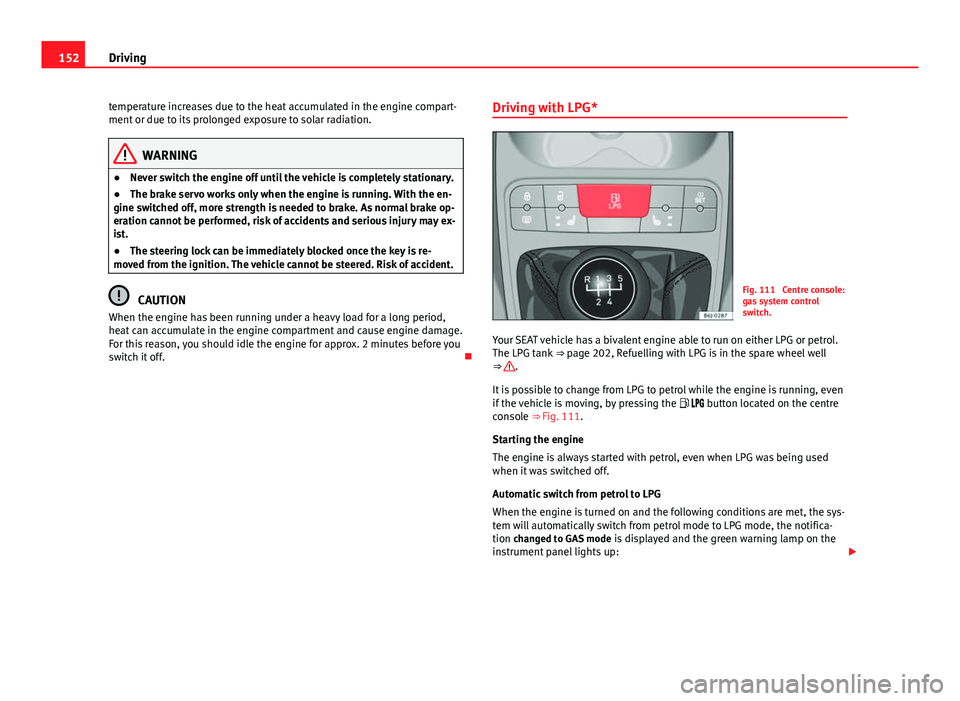
switch it off. Driving with LPG*Fig. 111 Centre console:
gas system control
switch.
Your SEAT vehicle has a bivalent engine able to run on either LPG or petrol.
The LPG tank ⇒ page 202, Refuelling with LPG is in the spare wheel well
⇒
.
It is possible to change from LPG to petrol while the engine is running, even
if the vehicle is moving, by pressing the button located on the centre
console ⇒ Fig. 111.
Starting the engine
The engine is always started with petrol, even when LPG was being used
when it was switched off.
Automatic switch from petrol to LPG
When the engine is turned on and the following conditions are met, the sys-
tem will automatically switch from petrol mode to LPG mode, the notifica-
tion changed to GAS mode is displayed and the green warning lamp on the
instrument panel lights up:
Page 160 of 294

158Driving
The selector lever lock is released as follows:
–Switch the ignition on.
– Hold the brake pedal pressed down and at the same time, hold
the selector lever lock on the left of the selector lever also
pressed down.
The warning lamp on the instrument panel lights up when the brake ped-
al should be applied. This is essential when the selector lever is taken from
the P or N positions.
Level lock only engages with the vehicle stationary at a speed of up to
5 km/h (3 mph). At speeds of over 5 km/h (3 mph) the selector lever lock is
automatically deactivated in position N.
The selector lever lock is not engaged if the selector lever is moved quickly
through position N (e.g. when shifting from R to D). This makes it possible,
for instance, to “rock” the vehicle backwards and forwards if it is stuck in
snow or mud. The selector lever lock engages automatically if the brake
pedal is not depressed and the lever is in position N for more than about
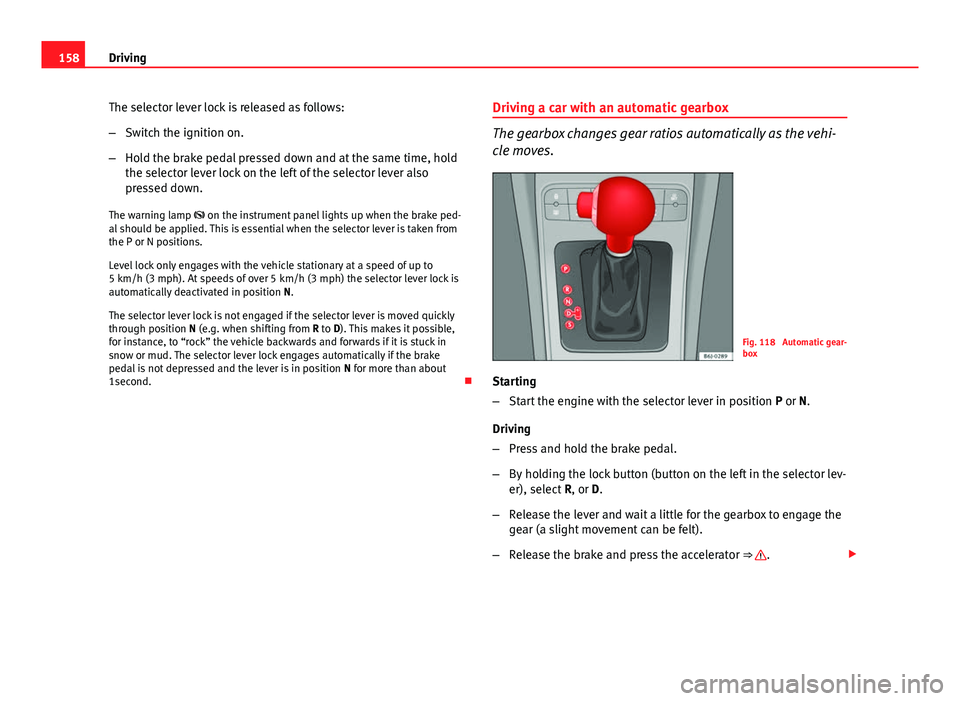
1second. Driving a car with an automatic gearbox
The gearbox changes gear ratios automatically as the vehi-
cle moves.
Fig. 118 Automatic gear-
box
Starting
– Start the engine with the selector lever in position P or N.
Driving
– Press and hold the brake pedal.
– By holding the lock button (button on the left in the selector lev-
er), select R, or D.
– Release the lever and wait a little for the gearbox to engage the
gear (a slight movement can be felt).
– Release the brake and press the accelerator ⇒
.
Page 161 of 294

159
Driving
Stopping briefly
– If stopping for a short time, keep the vehicle stationary by
pressing the foot brake hard to prevent the vehicle moving
backwards on a slope or “creeping” forwards, e.g. at traffic
lights. The selector lever does not need to be put into the posi-
tions P or N.
– Do not press the accelerator.
Parking
– Press and hold the brake pedal until the vehicle comes to a
standstill ⇒
.
– Apply the handbrake.
– By pressing the lock button down, move the selector lever to P
and release the lock button.
Driving up and down hills
– Press the selector lever from position “D” to the right into the
tiptronic selector gate.
– Lightly press the selector lever back to change down.
Holding the car on a hill
– The brake must be always pressed down to prevent the vehicle
from “rolling backwards” ⇒
. Do not try to prevent the vehicle
from rolling backwards by increasing the engine speed while a
range of gears is selected.
Starting the vehicle up hills
– Apply the handbrake. –
With a selected gear, accelerate slowly and at the same time,
release the handbrake.
The steeper the slope, the lower the needed gear. This increases the brak-
ing effect of the engine. For example, when driving down a very steep slope
in third gear. If the engine brake effect is not enough, the vehicle will speed
up. The automatic gearbox automatically changes up to prevent the engine
over-revving. Use the foot brake to reduce speed and change into 3rd gear
using Tiptronic* ⇒
.
Your vehicle has an automatic interlock which prevents the selector lever
from being put into a position for driving forwards or in reverse from posi-
tions P or N if the brake pedal is not depressed.
The ignition key cannot be removed unless the selector lever is in position
P.
Control lamp “Pressing brake pedal”
When the warning lamp next to the selector lever lights up, press the brake
pedal. This is necessary when the automatic gearbox selector lever is
moved out of positions P or N. A text message or instructions to perform
necessary operations may appear on the instrument panel.
WARNING
● As a driver, you should never leave your vehicle if the engine is run-
ning and a gear range is engaged. If you have to leave your vehicle while
the engine is running, you must apply the parking brake and put the se-
lector lever in position P.
● If the engine is running and D or R are engaged, you will need to hold
vehicle stopped by depressing the brake pedal. The vehicle would keep
on creeping forward as the power transmission is not fully interrupted
even when the engine is idling.
Safety FirstOperating instructionsPractical TipsTechnical Specifications