2013 Peugeot 508 check engine
[x] Cancel search: check enginePage 125 of 340
4
123
Driving
The system is reactivated automatically at every new star t using the key.
Reactivation
Press the "ECO OFF"switch again.
The s
ystem is active again; this is confirmed
by the switch warning lamp going off and a message in the screen.
Operating fault
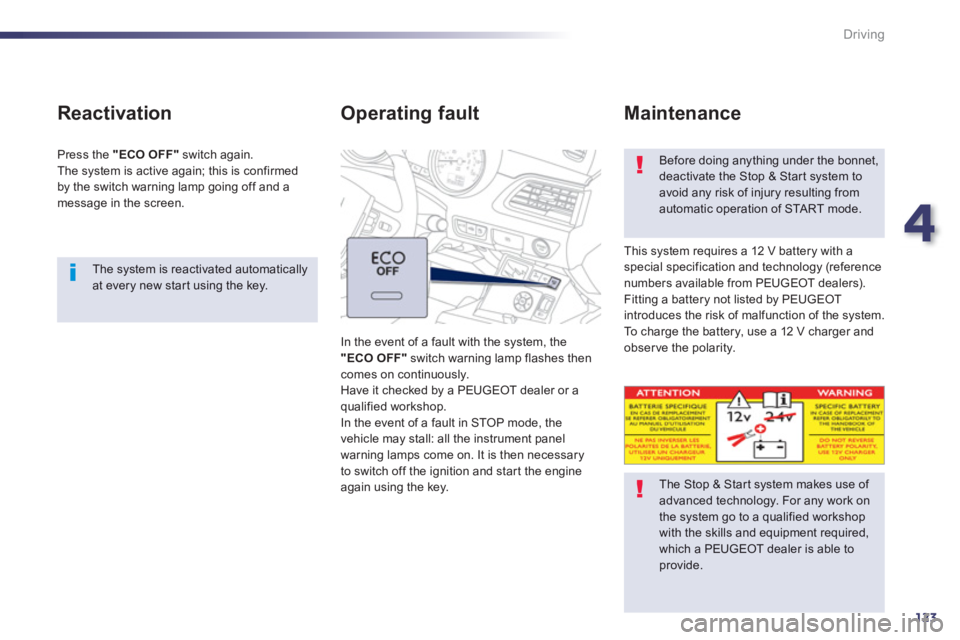
In the event of a fault with the system, the
"ECO OFF"
switch warning lamp flashes thencomes on continuously.
Have it checked by a PEUGEOT dealer or aqualified workshop.
In the event of a fault in STOP mode, the
vehicle ma
y stall: all the instrument panelwarning lamps come on. It is then necessary
to switch off the ignition and star t the engine again using the key.
Before doing anything under the bonnet,deactivate the Stop & Start system toavoid any risk of injury resulting fromautomatic operation of STA R T m o d e .
This system requires a 12 V battery with a
special specification and technology (reference
numbers available from PEUGEOT dealers).
Fitting a battery not listed by PEUGEOT
introduces the risk of malfunction of the system.
To c h a rge the battery, use a 12 V charger andobser ve the polarity.
Maintenance
The Stop & Star t system makes use of advanced technology. For any work onthe system go to a qualified workshopwith the skills and equipment required,which a PEUGEOT dealer is able toprovide.
Page 126 of 340
124
Driving
Hill start assist
System which keeps your vehicle immobilised
temporarily (approximately 2 seconds) whenstarting on a gradient, the time it takes to move your foot from the brake pedal to the accelerator pedal. This system only operates when:
- the vehicle is completely stationary, withyour foot on the brake pedal,
- in par ticular conditions on a slope,
- with th
e driver’s door closed.
The hill star t assist system cannot be deactivated.
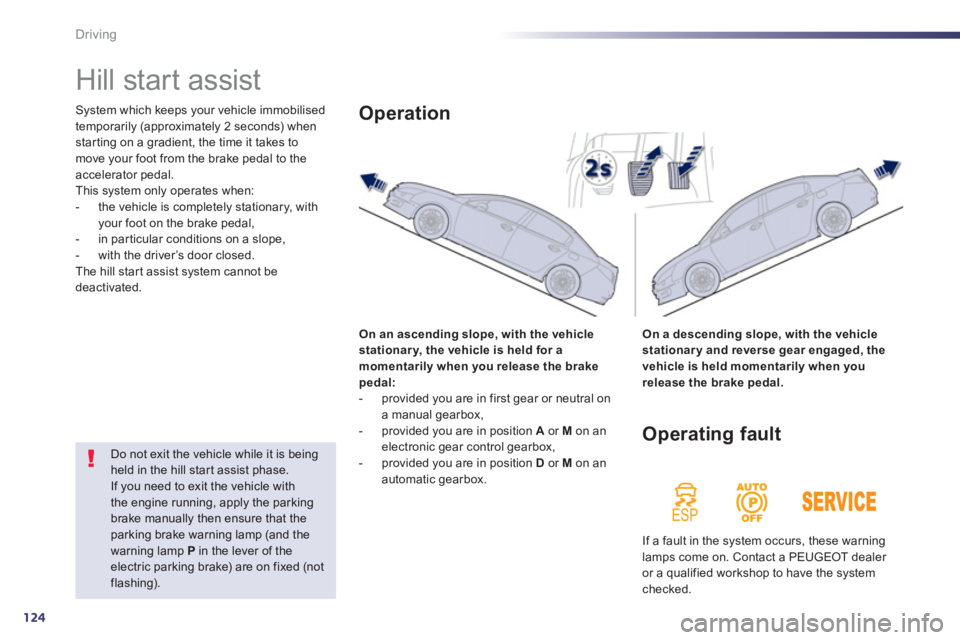
On an ascendin
g slope, with the vehiclestationary, the vehicle is held for amomentarily when you release the brakepedal:
- provided you are in first gear or neutral on
a manual gearbox,
- provided you are in position A
or M
on an electronic gear control gearbox,
- provided you are in position D
or M
on an
automatic gearbox.
Operation
On a descending slope, with the vehicle
stationary and reverse gear engaged, thevehicle is held momentarily when yourelease the brake pedal.
Do not exit the vehicle while it is beingheld in the hill star t assist phase.
If you need to exit the vehicle withthe engine running, apply the parkingbrake manually then ensure that theparking brake warning lamp (and the warning lamp P
in the lever of theelectric parking brake) are on fixed (not flashing).
Operating fault
If a fault in the system occurs, these warning
lamps come on. Contact a PEUGEOT dealer
or a qualified workshop to have the systemchecked.
Page 172 of 340
170
Safety
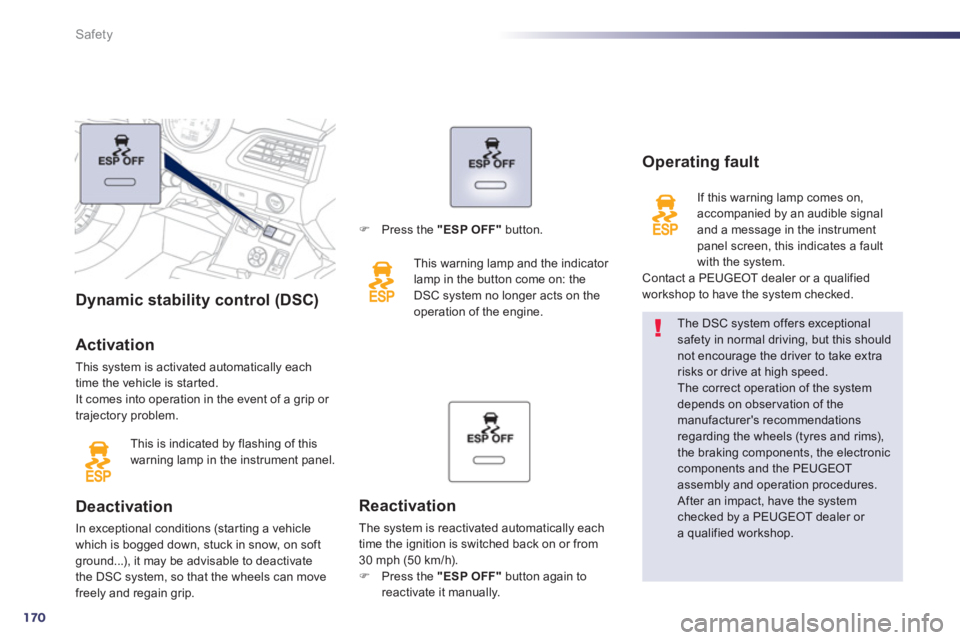
Dynamic stability control (DSC)
Activation
This system is activated automatically each
time the vehicle is started.
It comes into operation in the event of a grip or
trajectory problem.
This is indicated b
y flashing of this
warning lamp in the instrument panel.
Deactivation
In exceptional conditions (starting a vehicle
which is bogged down, stuck in snow, on softground...), it may be advisable to deactivate
the DSC system, so that the wheels can move
freely and regain grip.
The DSC system offers exceptional safety in normal driving, but this should not encourage the driver to take extra risks or drive at high speed.
The correct operation of the system depends on obser vation of the manufacturer's recommendationsregarding the wheels (tyres and rims),the braking components, the electronic components and the PEUGEOTassembly and operation procedures.
After an impact, have the systemchecked by a PEUGEOT dealer or a qualified workshop.
Operating fault
If this warning lamp comes on,
accompanied by an audible signal
and a messa
ge in the instrument
panel screen, this indicates a fault
with the system.
Contact a PEUGEOT dealer or a qualified
workshop to have the system checked.
Reactivation
The system is reactivated automatically eachtime the ignition is switched back on or from
30 mph (50 km/h).F Press the "ESP OFF"
button again to
reactivate it manually.
F Press the "ESP OFF"
button.
This warnin
g lamp and the indicator
lamp in the button come on: the
D
SC system no longer acts on the
operation of the engine.
Page 182 of 340
180
Practical information
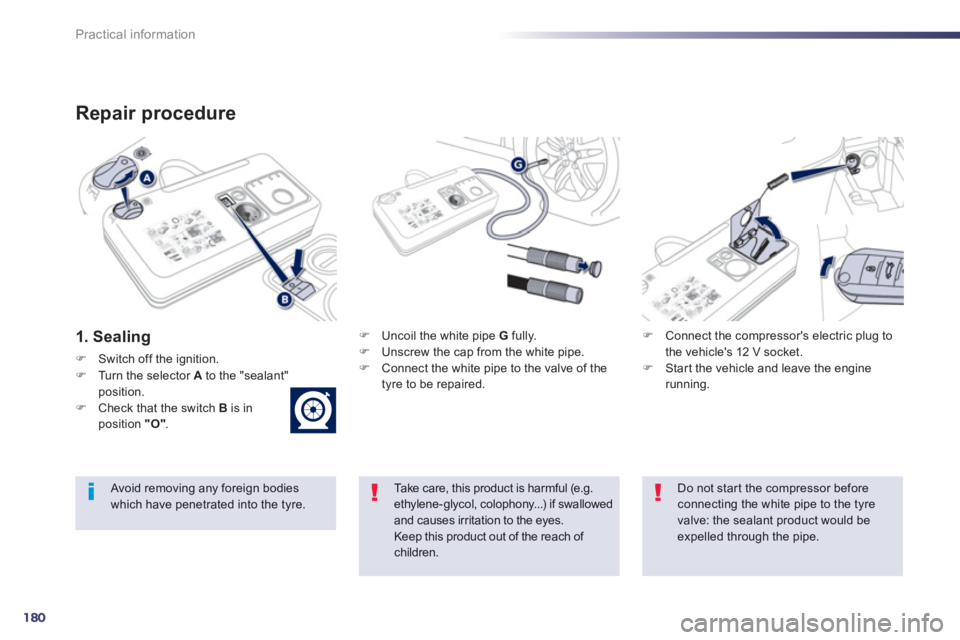
Repair procedure
1. SealingF Uncoil the white pipe G
fully.F
Unscrew the cap from the white pipe.F
Connect the white pipe to the valve of the
tyre to be repaired.
F
Connect the compressor's electric plug to
the vehicle's 12 V socket. F Star t the vehicle and leave the engine running.
Take care, this product is harmful (e.g.ethylene-glycol, colophony...) if swallowed and causes irritation to the eyes.Keep this product out of the reach of children.
Avoid removing any foreign bodieswhich have penetrated into the tyre.
Do not star t the compressor before connecting the white pipe to the tyre valve: the sealant product would be expelled through the pipe.
FSwitch off the ignition.
FTurn the selector Ato the "sealant"position.FCheck that the switch B
is in position "O".
Page 185 of 340
8
183
Practical information
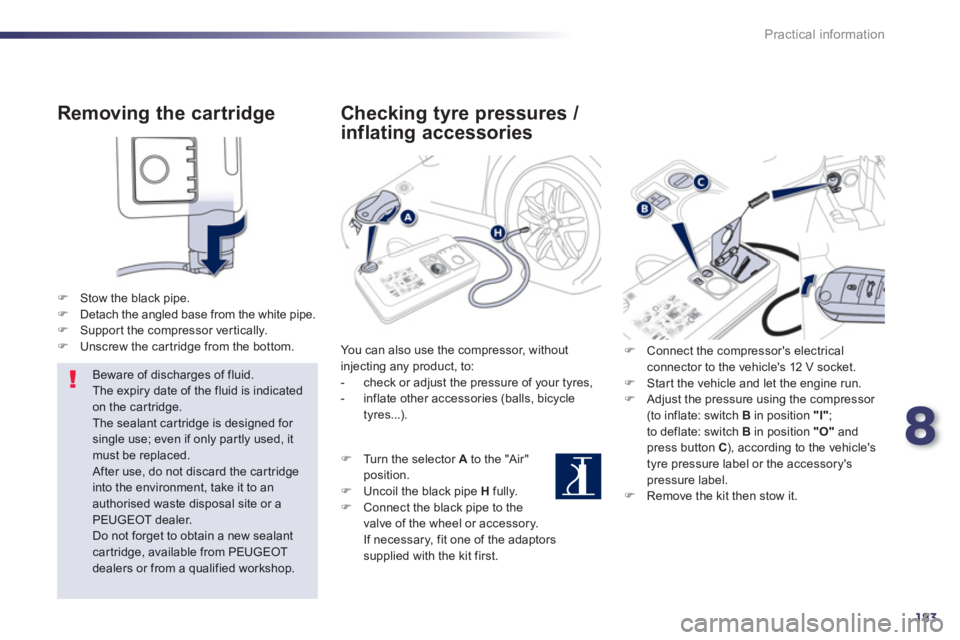
Removing the cartridge
F
Stow the black pipe. F
Detach the angled base from the white pipe.F
Suppor t the compressor ver tically.F
Unscrew the car tridge from the bottom.
Beware of discharges of fluid.
The expiry date of the fluid is indicated on the car tridge.
The sealant car tridge is designed for
single use; even if only partly used, itmust be replaced. After use, do not discard the car tridgeinto the environment, take it to an authorised waste disposal site or a PEUGEOT dealer.
Do not forget to obtain a new sealantcartridge, available from PEUGEOT dealers or from a qualified workshop.
Checking tyre pressures /
inflating accessories
You can also use the compressor, withoutinjecting any product, to:
- check or adjust the pressure of your tyres,
- inflate other accessories (balls, bicycle
tyres...).
FT
urn the selector Ato the "Air"
position.
FUncoil the black pipe
H
fully.FConnect the black pipe to the
valve of the wheel or accessory.
If necessar
y, fit one of the adaptorssupplied with the kit first.
F Connect the compressor's electrical connector to the vehicle's 12 V socket. F
Star t the vehicle and let the engine run. F
Adjust the pressure using the compressor (to inflate: switch B
in position "I"
;
to deflate: switch B in position "O"and press button C), according to the vehicle's
tyre pressure label or the accessory'spressure label. F Remove the kit then stow it.
Page 207 of 340
8
205
Practical information
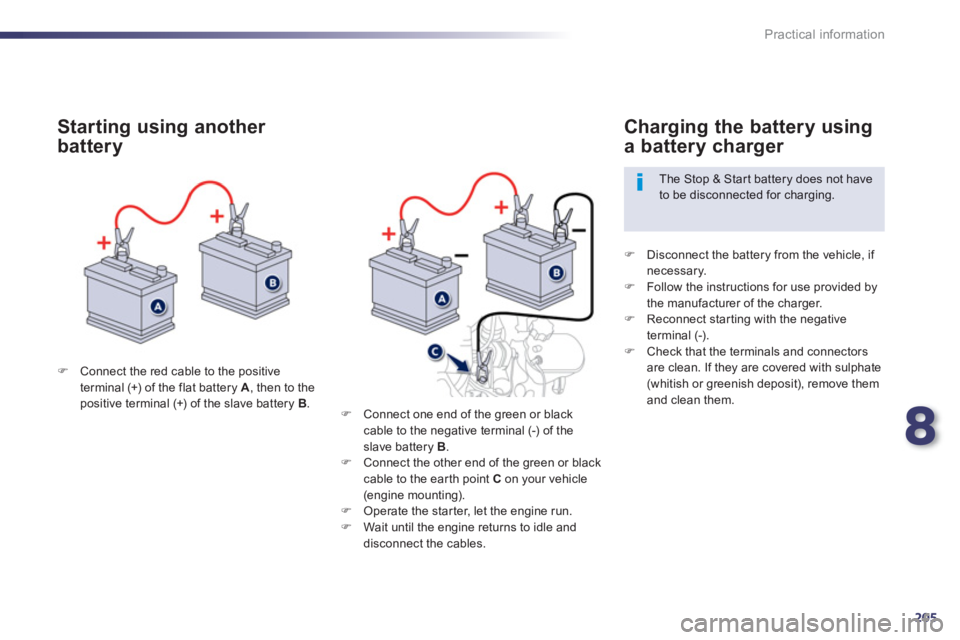
F Connect the red cable to the positive
terminal (+) of the flat battery A , then to the positive terminal (+) of the slave battery B
.
Starting using another
battery
F
Disconnect the battery from the vehicle, if necessary. F
Follow the instructions for use provided by
the manufacturer of the charger. F Reconnect starting with the negative
terminal (-). F Check that the terminals and connectors
are clean. If they are covered with sulphate (whitish or greenish deposit), remove themand clean them.
Charging the battery using
a battery charger
The Stop & Star t battery does not have to be disconnected for charging.
FConnect one end of the
green or black cable to the negative terminal (-) of theslave battery B.FConnect the other end of the green or blackcable to the ear th point C
on your vehicle (engine mounting).FOperate the star ter, let the engine run.
FWait until the engine returns to idle and
disconnect the cables.
Page 214 of 340

212
Practical information
Driving advice
Distribution of loads
FDistribute the load in the trailer so that theheaviest items are as close as possible to
the axle and the nose weight approaches
the maximum permitted without
excee
ding it.
Air density decreases with altitude, thus reducingengine performance. Above 1 000 metres, the maximum towed load must be reduced by 10 %
for every 1 000 metres of altitude.
Side wind
FTake into account the increased sensitivity
to side wind.
Cooling
To w i ng a trailer on a slope increases the
temperature of the coolant.
As the fan is electricall
y controlled, its cooling capacity is not dependent on the engine speed.
F
To lower the engine speed, reduce your speed.
The maximum towed load on a long incline
depends on the
gradient and the ambient
temperature.
In all cases, keep a check on the coolant
temperature.
FIf the warning lamp and the
STOP warning lamp come on, stop the vehicle and switch off
the engine as soon as possible.
Braking
To w i ng a trailer increases the braking distance.
To avoid overheating of the brakes on a longmountain type of descent, the use of engine braking is recommended.
Tyres
F
Check the tyre pressures of the towingvehicle and of the trailer, obser ving the recommended pressures.
Lighting
F
Check the electrical lighting and signalling on the trailer.
The rear parking sensors will be deactivated automatically if a genuine PEUGEOT towbar is used.
R
efer to the "Technical Data" section for details
of the weights and towed loads which apply to your vehicle.
Page 220 of 340
218
Checks
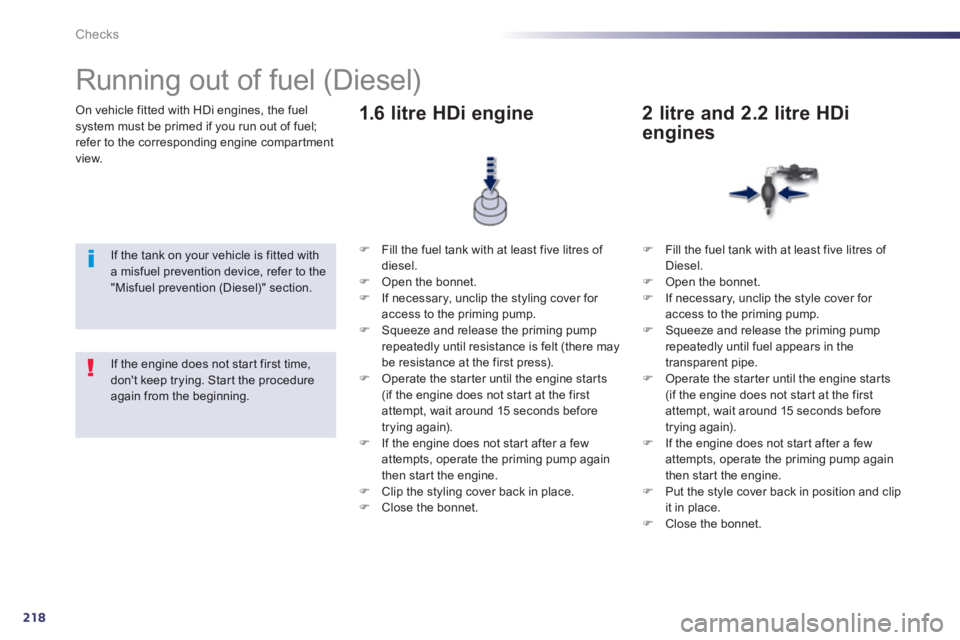
On vehicle fitted with HDi engines, the fuelsystem must be primed if you run out of fuel; refer to the corresponding engine compar tment
view.
Running out of fuel (Diesel)
If the tank on your vehicle is fitted witha misfuel prevention device, refer to the "Misfuel prevention (Diesel)" section.
F
Fill the fuel tank with at least five litres of diesel. F
Open the bonnet.F
If necessary, unclip the styling cover for
access to the priming pump. F Squeeze and release the priming pump
repeatedly until resistance is felt (there may
be resistance at the first press). F Operate the star ter until the engine starts(if the engine does not star t at the first
attempt, wait around 15 seconds before
trying again).
F If the engine does not star t after a few
attempts, operate the priming pump again
then start the engine. F Clip the styling cover back in place. F
Close the bonnet.
1.6 litre HDi engine
F
Fill the fuel tank with at least five litres of
Diesel.F Open the bonnet. F
If necessary, unclip the style cover for access to the priming pump. F
Squeeze and release the priming pump repeatedly until fuel appears in the
transparent pipe. F Operate the star ter until the engine star ts (if the engine does not star t at the first attempt, wait around 15 seconds before
trying again).
F If the engine does not star t after a few attempts, operate the priming pump again
then start the engine. F Put the style cover back in position and clip it in place.F
Close the bonnet.
2 litre and 2.2 litre HDi
engines
If the engine does not star t first time, don't keep trying. Star t the procedureagain from the beginning.