Page 122 of 382

6
120
FITTINGS
High load retaining net
Hooked onto the special upper and low-
er fi xings, this permits use of the entire
loading volume up to the roof:
- behind the rear seats (row 2),
- behind the front seats (row 1) when
the rear seats are folded.
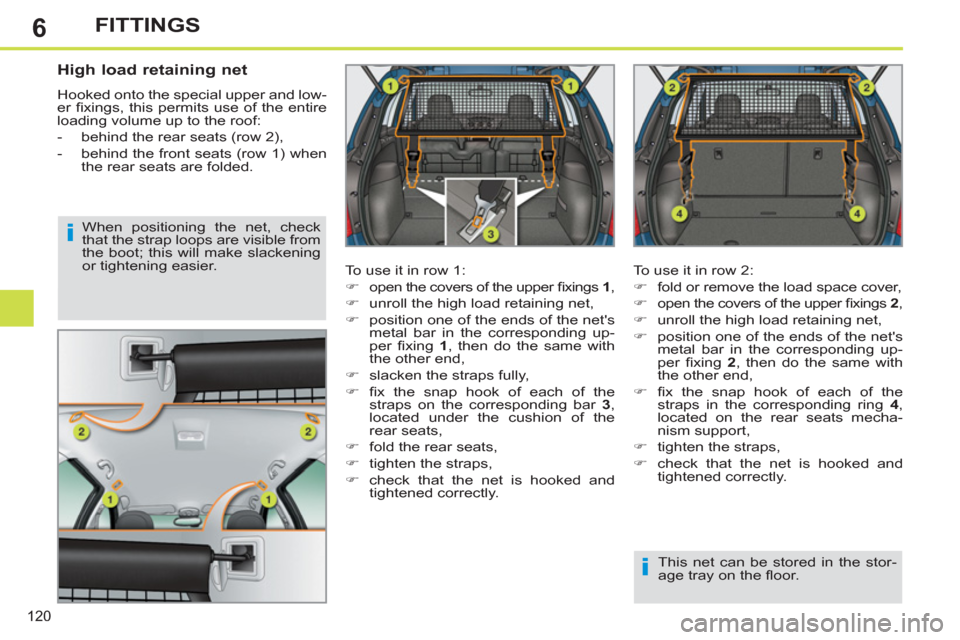
To use it in row 1:
�)
open the covers of the upper fi xings 1
,
�)
unroll the high load retaining net,
�)
position one of the ends of the net's
metal bar in the corresponding up-
per fi xing 1
, then do the same with
the other end,
�)
slacken the straps fully,
�)
fi x the snap hook of each of the
straps on the corresponding bar 3
,
located under the cushion of the
rear seats,
�)
fold the rear seats,
�)
tighten the straps,
�)
check that the net is hooked and
tightened correctly. To use it in row 2:
�)
fold or remove the load space cover,
�)
open the covers of the upper fi xings 2
,
�)
unroll the high load retaining net,
�)
position one of the ends of the net's
metal bar in the corresponding up-
per fi xing 2
, then do the same with
the other end,
�)
fi x the snap hook of each of the
straps in the corresponding ring 4
,
located on the rear seats mecha-
nism support,
�)
tighten the straps,
�)
check that the net is hooked and
tightened correctly. When positioning the net, check
that the strap loops are visible from
the boot; this will make slackening
or tightening easier.
This net can be stored in the stor-
age tray on the fl oor.
Page 125 of 382

6
123
FITTINGS
High load retaining net
Hooked onto the special upper and low-
er fi xings, this permits use of the entire
loading volume up to the roof behind
the seats of the 2nd row.
12 V accessory socket
�)
To connect a 12 V accessory (max
power: 120 W), remove the cap and
connect an appropriate adaptor.
�)
Turn the key to the ignition on posi-
tion.
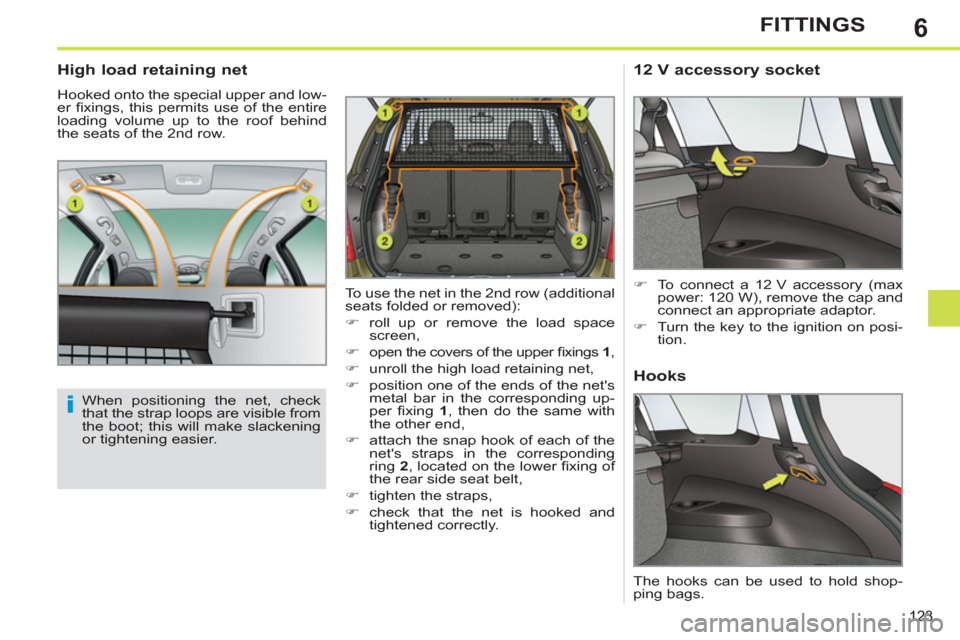
To use the net in the 2nd row (additional
seats folded or removed):
�)
roll up or remove the load space
screen,
�)
open the covers of the upper fi xings 1
,
�)
unroll the high load retaining net,
�)
position one of the ends of the net's
metal bar in the corresponding up-
per fi xing 1
, then do the same with
the other end,
�)
attach the snap hook of each of the
net's straps in the corresponding
ring 2
, located on the lower fi xing of
the rear side seat belt,
�)
tighten the straps,
�)
check that the net is hooked and
tightened correctly.
When positioning the net, check
that the strap loops are visible from
the boot; this will make slackening
or tightening easier.
Hooks
The hooks can be used to hold shop-
ping bags.
Page 130 of 382

7
128
CHILD SAFETY
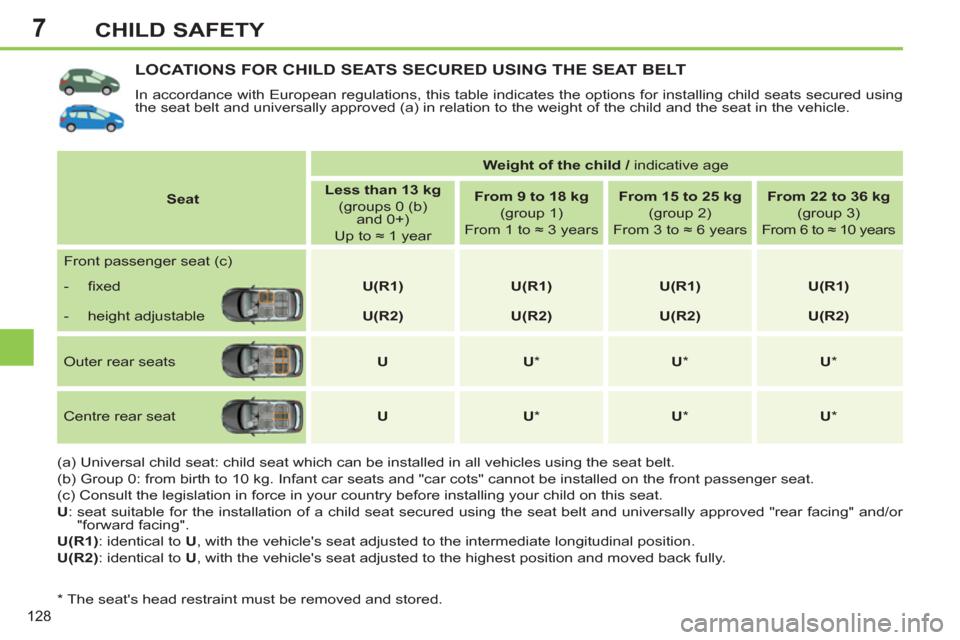
LOCATIONS FOR CHILD SEATS SECURED USING THE SEAT BELT
In accordance with European regulations, this table indicates the options for installing child seats secured using
the seat belt and universally approved (a) in relation to the weight of the child and the seat in the vehicle.
(a) Universal child seat: child seat which can be installed in all vehicles using the seat belt.
(b) Group 0: from birth to 10 kg. Infant car seats and "car cots" cannot be installed on the front passenger seat.
(c) Consult the legislation in force in your country before installing your child on this seat.
U
: seat suitable for the installation of a child seat secured using the seat belt and universally approved "rear facing" and/or
"forward facing".
U(R1)
: identical to U
, with the vehicle's seat adjusted to the intermediate longitudinal position.
U(R2)
: identical to U
, with the vehicle's seat adjusted to the highest position and moved back fully.
*
The seat's head restraint must be removed and stored.
Seat
Weight of the child /
indicative age
Less than 13 kg
(groups 0 (b)
and 0+)
Up to ≈ 1 year
From 9 to 18 kg
(group 1)
From 1 to ≈ 3 years
From 15 to 25 kg
(group 2)
From 3 to ≈ 6 years
From 22 to 36 kg
(group 3)
From 6 to ≈ 10 years
Front passenger seat (c)
- fi xed
U(R1)
U(R1)
U(R1)
U(R1)
- height adjustable
U(R2)
U(R2)
U(R2)
U(R2)
Outer rear seats
U
U
*
U
*
U
*
Centre rear seat
U
U
*
U
*
U
*
Page 151 of 382

8
149
SAFETY
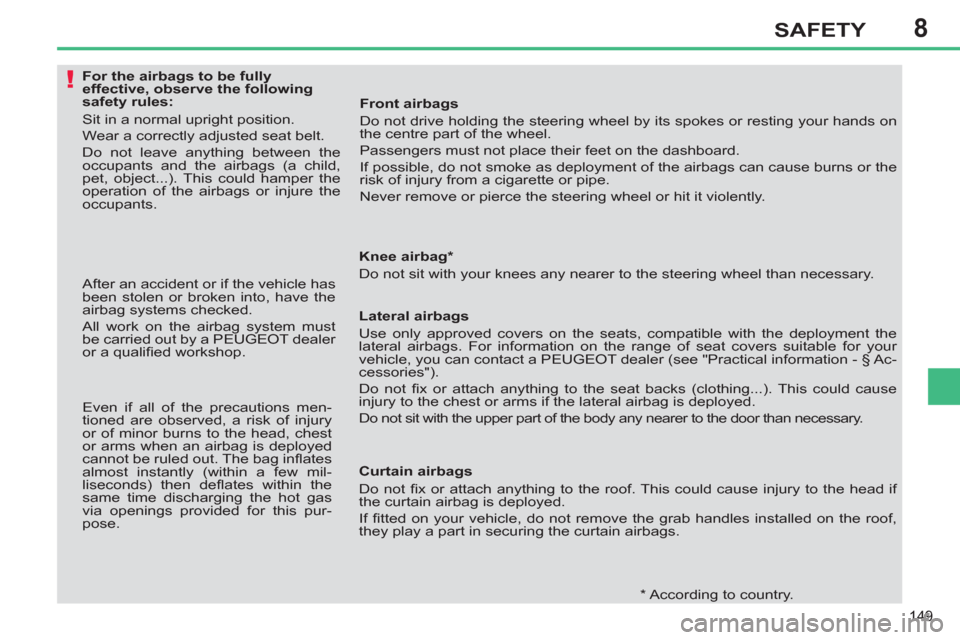
For the airbags to be fully
effective, observe the following
safety rules:
Sit in a normal upright position.
Wear a correctly adjusted seat belt.
Do not leave anything between the
occupants and the airbags (a child,
pet, object...). This could hamper the
operation of the airbags or injure the
occupants.
*
According to country.
Knee airbag *
Do not sit with your knees any nearer to the steering wheel than necessary.
Lateral airbags
Use only approved covers on the seats, compatible with the deployment the
lateral airbags. For information on the range of seat covers suitable for your
vehicle, you can contact a PEUGEOT dealer (see "Practical information - § Ac-
cessories").
Do not fi x or attach anything to the seat backs (clothing...). This could cause
injury to the chest or arms if the lateral airbag is deployed.
Do not sit with the upper part of the body any nearer to the door than necessary.
Curtain airbags
Do not fi x or attach anything to the roof. This could cause injury to the head if
the curtain airbag is deployed.
If fi tted on your vehicle, do not remove the grab handles installed on the roof,
they play a part in securing the curtain airbags.
After an accident or if the vehicle has
been stolen or broken into, have the
airbag systems checked.
All work on the airbag system must
be carried out by a PEUGEOT dealer
or a qualifi ed workshop.
Even if all of the precautions men-
tioned are observed, a risk of injury
or of minor burns to the head, chest
or arms when an airbag is deployed
cannot be ruled out. The bag infl ates
almost instantly (within a few mil-
liseconds) then defl ates within the
same time discharging the hot gas
via openings provided for this pur-
pose.
Front airbags
Do not drive holding the steering wheel by its spokes or resting your hands on
the centre part of the wheel.
Passengers must not place their feet on the dashboard.
If possible, do not smoke as deployment of the airbags can cause burns or the
risk of injury from a cigarette or pipe.
Never remove or pierce the steering wheel or hit it violently.