Page 190 of 382

11
188
PRACTICAL INFORMATION
Fitting a steel spare wheel
If your vehicle is fi tted with alloy
wheels, it is normal to notice, when
tightening the bolts on fi tting, that
the washers do not come into con-
tact with the steel spare wheel. The
wheel is secured by the conical
contact of each bolt.
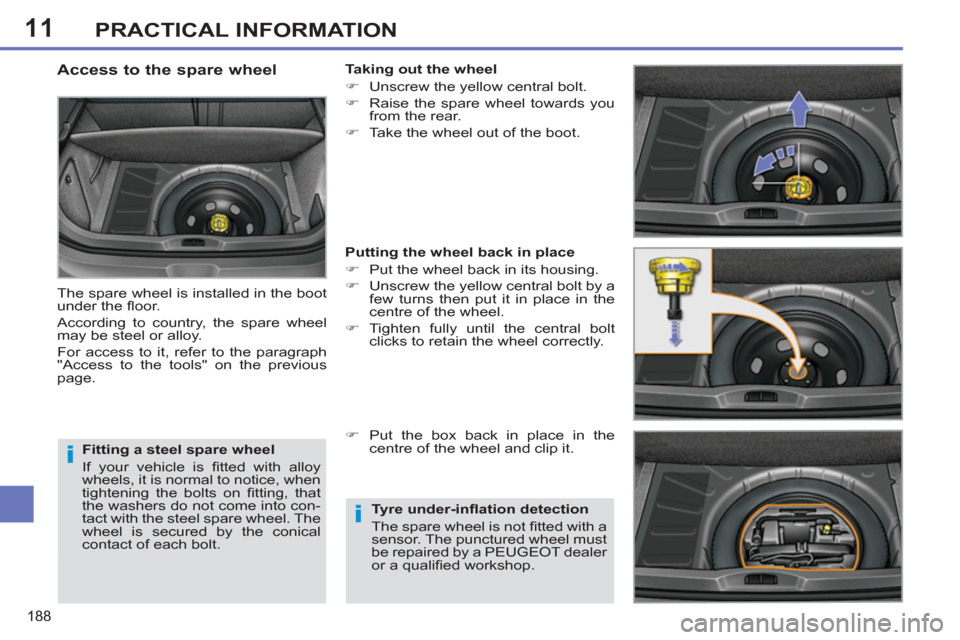
Access to the spare wheel
The spare wheel is installed in the boot
under the fl oor.
According to country, the spare wheel
may be steel or alloy.
For access to it, refer to the paragraph
"Access to the tools" on the previous
page.
Taking out the wheel
�)
Unscrew the yellow central bolt.
�)
Raise the spare wheel towards you
from the rear.
�)
Take the wheel out of the boot.
Putting the wheel back in place
�)
Put the wheel back in its housing.
�)
Unscrew the yellow central bolt by a
few turns then put it in place in the
centre of the wheel.
�)
Tighten fully until the central bolt
clicks to retain the wheel correctly.
�)
Put the box back in place in the
centre of the wheel and clip it.
Tyre under-infl ation detection
The spare wheel is not fi tted with a
sensor. The punctured wheel must
be repaired by a PEUGEOT dealer
or a qualifi ed workshop.
Page 191 of 382

11
189
PRACTICAL INFORMATION
CHANGING A WHEEL
Procedure for changing a
faulty wheel for the spare
wheel using the tools pro-
vided with the vehicle.
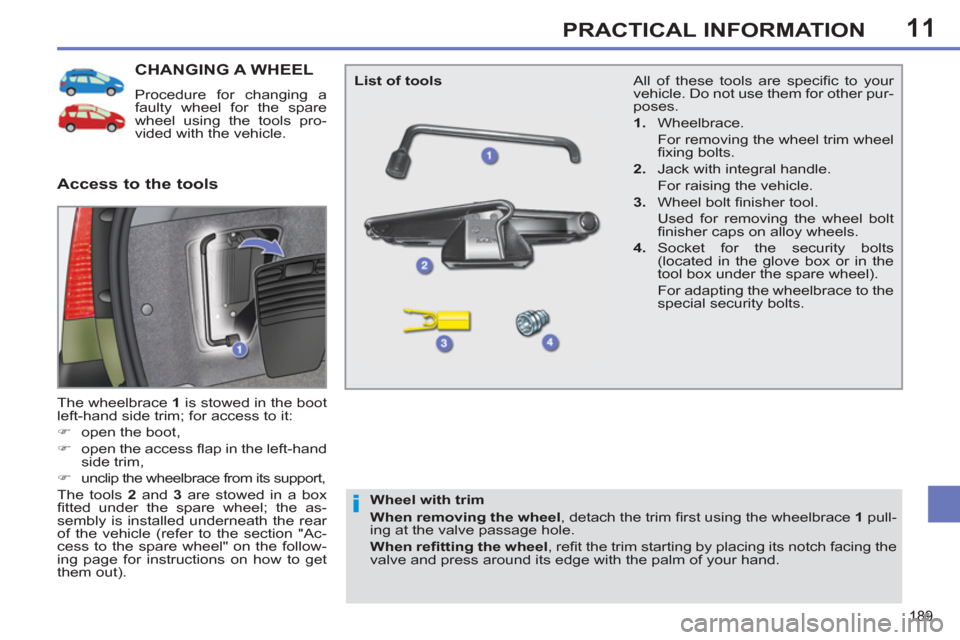
The wheelbrace 1
is stowed in the boot
left-hand side trim; for access to it:
�)
open the boot,
�)
open the access fl ap in the left-hand
side trim,
�)
unclip the wheelbrace from its support,
The tools 2
and 3
are stowed in a box
fi tted under the spare wheel; the as-
sembly is installed underneath the rear
of the vehicle (refer to the section "Ac-
cess to the spare wheel" on the follow-
ing page for instructions on how to get
them out).
Access to the tools
List of tools
Wheel with trim
When removing the wheel
, detach the trim fi rst using the wheelbrace 1
pull-
ing at the valve passage hole.
When refi tting the wheel
, refi t the trim starting by placing its notch facing the
valve and press around its edge with the palm of your hand.
All of these tools are specifi c to your
vehicle. Do not use them for other pur-
poses.
1.
Wheelbrace.
For removing the wheel trim wheel
fi xing bolts.
2.
Jack with integral handle.
For raising the vehicle.
3.
Wheel bolt fi nisher tool.
Used for removing the wheel bolt
fi nisher caps on alloy wheels.
4.
Socket for the security bolts
(located in the glove box or in the
tool box under the spare wheel).
For adapting the wheelbrace to the
special security bolts.
Page 203 of 382

11
201
PRACTICAL INFORMATION
PEUGEOT will not accept re-
sponsibility for the cost incurred in
repairing your vehicle or for recti-
fying malfunctions resulting from
the installation of accessories not
supplied and not recommended
by PEUGEOT and not installed in
accordance with its instructions,
in particular when the combined
consumption of all of the addition-
al equipment connected exceeds
10 milliamperes.
Installing electrical accessories
Your vehicle's electrical system is
designed to operate with standard
or optional equipment.
Before installing other electrical
equipment or accessories on your
vehicle, contact a PEUGEOT dealer
or a qualifi ed workshop.
CHANGING A FUSE
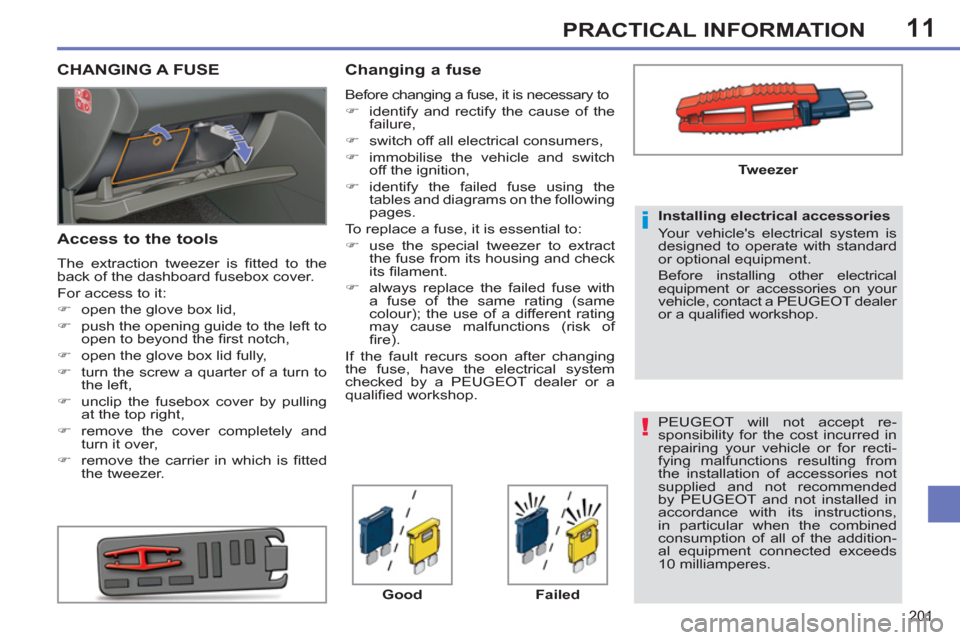
Access to the tools
The extraction tweezer is fi tted to the
back of the dashboard fusebox cover.
For access to it:
�)
open the glove box lid,
�)
push the opening guide to the left to
open to beyond the fi rst notch,
�)
open the glove box lid fully,
�)
turn the screw a quarter of a turn to
the left,
�)
unclip the fusebox cover by pulling
at the top right,
�)
remove the cover completely and
turn it over,
�)
remove the carrier in which is fi tted
the tweezer.
Changing a fuse
Before changing a fuse, it is necessary to
�)
identify and rectify the cause of the
failure,
�)
switch off all electrical consumers,
�)
immobilise the vehicle and switch
off the ignition,
�)
identify the failed fuse using the
tables and diagrams on the following
pages.
To replace a fuse, it is essential to:
�)
use the special tweezer to extract
the fuse from its housing and check
its fi lament.
�)
always replace the failed fuse with
a fuse of the same rating (same
colour); the use of a different rating
may cause malfunctions (risk of
fi re).
If the fault recurs soon after changing
the fuse, have the electrical system
checked by a PEUGEOT dealer or a
qualifi ed workshop.
Good
Failed
Tweezer
Page 282 of 382
280
09
MEDIA
TRAFFIC
SCREEN MENU MAP
MAIN FUNCTION
option A
o
ption B...
option A1
option A2
1
2
3
2
3
"Traffic" Menu
Messages on route
Select preferred list
1
2
3
Deactivate PIN 4
Only warnings on route3
All warning messages3
All messages3
Geo. Filter3
Within 2 miles (3 km) 4
Within 3 miles (5 km) 4
Within 6 miles (10 km) 4
Within 30 miles (50 km)4
On confi rmation Read out settin
gs2
3
Incoming messages3
TMC station information2
"Media" Menu
Audio CD / MP3-Disc//DVD-Audio//DVD-Video
Select media
1
2
3
Jukebox (Folders & Files)3
SD-Card3
USB3
External device (audio/AV)3
Add fi les
Jukebox management2
3
Folders & Files 4
Create folder3
Modify content3
Edit playlist3
Play options3
Playlists4
Memory capacity3
Refer to the "Sound settings"menu details of which are shown on the next page.
Sound settings 2
3
Aspect ratio
Video settings2
3
Menu language3
Display3
Brightness 4
Contrast4
Colour 4
Page 303 of 382
301
04
TOWARDS POINTS OF INTEREST (POI)
NAVIGATION - GUIDANCE
The points of interest (POI) indicate all of the service locations in the vicinity(hotels, various businesses, airports...).
Select the " Enter an address
" function
and confi rm, then select Select
destinationand confi rm.
To select a P
OI close to your currentlocation, select "POI" and confi rm, thenselect " Around the current place
" and confi rm.
To select a P
OI as a stage on the route,select " POI" and confi rm, then select " On
the route" and confi rm.
To select a P
OI as a destination, fi rst enter the country and town (see "Towards
a new destination"), select "POI" andconfi rm, fi nally select "Near" and confi rm.r
Search for POIs in the categories
suggested in the following pages.
Select " Search by Name
" to search for POIs by name and not byproximity.
Select the POI and confi rm " OK" to start
the guidance. Pr
ess NAV
to display the
"Navigation - guidance" menu.
Page 359 of 382

357
06
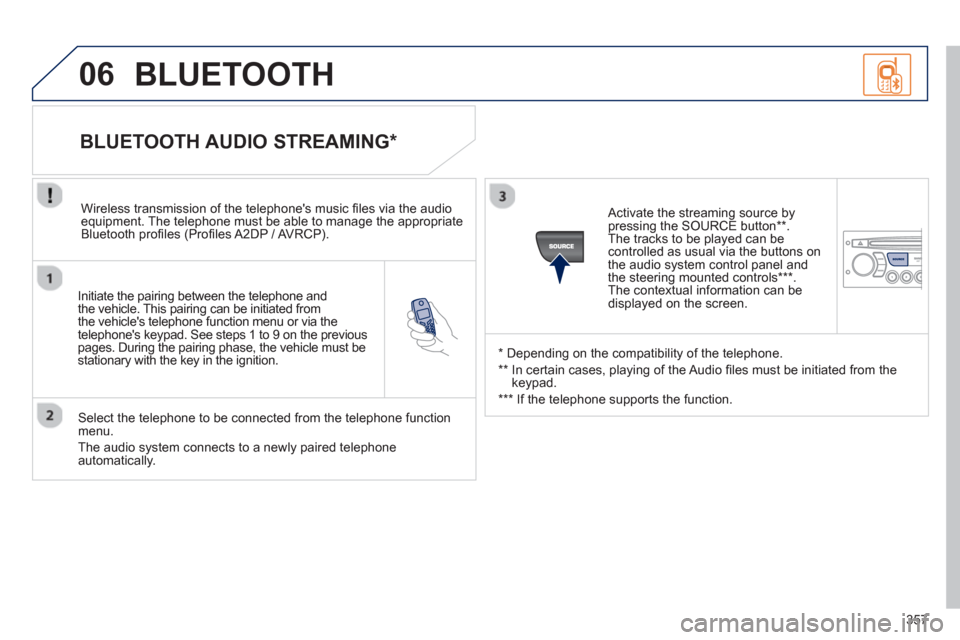
Initiate the pairing between the telephone and
the vehicle. This pairing can be initiated from
the vehicle's telephone function menu or via the
telephone's ke
ypad. See steps 1 to 9 on the previouspages. During the pairing phase, the vehicle must bestationary with the key in the ignition.
Select the telephone to be connected from the telephone function
menu.
The audio system connects to a newly paired telephone automatically.
BLUETOOTH AUDIO STREAMING *
Wireless transmission of the telephone's music fi les via the audioequipment. The telephone must be able to manage the appropriate
Bluetooth profi les (Profi les A2DP / AV RCP).
*
Depending on the compatibility of the telephone.
**
In certain cases, playing of the Audio fi les must be initiated from the
keypad.
***
If the tele
phone supports the function.
Activate the streamin
g source by
pressing the SOURCE button ** .The tracks to be played can becontrolled as usual via the buttons on
the audio system control panel andthe steering mounted controls *** .
The contextual information can bedisplayed on the screen.
BLUETOOTH