2013 PEUGEOT 3008 instrument panel
[x] Cancel search: instrument panelPage 30 of 352
IN
S
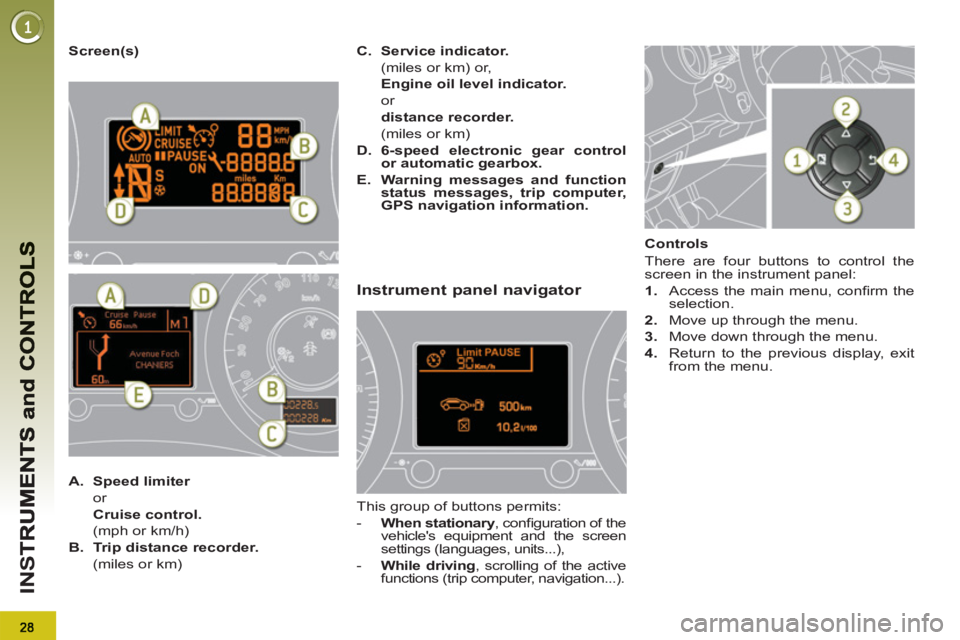
Screen(s)
A.
Speed limiter
or
Cruise control.
(mph or km/h)
B.
Trip distance recorder.
(miles or km)
C.
Service indicator.
(miles or km) or,
Engine oil level indicator.
or
distance recorder.
(miles or km)
D.
6-speed electronic gear control
or automatic gearbox.
E.
Warning messages and function
status messages, trip computer,
GPS navigation information.
Instrument panel navigator
This group of buttons permits:
- When stationary
, confi guration of the
vehicle's equipment and the screen
settings (languages, units...),
- While driving
, scrolling of the active
functions (trip computer, navigation...).
Controls
There are four buttons to control the
screen in the instrument panel:
1.
Access the main menu, confi rm the
selection.
2.
Move up through the menu.
3.
Move down through the menu.
4.
Return to the previous display, exit
from the menu.
Page 43 of 352
41
IN
S
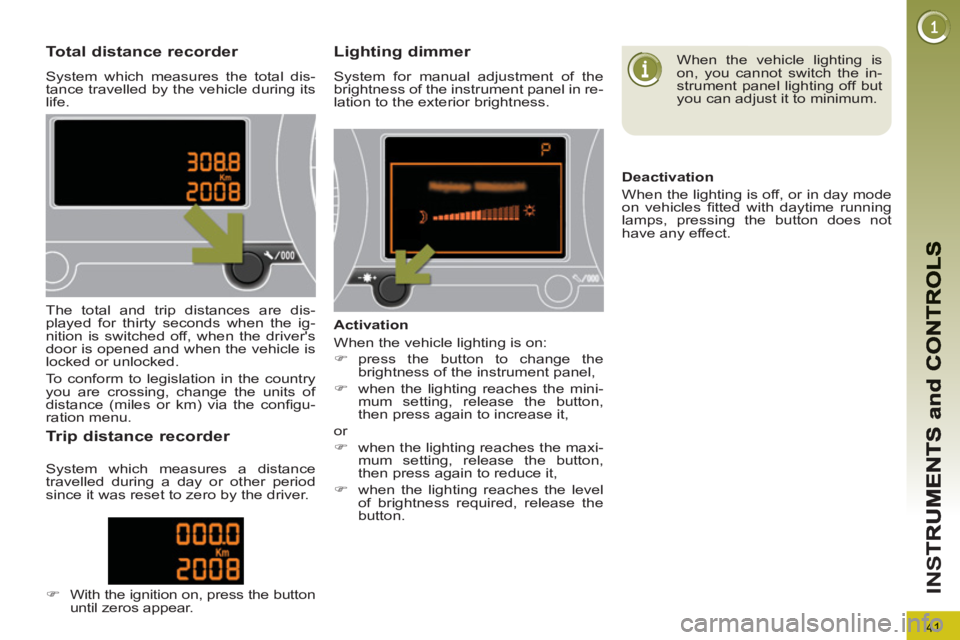
Total distance recorder
System which measures the total dis-
tance travelled by the vehicle during its
life.
Lighting dimmer
System for manual adjustment of the
brightness of the instrument panel in re-
lation to the exterior brightness.
The total and trip distances are dis-
played for thirty seconds when the ig-
nition is switched off, when the driver's
door is opened and when the vehicle is
locked or unlocked.
To conform to legislation in the country
you are crossing, change the units of
distance (miles or km) via the confi gu-
ration menu.
Tr ip distance recorder
Activation
When the vehicle lighting is on:
�)
press the button to change the
brightness of the instrument panel,
�)
when the lighting reaches the mini-
mum setting, release the button,
then press again to increase it,
or
�)
when the lighting reaches the maxi-
mum setting, release the button,
then press again to reduce it,
�)
when the lighting reaches the level
of brightness required, release the
button.
When the vehicle lighting is
on, you cannot switch the in-
strument panel lighting off but
you can adjust it to minimum.
Deactivation
When the lighting is off, or in day mode
on vehicles fi tted with daytime running
lamps, pressing the button does not
have any effect.
System which measures a distance
travelled during a day or other period
since it was reset to zero by the driver.
�)
With the ignition on, press the button
until zeros appear.
Page 51 of 352
49
M
U
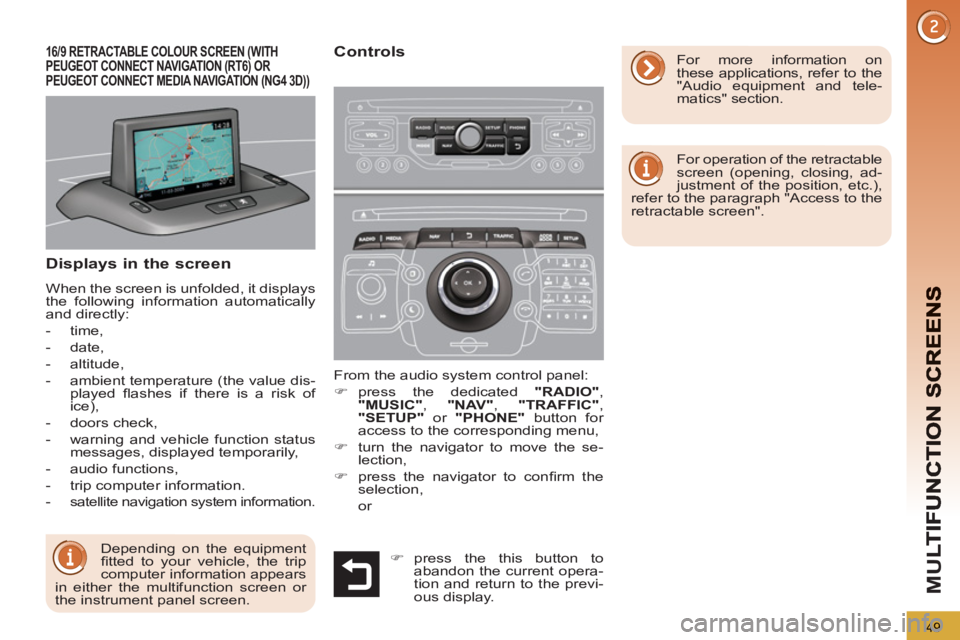
Displays in the screen
When the screen is unfolded, it displays
the following information automatically
and directly:
- time,
- date,
- altitude,
- ambient temperature (the value dis-
played fl ashes if there is a risk of
ice),
- doors check,
- warning and vehicle function status
messages, displayed temporarily,
- audio functions,
- trip computer information.
-
satellite navigation system information.
From the audio system control panel:
�)
press the dedicated "RADIO"
,
"MUSIC"
, "NAV"
, "TRAFFIC"
,
"SETUP"
or "PHONE"
button for
access to the corresponding menu,
�)
turn the navigator to move the se-
lection,
�)
press the navigator to confi rm the
selection,
or
16/9 RETRACTABLE COLOUR SCREEN (WITH PEUGEOT CONNECT NAVIGATION (RT6) ORPEUGEOT CONNECT MEDIA NAVIGATION (NG4 3D))
Controls
For operation of the retractable
screen (opening, closing, ad-
justment of the position, etc.),
refer to the paragraph "Access to the
retractable screen".
For more information on
these applications, refer to the
"Audio equipment and tele-
matics" section.
Depending on the equipment
fi tted to your vehicle, the trip
computer information appears
in either the multifunction screen or
the instrument panel screen.
�)
press the this button to
abandon the current opera-
tion and return to the previ-
ous display.
Page 55 of 352
53
M
U
Monochrome screen C
16/9 colour screen
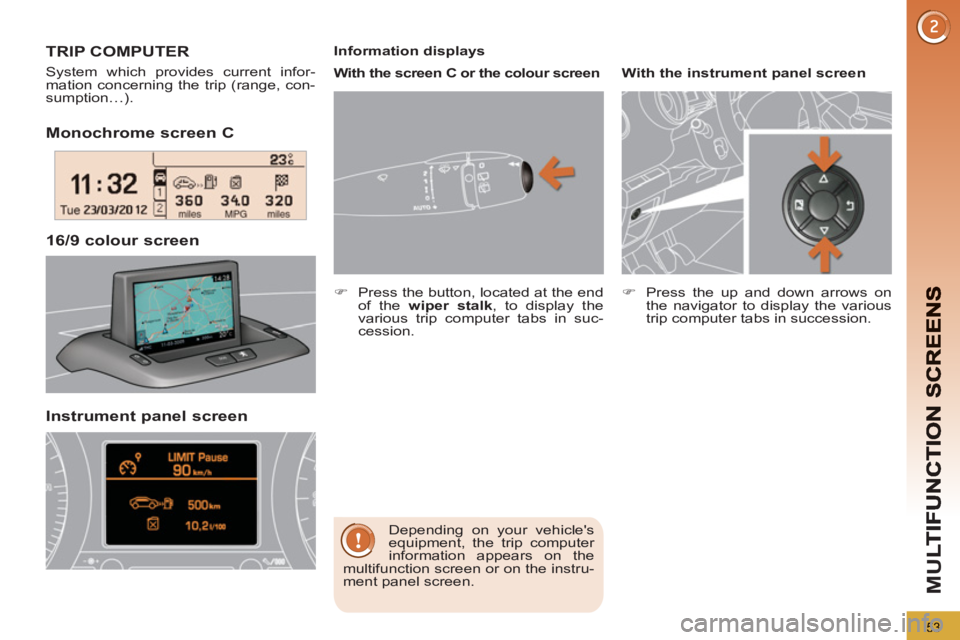
TRIP COMPUTER
System which provides current infor-
mation concerning the trip (range, con-
sumption…).
Depending on your vehicle's
equipment, the trip computer
information appears on the
multifunction screen or on the instru-
ment panel screen.
Instrument panel screen
Information displays
With the screen C or the colour screen
�)
Press the button, located at the end
of the wiper stalk
, to display the
various trip computer tabs in suc-
cession.
With the instrument panel screen
�)
Press the up and down arrows on
the navigator to display the various
trip computer tabs in succession.
Page 56 of 352
54
M
U
- The current information
tab with:
●
the range,
●
the current fuel
consumption,
●
the distance remaining
to be travelled.
- The trip "1"
tab with:
●
the distance travelled,
●
the average fuel
consumption,
●
the average speed,
for the fi rst trip.
- The trip "2"
tab with:
●
the distance travelled,
●
the average fuel
consumption,
●
the average speed,
for the second trip.
�)
Pressing the button again takes you
to a black screen.
A further press returns you to the
normal display.
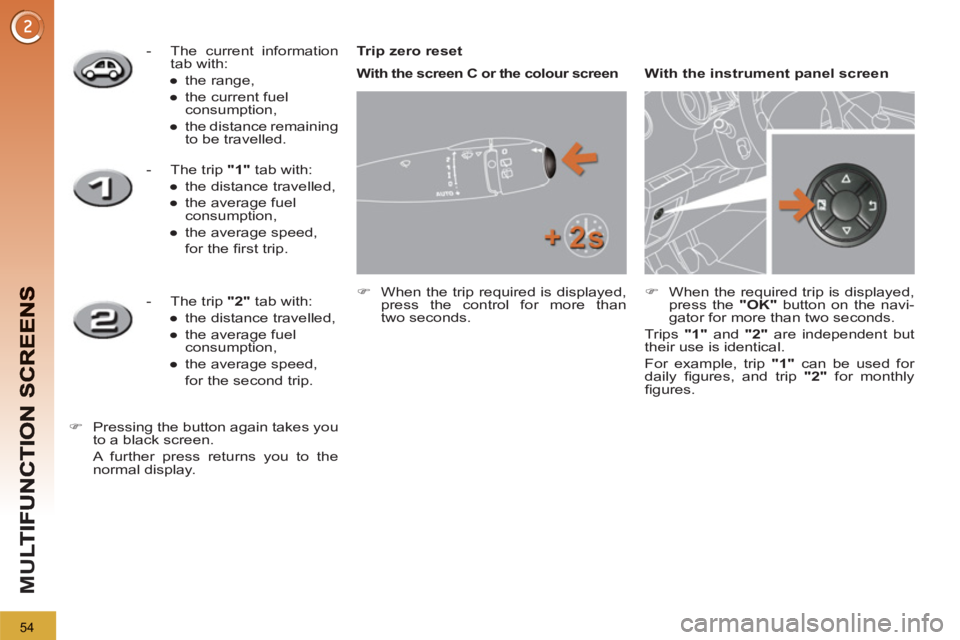
Trip zero reset
�)
When the trip required is displayed,
press the control for more than
two seconds.
�)
When the required trip is displayed,
press the "OK"
button on the navi-
gator for more than two seconds.
Trips "1"
and "2"
are independent but
their use is identical.
For example, trip "1"
can be used for
daily fi gures, and trip "2"
for monthly
fi gures.
With the screen C or the colour screen
With the instrument panel screen
Page 87 of 352
85
AC
C
The key cannot be removed
from the lock until the cap is
put back on the tank.
Opening the cap may trigger an in-
rush of air. This vacuum, which is
completely normal, is caused by the
sealing of the fuel system.
FUEL TANK
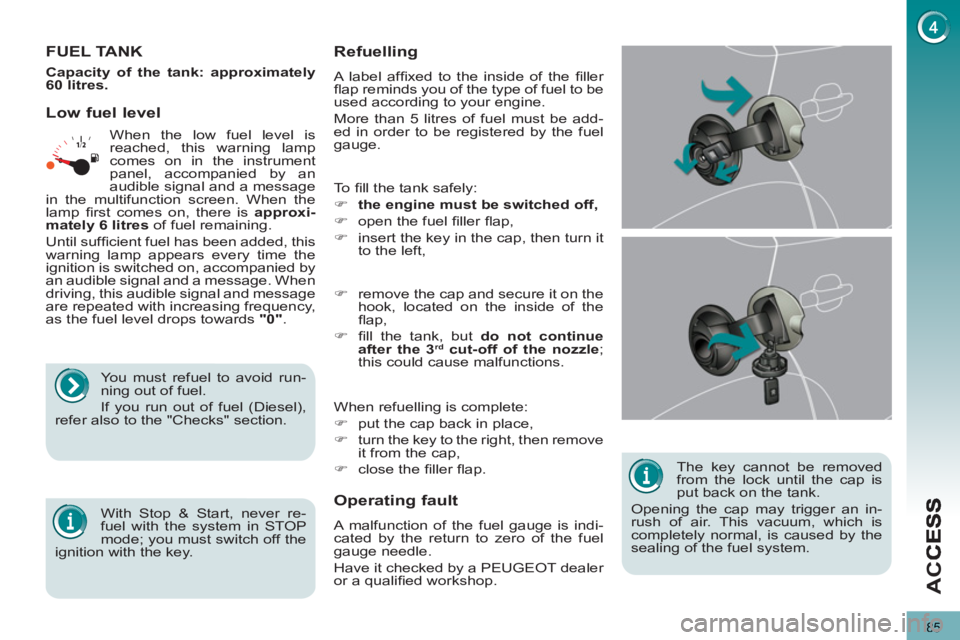
To fi ll the tank safely:
�)
the engine must be switched off,
�)
open the fuel fi ller fl ap,
�)
insert the key in the cap, then turn it
to the left,
When refuelling is complete:
�)
put the cap back in place,
�)
turn the key to the right, then remove
it from the cap,
�)
close the fi ller fl ap.
�)
remove the cap and secure it on the
hook, located on the inside of the
fl ap,
�)
fi ll the tank, but do not continue
after the 3
rd cut-off of the nozzle
;
this could cause malfunctions.
Low fuel level
Operatin
g fault
A malfunction of the fuel gauge is indi-
cated by the return to zero of the fuel
gauge needle.
Have it checked by a PEUGEOT dealer
or a qualifi ed workshop.
Refuelling
A label affi xed to the inside of the fi ller
fl ap reminds you of the type of fuel to be
used according to your engine.
More than 5 litres of fuel must be add-
ed in order to be registered by the fuel
gauge. When the low fuel level is
reached, this warning lamp
comes on in the instrument
panel, accompanied by an
audible signal and a message
in the multifunction screen. When the
lamp fi rst comes on, there is approxi-
mately
6 litres
of fuel remaining.
Until suffi cient fuel has been added, this
warning lamp appears every time the
ignition is switched on, accompanied by
an audible signal and a message. When
driving, this audible signal and message
are repeated with increasing frequency,
as the fuel level drops towards "0"
.
You must refuel to avoid run-
ning out of fuel.
If you run out of fuel (Diesel),
refer also to the "Checks" section.
With Stop & Start, never re-
fuel with the system in STOP
mode; you must switch off the
ignition with the key.
Capacity of the tank: approximately
60 litres.
Page 89 of 352
87
VIS
LIGHTING CONTROLS
System for selection and control of the
various front and rear lamps providing
the vehicle's lighting.
Main lighting
The various front and rear lamps of
the vehicle are designed to adapt the
lighting progressively in relation to the
climatic conditions and so improve the
driver's visibility:
- sidelamps, to be seen,
- dipped beam headlamps to see
without dazzling other drivers,
- main beam headlamps to see clearly
when the road is clear,
- directional headlamps for improved
visibility when cornering.
Additional lighting
Other lamps are installed to fulfi l the
requirements of particular driving con-
ditions:
- a rear foglamp to be seen from a
distance,
-
front foglamps for even better visibility,
- daytime running lamps to be seen
during the day.
Programming
Various automatic lighting control
modes are also available according to
the following options:
- guide-me-home lighting,
- automatic lighting,
- directional headlamps.
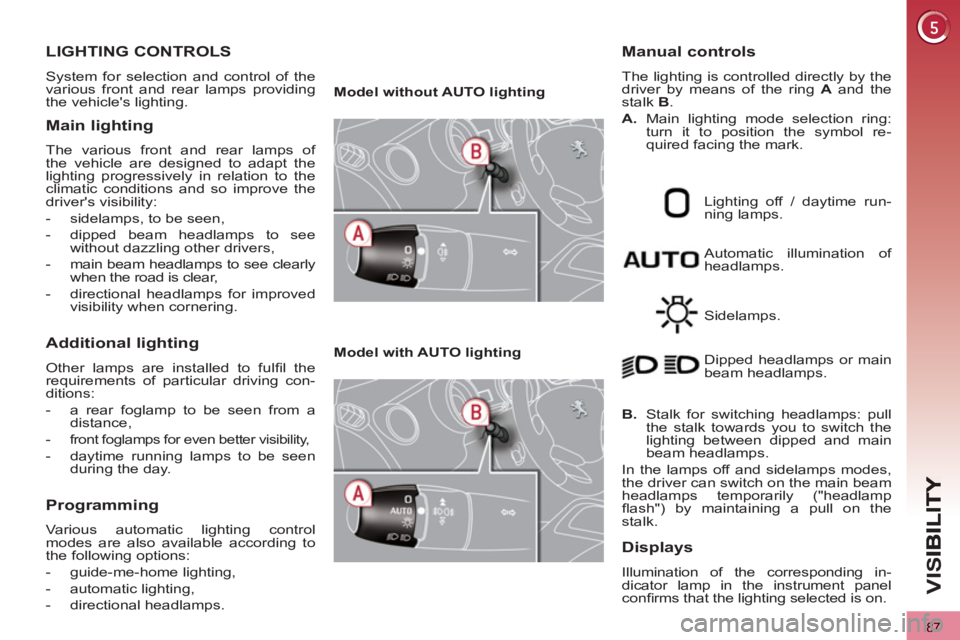
Model without AUTO lighting
Model with AUTO lighting
Automatic illumination of
headlamps.
Manual controls
The lighting is controlled directly by the
driver by means of the ring A
and the
stalk B
.
A.
Main lighting mode selection ring:
turn it to position the symbol re-
quired facing the mark.
Lighting off / daytime run-
ning lamps.
Sidelamps.
B.
Stalk for switching headlamps: pull
the stalk towards you to switch the
lighting between dipped and main
beam headlamps.
In the lamps off and sidelamps modes,
the driver can switch on the main beam
headlamps temporarily ("headlamp
fl ash") by maintaining a pull on the
stalk. Dipped headlamps or main
beam headlamps.
Displays
Illumination of the corresponding in-
dicator lamp in the instrument panel
confi rms that the lighting selected is on.
Page 92 of 352
90
VIS
In fog or snow, the sunshine
sensor may detect suffi cient
light. In this case, the lighting
will not come on automatically.
Do not cover the sunshine sensor,
coupled with the rain sensor and lo-
cated in the centre of the windscreen
behind the rear view mirror; the as-
sociated functions would no longer
be controlled.
Automatic "guide-me-home" lightingAutomatic illumination of headlamps
When a low level of ambient light is de-
tected by a sunshine sensor, the num-
ber plate lamps, sidelamps and dipped
beam headlamps are switched on auto-
matically, without any action on the part of
the driver. They can also come on if rain is
detected, at the same time as automatic
operation of the windscreen wipers.
As soon as the brightness returns to a
suffi cient level or after the windscreen
wipers are switched off, the lamps are
switched off automatically.
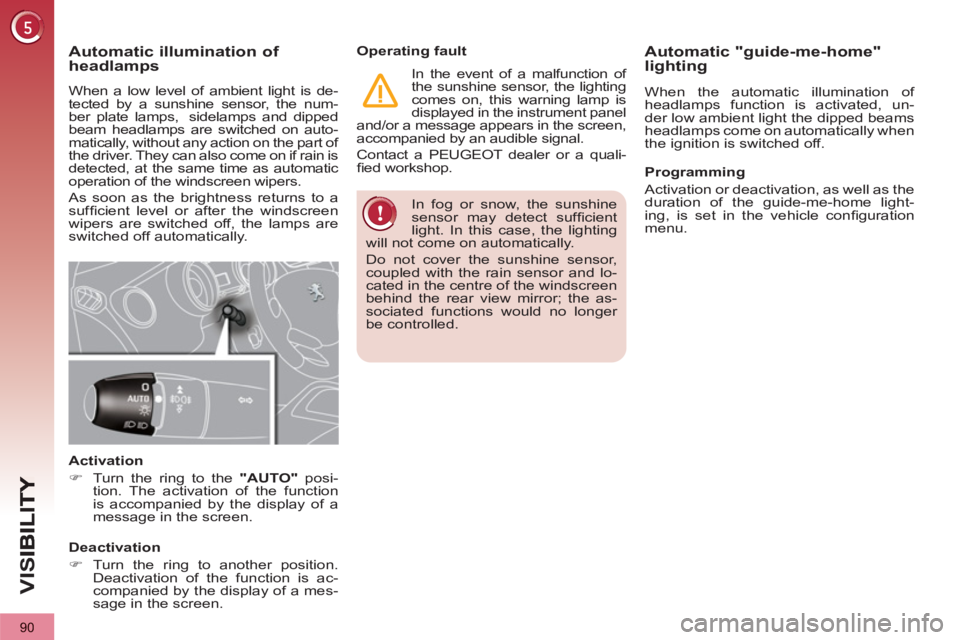
Activation
�)
Turn the ring to the "AUTO"
posi-
tion. The activation of the function
is accompanied by the display of a
message in the screen.
Deactivation
�)
Turn the ring to another position.
Deactivation of the function is ac-
companied by the display of a mes-
sage in the screen.
Operating fault
In the event of a malfunction of
the sunshine sensor, the lighting
comes on, this warning lamp is
displayed in the instrument panel
and/or a message appears in the screen,
accompanied by an audible signal.
Contact a PEUGEOT dealer or a quali-
fi ed workshop.
When the automatic illumination of
headlamps function is activated, un-
der low ambient light the dipped beams
headlamps come on automatically when
the ignition is switched off.
Programming
Activation or deactivation, as well as the
duration of the guide-me-home light-
ing, is set in the vehicle confi guration
menu.