Page 4 of 22

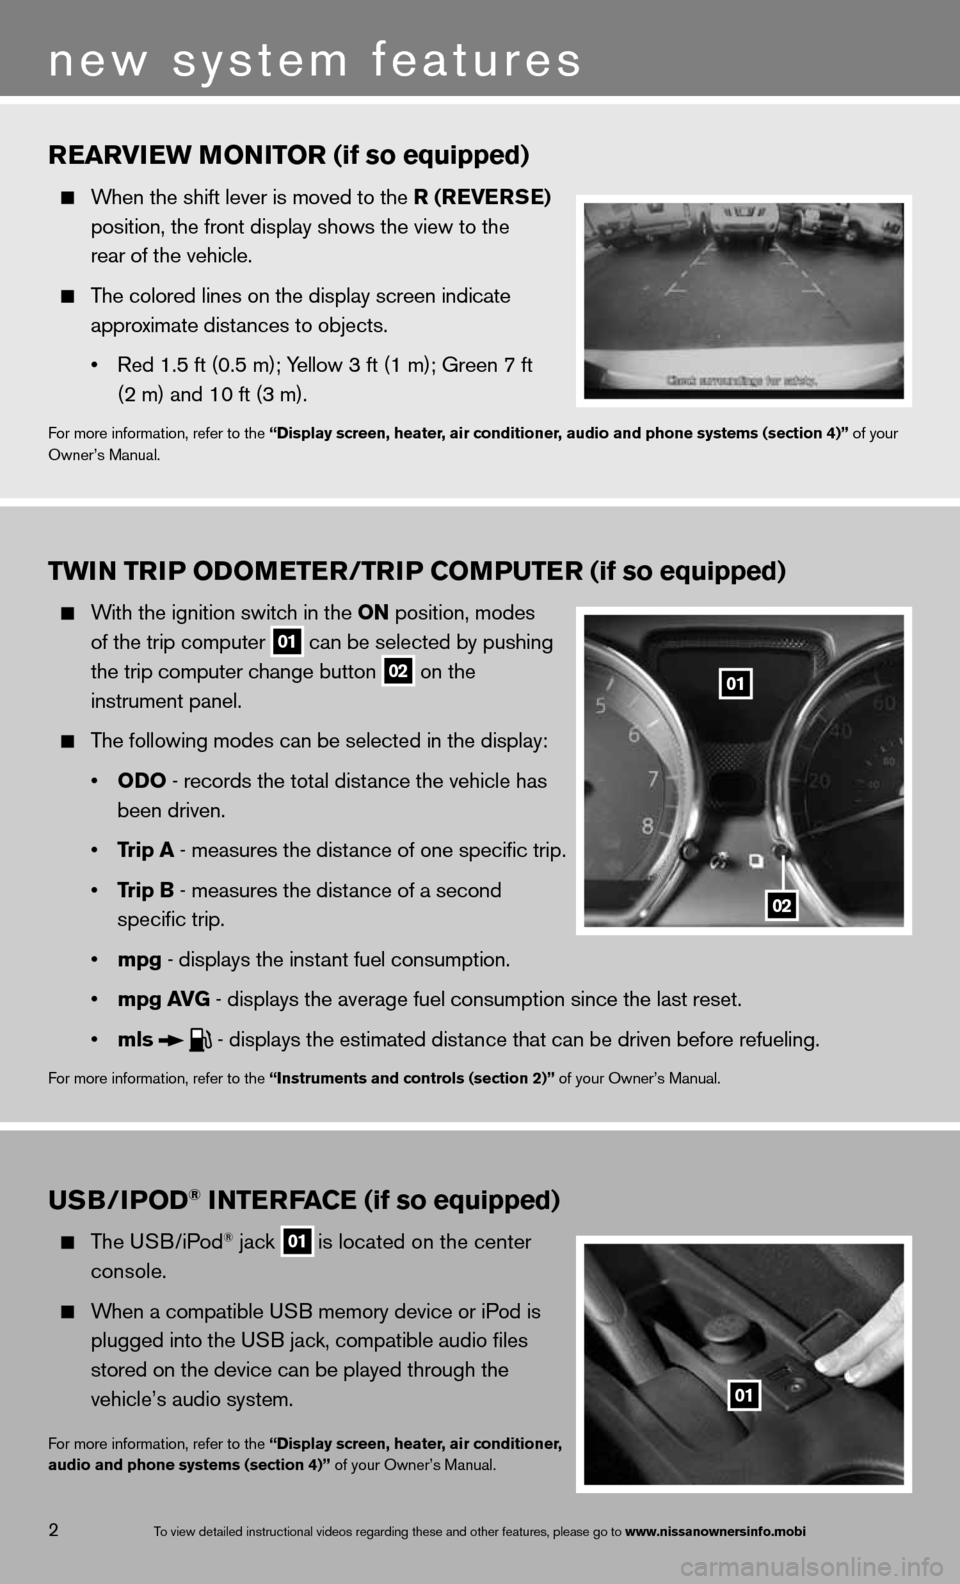
TwiN Tri P oDoMeTer /TriP CoMPuTer (if so equipped)
With the ignition switch in the oN position, modes
of the trip computer
01 can be selected by pushing
the trip computer change button
02 on the
instrument panel.
The following modes can be selected in the display:
• oD o - records the total distance the vehicle has
been driven.
• Trip a - measures the distance of one specific trip.
• Trip B - measures the distance of a second
specific trip.
• mpg - displays the instant fuel consumption.
• mpg av G - displays the average fuel consumption since the last reset.
• mls
- displays the estimated distance that can be driven before refueling.
for more information, refer to the “instruments and controls (section 2)” of your Owner’s Manual.
rearview M oNiTor (if so equipped)
When the shift lever is moved to the r (reverSe )
position, the front display shows the view to the
rear of the vehicle.
The colored lines on the display screen indicate
approximate distances to objects.
• Red 1.5 ft (0.5 m); Yellow 3 ft (1 m); Green 7 ft
(2 m) and 10 ft (3 m).
for more information, refer to the “Display screen, heater, air conditioner, audio and phone systems (section 4)” of your
Owner’s Manual.
u SB/iPo D® iNTerFa Ce (if so equipped)
The u SB/iPod® jack
01 is located on the center
console.
When a compatible USB memory device or iPod is
plugged into the USB jack, compatible audio files
stored on the device can be played through the
vehicle’s audio system.
for more information, refer to the “Display screen, heater, air conditioner,
audio and phone systems (section 4)” of your Owner’s Manual.
2
new system features
01
02
01
To view detailed in\fstructional videos\f regarding these a\fnd other features\f \fplease go to www.nissanownersin\hfo.mobi
Page 9 of 22

HeaD liGHT CoNTrol
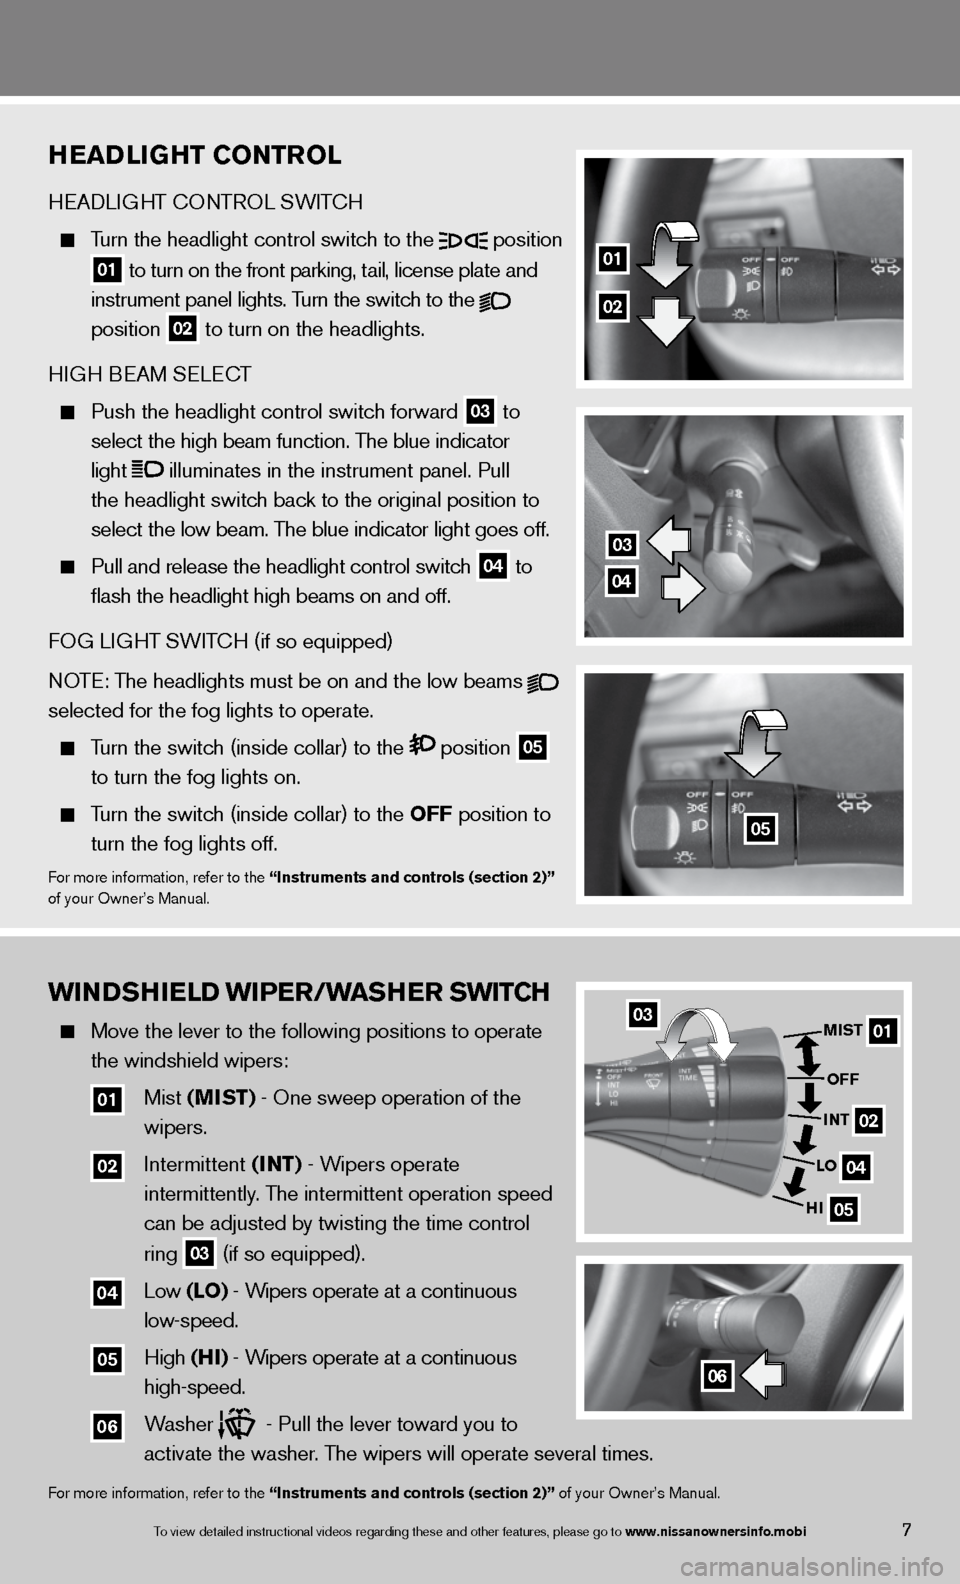
H eAd LiGHT c OnTROL SW iTc H
Turn the headlight control switch to the
position
01 to turn on the front parking, tail, license plate and
instrument panel lights. Turn the switch to the
position
02 to turn on the headlights.
H iGH B eAM S eLec T
Push the headlight control switch forward
03 to
select the high beam function. The blue indicator
light
illuminates in the instrument panel. Pull
the headlight switch back to the original position to
select the low beam. The blue indicator light goes off.
Pull and release the headlight control switch
04 to
flash the headlight high beams on and off.
fOG Li GHT SW iTc H (if so equipped)
NOTE: The headlights must be on and the low beams
selected for the fog lights to operate.
Turn the switch (inside collar) to the position
05
to turn the fog lights on.
Turn the switch (inside collar)
to the oFF position to
turn the fog lights off.
for more information, refer to the “instruments and controls (section 2)”
of your Owner’s Manual.
01
02
05
03
04
wiNDSHiel D wiPer/waSHer Swi TCH
Move the lever to the following positions to operate
the windshield wipers:
01 Mist (MiST) - One sweep operation of the
wipers.
02 intermittent (iNT) - Wipers operate
intermittently. The intermittent operation speed
can be adjusted by twisting the time control
ring
03 (if so equipped).
04 Low (lo) - Wipers operate at a continuous
low-speed.
05 High (Hi) - Wipers operate at a continuous
high-speed.
06 Washer - Pull the lever toward you to
activate the washer. The wipers will operate several times.
for more information, refer to the “instruments and controls (section 2)” of your Owner’s Manual.
0301
02
04
05
MiST
oFF
i NT
lo
Hi
06
7To view detailed in\fstructional videos\f regarding these a\fnd other features\f \fplease go to www.nissanownersin\hfo.mobi
Page 14 of 22

Fuel-Filler Door
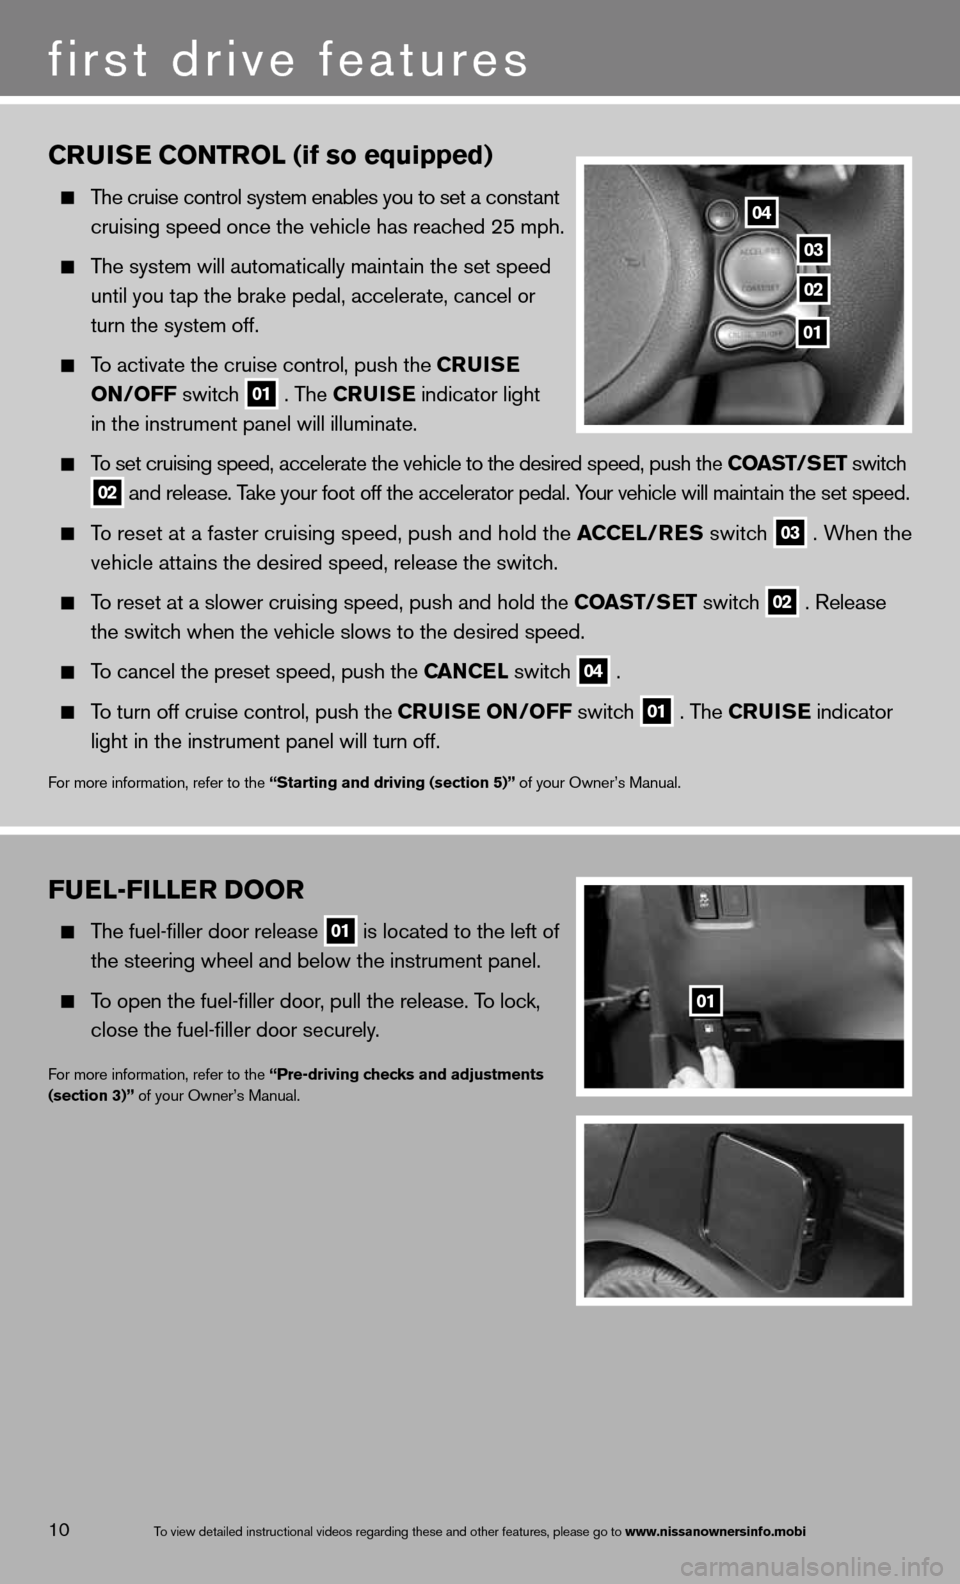
The fuel-filler door release
01 is located to the left of
the steering wheel and below the instrument panel.
To open the fuel-filler door, pull the release. To lock,
close the fuel-filler door securely.
for more information, refer to the “Pre-driving checks and adjustments
(section 3)” of your Owner’s Manual.
01
C rui Se C oNT rol (if so equipped)
The cruise control system enables you to set a constant
cruising speed once the vehicle has reached 25 mph.
The system will automatically maintain the set speed
until you tap the brake pedal, accelerate, cancel or
turn the system off.
To activate the cruise control, push the C ruiSe
oN/oFF switch
01 . The C
ruiSe indicator light
in the instrument panel will illuminate.
To set cruising speed, accelerate the vehicle to the desired speed, push \
the CoaST/S eT switch
02 and release. Take your foot off the accelerator pedal. Your vehicle will maintain the set speed.
To reset at a faster cruising speed, push and hold the a CCel/reS switch
03 . When the
vehicle attains the desired speed, release the switch.
To reset at a slower cruising speed, push and hold the CoaST/S eT switch
02 . Release
the switch when the vehicle slows to the desired speed.
To cancel the preset speed, push the C aNCel switch
04 .
To turn off cruise control, push the Crui Se oN/oFF switch
01 . The C
ruiSe indicator
light in the instrument panel will turn off.
for more information, refer to the “Starting and driving (section 5)” of your Owner’s Manual.
04
03
02
01
10
first drive features
To view detailed in\fstructional videos\f regarding these a\fnd other features\f \fplease go to www.nissanownersin\hfo.mobi