Page 7 of 36

TIre Pre SSure MONITOr ING SYSTeM (TPMS)
wITH eaSY FILL TI re aLerT
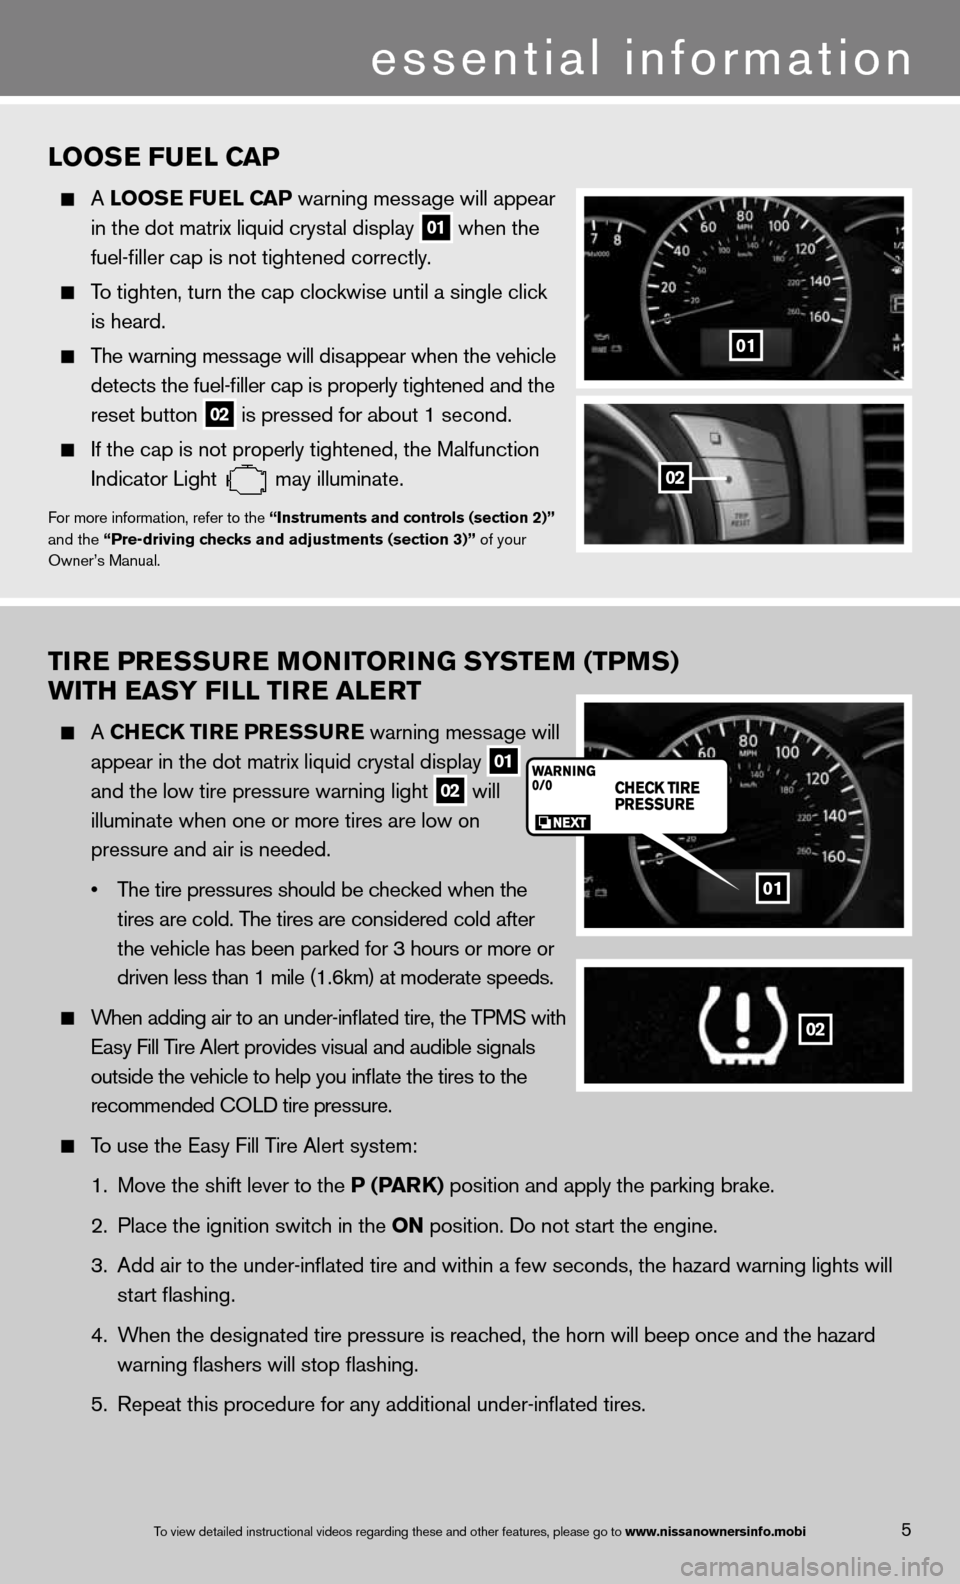
A CHe CK TIre P reSSure warning message will
appear in the dot matrix liquid crystal display
01
and the low tire pressure warning light
02 will
illuminate when one or more tires are low on
pressure and air is needed.
• The tire pressures should be checked when the
tires are cold. The tires are considered cold after
the vehicle has been parked for 3 hours or more or
driven less than 1 mile (1.6km) at moderate speeds.
When adding air to an under-inflated tire, the TPMS with
easy fill Tire Alert provides visual and audible signals
outside the vehicle to help you inflate the tires to the
recommended c OLd tire pressure.
To use the easy fill Tire Alert system:
1. Move the shift lever to the P (P arK) position and apply the parking brake.
2. Place the ignition switch in the ON position. do not start the engine.
3. Add air to the under-inflated tire and within a few seconds, the hazar\
d warning lights will
start flashing.
4. When the designated tire pressure is reached, the horn will beep once and the hazard
warning flashers will stop flashing.
5. Repeat this procedure for any additional under-inflated tires.
01
02
5To view detailed in\fstructional videos\f regarding these a\fnd other features\f \fplease go to www.nissanownersin\Ifo.mobi
LOOS e Fue L CaP
A LOOS e Fue L CaP warning message will appear
in the dot matrix liquid crystal display
01 when the
fuel-filler cap is not tightened correctly.
To tighten, turn the cap clockwise until a single click
is heard.
The warning message will disappear when the vehicle
detects the fuel-filler cap is properly tightened and the
reset button
02 is pressed for about 1 second.
if the cap is not properly tightened, the Malfunction
indicator Light
may illuminate.f
or more information, refer to the “Instruments and controls (section 2)”
and the “Pre-driving checks and adjustments (section 3)” of your
Owner’s Manual.
01
02
essential information
Page 14 of 36

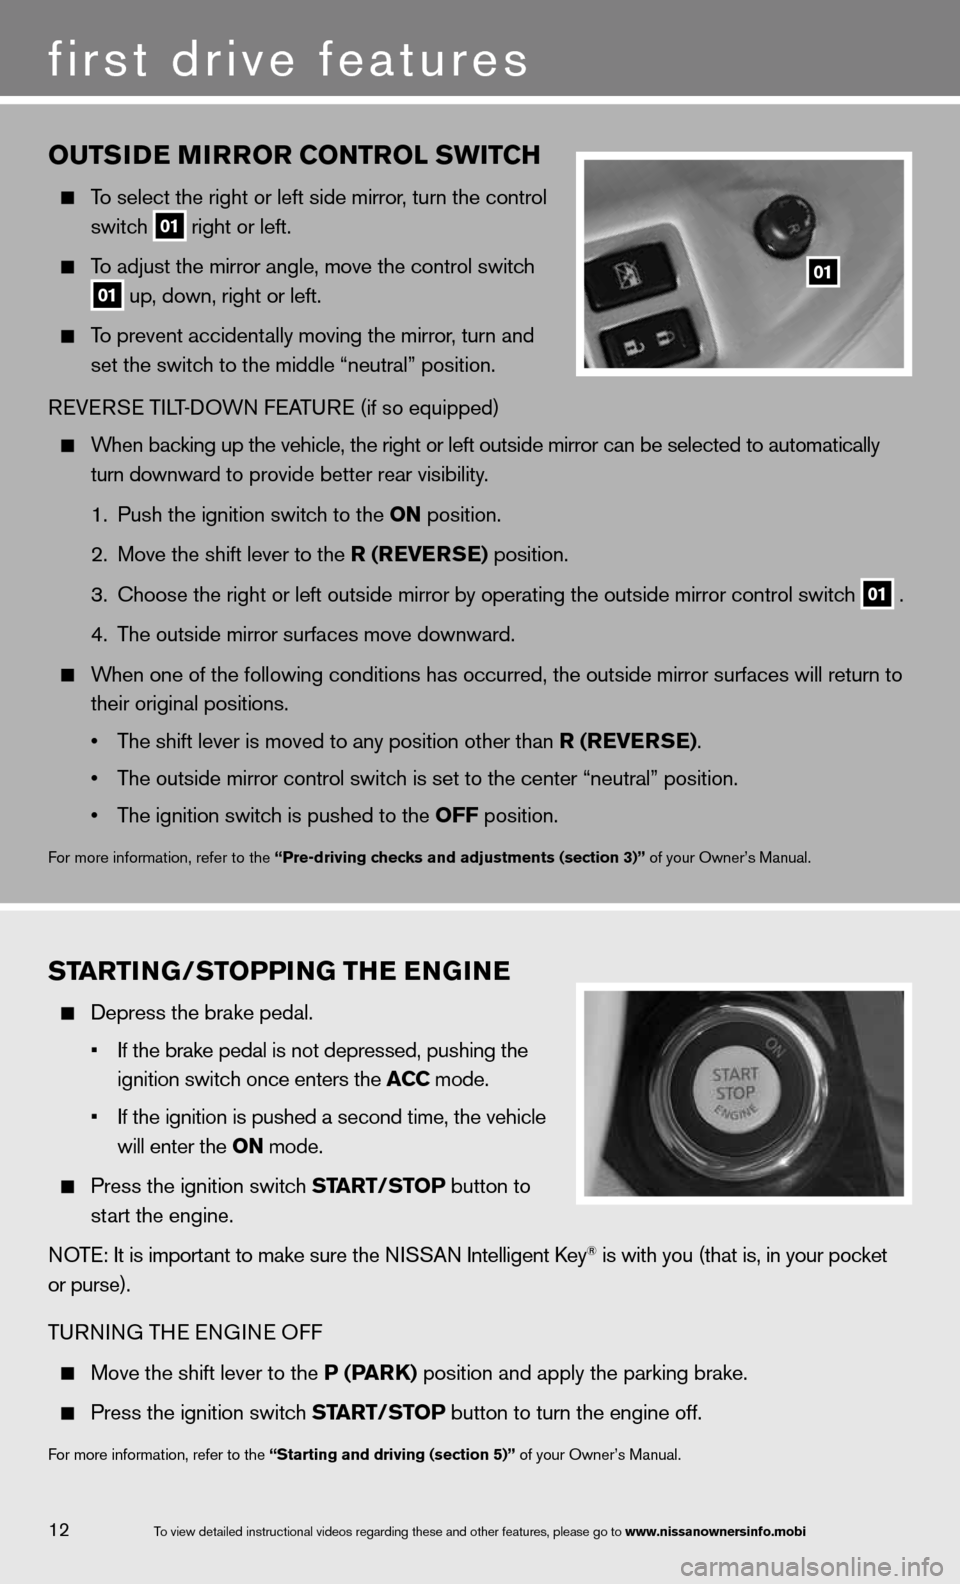
OuTSIDe MIrrOr CONTr OL SwITCH
To select the right or left side mirror , turn the control
switch
01 right or left.
To adjust the mirror angle, move the control switch
01 up, down, right or left.
To prevent accidentally moving the mirror, turn and
set the switch to the middle “neutral” position.
R eVe RSe Ti LT-d OWn feATu Re (if so equipped)
When backing up the vehicle, the right or left outside mirror can be selected to\
automatically
turn downward to provide better rear visibility.
1. Push the ignition switch to the ON position.
2. Move the shift lever to the r (reVer Se) position.
3. choose the right or left outside mirror by operating the outside mirror c\
ontrol switch
01 .
4. The outside mirror surfaces move downward.
When one of the following conditions has occurred, the outside mirror sur\
faces will return to
their original positions.
• The shift lever is moved to any position other than r (reVer Se).
• The outside mirror control switch is set to the center “neutral” position.
• The ignition switch is pushed to the OFF position.
for more information, refer to the “Pre-driving checks and adjustments (section 3)” of your Owner’s Manual.
01
ST arTING/STOPPING TH e eNGIN e
depress the brake pedal.
• If the \brake pedal i\fs not depressed\f pu\fshing the
ignition switch on\fce enters the ACC mode.
• If the ignition is \fpushed a second ti\fme\f the vehicle
will enter the ON mode.
Press the ignition switch ST arT/STOP button to
start the engine.
n OTe: it is important to make sure the ni SSAn intelligent key
® is with you (that is, in your pocket
or purse).
T uRnin G THe enGine Off
Move the shift lever to the P (P arK) position and apply the parking brake.
Press the ignition switch ST arT/STOP button to turn the engine off.
for more information, refer to the “Starting and driving (section 5)” of your Owner’s Manual.
12
first drive features
To view detailed in\fstructional videos\f regarding these a\fnd other features\f \fplease go to www.nissanownersin\Ifo.mobi
Page 32 of 36

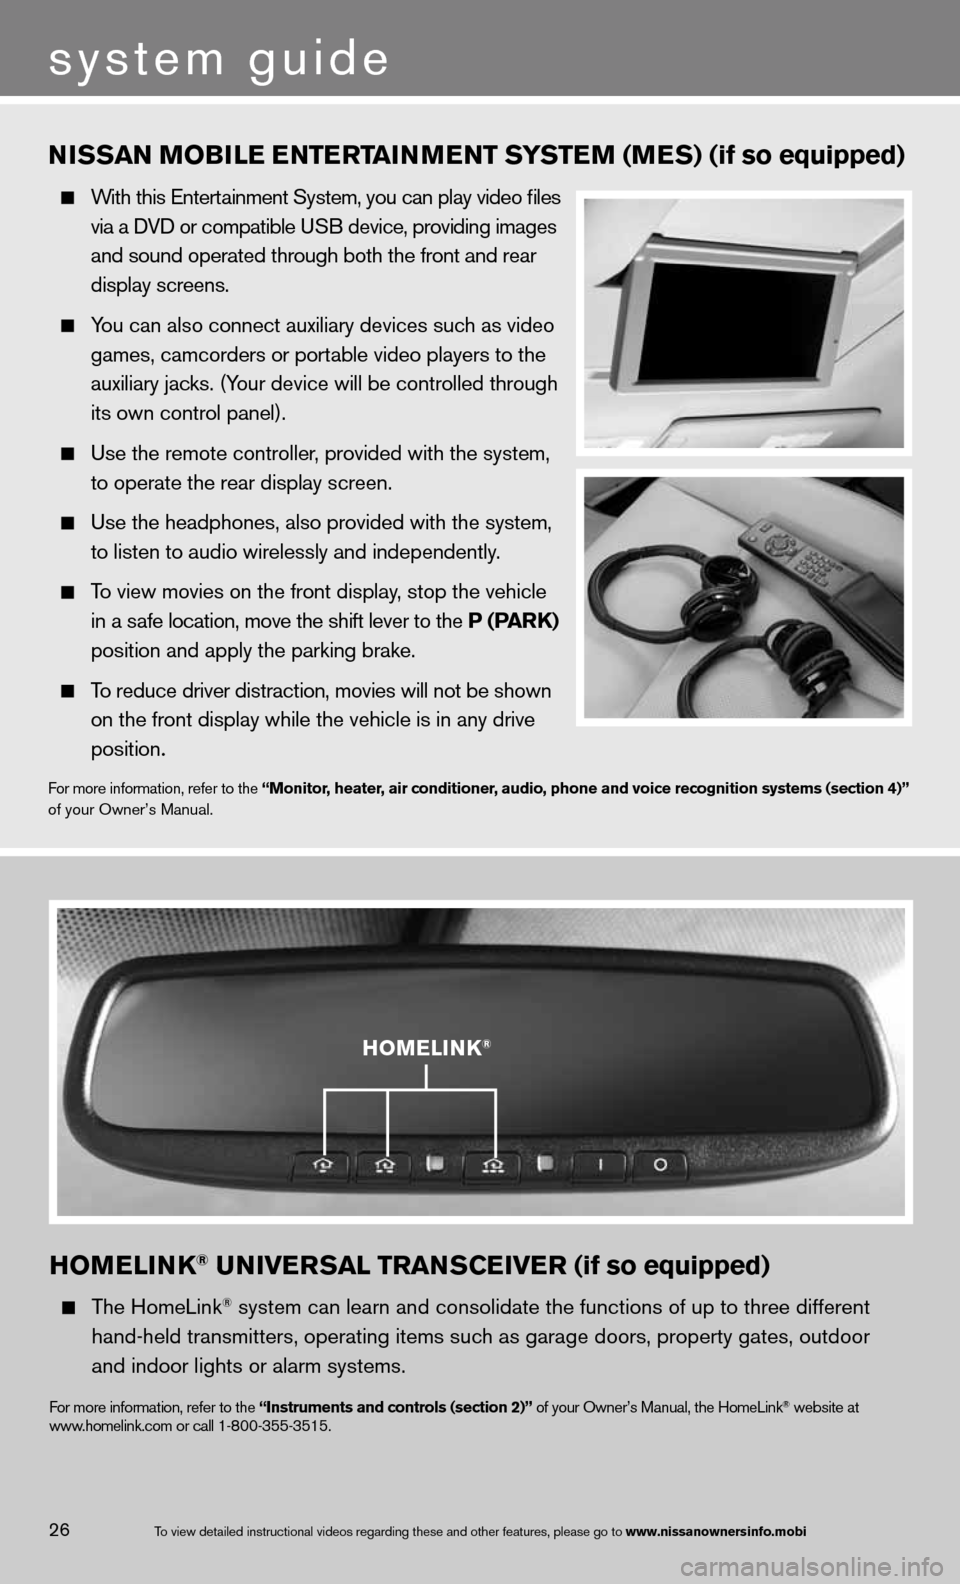
HOMeLINK® uNIVer SaL TraNSCe IVer (if so equipped)
The HomeLink® system can learn and consolidate the functions of up to three different\
hand-held transmitters, operating items such as garage doors, property gates, outdoor
and indoor lights or alarm systems.
for more information, refer to the “Instruments and controls (section 2)” of your Owner’s Manual, the HomeLink® website at
www.homelink.com or call 1-800-355-3515.
HOMeLINK®
NISSaN M OBILe eNTerT aINMeNT S YSTe M (MeS) (if so equipped)
With this entertainment System, you can play video files
via a d Vd or compatible u SB device, providing images
and sound operated through both the front and rear
display screens.
You can also connect auxiliary devices such as video
games, camcorders or portable video players to the
auxiliary jacks. (Your device will be controlled through
its own control panel).
use the remote controller, provided with the system,
to operate the rear display screen.
use the headphones, also provided with the system,
to listen to audio wirelessly and independently.
To view movies on the front display, stop the vehicle
in a safe location, move the shift lever to the P (P arK)
position and apply the parking brake.
To reduce driver distraction, movies will not be shown
on the front display while the vehicle is in any drive
position.
for more information, refer to the “Monitor, heater, air conditioner, audio, phone and voice recognition systems (section 4)”
of your Owner’s Manual.
To view detailed in\fstructional videos\f regarding these a\fnd other features\f \fplease go to www.nissanownersin\Ifo.mobi26
system guide