2013 NISSAN MURANO air condition
[x] Cancel search: air conditionPage 3 of 28
TABLE OF CONTENTS
y
NEW SYSTEM FEATURES
Heated Steering Wheel (if so equipped). . . . . . . . . . . . . . . . . . . . . . . . . . . . 2
Opening the Soft Top (CrossCabriolet models) . . . . . . . . . . . . . . . . . . . . . . 2
Moving Object Detection (MOD) (if so equipped) . . . . . . . . . . . . . . . . . . . . 2
Blind Spot Warning (BSW) System (if so equipped) . . . . . . . . . . . . . . . . . 3
Lane Departure Warning (LDW) System (if so equipped). . . . . . . . . . . . . . 3
ESSENTIAL INFORMATION
Loose Fuel Cap . . . . . . . . . . . . . . . . . . . . . . . . . . . . . . . . . . . . \
. . . . . . . . . . . . 4
Tire Pressure Monitoring System (TPMS) . . . . . . . . . . . . . . . . . . . . . . . . . . . 4
Towing Your Vehicle . . . . . . . . . . . . . . . . . . . . . . . . . . . . . . . . . . . . \
. . . . . . . . . 5
Automatic Power Windows (CrossCabriolet models) . . . . . . . . . . . . . . . . . 5
Before Operating the Soft Top (CrossCabriolet models) . . . . . . . . . . . . . . 5
FIRST DRIVE FEATURES
NISSAN Intelligent Key
® System . . . . . . . . . . . . . . . . . . . . . . . . . . . . . . . . . . 6
Power Liftgate Release (Hardtop models - if so equipped). . . . . . . . . . . . . 7
Trunk Lid Release (CrossCabriolet models) . . . . . . . . . . . . . . . . . . . . . . . . . 7
Soft Top Operation (CrossCabriolet models) . . . . . . . . . . . . . . . . . . . . . . . . 8
Front Seat Adjustments. . . . . . . . . . . . . . . . . . . . . . . . . \
. . . . . . . . . . . . . . . . . 8
Rear Seat Adjustments (Hardtop models) . . . . . . . . . . . . . . . . . . . . . . . . . . 9
Rear Seat Entry/Exit (CrossCabriolet models) . . . . . . . . . . . . . . . . . . . . . . 10
Automatic Drive Positioner (if so equipped) . . . . . . . . . . . . . . . . . . . . . . . . 11
Outside Mirror Control Switch . . . . . . . . . . . . . . . . . . . . . . . . . . . . . . . . . . . 11
Starting/Stopping the Engine . . . . . . . . . . . . . . . . . . . . . . . . . . . . . . . . . . . . 12
Headlight Control Switch . . . . . . . . . . . . . . . . . . . . . . . . . . . . . . . . . . . \
. . . . 12
Windshield Wiper and Washer Switch . . . . . . . . . . . . . . . . . . . . . . . . . . . . 13
Automatic Climate Controls (if so equipped) . . . . . . . . . . . . . . . . . . . . . . . 14
FM/AM/SiriusXM Satellite Radio with CD/DVD Player (if so equipped) . . 16
Cruise Control . . . . . . . . . . . . . . . . . . . . . . . . . . . . . . . . . . . .\
. . . . . . . . . . . . 17
Front Armrest/Center Console Storage Box. . . . . . . . . . . . . . . . . . . . . . . . 17
Fuel-Filler Door . . . . . . . . . . . . . . . . . . . . . . . . . . . . . . . . . . . .\
. . . . . . . . . . . 17
SYSTEM GUIDE
Trip Computer . . . . . . . . . . . . . . . . . . . . . . . . . . . . . . . . . . . .\
. . . . . . . . . . . . 18
Bluetooth
® Hands-free Phone System (if so equipped) . . . . . . . . . . . . . . 19
System Operating Tips. . . . . . . . . . . . . . . . . . . . . . . . . . . . . . . . . . .\
. . . . . 19
Bluetooth
® System with Navigation (if so equipped) . . . . . . . . . . . . . . . 20
Bluetooth® System without Navigation (if so equipped) . . . . . . . . . . . . . 21
Bluetooth® Streaming Audio (with Navigation System - if so equipped) . . . . 22
Navigation System (if so equipped) . . . . . . . . . . . . . . . . . . . . . . . . . . . . . . . 23
HomeLink
® Universal Transceiver (if so equipped) . . . . . . . . . . . . . . . . . . . 24
• A cellular telephone should not be used for any purpose while
driving so full attention may be given to vehicle operation.
• Always wear your seat belt.
• Supplemental air bags do not replace proper seat belt usage.
• Children 12 and under should always ride in the rear seat
properly secured in child restraints or seat belts according to
their age and weight.
• Do not drink and drive.
For more information, refer to the “Safety –– Seats, seat belts and
supplemental restraint system (section 1)” , the “Monitor, heater, air
conditioner, audio, phone and voice recognition systems (section 4)”
and the “Starting and driving (section 5)” of your Owner’s Manual.
Additional information about your vehicle is also available in your Owner’s Manual, Navigation System Owner’s Manual and at www.nissanusa.com. To view detailed
instructional videos, go to
www.nissanownersinfo.mobi/2013/murano or snap this barcode with an appropriate barcode reader.
Page 4 of 28
To view detailed instructional videos regarding these and other features, please go to www.nissanownersinfo.mobi.2
new system features
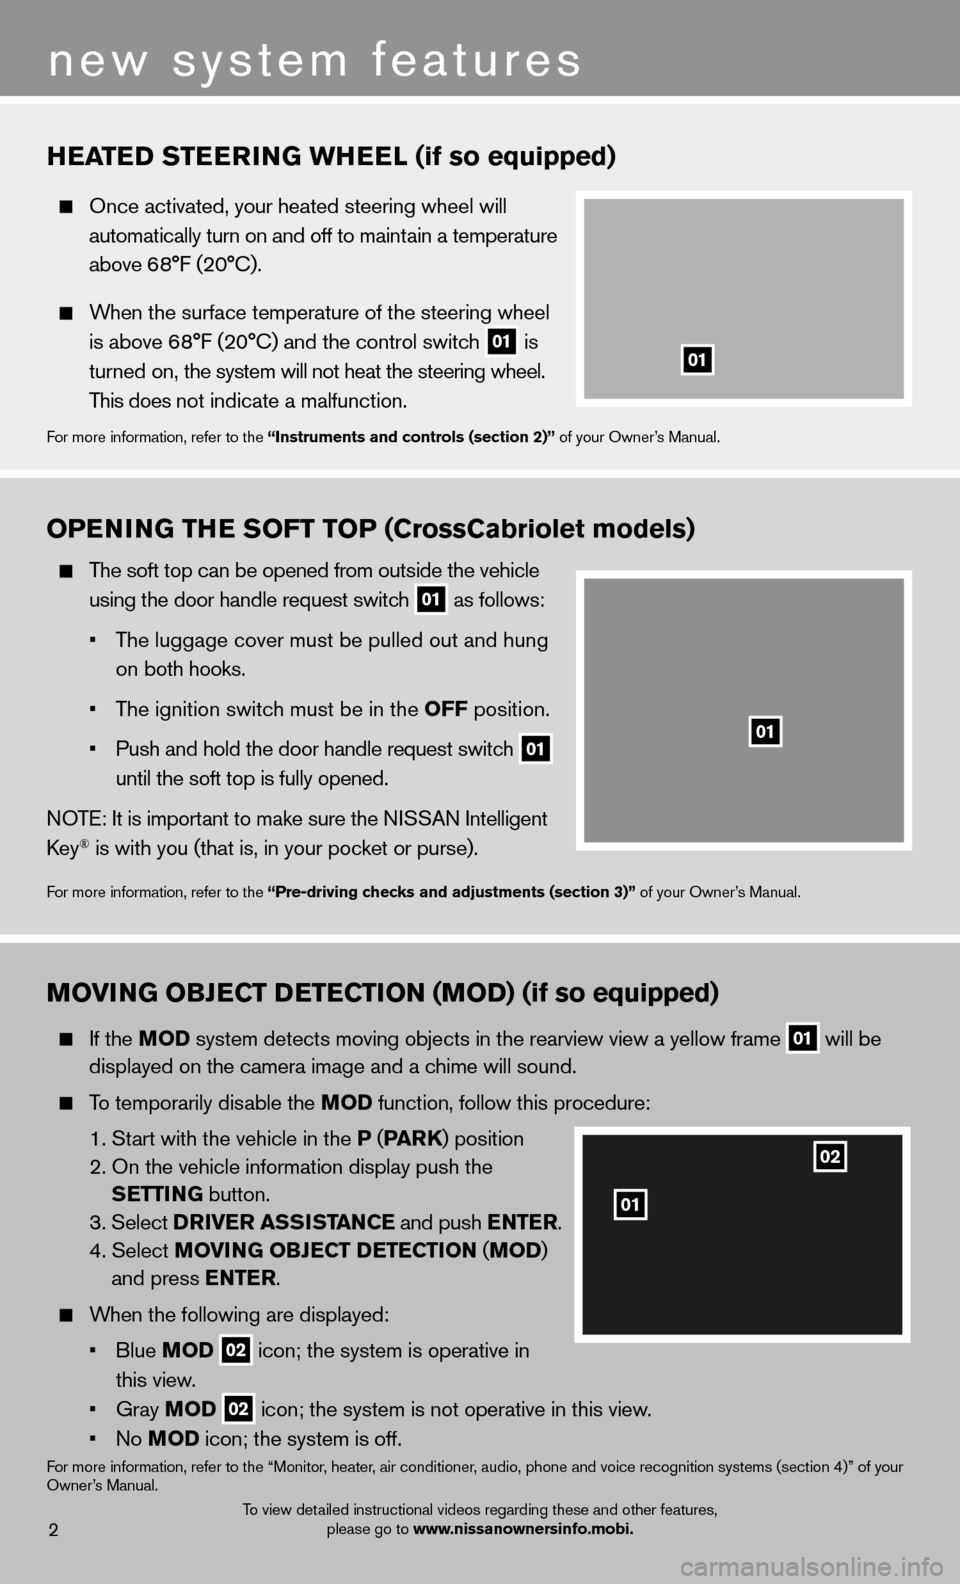
HEATED STEERING WHEEL (if so equipped)
Once activated, your heated steering wheel will
automatically turn on and off to maintain a temperature
above 6 8°F (20°C).
When the surface temperature of the steering wheel
is above 68°F (20°C) and the control switch
01 is
turned on, the system will not heat the steering wheel.
This does not indicate a malfunction.
For more information, refer to the “Instruments and controls (section 2)” of your Owner’s Manual.
OPENING THE SOFT TOP (CrossCabriolet models)
The soft top can be opened from outside the vehicle
using the door handle request switch
01 as follows:
• The luggage cover must be pulled out and hung
on both hooks.
• The ignition switch must be in the OFF position.
• Push and hold the door handle request switch
01
until the soft top is fully opened.
NOTE: It is important to make sure the NISSAN Intelligent
Key
® is with you (that is, in your pocket or purse).
For more information, refer to the “Pre-driving checks and adjustments (section 3)” of your Owner’s Manual.
MOVING OBJECT DETECTION (MOD) (if so equipped)
If the MOD system detects moving objects in the rearview view a yellow frame
01 will be
displayed on the camera image and a chime will sound.
To temporarily disable the MOD function, follow this procedure:
1. Start with the vehicle in the P (PA R K) position
2. On the vehicle information display push the SETTING button.
3. Select DRIVER ASSISTANCE and push ENTER.
4. Select MOVING OBJECT DETECTION (MOD )
and press ENTER.
When the following are displayed:
• Blue MOD
02 icon; the system is operative in
this view.
• Gray MOD
02 icon; the system is not operative in this view.
• No MOD icon; the system is off.
For more information, refer to the “Monitor, heater, air conditioner, audio, phone and voice recognition systems (section 4)” of your
Owner’s Manual.
01
01
02
01
Page 16 of 28
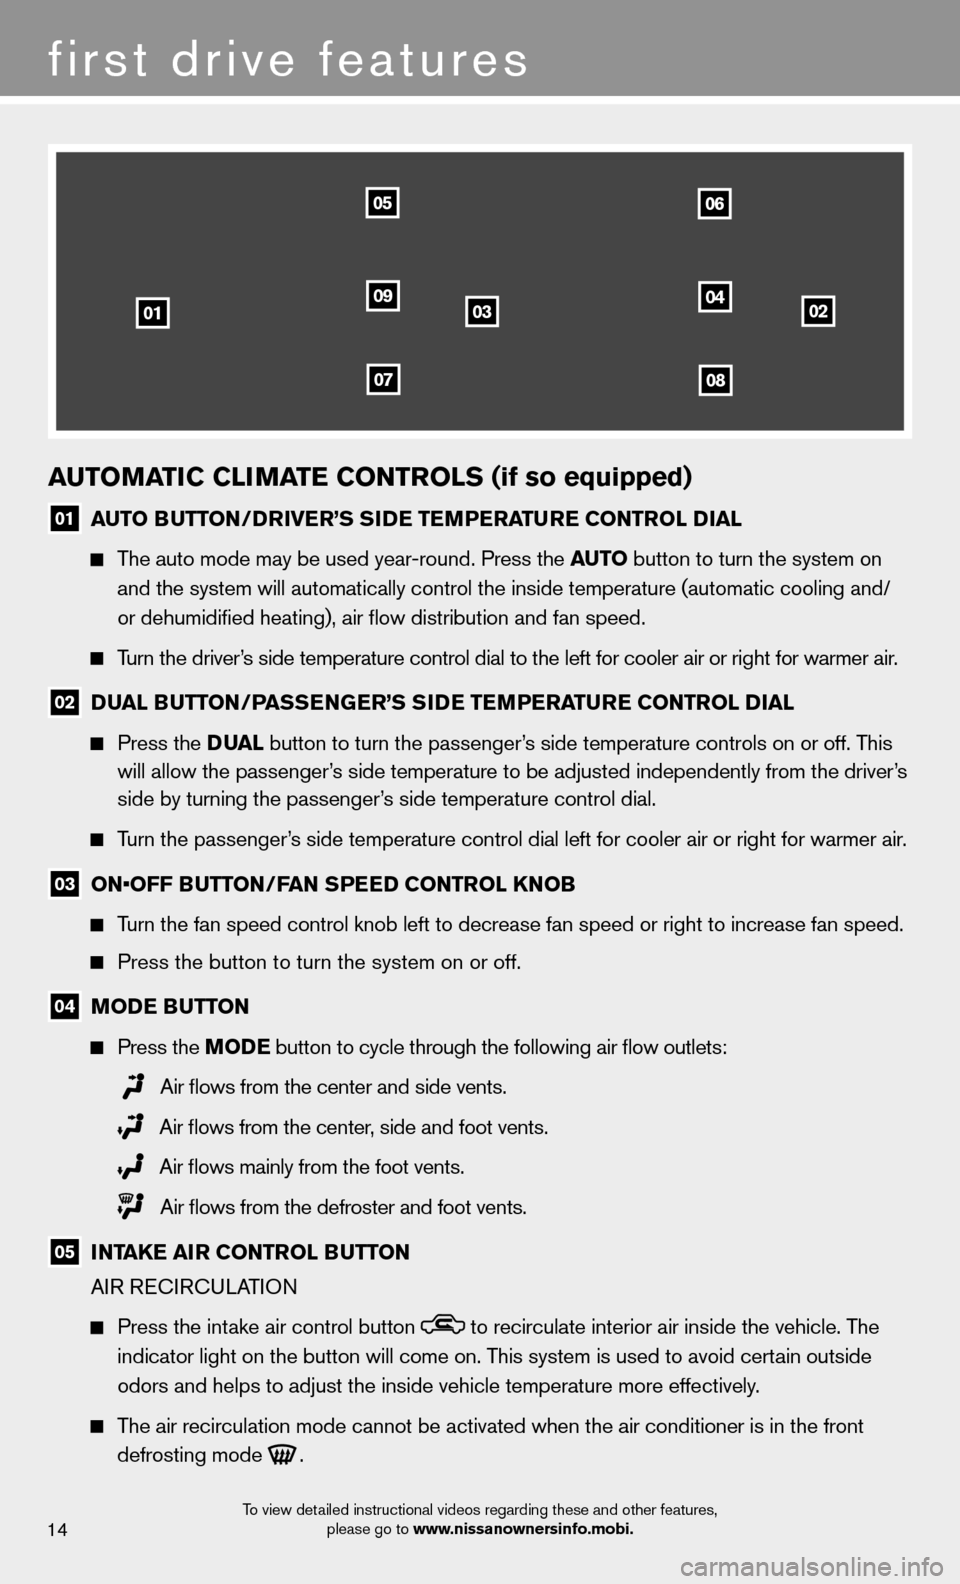
AUTOMATIC CLIMATE CONTROLS (if so equipped)
01 AUTO BUTTON/DRIVER’S SIDE TEMPERATURE CONTROL DIAL
The auto mode may be used year-round. Press the AUTO button to turn the system on
and the system will automatically control the inside temperature (autom\
atic cooling and/
or dehumidifi ed heating), air fl ow distribution and fan speed.
Turn the driver’s side temperature control dial to the left for cooler air or right for \
warmer air.
02 DUAL BUTTON/PASSENGER’S SIDE TEMPERATURE CONTROL DIAL
Press the DUAL button to turn the passenger’s side temperature controls on or off. This
will allow the passenger’s side temperature to be adjusted independently from the driver’s
side by turning the passenger’s side temperature control dial.
Turn the passenger’s side temperature control dial left for cooler air or right for warmer \
air.
03 ON•OFF BUTTON/FAN SPEED CONTROL KNOB
Turn the fan speed control knob left to decrease fan speed or right to in\
crease fan speed.
Press the button to turn the system on or off.
04 MODE BUTTON
Press the MODE button
to cycle through the following air fl ow outlets:
Air fl ows from the center and side vents.
Air fl ows from the center, side and foot vents.
Air fl ows mainly from the foot vents.
Air fl ows from the defroster and foot vents.
05 INTAKE AIR CONTROL BUTTON
AIR RECIRCULATION
Press the intake air control button to recirculate interior air inside the vehicle. The
indicator light on the button will come on. This system is used to avoid certain outside
odors and helps to adjust the inside vehicle temperature more effectivel\
y.
The air recirculation mode cannot be activated when the air conditioner i\
s in the front
defrosting mode
.
030201
0506
0904
0708
first drive features
14
To view detailed instructional videos regarding these and other features,
please go to www.nissanownersinfo.mobi.
Page 17 of 28
15
OUTSIDE AIR CIRCULATION
Press the intake air control button again to draw outside air into the passenger
compartment. The indicator light on the button will turn off.
AUTOMATIC INTAKE AIR CONTROL (if so equipped)
In the auto mode, the intake air will be controlled automatically. To manually control the
intake air, press the intake air control button. To return to the automatic control mode,
press the intake air control button for about 2 seconds.
06 UPPER VENT BUTTON
When the upper vent button is pressed, the air fl ow against the driver’s or passenger’s
upper body becomes gentle. The indicator light on the button will illuminate.
In this mode, air from the upper ventilator fl ows to control the cabin temperature without
blowing air directly on the occupants.
07 DEFROSTIN G/DEFOGGING FR ONT AND SIDE WINDOWS
Press the defroster control button
to turn the system on. The A/C automatically turns
on when the defroster mode is selected. This features removes humidity from the air.
Turn the temperature control dial 01 to set the desired temperature.
To defrost the front and side windows quickly, set the temperature controls and fan speed
controls to their maximum settings.
08 DEFROSTING REAR WINDOW AND OUT SIDE MIRRORS (if so equipped)
Press the rear window defroster switch REAR to turn the system on or off.
This function automatically turns off after approximately 15 minutes.
09 A/C BUTTON
Press the A/C button to turn the air conditioner system on or off. This system helps cool
and dehumidify the air inside the cabin and defog the windows.
For more information, refer to the “Instruments and controls (section 2)” and the “Monitor, heater, air conditioner, audio,
phone and voice recognition systems (section 4)” of your Owner’s Manual.
To view detailed instructional videos regarding these and other features, please go to www.nissanownersinfo.mobi.
Page 18 of 28
03
0506
02
01
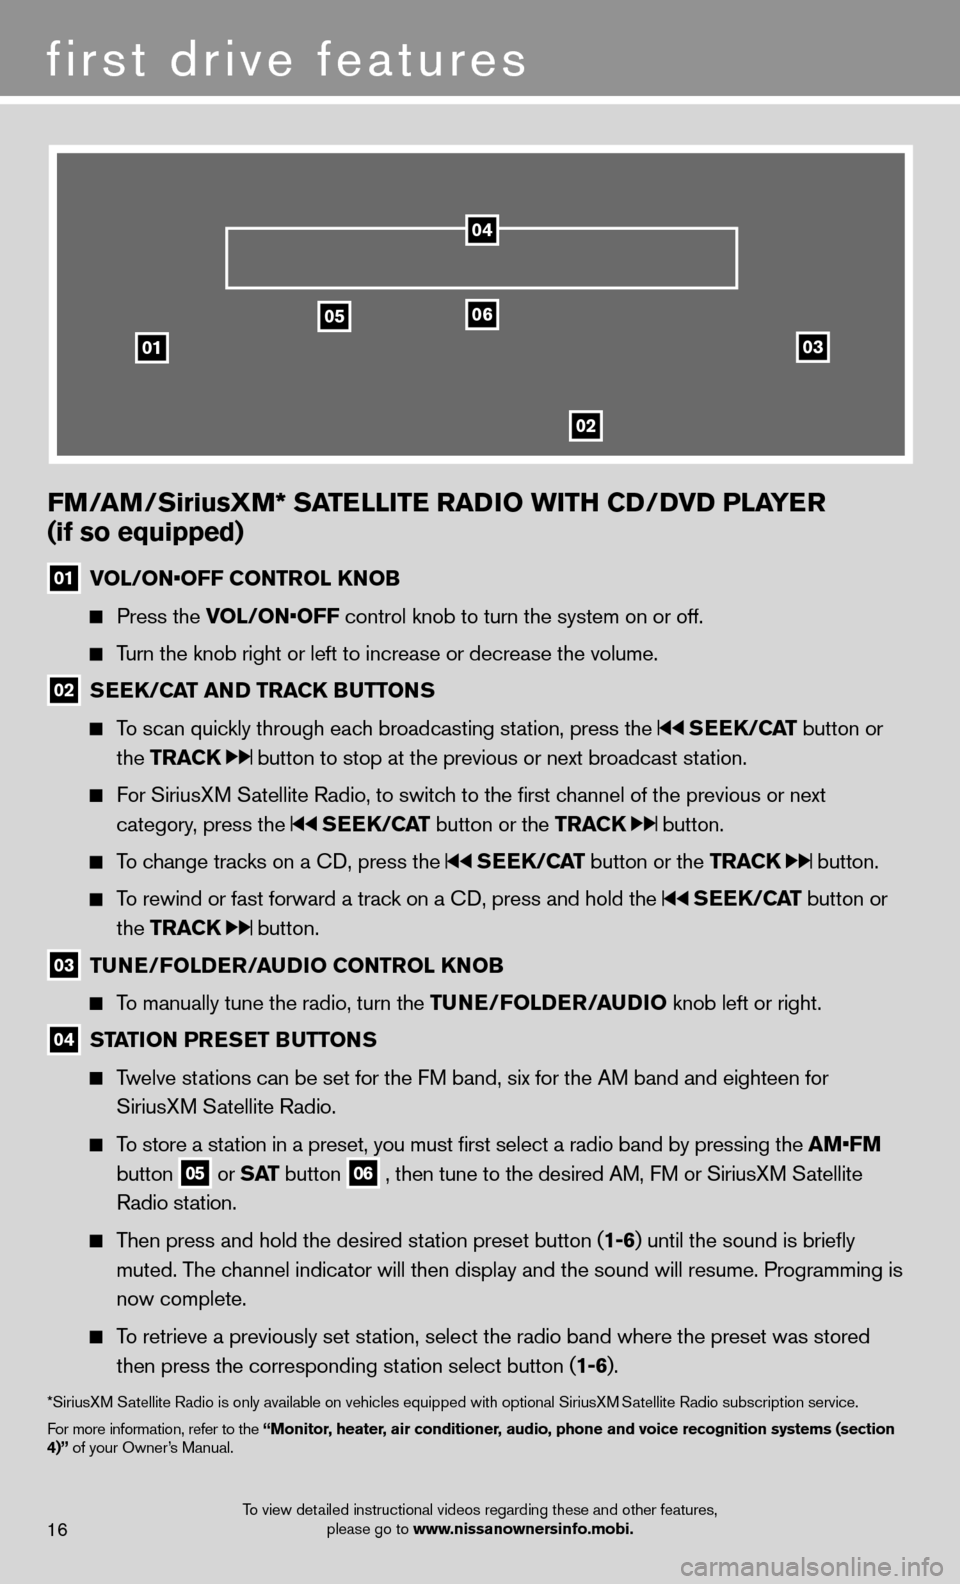
FM/AM/SiriusXM* SATELLITE RADIO WITH CD/DVD PLAYER
(if so equipped)
01 VOL/ON•OFF CONTROL KNOB
Press the VOL/ON•OFF control knob to turn the system on or off.
Turn the knob right or left to increase or decrease the volume.
02 SEEK/CAT AND TRACK BUTTONS
To scan quickly through each broadcasting station, press the SEEK/CAT button or
the TRACK
button to stop at the previous or next broadcast station.
For SiriusXM Satellite Radio, to switch to the fi rst channel of the previous or next
category, press the
SEEK/CAT button or the TRACK button.
To change tracks on a CD, press the SEEK/CAT button or the TRACK button.
To rewind or fast forward a track on a CD, press and hold the SEEK/CAT button or
the TRACK
button.
03 TUNE/FOLDER/AUDIO
CONTROL KNOB
To manually tune the radio, turn the TUNE/FOLDER/AUDIO knob left or right.
04 STATION PRESET BUTTONS
Twelve stations can be set for the FM band, six for the AM band and eighteen for
SiriusXM Satellite Radio.
To store a station in a preset, you must fi rst select a radio band by pressing the AM•FM
button
05 or SAT button
06 , then tune to the desired AM, FM or SiriusXM Satellite
Radio station.
Then press and hold the desired station preset button ( 1-6) until the sound is briefl y
muted. The channel indicator will then display and the sound will resume. Programmin\
g is
now complete.
To retrieve a previously set station, select the radio band where the preset was stored
then press the corresponding station select button ( 1-6).
*SiriusXM Satellite Radio is only available on vehicles equipped with optional Siri\
usXM Satellite Radio subscription service.
For more information, refer to the “Monitor, heater, air conditioner, audio, phone and voice recognition systems (section
4)” of your Owner’s Manual.
04
first drive features
16To view detailed instructional videos regarding these and other features, please go to www.nissanownersinfo.mobi.
Page 24 of 28
system guide
BLUETOOTH® STREAMING AUDIO
(with Navigation System - if so equipped)
If you have a compatible Bluetooth® device with
streaming audio (A2DP profi le), you can set up the
wireless connection between your Bluetooth
® device
and your vehicle’s audio system. This connection
allows you to listen to audio from the Bluetooth
®
device using your vehicle’s speakers.
A cellular phone should not be used while driving so full attention may \
be given to
vehicle operation.*
CONNECTING PROCEDURE
1. Press the SETTING button and select the “Bluetooth” key.
2. Select the “Connect Bluetooth” key.
3. A confi rmation screen will be displayed. Select “No”.
22
PHONEBOOK REGISTRATION
When the cellular phone is connected to the in-vehicle module, the data stored in the cellular
phone such as phonebook, outgoing call logs, incoming call logs and missed call l\
ogs is
automatically transferred and registered to the system.
The availability of this function depends on each cellular phone. The copying procedure
also varies according to each cellular phone. See your cellular phone Owner’s Manual for more information.
Up to 1,000 phone numbers per registered cellular phone can be stored in\
the phonebook.
MAKING A CALL
1. Push the
button on the steering wheel. A tone will sound.
2.
Say “Call”. The system acknowledges the command and announces the next set of
available commands.
3. Say the registered person’s name. The system acknowledges the command and announces
the next set of available commands.
4.
Say “Yes”. The system acknowledges the command and makes the call.
RECEIVING/ENDING A CALL
To accept the call, press the
button on the steering wheel.
To reject the call, press the button.
To hang up, press the button.
For more information, refer to the “Monitor, heater, air conditioner, audio, phone and voice recognition systems
(section 4)” of your Owner’s Manual or please visit www.nissanusa.com/bluetooth.
*Some jurisdictions prohibit the use of cellular telephones while drivin\
g.
o
To view detailed instructional videos regarding these and other features, please go to www.nissanownersinfo.mobi.
Page 25 of 28
23
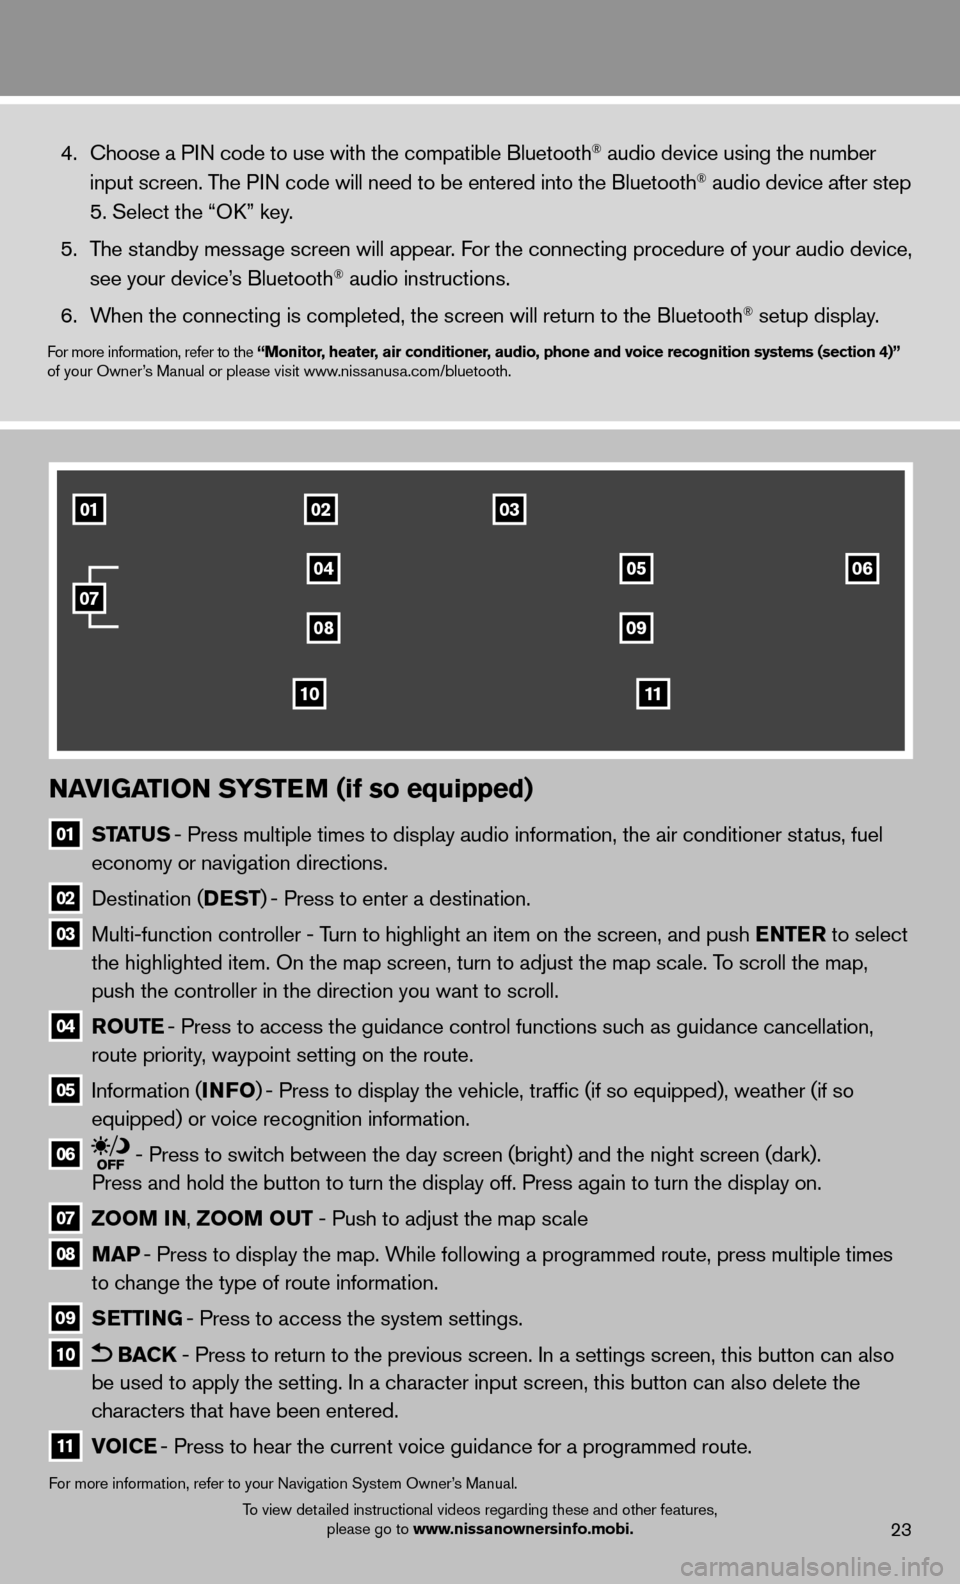
NAVIGATION SYSTEM (if so equipped)
01
STATUS - Press multiple times to display audio information, the air conditioner\
status, fuel
economy or navigation directions.
02 Destination (DEST ) - Press to enter a destination.
03 Multi-function controller - Turn to highlight an item on the screen, and push ENTER to select
the highlighted item. On the map screen, turn to adjust the map scale. T\
o scroll the map,
push the controller in the direction you want to scroll.
04 ROUTE - Press to access the guidance control functions such as guidance cancellation,
route priority, waypoint setting on the route.
05 Information (INFO ) - Press to display the vehicle, traffi c (if so equipped), weather (if so
equipped) or voice recognition information.
06 - Press to switch between the day screen (bright) and the night screen (dark).
Press and hold the button to turn the display off. Press again to turn t\
he display on.
07 ZOOM IN, ZOOM OUT - Push to adjust the map scale
08
MAP - Press to display the map. While following a programmed route, press multiple times
to change the type of route information.
09
SETTING - Press to access the system settings.
10 BACK - Press to return to the previous screen. In a settings screen, this bu\
tton can also
be used to apply the setting. In a character input screen, this button can also delete the
characters that have been entered.
11 VOICE - Press to hear the current voice guidance for a programmed route.
For more information, refer to your Navigation System Owner’s Manual.
4. Choose a PIN code to use with the compatible Bluetooth® audio device using the number
input screen. The PIN code will need to be entered into the Bluetooth® audio device after step
5. Select the “OK” key.
5. The standby message screen will appear. For the connecting procedure of your audio device,
see your device’s Bluetooth
® audio instructions.
6. When the connecting is completed, the screen will return to the Bluetooth\
® setup display.
For more information, refer to the “Monitor, heater, air conditioner, audio, phone and voice recognition systems (section 4)”
of your Owner’s Manual or please visit www.nissanusa.com/bluetooth.
010203
04
0809
1110
0506
07
To view detailed instructional videos regarding these and other features,
please go to www.nissanownersinfo.mobi.