Page 25 of 37
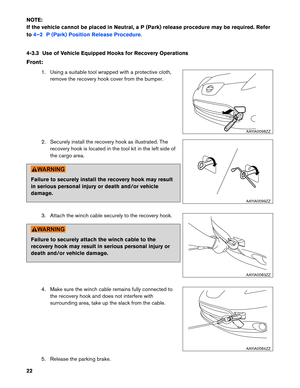
3. To lift the vehicle, securely hold the jack lever and rod with both hands as shown. Carefully raise
the vehicle until the tire clears the ground. Remove the wheel nuts, and then remove the tire.
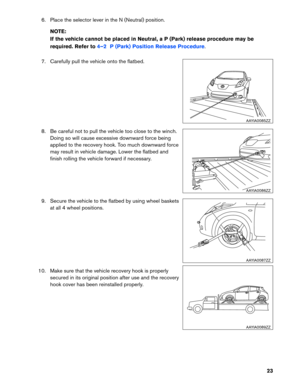
4. Install new or repaired tire and hand-tighten the wheel nuts with the wheel nut wrench in an alternating pattern.
5. Securely torque the wheel nuts in an alternating pattern to 83 ft-lbs (113 Nm) .
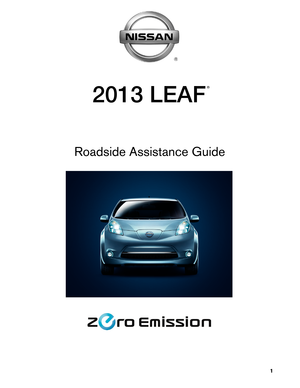
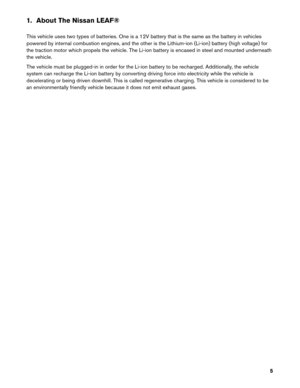
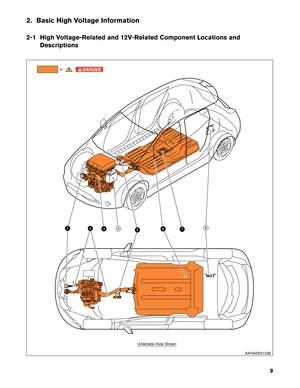
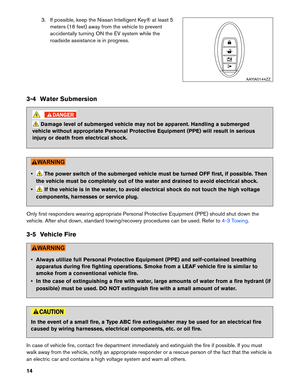
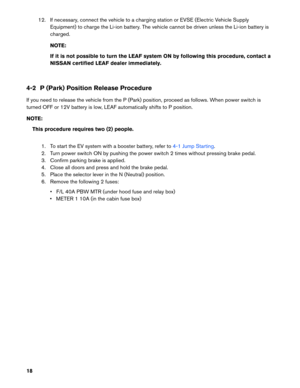
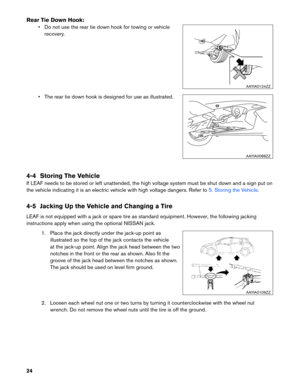
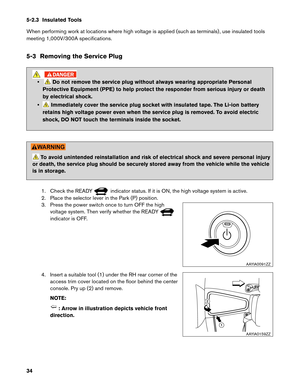
4-6 Tools Installed in the Vehicle
The tools are located in the left rear corner of the cargo area. The
jack is a NISSAN dealer option and not equipped as standard. AAYIA0136ZZ
B
EC DA
AAYIA0137ZZ AAYIA0161ZZ
25
Page 26 of 37

4-7 Repairing a Flat Tire with NISSAN Emergency Tire Puncture Repair Kit
LEAF
is equipped with a tire repair kit as standard equipment. It is intended to be used to temporarily repair
minor tire punctures. • After using the Emergency Tire Sealant to repair a minor tire puncture, do not drive the
vehicle
at speeds faster than 50 MPH (80 km/h) .
• Immediately after using the Emergency Tire Sealant to repair a minor tire puncture, take the vehicle to a NISSAN certified LEAF dealer to inspect, and repair or replace the tire.
The Emergency Tire Sealant cannot permanently seal a punctured tire. Continuing
operation of the vehicle without a permanent tire repair can lead to a crash.
• If you used the Emergency Tire Sealant to repair a minor tire puncture, a NISSAN certified LEAF dealer will also need to replace the TPMS sensor in addition to repairing or
replacing the tire.
• NISSAN recommends using only NISSAN Genuine Emergency Tire Sealant provided with the vehicle. Other tire sealants may damage the valve stem seal which can cause the tire
to lose air pressure.
• Make sure the parking brake is applied.
• Turn the power switch OFF while using the Emergency Tire Sealant to repair a flat tire.
• Have all passengers get out of the vehicle and stand in a safe place away from traffic and clear of the vehicle.
• Make sure the vehicle is located safely away from oncoming traffic and other hazards.
• Observe the following precautions when using the tire repair compound:
– Swallowing the compound is dangerous. Immediately drink as much water as possible and seek prompt medical assistance.
– Rinse well with lots of water if the compound comes into contact with skin or eyes. If irritation persists, seek prompt medical attention.
– Keep the repair compound out of the reach of children.
– The emergency repair compound may cause a malfunction of the tire pressure sensors and cause the low tire pressure warning light to illuminate. Have the tire pressure
sensor replaced as soon as possible.
26
Page 27 of 37

• To avoid the Emergency Tire Puncture Repair Kit from being damaged during storage or
use:
–
Only use the Emergency Tire Puncture Repair Kit on the LEAF vehicle. Do not use it
on other vehicles.
– Only use the kit to inflate the tires of the LEAF and to check the vehicle’s tire pressure.
– Only plug the compressor into a 12V DC car power point.
– Keep the kit free of dirt and water.
– Do not disassemble or modify the kit.
– Do not drop the kit or allow hard impacts to the kit.
• Do not use the Emergency Tire Puncture Repair Kit under the following conditions. Contact a NISSAN certified LEAF dealer or professional road assistance:
– when the sealant has passed its expiration date (shown on the label attached to the bottle) .
– when the cut or the puncture in the tire is approximately 0.25 in (6 mm) or longer.
– when the tire sidewall is damaged.
– when the vehicle has been driven with extremely low tire pressure.
– when the tire has come off the inside or the outside of the wheel.
– when the wheel is damaged.
– when two (2) or more tires are flat.
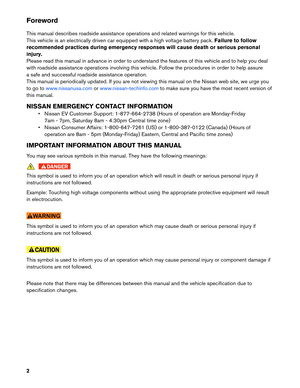
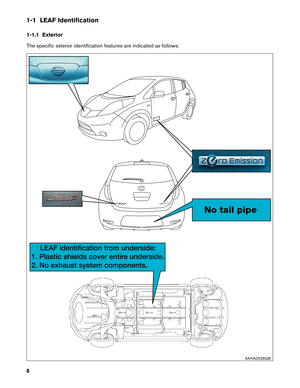
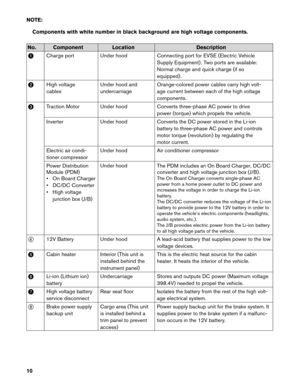
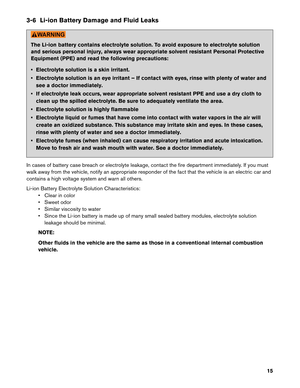
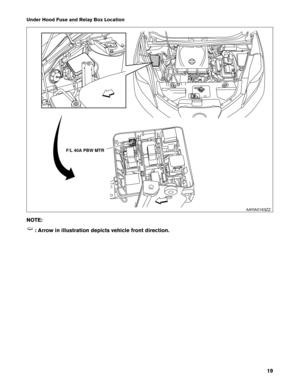
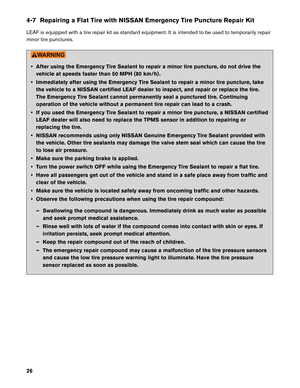
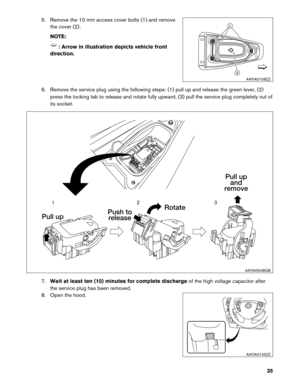
Remove the emergency tire puncture repair kit from the left side of
the cargo area. The kit consists of the following items:
1. NISSAN Genuine Emergency Tire Sealant bottle
2. Air compressor
3. Speed restriction sticker
4-7.1 Before Using Emergency Tire Puncture Repair Kit • If any foreign object (for example, a screw or nail) is embedded in the tire, do not remove it.
• Check the expiration date of the sealant (shown on the label attached to the bottle) . Never use asealant if the expiration date has passed. 321
AAYIA0162ZZ
27
Page 28 of 37
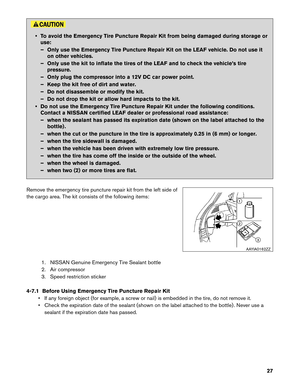
4-7.2 Repairing the Tire
1. Open the lid of the air compressor and take out the
speed restriction sticker. Put the sticker in a location
where the driver can see it while driving. Do not obstruct the view of gauges or warning lights
with
the sticker.
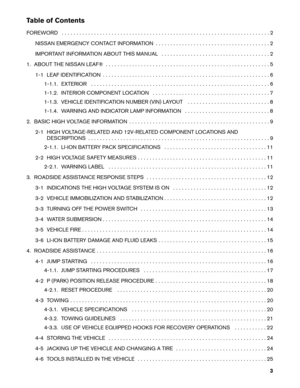
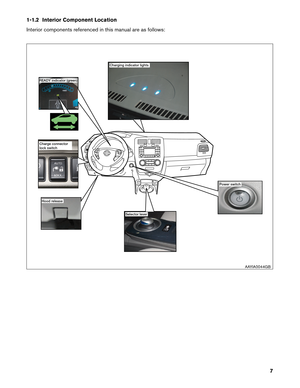
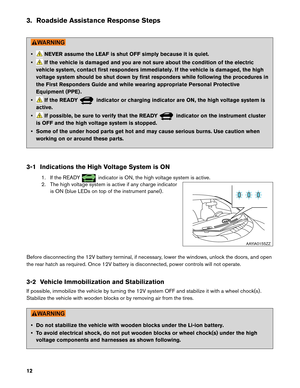
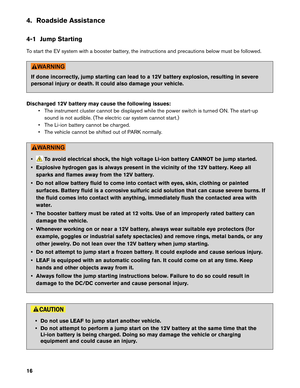
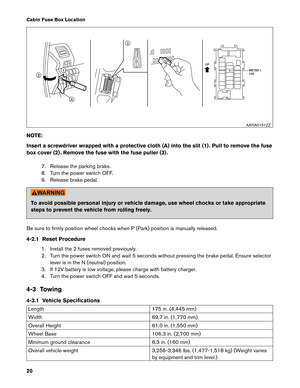
Do not put the sticker on the steering wheel pad. 2. Take the hose (1) and power plug (2) out of the aircompressor. Remove the cap of the bottle holder from
the air compressor.
3. Remove the cap from the tire sealant bottle and screw the bottle clockwise onto the bottle holder. Leave the
bottle seal intact. Screwing the bottle onto the bottle
holder will pierce the seal of the bottle.
4. Remove the cap from the tire valve on the flat tire. AAYIA0131ZZ
2
1
AAYIA0132ZZ AAYIA0133ZZ
28
Page 29 of 37
 of the hose and screw
the hose securely onto the tire valve. Make sure that the
pressure release valve (B) is securely tightened. Make
sure that the air compressor swi")
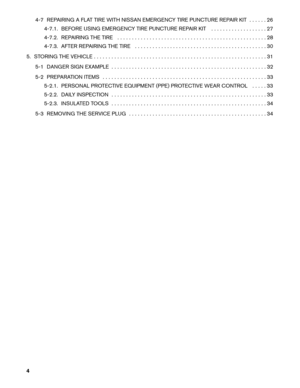
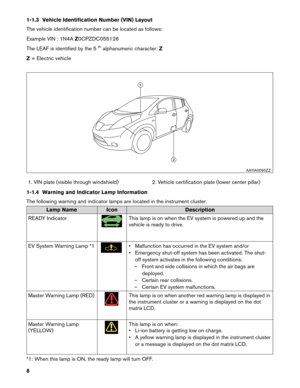
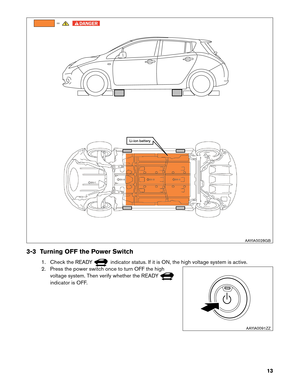
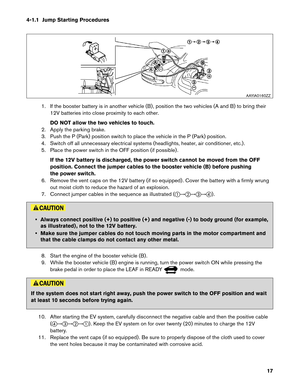
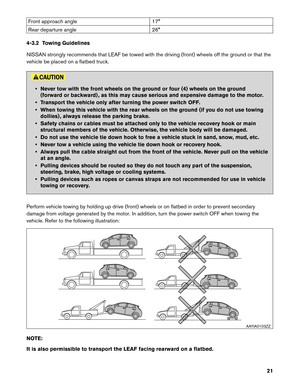
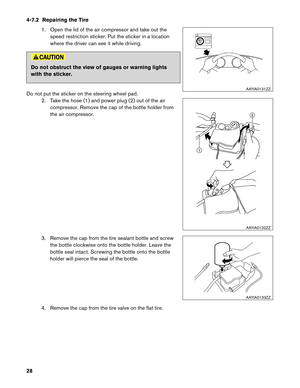
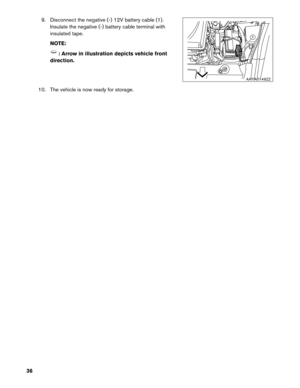
5. Remove the protective cap (A) of the hose and screw
the hose securely onto the tire valve. Make sure that the
pressure release valve (B) is securely tightened. Make
sure that the air compressor switch is in the OFF (O)
position and then insert the power plug into the power
outlet in the vehicle.
6. Push the vehicle power switch to the ACC position.
7. Turn the air compressor switch to the ON (-) position and inflate the tire up to the pressure that is specified on
the tire and loading information label affixed to the
driver’s side center pillar if possible or to the minimum of
26 psi (180 kPa) . Turn the air compressor off briefly in
order to check the tire pressure with the pressure gauge.
If the tire is inflated to higher than the specified pressure,
lower the tire pressure by releasing air with the pressure
release valve.
NOTE:
The compressor tire gauge may show a pressure reading of 87 psi (600 kPa) for about
30 seconds while inflating the tire. The pressure gauge is indicating the pressure
inside the sealant bottle. When the sealant has been injected into the tire the
pressure gauge will drop and indicate actual tire pressure. • To avoid serious personal injury while using the emergency tire puncture repair kit:
–
Securely tighten the compressor hose to the tire valve. Failure to do so can cause the
sealant to spray into the air and get into your eyes or on your skin.
– Do not stand directly beside the damaged tire while it is being inflated because of the risk of rupture. If there are any cracks or bumps in the tire, turn the compressor OFF
immediately.
If the tire pressure does not increase to 26 psi (180 kPa) within ten (10) minutes, the tire may be
seriously damaged and the tire cannot be repaired with this tire repair kit.
Contact a NISSAN certified LEAF dealer. B
A
AAYIA0134ZZ AAYIA0135ZZ
29
Page 30 of 37

8. When the tire pressure is at the specified amount, turn the air compressor OFF. If the tire cannot
be inflated to the specified amount, the air compressor can be turned OFF at the minimum of 26
psi (180 kPa) . Remove the power plug from the power outlet and quickly remove the hose from
the tire valve. Attach the protective cap and the valve cap. Securely stow the emergency tire
puncture repair kit in the cargo area. To avoid serious personal injury when stowing the emergency tire puncture repair kit keep
the
sealant bottle screwed into the compressor. Failure to do so can cause the sealant
to spray into the air and get into your eyes or on your skin.
9. Immediately drive the vehicle for ten (10) minutes or 2 miles (3 km) at a speed below 50 MPH(80 km/h) .
10. After driving, make sure the air compressor switch is in the OFF position. Then screw the hose securely onto the tire valve. Check the tire pressure with the pressure gauge. Temporary repair is
completed if the tire pressure does not drop. Make sure the pressure is adjusted to the pressure
specified on the tire and loading information label before driving.
11. If the tire pressure drops, repeat the steps from 5 to 10. If the pressure drops again or under 19 psi (130 kPa) , the tire cannot be repaired with this tire repair kit. Contact a NISSAN
certified LEAF dealer. The sealant bottle and hose cannot be reused to repair another punctured
tire. Contact a NISSAN certified LEAF dealer to purchase replacements.
4-7.3 After Repairing the Tire
See a NISSAN certified LEAF dealer for tire repair/replacement as soon as possible. • After using Emergency Tire Sealant to repair a minor puncture, do not drive the vehicle at
speeds
faster than 50 MPH (80 km/h) .
• Immediately after using Emergency Tire Sealant to repair a minor tire puncture, take the vehicle to a NISSAN certified LEAF dealer to inspect and repair or replace the tire. The
Emergency Tire Sealant cannot permanently seal a punctured tire. Continuing operation
of the vehicle without a permanent tire repair can lead to a crash.
• Do not inject any tire liquid or aerosol tire sealant into the tires as this may cause a malfunction of the tire pressure sensors.
• If you used the Emergency Tire Sealant to repair a minor tire puncture, a NISSAN certified LEAF dealer will also need to replace the TPMS sensor in addition to repairing or
replacing the tire.
• NISSAN recommends using only NISSAN Genuine Emergency Tire Sealant provided with the vehicle. Other tire sealants may damage the valve stem seal which can cause the tire
to lose air pressure.
30
Page 31 of 37
5. Storing the Vehicle
The service plug must be removed to shut down the high voltage system for storage.
Do
not store a vehicle inside a structure. Keep the vehicle away from other vehicles if the
li-ion battery is severely damaged. There is possibility of delayed fire from a severely
damaged li-ion battery.
31
Page 32 of 37
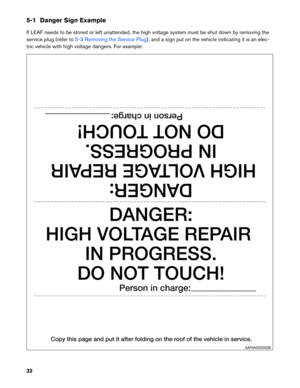
5-1 Danger Sign Example
If
LEAF needs to be stored or left unattended, the high voltage system must be shut down by removing the
service plug (refer to 5-3 Removing the Service Plug) , and a sign put on the vehicle indicating it is an elec-
tric
vehicle with high voltage dangers. For example: AAYIA0020GB
32


 , and a sign put")