2013 NISSAN LEAF reset
[x] Cancel search: resetPage 140 of 275

4-6Audio system
Notes for iPod®use:
iPod®is a trademark of Apple Inc., registered in
the U.S. and other countries.
. Improperly plugging in the iPod
®may cause
a checkmark to be displayed on and off
(flickering) . Always make sure that the iPod
®
is connected properly.
. An iPod nano®(1st Generation) may remain
in fast forward or rewind mode if it is
connected during a seek operation. In this
case, please manually reset the iPod
®.
. An iPod nano®(2nd Generation) will con-
tinue to fast-forward or rewind if it is
disconnected during a seek operation.
. An incorrect song title may appear when the
Play Mode is changed while using an iPod
nano
®(2nd Generation)
. Audiobooks may not play in the same order
as they appear on an iPod
®.
. Large video files cause slow responses in an
iPod
®. The vehicle display may momentarily
black out, but will soon recover.
. If an iPod
®automatically selects large video
files while in the shuffle mode, the vehicle
display may momentarily black out, but will
soon recover.
iPod®PLAYER AND iPhone®
This system supports iPod®and iPhone®
models.
. A USB cable for connecting an iPod®or
iPhone®is not included with this system.
Use your own USB cable to connect an
iPod
®or iPhone®.
. Once connected to the system, operation
will not be possible from an iPod
®or
iPhone®.
. Some functions may be limited depending
on the model of iPod
®or iPhone®and/or the
version of the firmware currently installed.
. When connected to the system, the battery
of an iPod
®or iPhone®will be recharged.
. Do not use headphones or other acces-
sories when an iPod
®or iPhone®is con-
nected to the system. Doing so could
prevent the system from operating properly.
. NISSAN does not accept any responsibility
for any data that may be lost from an iPod
®
or iPhone®while it is connected to the
system.
. Please refer to the Owner’s Manual of the
iPod
®or iPhone®that is connected to the
system. .
Large video files cause slow responses in an
iPod
®. The vehicle center display may
momentarily black out, but it will soon
recover.
. If an iPod
®automatically selects large video
files while in the shuffle mode, the vehicle
center display may momentarily black out,
but it will soon recover.
. An iPod nano
®(1st Generation) may remain
in fast forward or rewind mode if it is
connected during a seek operation. In this
case, please manually reset the iPod
®.
. After the Album Shuffle setting has been set
when an iPod touch
®1G is connected, if the
USB cable is pulled out and inserted again,
or if the power switch is placed in the "ACC"
or "OFF" positions from the "ON" position,
the song that was last played will not be
saved.
. Songs that are being played back cannot be
cued using the track down operation of an
iPod touch
®1G. To use this function,
update the firmware of the iPod®that is
being used (version 2.2.1 or later) .
. After the Album Shuffle setting has been set
when an iPod touch
®2G is connected, if the
USB cable is pulled out and inserted again,
or if the power switch is placed in the "ACC"
or "OFF" positions from the "ON" position,
Page 147 of 275
![NISSAN LEAF 2013 1.G Navigation Manual FM/AM radio screen:
*1Displays the broadcasting station and category
currently being received.
*2Displays the frequency currently being received.
*3[Info]:
Displays the broadcasting station informatio NISSAN LEAF 2013 1.G Navigation Manual FM/AM radio screen:
*1Displays the broadcasting station and category
currently being received.
*2Displays the frequency currently being received.
*3[Info]:
Displays the broadcasting station informatio](/manual-img/5/324/w960_324-146.png)
FM/AM radio screen:
*1Displays the broadcasting station and category
currently being received.
*2Displays the frequency currently being received.
*3[Info]:
Displays the broadcasting station information
currently being received.
*4[SCAN]:
Touch to tune from low to high frequencies and
stop at each broadcasting station for 5 seconds.
*5Displays the preset channel list. If 1 of the 6
preset stations listed is touched and held, the
current station will be stored as the new preset.
SiriusXM Satellite Radio screen:
*1Indicates the channel, category, program and title
currently being received.
*2Indicates the frequency currently being received.
*3[CAT]:
Displays a category list for SiriusXM Satellite
Radio. When a category is selected, the channel
list will be displayed.
*4[Direct]:
Input the channel number by using a keypad.
*5[Info]:
Indicates the broadcasting station information
currently being received.
*6[SCAN]:
Touch to tune from low to high frequencies and
stop at each broadcasting channel for 5 seconds.
*7Displays the preset channel list. If 1 of the 6
preset stations listed is touched and held, the
current station will be stored as the new preset.
Selecting channel/category
TUNE (Tuning):
For AM and FM radio:
Push theTUNE SEEK CH button for manual
tuning.
For SiriusXM Satellite Radio:
Push the TUNE SEEK CH button to seek
channels from all of the categories.
During satellite radio reception, the following
messages will be displayed under certain
conditions.
. No Signal (No signal is received while the
SAT tuner is connected)
. Channel Off Air (Broadcasting signed off)
. Check Antenna (Antenna connection error) .
Loading (The system is receiving the music
or information that is provided from the
selected channel)
. Channel Not Available (No channels are
searched)
. Channel Not Authorized (There is no user
subscription to this channel)
SEEK tuning:
For AM and FM radio:
Push the TUNE SEEK CH button for less than
1.5 seconds to tune from low to high or high to
low frequencies and to stop at the next broad-
casting station.
When the TUNE SEEK CH button is pushed
and held, radio frequencies will increase or
decrease by skipping the broadcasting stations.
When the button is released, the next broad-
casting station is selected.
SCAN tuning:
Touch [SCAN] to tune from low to high
frequencies and stop at each broadcasting
station/channel for 5 seconds.
Touch [SCAN] again during this 5 second
period to stop SCAN tuning. The radio will
remain tuned to that station/channel.
If [SCAN] is not touched within 5 seconds,
SCAN tuning moves to the next station/channel.
Audio system4-13
Page 148 of 275

4-14Audio system
Storing stations/channels
12 stations/channels can be set for the FM band
(6 each for FM1 and FM2) , 18 for SiriusXM
Satellite Radio (6 each for XM1, XM2 and XM3)
and 6 stations can be set for the AM band.
1. Choose the radio band pushing theFM·AM
button or XMbutton.
2. Tune to the preferred station/channel push- ing the TUNE SEEK CH button.
3. Touch and hold one of the preset lists to register the chosen broadcasting station or
channel.
COMPACT DISC (CD) PLAYER OP-
ERATION
Playing CD
1. Push the power switch to the "ACC" or"ON" position.
2. Push the OPEN/TILTbutton to open the
monitor.
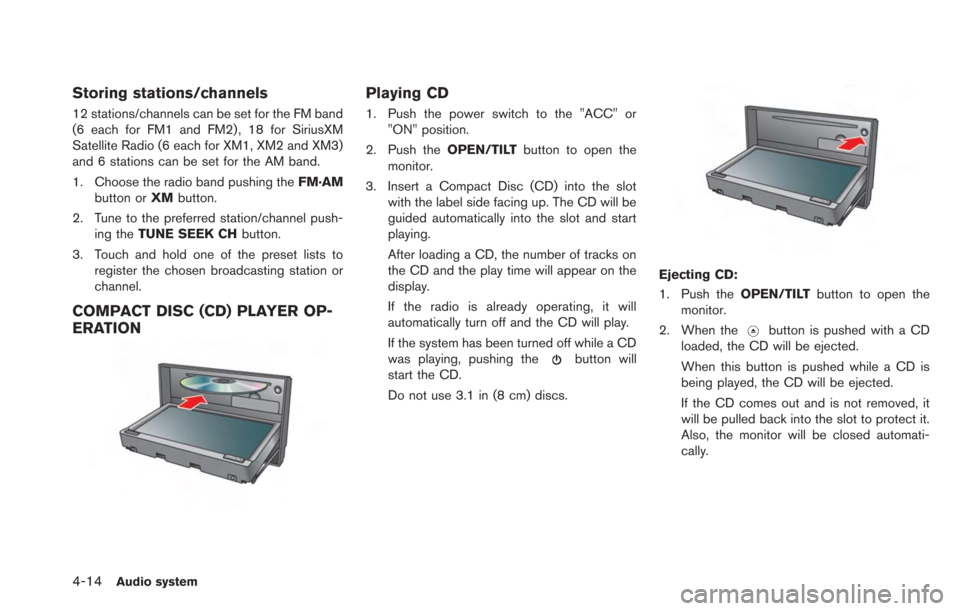
3. Insert a Compact Disc (CD) into the slot with the label side facing up. The CD will be
guided automatically into the slot and start
playing.
After loading a CD, the number of tracks on
the CD and the play time will appear on the
display.
If the radio is already operating, it will
automatically turn off and the CD will play.
If the system has been turned off while a CD
was playing, pushing the
button will
start the CD.
Do not use 3.1 in (8 cm) discs.
Ejecting CD:
1. Push the OPEN/TILTbutton to open the
monitor.
2. When the
button is pushed with a CD
loaded, the CD will be ejected.
When this button is pushed while a CD is
being played, the CD will be ejected.
If the CD comes out and is not removed, it
will be pulled back into the slot to protect it.
Also, the monitor will be closed automati-
cally.
Page 158 of 275

4-24Audio system
.High
STEERING WHEEL SWITCHES FOR
AUDIO CONTROL
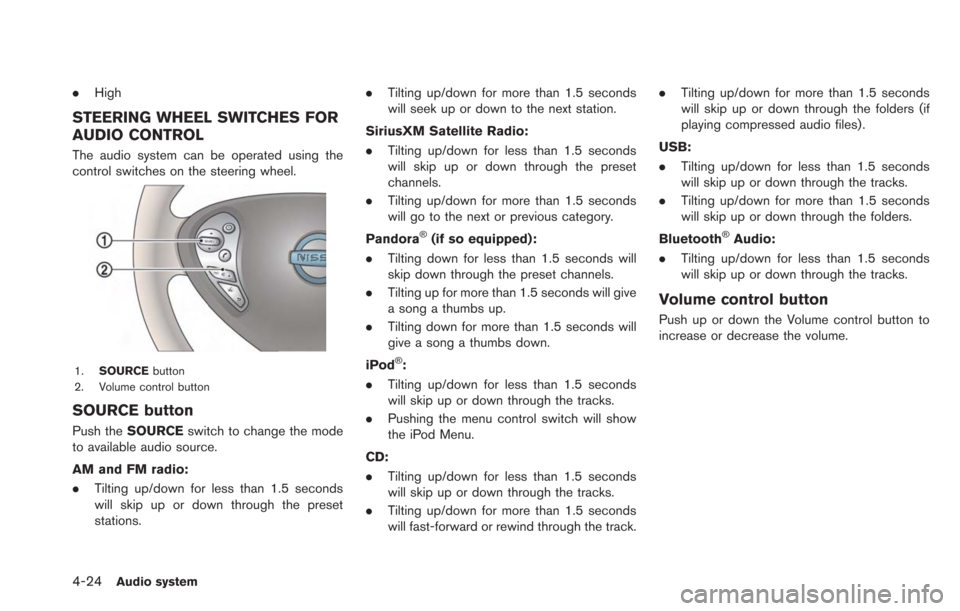
The audio system can be operated using the
control switches on the steering wheel.
1. SOURCE button
2. Volume control button
SOURCE button
Push the SOURCE switch to change the mode
to available audio source.
AM and FM radio:
. Tilting up/down for less than 1.5 seconds
will skip up or down through the preset
stations. .
Tilting up/down for more than 1.5 seconds
will seek up or down to the next station.
SiriusXM Satellite Radio:
. Tilting up/down for less than 1.5 seconds
will skip up or down through the preset
channels.
. Tilting up/down for more than 1.5 seconds
will go to the next or previous category.
Pandora
®(if so equipped):
. Tilting down for less than 1.5 seconds will
skip down through the preset channels.
. Tilting up for more than 1.5 seconds will give
a song a thumbs up.
. Tilting down for more than 1.5 seconds will
give a song a thumbs down.
iPod
®:
. Tilting up/down for less than 1.5 seconds
will skip up or down through the tracks.
. Pushing the menu control switch will show
the iPod Menu.
CD:
. Tilting up/down for less than 1.5 seconds
will skip up or down through the tracks.
. Tilting up/down for more than 1.5 seconds
will fast-forward or rewind through the track. .
Tilting up/down for more than 1.5 seconds
will skip up or down through the folders (if
playing compressed audio files) .
USB:
. Tilting up/down for less than 1.5 seconds
will skip up or down through the tracks.
. Tilting up/down for more than 1.5 seconds
will skip up or down through the folders.
Bluetooth
®Audio:
. Tilting up/down for less than 1.5 seconds
will skip up or down through the tracks.
Volume control button
Push up or down the Volume control button to
increase or decrease the volume.
Page 161 of 275

5 CARWINGSTM
Telematics overview .................................................................. 5-2
CARWINGSTMoverview.......................................................... 5-4
About service application .................................................. 5-6
Notice for usage................................................................... 5-6
Radio approval number and information ........................ 5-7
Displaying CARWINGS
TMinformation screen ................... 5-7
How to view information screen ...................................... 5-8
Storing favorites ........................................................................\
. 5-9
Google search ........................................................................\
. 5-10
Viewing CARWINGS
TMrecords ........................................ 5-11 CARWINGS
TMsettings ....................................................... 5-12
Setting messages that are received by email ......... 5-12
Information feed setting ................................................ 5-15
Displaying unit ID information ...................................... 5-18
Reset all CARWINGS
TMsettings to default ........... 5-18
Error message on communication ..................................... 5-19
Data communication settings.............................................. 5-20 Automatic carrier settings ............................................. 5-20
Manual carrier settings .................................................. 5-20
Page 172 of 275
![NISSAN LEAF 2013 1.G Navigation Manual 5-12CARWINGSTM
1. Push theMENUbutton and touch [CARW-
INGS].
2. Touch [CARWINGS Settings].
3. Touch the item you would like to set.
Available settings
. [Charging Message]:
Sends a notification to a p NISSAN LEAF 2013 1.G Navigation Manual 5-12CARWINGSTM
1. Push theMENUbutton and touch [CARW-
INGS].
2. Touch [CARWINGS Settings].
3. Touch the item you would like to set.
Available settings
. [Charging Message]:
Sends a notification to a p](/manual-img/5/324/w960_324-171.png)
5-12CARWINGSTM
1. Push theMENUbutton and touch [CARW-
INGS].
2. Touch [CARWINGS Settings].
3. Touch the item you would like to set.
Available settings
. [Charging Message]:
Sends a notification to a preset e-mail
address. This notification includes the
charge connector status and the charge
completion.
“Setting messages that are received
by email” (page 5-12)
. [Sign in]:
The user ID and password can be entered.
“Inputting user ID and password”
(page 1-11)
. [Auto-Update Stations]:
When information for new charging stations
is received while the vehicle is connecting to
the NISSAN CARWINGS Data Center, the information is automatically downloaded and
the map data is updated.
. [Service Reminders]:
The information that is sent from the
NISSAN CARWINGS Data Center is dis-
played.
. [Information Feed Setting]:
Set the timing of the connection to the
NISSAN CARWINGS Data Center, or edit
the list of the information feeds.
“Information feed setting” (page 5-15)
. [Vehicle Data Transmission Setting]:
— [Share Vehicle Information]:
Vehicle information (driving history, etc.) is
automatically sent to the NISSAN CARWINGS
Data Center. — [Share Vehicle Info When Powered On]:
Vehicle information (such as the driving history,
etc.) is automatically sent to the NISSAN
CARWINGS Data Center every time the power
switch is turned to the ACC, ON or READY
position. — [Delete Share Vehicle Information]
Vehicle information (driving history, etc.) is
deleted.
. [Unit ID Information]:
The necessary information for user registra-
tion is displayed.
“Displaying unit ID information” (page 5-18)
. [Reset all CARWINGS settings to default]:
All CARWINGS
TMsettings are reset to the
factory default setting.
“Reset all CARWINGSTMsettings to
default” (page 5-18)
SETTING MESSAGES THAT ARE
RECEIVED BY EMAIL
Sends a notification to a preset e-mail address.
This notification includes the charge connector
status and the charge completion. To receive a
notification to your personal computer or cellular
phone, an e-mail address should be set before-
hand. For details, access the NISSAN Owner’s
Portal Website.
Storing location for receiving charge
connector disconnected notifica-
tions
A maximum of 5 regularly used charging stations
can be registered. If the charging connector is
disconnected in one of these locations, an email
informing you of this will be sent.
1. Touch [Store charging plug reminder loca- tions].
CARWINGSTMSETTINGS
Page 173 of 275
![NISSAN LEAF 2013 1.G Navigation Manual 2. Touch [Add New].
3. Touch the appropriate method to search fora location.
“Setting destination” (page 3-17)
4. When a preferred location is displayed atthe center of the map, confirm the locati NISSAN LEAF 2013 1.G Navigation Manual 2. Touch [Add New].
3. Touch the appropriate method to search fora location.
“Setting destination” (page 3-17)
4. When a preferred location is displayed atthe center of the map, confirm the locati](/manual-img/5/324/w960_324-172.png)
2. Touch [Add New].
3. Touch the appropriate method to search fora location.
“Setting destination” (page 3-17)
4. When a preferred location is displayed atthe center of the map, confirm the location
and touch [OK]. A message is displayed,
and the location is stored.
Editing charging plug reminder location:
1. Touch [Store charging plug reminder loca- tions].
2. Touch the preferred stored location from thelist.
3. Touch the item you would like to set.
Available settings
.[Edit Name]:Changes the name of a stored location.
“How to input letters and numbers”
(page 1-7)
.[Relocate]:
Adjusts the location of the stored loca-
tion.
.[Delete]:Deletes the stored address.
.[OK]:Applies the settings.
Setting time for receiving charge
connector status notifications
This confirms the charge connector status at the
set checking time. If the charge connector is
then disconnected, a notification is sent to the
preset e-mail address.
CARWINGSTM5-13
Page 174 of 275
![NISSAN LEAF 2013 1.G Navigation Manual 5-14CARWINGSTM
1. Touch [Charging Plug Reminder Time].
2. Touch the preferred checking time. Theindicator of the selected time illuminates.
Available checking times
.5 min.10 min.15 min.30 min.1 hour
NISSAN LEAF 2013 1.G Navigation Manual 5-14CARWINGSTM
1. Touch [Charging Plug Reminder Time].
2. Touch the preferred checking time. Theindicator of the selected time illuminates.
Available checking times
.5 min.10 min.15 min.30 min.1 hour](/manual-img/5/324/w960_324-173.png)
5-14CARWINGSTM
1. Touch [Charging Plug Reminder Time].
2. Touch the preferred checking time. Theindicator of the selected time illuminates.
Available checking times
.5 min.10 min.15 min.30 min.1 hour
3. When the power switch is placed in the "OFF" position from the "ON" position, the
setting will be set to ON.
INFO:
When the power switch is placed in the "OFF"
position from the "ACC" position, the check time
setting will be reset.
Sending charge connector status
information to Data Center
If the system recognizes that the charge
connector is not connected to the vehicle even
though the charge timer function is set, the
system transmits this information to the NISSAN
CARWINGS Data Center. When the NISSAN
CARWINGS Data Center receives the informa-
tion, it will send an e-mail to the specified
address to inform you of the charge connector
status.
1. Touch [Send unplugged status to Data Center]. The indicator illuminates when the
item is set.
INFO:
Even if the notification service for the charge
connector status is set, no notification is sent
and no status can be checked under the
following conditions.
. The system will check the connection status
of the charge connector within the period of
time set, but will not check once this period
of time has been exceeded. Therefore, if the
charge connector is removed from the
vehicle after the period of time set, a
notification is not sent.
. The charge connector status notification
does not indicate the start of battery
charging.
. No notification is sent if the vehicle is
outside the communication service area.
. The notification does not include the reason
why the charge connector is disconnected.
. If the vehicle is not used for 2 weeks,
communication with the vehicle is disabled.
. If the power switch is in the "ON" position,
no notification is sent.
Sending battery charge status in-
formation to Data Center
If a battery charge is interrupted before it is
completed, the system recognizes this and
transmits this information to the NISSAN