2013 NISSAN GT-R ESP
[x] Cancel search: ESPPage 220 of 346
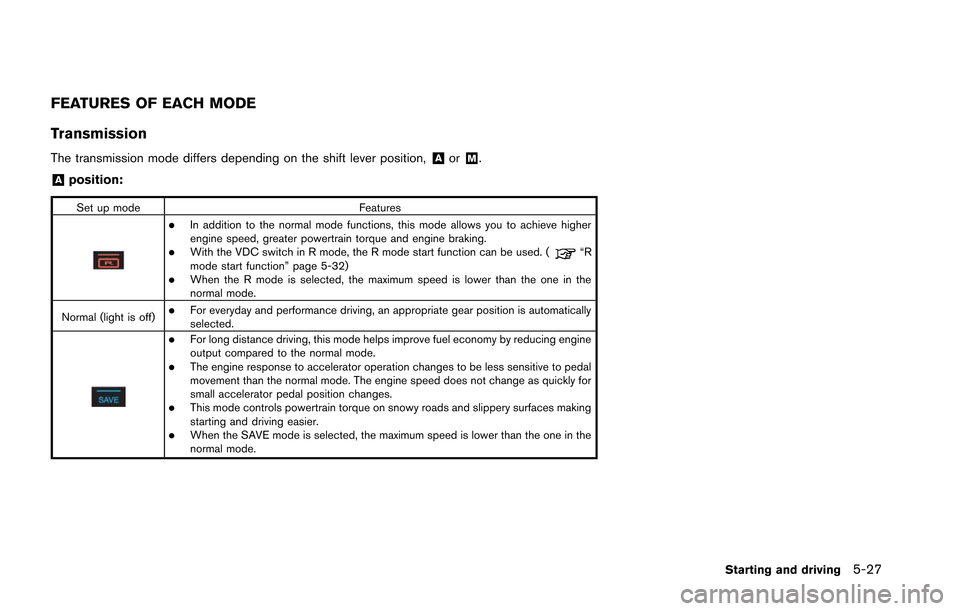
FEATURES OF EACH MODE
Transmission
The transmission mode differs depending on the shift lever position,&Aor&M.
&Aposition:
Set up modeFeatures
.In addition to the normal mode functions, this mode allows you to achieve higher
engine speed, greater powertrain torque and engine braking.
.With the VDC switch in R mode, the R mode start function can be used. (“R
mode start function” page 5-32)
.When the R mode is selected, the maximum speed is lower than the one in the
normal mode.
Normal (light is off)
.For everyday and performance driving, an appropriate gear position is automatically
selected.
.For long distance driving, this mode helps improve fuel economy by reducing engine
output compared to the normal mode.
.The engine response to accelerator operation changes to be less sensitive to pedal
movement than the normal mode. The engine speed does not change as quickly for
small accelerator pedal position changes.
.This mode controls powertrain torque on snowy roads and slippery surfaces making
starting and driving easier.
.When the SAVE mode is selected, the maximum speed is lower than the one in the
normal mode.
Starting and driving5-27
Page 221 of 346
5-28Starting and driving
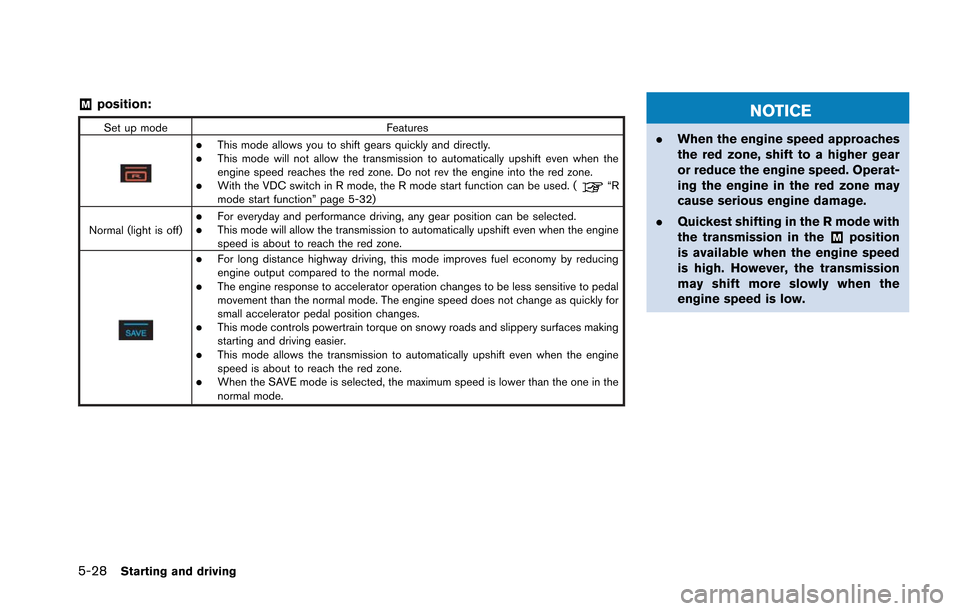
&Mposition:
Set up modeFeatures
.This mode allows you to shift gears quickly and directly..This mode will not allow the transmission to automatically upshift even when the
engine speed reaches the red zone. Do not rev the engine into the red zone.
.With the VDC switch in R mode, the R mode start function can be used. (“R
mode start function” page 5-32)
Normal (light is off)
.For everyday and performance driving, any gear position can be selected..This mode will allow the transmission to automatically upshift even when the engine
speed is about to reach the red zone.
.For long distance highway driving, this mode improves fuel economy by reducing
engine output compared to the normal mode.
.The engine response to accelerator operation changes to be less sensitive to pedal
movement than the normal mode. The engine speed does not change as quickly for
small accelerator pedal position changes.
.This mode controls powertrain torque on snowy roads and slippery surfaces making
starting and driving easier.
.This mode allows the transmission to automatically upshift even when the engine
speed is about to reach the red zone.
.When the SAVE mode is selected, the maximum speed is lower than the one in the
normal mode.
NOTICE
. When the engine speed approaches
the red zone, shift to a higher gear
or reduce the engine speed. Operat-
ing the engine in the red zone may
cause serious engine damage.
. Quickest shifting in the R mode with
the transmission in the
&Mposition
is available when the engine speed
is high. However, the transmission
may shift more slowly when the
engine speed is low.
Page 226 of 346
abled, the warning light illuminates.
When the warning light illuminates,
perform cool down driving.
(
“Cool down” page GTR-13)
When the warning light turns off,
the function can be used again.
. The performance of start may vary
depending on the amount of wheel
spin ,or increase and decrease of
the engine output in response to the
outside temperature. (This vehicle
was set up according to the road
surface conditions of the straight
sections of the Sendai Highland
Raceway course in Japan at 598F
(158C) .)
. For safety reasons, VDC control may
activate automatically when driving
on a slippery road surface, such as a
wet road, in order to apply the
brakes or limit the engine output.
. Frequent use of the R mode start
function increases the load on the
powertrain related parts such as the
clutch and transmission compared
to normal driving. In particular, the
clutch will wear out more quickly.
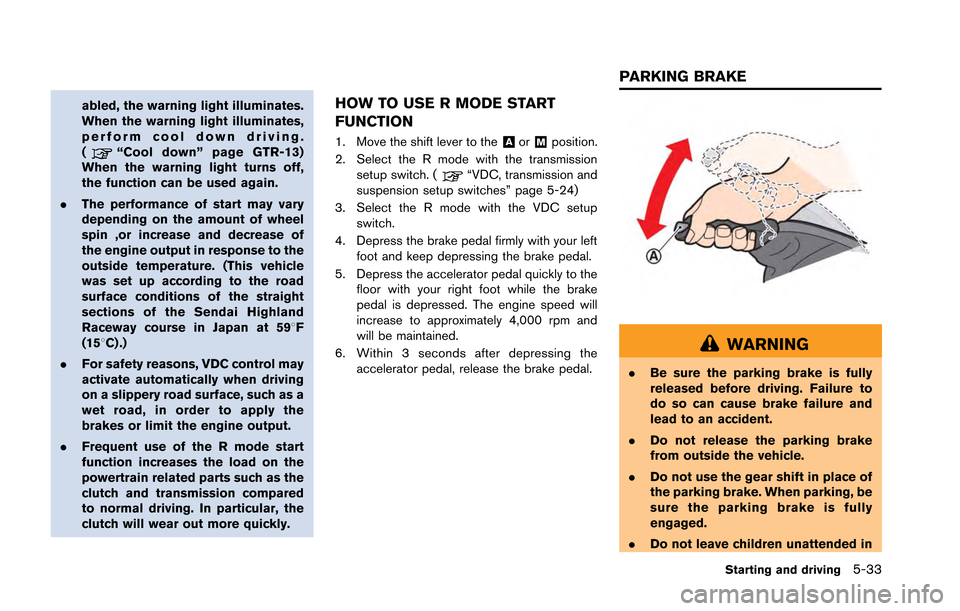
HOW TO USE R MODE START
FUNCTION
1. Move the shift lever to the&Aor&Mposition.
2. Select the R mode with the transmission setup switch. (
“VDC, transmission and
suspension setup switches” page 5-24)
3. Select the R mode with the VDC setup switch.
4. Depress the brake pedal firmly with your left foot and keep depressing the brake pedal.
5. Depress the accelerator pedal quickly to the floor with your right foot while the brake
pedal is depressed. The engine speed will
increase to approximately 4,000 rpm and
will be maintained.
6. Within 3 seconds after depressing the accelerator pedal, release the brake pedal.
WARNING
.Be sure the parking brake is fully
released before driving. Failure to
do so can cause brake failure and
lead to an accident.
. Do not release the parking brake
from outside the vehicle.
. Do not use the gear shift in place of
the parking brake. When parking, be
sure the parking brake is fully
engaged.
. Do not leave children unattended in
Starting and driving5-33
PARKING BRAKE
Page 231 of 346
5-38Starting and driving
NOTE:
.If cruise control was canceled by press-
ing the cancel switch or by depressing
the brake pedal, the system changes to
standby status.
. If you depress the brake pedal while
pushing the RESUME/ACCELERATE or
SET/COAST switch and reset at the
cruising speed, the cruise control will
be deactivated. Turn the MAIN switch
off once and then turn it on again.
Under the following conditions, cruise control
will be automatically canceled.
. Vehicle speed drops to below approximately
19 MPH (30 km/h) .
. Vehicle speed drops to more than approxi-
mately 8 MPH (13 km/h) below the set
vehicle speed.
. The shift lever is moved to a position other
than
&A↔&M.
. VDC operates.
. A tire is spinning.
. There is a malfunction in the cruise control
system.
WARNING
.Never rely solely on the hill start
assist system to prevent the vehicle
from moving backward on a hill.
Always drive carefully and atten-
tively. Depress the brake pedal
when the vehicle is stopped on a
steep hill. Be especially careful
when stopped on a hill on frozen
or muddy roads. Failure to prevent
the vehicle from rolling backwards
may result in a loss of control of the
vehicle and possible serious injury
or death.
. The hill start assist system is not
designed to hold the vehicle at a
standstill on a hill. Depress the
brake pedal when the vehicle is
stopped on a steep hill. Failure to
do so may cause the vehicle to roll
backwards and may result in a
collision or serious personal injury.
. The hill start assist may not prevent
the vehicle from rolling backwards
on a hill under all load or road
conditions. Always be prepared to
depress the brake pedal to prevent the vehicle from rolling backwards.
Failure to do so may result in a
collision or serious personal injury.
NOTICE
When the vehicle is stopped on a hill,
do not hold the vehicle in place by
depressing the accelerator pedal. Doing
so may cause the clutch to overheat and
result in transmission damage. Use the
brakes to prevent the vehicle from
moving.
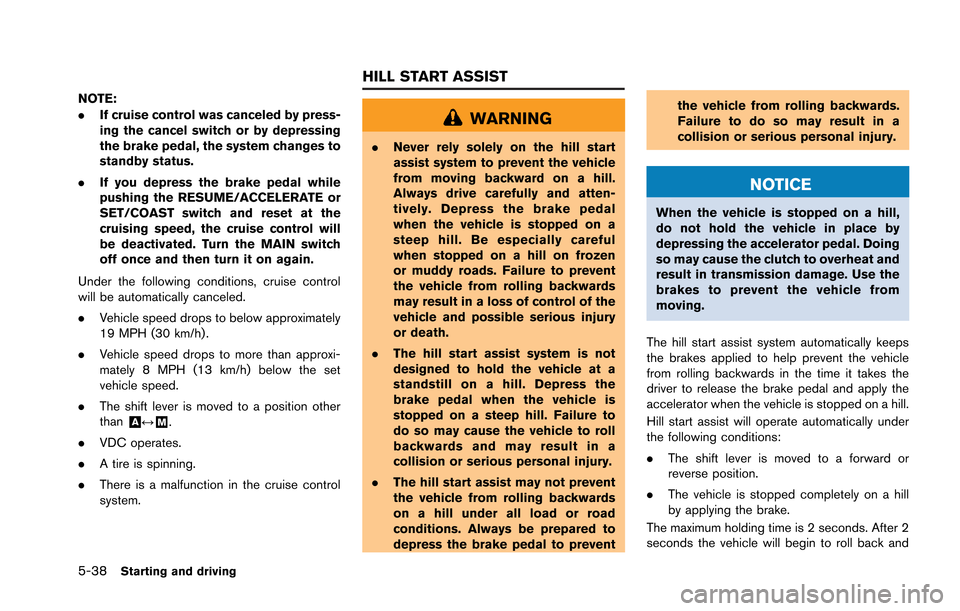
The hill start assist system automatically keeps
the brakes applied to help prevent the vehicle
from rolling backwards in the time it takes the
driver to release the brake pedal and apply the
accelerator when the vehicle is stopped on a hill.
Hill start assist will operate automatically under
the following conditions:
. The shift lever is moved to a forward or
reverse position.
. The vehicle is stopped completely on a hill
by applying the brake.
The maximum holding time is 2 seconds. After 2
seconds the vehicle will begin to roll back and
HILL START ASSIST
Page 239 of 346
5-46Starting and driving
.HEADED UPHILL OR DOWNHILL, NO
CURB:
*3Turn the wheels toward the side of the
road so the vehicle will move away from
the center of the road if it moves.
4. Push the ignition switch to the LOCK position.
The GT-R uses brake pad materials that have
high metallic content. The brake pad material
helps maintain braking performance in a wide
range of weather and driving conditions.
For the first 3,000 - 6,000 miles (5,000 -
10,000 km) of the vehicle’s service life, and for
the first 3,000 - 6,000 miles (5,000 - 10,000
km) after a brake replacement, the brake pad to
brake rotor clearance is very small. When
parking, apply the parking brake and move the
shift lever to the
&Pposition. Idle the engine for
more than 20 seconds without depressing the
brake pedal. This allows the brake pads to move
away from the rotor so the pad does not contact
the rotor.
Additionally, the brakes must be dry before
parking the vehicle after driving on wet roads or
after washing the vehicle. If the roads are wet,
lightly apply the brakes for a short distance
before parking the vehicle to dry the brakes.
After washing the vehicle, dry the brakes by
driving on a dry road for a few miles and apply the brakes normally based on traffic and road
conditions.
The metallic brake pads and brake disc rotor
may rust together when the brakes are not
applied:
.
If the vehicle is not idled for 20 seconds
without the brakes applied, or if the brakes
are applied when the vehicle is shut off, the
rotor and pads can rust together, even when
the brake pads are dry.
. If the brakes are wet when the vehicle is
parked and the parking brake is applied for a
long time.
Contact a GT-R certified NISSAN dealer if the
brake pads and brake rotor have rusted
together.
WARNING
If the engine is not running or is turned
off while driving, the power assist for
the steering will not work. Steering will
be harder to operate.
The power assisted steering uses a hydraulic
pump, driven by the engine, to assist steering.
If the engine stops or the drive belt breaks, you
will still have control of the vehicle. However,
much greater steering effort is needed, espe-
cially in sharp turns and at low speeds.
POWER STEERING
Page 241 of 346
5-48Starting and driving
ANTI-LOCK BRAKING SYSTEM
(ABS)
WARNING
.The Anti-lock Braking System (ABS)
is a sophisticated device, but it
cannot prevent accidents resulting
from careless or dangerous driving
techniques. It can help maintain
vehicle control during braking on
slippery surfaces. Remember that
stopping distances on slippery sur-
faces will be longer than on normal
surfaces even with ABS. Stopping
distances may also be longer on
rough, gravel or snow covered
roads, or if you are using tire chains.
Always maintain a safe distance
from the vehicle in front of you.
Ultimately, the driver is responsible
for safety.
. Tire type and condition may also
affect braking effectiveness. When
replacing tires, install the specified
size of tires on all four wheels.
The Anti-lock Braking System (ABS) controls the brakes so the wheels do not lock during hard
braking or when braking on slippery surfaces.
The system detects the rotation speed at each
wheel and varies the brake fluid pressure to
prevent each wheel from locking and sliding. By
preventing each wheel from locking, the system
helps the driver maintain steering control and
helps to minimize swerving and spinning on
slippery surfaces.
Using the system
Depress the brake pedal and hold it down.
Depress the brake pedal with firm steady
pressure, but do not pump the brakes. The
ABS will operate to prevent the wheels from
locking up. Steer the vehicle to avoid obstacles.
WARNING
Do not pump the brake pedal. Doing so
may result in increased stopping dis-
tances.
Self-test feature
The ABS includes electronic sensors, electric
pumps, hydraulic solenoids and a computer. The
computer has a built-in diagnostic feature that
tests the system each time you start the engine
and move the vehicle at a low speed in forwardor reverse. When the self-test occurs, you may
hear a “clunk” noise and/or feel a pulsation in the
brake pedal. This does not indicate that there is
a malfunction. If the computer senses a mal-
function, it switches the ABS off and illuminates
the ABS warning light on the instrument panel.
The brake system then operates normally, but
without anti-lock assistance.
If the ABS warning light illuminates during the
self-test or while driving, have the vehicle
checked by a GT-R certified NISSAN dealer.
Normal operation
The ABS operates at speeds above 3 to 6 MPH
(5 to 10 km/h). The speed varies according to
road conditions.
When the ABS senses that one or more wheels
are close to locking up, the actuator rapidly
applies and releases hydraulic pressure. This
action is similar to pumping the brakes very
quickly. You may feel a pulsation in the brake
pedal and hear a noise from under the hood or
feel a vibration from the actuator when it is
operating. This is normal and indicates that the
ABS is operating properly. However, the pulsa-
tion may indicate that road conditions are
hazardous and extra care is required while
driving.
BRAKE ASSIST
Page 242 of 346
The Vehicle Dynamic Control (VDC) system
uses various sensors to monitor driver inputs
and vehicle motion. Under certain driving con-
ditions, the VDC system helps to perform the
following functions.
.Controls brake pressure to reduce wheel
slip on one slipping drive wheel so power is
transferred to a non slipping drive wheel on
the same axle.
. Controls brake pressure and engine output
to reduce drive wheel slip based on vehicle
speed (traction control function) .
. Controls brake pressure at individual wheels
and engine output to help the driver maintain
control of the vehicle in the following
conditions:
— understeer (vehicle tends to not follow
the steered path despite increased
steering input)
— oversteer (vehicle tends to spin due to certain road or driving conditions) .
The VDC system can help the driver to maintain
control of the vehicle, but it cannot prevent loss
of vehicle control in all driving situations.
When the VDC system operates, the VDC
warning light
in the instrument panel flashes
so note the following: .
The road may be slippery or the system may
determine some action is required to help
keep the vehicle on the steered path.
. You may feel a pulsation in the brake pedal
and hear a noise or vibration from under the
hood. This is normal and indicates that the
VDC system is working properly.
. Adjust your speed and driving to the road
conditions.
. The VDC mode can be changed using the
VDC setup switch. (
“VDC, transmis-
sion and suspension setup switches” page
5-24)
(
“Vehicle Dynamic Control (VDC) warning
light” page 2-30,“Vehicle Dynamic Con-
trol (VDC) off indicator light” page 2-31)
If a malfunction occurs in the system, the VDC
warning light
illuminates in the instrument
panel. The VDC system automatically turns off.
The VDC setup switch is used to turn off the
VDC system. The VDC off indicator
illuminates to indicate the VDC system is off.
When the VDC setup switch is used to turn off
the system, the VDC system still operates to
prevent one drive wheel from slipping by
transferring power to a non slipping drive wheel.
The VDC warning light
flashes if this
occurs. All other VDC functions are off and the VDC warning light
will not flash. The VDC
system is automatically reset to on when the
ignition switch is placed in the off position then
back to the on position.
(
“Vehicle Dynamic Control (VDC) warning
light” page 2-30,“Vehicle Dynamic Con-
trol (VDC) off indicator light” page 2-31)
The computer has a built-in diagnostic feature
that tests the system each time you start the
engine and move the vehicle forward or in
reverse at a slow speed. When the self-test
occurs, you may hear a “clunk” noise and/or feel
a pulsation in the brake pedal. This is normal and
is not an indication of a malfunction.
WARNING
. The VDC system is designed to help
the driver maintain stability but
does not prevent accidents due to
abrupt steering operation at high
speeds or by careless or dangerous
driving techniques. Reduce vehicle
speed and be especially careful
when driving and cornering on slip-
pery surfaces and always drive care-
fully.
. Do not modify the vehicle’s suspen-
sion. If suspension parts such as
Starting and driving5-49
VEHICLE DYNAMIC CONTROL (VDC)
SYSTEM
Page 261 of 346
7-2Appearance and care
In order to maintain the appearance of your
vehicle, it is important to take proper care of it.
To protect the paint surfaces, wash your vehicle
as soon as you can:
.after a rainfall to prevent possible damage
from acid rain
. after driving on coastal roads
. when contaminants such as soot, bird
droppings, tree sap, metal particles or bugs
get on the paint surface
. when dust or mud builds up on the surface
Whenever possible, store or park your vehicle
inside a garage or in a covered area.
When it is necessary to park outside, park in a
shady area or protect the vehicle with a body
cover.
Be careful not to scratch the paint surface
when putting on or removing the body
cover.WASHING
Wash dirt off the vehicle with a wet sponge and
plenty of water. Clean the vehicle thoroughly
using a mild soap, a special vehicle soap or
general purpose dishwashing liquid mixed with
clean, lukewarm (never hot) water.
NOTICE
. Do not use an automatic car wash.
The rear spoiler may be damaged.
. Do not use car washes that use acid
in the detergent. Some car washes,
especially brushless ones, use some
acid for cleaning. The acid may react
with some plastic vehicle compo-
nents, causing them to crack. This
could affect their appearance, and
also could cause them not to func-
tion properly. Always check with
your car wash to confirm that acid
is not used.
. Do not wash the vehicle with strong
household soap, strong chemical
detergents, gasoline or solvents.
. Do not wash the vehicle in direct
sunlight or while the vehicle body is
hot, as the surface may become water-spotted.
. Avoid using tight-napped or rough
cloths, such as washing mitts. Care
must be taken when removing
caked-on dirt or other foreign sub-
stances so the paint surface is not
scratched or damaged.
Rinse the vehicle thoroughly with plenty of clean
water.
Inside flanges, seams and folds on the doors,
hatches and hood are particularly vulnerable to
the effects of road salt. Therefore, these areas
must be regularly cleaned. Take care that the
drain holes in the lower edge of the door are
open. Spray water under the body and in the
wheel wells to loosen the dirt and wash away
road salt.
Avoid leaving water spots on the paint surface
by using a damp chamois to dry the vehicle.
CLEANING EXTERIOR