2013 NISSAN GT-R Low battery
[x] Cancel search: Low batteryPage 97 of 346
Cruise control system warning .................................... 2-39
Low fuel warning ............................................................. 2-39
Door/trunk open warning .............................................. 2-40
Low washer fluid warning ............................................. 2-40
No key warning ................................................................ 2-40
Operation displays ................................................................ 2-41 Engine start operation indicator .................................. 2-41
Shift “P” warning ............................................................. 2-42
“PUSH” warning .............................................................. 2-42
Steering lock release malfunction indicator ............. 2-42
Intelligent Key insertion indicator ................................ 2-43
Intelligent Key removal indicator .................................. 2-43
Intelligent Key battery discharge indicator ................ 2-43
Security systems ................................................................... 2-44
Vehicle security system ................................................. 2-44
NISSAN Vehicle Immobilizer System ......................... 2-45
Windshield wiper and washer switch .............................. 2-46 Using the wipers ............................................................. 2-47
Using the washer ............................................................ 2-48
Rear window defroster switch ........................................... 2-48
Headlight and turn signal switch ...................................... 2-49
Xenon headlights ............................................................. 2-49
Headlight switch .............................................................. 2-49
Hazard warning flasher switch .......................................... 2-52
Horn ........................................................................\
.................. 2-53 Heated seats (if so equipped) .......................................... 2-53
Turning on the heaters ................................................. 2-53
Turning off the heaters ................................................. 2-53
Power outlets ........................................................................\
2-54
Storage ........................................................................\
........... 2-55 Cup holders .................................................................... 2-55
Sunglasses holder ........................................................ 2-56
Door pocket .................................................................... 2-57
Glove box ........................................................................\
2-57Console box ................................................................... 2-58
Coat hooks ..................................................................... 2-58
Windows ........................................................................\
........ 2-59 Power windows ............................................................. 2-59
Interior lights ........................................................................\
.. 2-61
Map lights ....................................................................... 2-61
Interior light control switch ......................................... 2-62
Vanity mirror lights ................................................................ 2-63
HomeLink
®Universal Transceiver .................................... 2-63
Programming HomeLink®............................................ 2-64
Programming HomeLink®for
Canadian customers .................................................... 2-65
Operating the HomeLink
®universal transceiver ... 2-65
Programming trouble-diagnosis ................................ 2-65
Clearing the programmed information ..................... 2-66
Reprogramming a single HomeLink
®button ......... 2-66
If your vehicle is stolen ................................................ 2-66
Page 105 of 346
2-10Instruments and controls
Setting
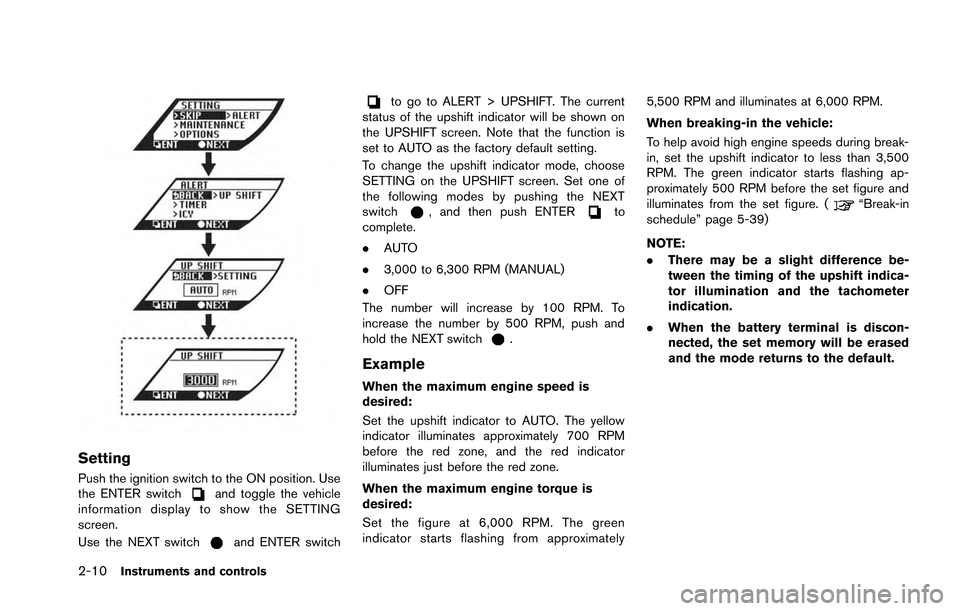
Push the ignition switch to the ON position. Use
the ENTER switchand toggle the vehicle
information display to show the SETTING
screen.
Use the NEXT switch
and ENTER switch
to go to ALERT > UPSHIFT. The current
status of the upshift indicator will be shown on
the UPSHIFT screen. Note that the function is
set to AUTO as the factory default setting.
To change the upshift indicator mode, choose
SETTING on the UPSHIFT screen. Set one of
the following modes by pushing the NEXT
switch
, and then push ENTERto
complete.
. AUTO
. 3,000 to 6,300 RPM (MANUAL)
. OFF
The number will increase by 100 RPM. To
increase the number by 500 RPM, push and
hold the NEXT switch
.
Example
When the maximum engine speed is
desired:
Set the upshift indicator to AUTO. The yellow
indicator illuminates approximately 700 RPM
before the red zone, and the red indicator
illuminates just before the red zone.
When the maximum engine torque is
desired:
Set the figure at 6,000 RPM. The green
indicator starts flashing from approximately 5,500 RPM and illuminates at 6,000 RPM.
When breaking-in the vehicle:
To help avoid high engine speeds during break-
in, set the upshift indicator to less than 3,500
RPM. The green indicator starts flashing ap-
proximately 500 RPM before the set figure and
illuminates from the set figure. (
“Break-in
schedule” page 5-39)
NOTE:
. There may be a slight difference be-
tween the timing of the upshift indica-
tor illumination and the tachometer
indication.
. When the battery terminal is discon-
nected, the set memory will be erased
and the mode returns to the default.
Page 106 of 346
INSTRUMENT BRIGHTNESS CON-
TROL
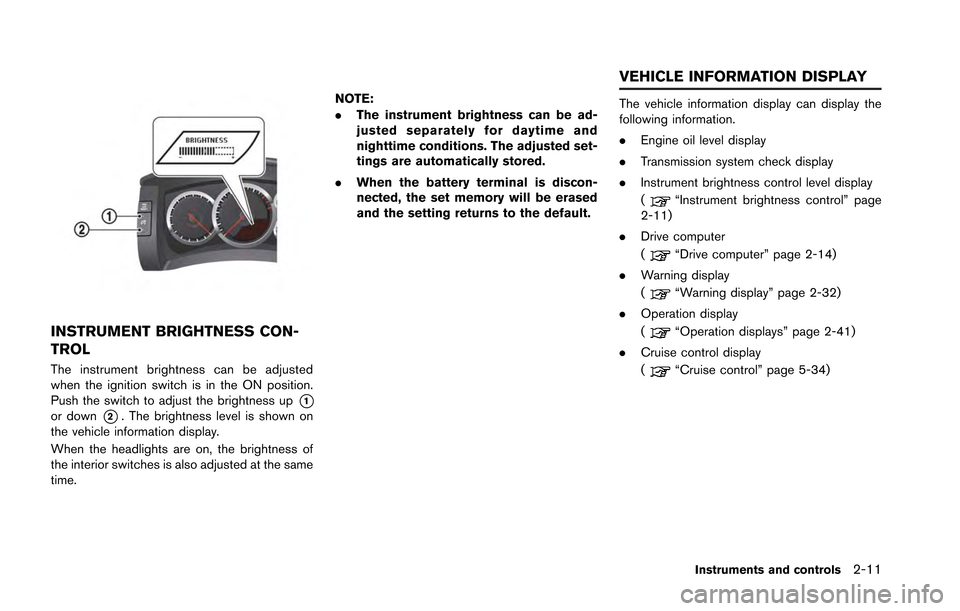
The instrument brightness can be adjusted
when the ignition switch is in the ON position.
Push the switch to adjust the brightness up
*1or down*2. The brightness level is shown on
the vehicle information display.
When the headlights are on, the brightness of
the interior switches is also adjusted at the same
time. NOTE:
.
The instrument brightness can be ad-
justed separately for daytime and
nighttime conditions. The adjusted set-
tings are automatically stored.
. When the battery terminal is discon-
nected, the set memory will be erased
and the setting returns to the default.
The vehicle information display can display the
following information.
.Engine oil level display
. Transmission system check display
. Instrument brightness control level display
(
“Instrument brightness control” page
2-11)
. Drive computer
(
“Drive computer” page 2-14)
. Warning display
(
“Warning display” page 2-32)
. Operation display
(
“Operation displays” page 2-41)
. Cruise control display
(
“Cruise control” page 5-34)
Instruments and controls2-11
VEHICLE INFORMATION DISPLAY
Page 113 of 346
2-18Instruments and controls
partment is high.
. When the outside air temperature is
lower than 378F(3 8C) , the low outside
temperature warning will be displayed
and “ICY” is indicated on the outside
air temperature display. (
“Alert”
page 2-19)
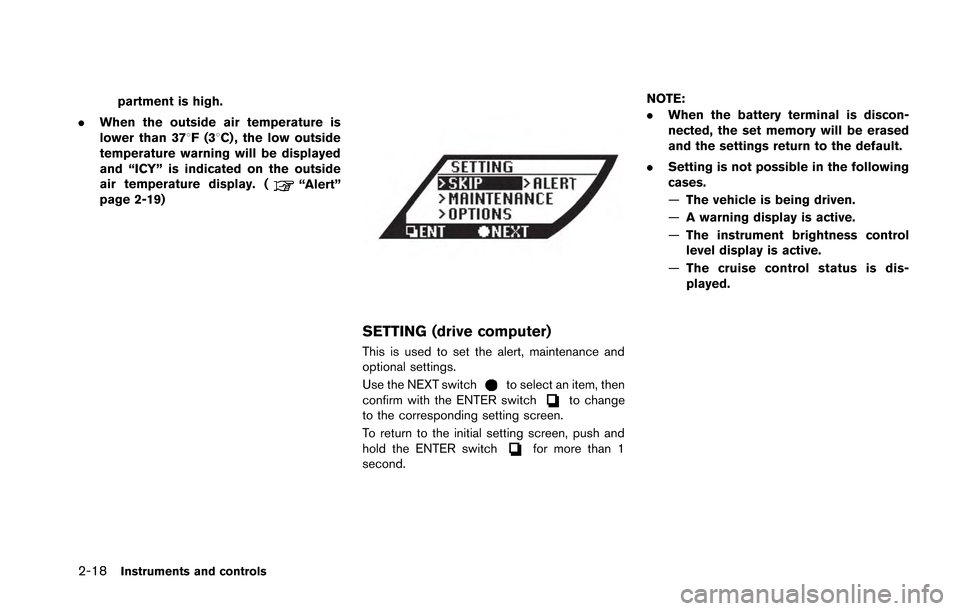
SETTING (drive computer)
This is used to set the alert, maintenance and
optional settings.
Use the NEXT switch
to select an item, then
confirm with the ENTER switchto change
to the corresponding setting screen.
To return to the initial setting screen, push and
hold the ENTER switch
for more than 1
second. NOTE:
.
When the battery terminal is discon-
nected, the set memory will be erased
and the settings return to the default.
. Setting is not possible in the following
cases.
—The vehicle is being driven.
— A warning display is active.
— The instrument brightness control
level display is active.
— The cruise control status is dis-
played.
Page 115 of 346
2-20Instruments and controls
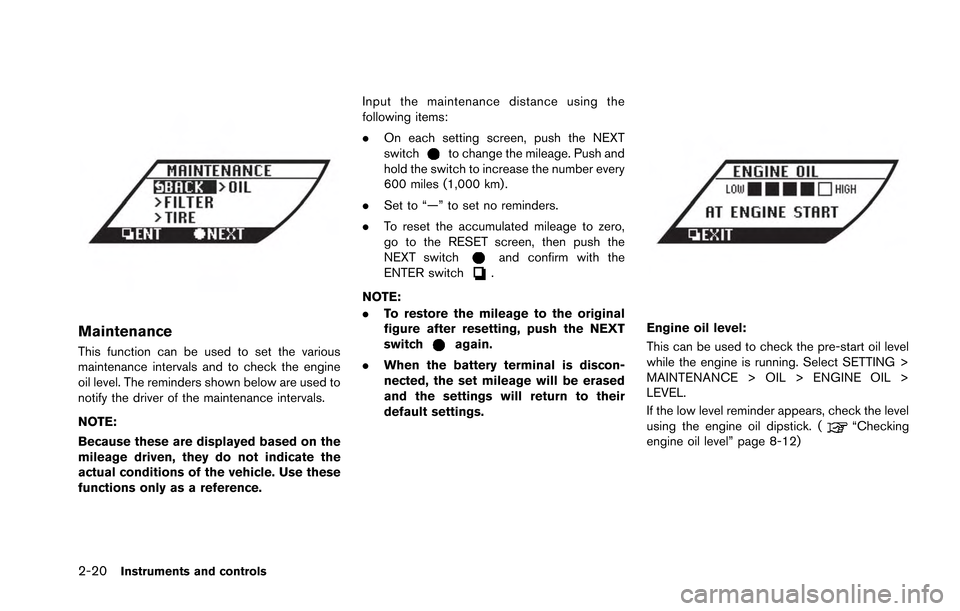
Maintenance
This function can be used to set the various
maintenance intervals and to check the engine
oil level. The reminders shown below are used to
notify the driver of the maintenance intervals.
NOTE:
Because these are displayed based on the
mileage driven, they do not indicate the
actual conditions of the vehicle. Use these
functions only as a reference.Input the maintenance distance using the
following items:
.
On each setting screen, push the NEXT
switch
to change the mileage. Push and
hold the switch to increase the number every
600 miles (1,000 km) .
. Set to “—” to set no reminders.
. To reset the accumulated mileage to zero,
go to the RESET screen, then push the
NEXT switch
and confirm with the
ENTER switch.
NOTE:
. To restore the mileage to the original
figure after resetting, push the NEXT
switch
again.
. When the battery terminal is discon-
nected, the set mileage will be erased
and the settings will return to their
default settings.
Engine oil level:
This can be used to check the pre-start oil level
while the engine is running. Select SETTING >
MAINTENANCE > OIL > ENGINE OIL >
LEVEL.
If the low level reminder appears, check the level
using the engine oil dipstick. (
“Checking
engine oil level” page 8-12)
Page 146 of 346
CAUTION
Use low beams when there are cars
approaching from the opposite direc-
tion, during city driving and at similar
times.
Battery saver system
A chime will sound when the driver side door is
opened with the light switch in theorposition and the ignition switch in the ACC,
OFF or LOCK position. (“Light reminder
chime” page 2-31)
When the headlight switch is in the
orposition while the ignition switch is in the ON
position, the lights will automatically turn off 45
seconds after the ignition switch has been
pushed to the OFF position.
When the headlight switch remains in the
orposition after the lights automatically turn
off, the lights will turn on when the ignition
switch is pushed to the ON position.
NOTICE
. When you turn on the headlight
switch again after the lights auto-
matically turn off, the lights will not
turn off automatically. Be sure to
turn the light switch to the OFF
position when you leave the vehicle
for extended periods of time, other-
wise the battery will be discharged.
. Never leave the light switch on
when the engine is not running for
extended periods of time even if the
headlights turn off automatically.
Daytime running light system
The daytime running lights automatically illumi-
nate when the engine is started with the parking
brake released. The daytime running lights
operate with the headlight switch in the OFF
position. Turn the headlight switch to the
position for full illumination when driving at night.
If the parking brake is applied before the engine
is started, the daytime running lights do not
illuminate. The daytime running lights illuminate
once the parking brake is released. The daytime
running lights will remain on until the ignition
switch is pushed to the OFF position.
WARNING
When the daytime running light system
is active, tail lights on your vehicle are
not on. It is necessary at dusk to turn on
your headlights. Failure to do so could
cause an accident injuring yourself and
others.
Instruments and controls2-51
Page 149 of 346
2-54Instruments and controls
with a dry cloth.
. If any malfunctions are found or the
heated seat does not operate, turn
the switch off and have the system
checked by a GT-R certified NISSAN
dealer.
NOTICE
.The battery could run down if the
seat heater is operated while the
engine is not running.
. Do not use the seat heater for
extended periods or when no one
is using the seat.
. When cleaning the seat, never use
gasoline, thinner, or any similar
materials.
CAUTION
.The outlet and plug may be hot
during or immediately after use.
. Do not use with accessories that
exceed a 12 volt, 120W (10A) power
draw. Do not use double adapters or
more than one electrical accessory.
. This power outlet is not designed
for use with a cigarette lighter unit.
. Before inserting or disconnecting a
plug, be sure the electrical acces-
sory being used is turned OFF.
. When not in use, be sure to close
the cap. Do not allow water to
contact the outlet.
NOTICE
.Use power outlet with the engine
running to avoid discharging the
vehicle battery.
. Avoid using power outlet when the
air conditioner, headlights or rear
window defroster is on. .
Push the plug in as far as it will go.
If good contact is not made, the plug
may overheat or the internal tem-
perature fuse may open.
POWER OUTLETS
Page 155 of 346
2-60Instruments and controls
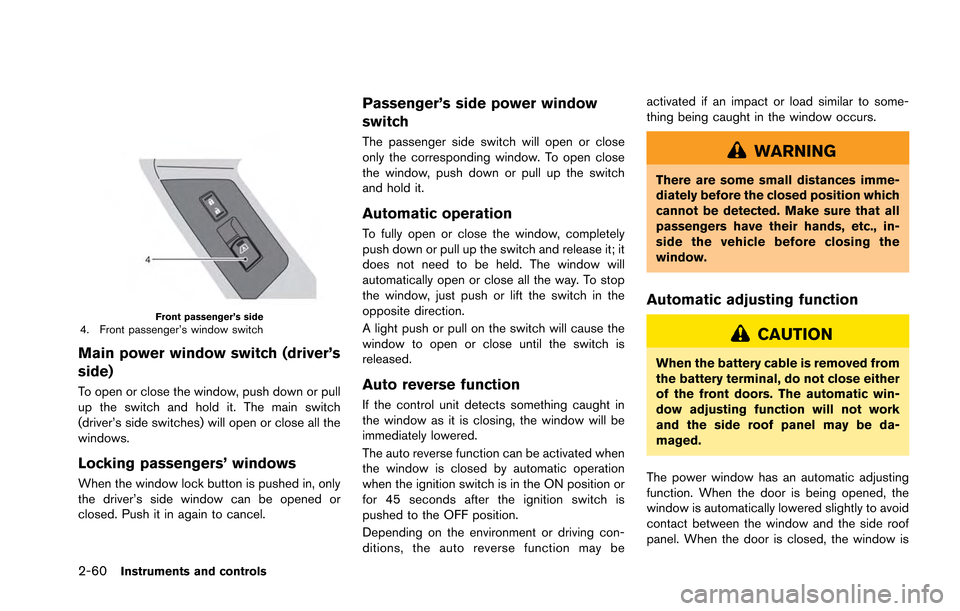
Front passenger’s side4. Front passenger’s window switch
Main power window switch (driver’s
side)
To open or close the window, push down or pull
up the switch and hold it. The main switch
(driver’s side switches) will open or close all the
windows.
Locking passengers’ windows
When the window lock button is pushed in, only
the driver’s side window can be opened or
closed. Push it in again to cancel.
Passenger’s side power window
switch
The passenger side switch will open or close
only the corresponding window. To open close
the window, push down or pull up the switch
and hold it.
Automatic operation
To fully open or close the window, completely
push down or pull up the switch and release it; it
does not need to be held. The window will
automatically open or close all the way. To stop
the window, just push or lift the switch in the
opposite direction.
A light push or pull on the switch will cause the
window to open or close until the switch is
released.
Auto reverse function
If the control unit detects something caught in
the window as it is closing, the window will be
immediately lowered.
The auto reverse function can be activated when
the window is closed by automatic operation
when the ignition switch is in the ON position or
for 45 seconds after the ignition switch is
pushed to the OFF position.
Depending on the environment or driving con-
ditions, the auto reverse function may beactivated if an impact or load similar to some-
thing being caught in the window occurs.
WARNING
There are some small distances imme-
diately before the closed position which
cannot be detected. Make sure that all
passengers have their hands, etc., in-
side the vehicle before closing the
window.
Automatic adjusting function
CAUTION
When the battery cable is removed from
the battery terminal, do not close either
of the front doors. The automatic win-
dow adjusting function will not work
and the side roof panel may be da-
maged.
The power window has an automatic adjusting
function. When the door is being opened, the
window is automatically lowered slightly to avoid
contact between the window and the side roof
panel. When the door is closed, the window is