Page 213 of 315
![NISSAN GT-R 2013 R35 Multi Function Display Owners Manual The image files in the USB memory will be
displayed.
1. Press<SETTING>.
2. Select [Others] and press <ENTER>.
3. Select [Image Viewer] and press <ENTER>.
The image of the selected file is displayed on NISSAN GT-R 2013 R35 Multi Function Display Owners Manual The image files in the USB memory will be
displayed.
1. Press<SETTING>.
2. Select [Others] and press <ENTER>.
3. Select [Image Viewer] and press <ENTER>.
The image of the selected file is displayed on](/manual-img/5/316/w960_316-212.png)
The image files in the USB memory will be
displayed.
1. Press.
2. Select [Others] and press .
3. Select [Image Viewer] and press .
The image of the selected file is displayed on the
right side of the screen.
When a number of folders are included in the
USB memory, select a folder from the list and
push to display the file list.
FULL SCREEN DISPLAY
The full screen display will appear when select-
ing [Full Screen Display] and press .
To operate the Image Viewer or to change the
settings, select the desired key.
.
(Start)
Select “
” and push to start
playing the slideshow.
.
(Stop)
Select “
” and push to stop
the slideshow.
.
(Next)
Select “
” and push to
display the next file.
.
(Previous)
Select “
” and push to
display the previous file.
SETTING THE IMAGE VIEWER
The Image Viewer setting display will appear
when selecting [Settings] on the full screen
display and pushing . The following
settings are available for the full screen display.
. Slideshow Speed
Choose [Slideshow Speed] and push
. From the following display,
select the changing time from 5, 10, 30,
60 seconds or “No Auto Change”. .
Slideshow Order
Choose [Slideshow Order] and push
. From the following display,
select “Random” or “Order List”.
Operating tips
. Only files that meet the following conditions
will be displayed.
— File format: JPEG (“.jpg” or “.jpeg”)
— File size: 2 MB or less
— Display size: 1,536 62,048 pixels or
less
. If an electronic device (such as a digital
camera) is directly connected to the vehicle
using a USB cable, no image will be
displayed on the screen.
. If the file name is too long, some file names
may not be entirely displayed.
Other settings7-11
IMAGE VIEWER
Page 243 of 315

the object projects over the actual backing up
course.WARNING
.Always turn and check that it is safe
to park your car before backing up.
Always back up slowly.
. Use the displayed lines as a refer-
ence. The lines are highly affected
by the number of occupants, fuel
level, vehicle position, road condi-
tion and road grade.
. If the tires are replaced with differ-
ent sized tires, the predicted course
line may not be displayed correctly.
. On a snow-covered or slippery road,
there may be a difference between
the predicted course line and the
actual course line.
. If the battery is disconnected or
becomes discharged, the predicted
course lines may be displayed in-
correctly. If this occurs, drive the
vehicle on a straight road for more
than 5 minutes.
. When the steering wheel is turned
with the ignition switch in the ACC
position, the predicted course lines
may be displayed incorrectly. .
The displayed line will appear
slightly off to the right because the
rear view camera is not installed in
the rear center of the vehicle.
. The distance guide line and the
vehicle width guide line should be
used as a reference only when the
vehicle is on a level paved surface.
The distance viewed on the monitor
is for reference only and may be
different than the actual distance
between the vehicle and displayed
objects.
. When backing up the vehicle up a
hill, objects viewed in the monitor
are further than they appear. When
backing up the vehicle down a hill,
objects viewed in the monitor are
closer than they appear. Use the
inside mirror or glance over your
shoulder to properly judge dis-
tances to other objects.
The vehicle width and predicted course
lines are wider than the actual width and
course.
Monitor system9-5
HOW TO PARK WITH PREDICTED
COURSE LINES
Page 283 of 315

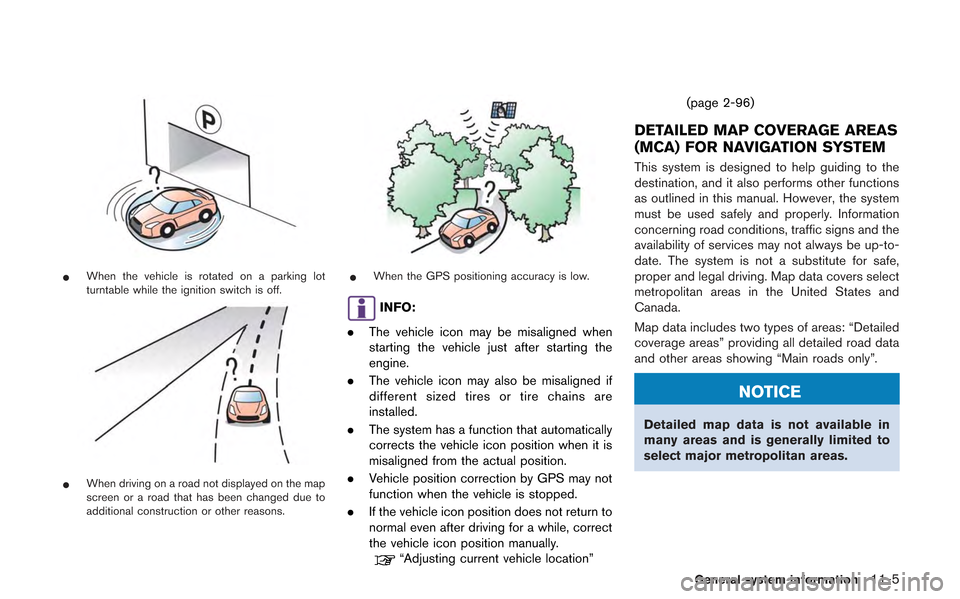
*When the vehicle is rotated on a parking lot
turntable while the ignition switch is off.
*When driving on a road not displayed on the map
screen or a road that has been changed due to
additional construction or other reasons.
*When the GPS positioning accuracy is low.
INFO:
. The vehicle icon may be misaligned when
starting the vehicle just after starting the
engine.
. The vehicle icon may also be misaligned if
different sized tires or tire chains are
installed.
. The system has a function that automatically
corrects the vehicle icon position when it is
misaligned from the actual position.
. Vehicle position correction by GPS may not
function when the vehicle is stopped.
. If the vehicle icon position does not return to
normal even after driving for a while, correct
the vehicle icon position manually.
“Adjusting current vehicle location” (page 2-96)
DETAILED MAP COVERAGE AREAS
(MCA) FOR NAVIGATION SYSTEM
This system is designed to help guiding to the
destination, and it also performs other functions
as outlined in this manual. However, the system
must be used safely and properly. Information
concerning road conditions, traffic signs and the
availability of services may not always be up-to-
date. The system is not a substitute for safe,
proper and legal driving. Map data covers select
metropolitan areas in the United States and
Canada.
Map data includes two types of areas: “Detailed
coverage areas” providing all detailed road data
and other areas showing “Main roads only”.
NOTICE
Detailed map data is not available in
many areas and is generally limited to
select major metropolitan areas.
General system information11-5