2013 NISSAN GT-R steering
[x] Cancel search: steeringPage 232 of 315
![NISSAN GT-R 2013 R35 Multi Function Display Owners Manual 8-18Voice recognition
to operate the learning function through this
tutorial.
1. Highlight [Adapting the System to YourVoice] and push <ENTER>. The tutorial
starts.
2. The voice guide demonstrates the NISSAN GT-R 2013 R35 Multi Function Display Owners Manual 8-18Voice recognition
to operate the learning function through this
tutorial.
1. Highlight [Adapting the System to YourVoice] and push <ENTER>. The tutorial
starts.
2. The voice guide demonstrates the](/manual-img/5/316/w960_316-231.png)
8-18Voice recognition
to operate the learning function through this
tutorial.
1. Highlight [Adapting the System to YourVoice] and push
starts.
2. The voice guide demonstrates the steps that have to be performed.
3. When the tutorial is completed, the system automatically switches to the Menu screen.
USING VOICE RECOGNITION SYS-
TEM
Initialization
When the ignition switch is pushed to the ON
position, Voice Recognition is initialized, which
takes a few seconds. When completed, the
system is ready to accept voice commands. If
<
>is pushed before the initialization com-
pletes, the display will show the message:
“System not ready”.
BEFORE STARTING
To get the best recognition performance out of
Voice Recognition, observe the following:
. The interior of the vehicle should be as quiet
as possible. Close the windows to eliminate
the surrounding noises (traffic noise and
vibration sounds, etc.), which may prevent
the system from correctly recognizing the
voice commands.
. Wait until the tone sounds before speaking a
command.
. Speak in a natural conversational voice
without pausing between words.
GIVING VOICE COMMANDS
1. Push <>located on the steering wheel.
2. A list of commands appears on the screen,
and the system announces, “Please say a
command”.
3. After the tone sounds and the icon on the screen changes from [
]to[], speak a
command.
Operating tips
. If the command is not recognized, the
system announces, “Please say again”.
Repeat the command in a clear voice.
. Push
previous screen.
. To cancel the command, push and hold
<
>. The message, “Voice canceled” will
be announced.
Page 233 of 315
![NISSAN GT-R 2013 R35 Multi Function Display Owners Manual .Push <>to stop the voice prompt and
give the command at once. Remember to
wait for the tone before speaking.
. To adjust the volume of the system feed-
back, push the volume control buttons [+] or
[� NISSAN GT-R 2013 R35 Multi Function Display Owners Manual .Push <>to stop the voice prompt and
give the command at once. Remember to
wait for the tone before speaking.
. To adjust the volume of the system feed-
back, push the volume control buttons [+] or
[�](/manual-img/5/316/w960_316-232.png)
.Push <>to stop the voice prompt and
give the command at once. Remember to
wait for the tone before speaking.
. To adjust the volume of the system feed-
back, push the volume control buttons [+] or
[−] on the steering wheel or use the audio
system volume control knob while the
system is making an announcement.
How to speak numbers
NISSAN Voice Recognition requires a certain
way to speak numbers when giving voice
commands. Refer to the following examples.
General rule:
Only single digits 0 (zero) to 9 can be used. For
example, to speak 500, “five zero zero” can be
used, but “five hundred” cannot.
Examples:
1-800-662-6200
“One eight zero zero six six two six two zero
zero”
Improving Recognition of Phone numbers:
Recognition of phone numbers can be improved
by speaking the phone number in 3 groups of
numbers. For example, to call 800-662-6200,
speak “Eight Zero Zero” first, and the system will
then ask to speak the next three digits. Then,
speak “Six Six Two”. After recognition, the system will then ask to speak the last 4 digits.
Speak, “Six Two Zero Zero”. Using this method
of phone digit entry can improve recognition
performance.
SYSTEM FEEDBACK ANNOUNCE-
MENT MODES
It is possible to select two modes, long or short,
for the announcement by the system.
How to set
1. Push
2. Highlight [Others] and push
3. Highlight [Voice Recognition] and push
4. Highlight [Minimize Voice Feedback] and
push
and the system announcement mode
switches to the short mode. 5. Push
screen. Push
Page 236 of 315
![NISSAN GT-R 2013 R35 Multi Function Display Owners Manual 8-22Voice recognition
5. Highlight a user to edit, and push<ENTER>.
6. Highlight [Setting] and push <ENTER>.
7. Highlight an item to edit, and push
<ENTER>.
Setting items
.[Edit User Name]:
Edit the u NISSAN GT-R 2013 R35 Multi Function Display Owners Manual 8-22Voice recognition
5. Highlight a user to edit, and push<ENTER>.
6. Highlight [Setting] and push <ENTER>.
7. Highlight an item to edit, and push
<ENTER>.
Setting items
.[Edit User Name]:
Edit the u](/manual-img/5/316/w960_316-235.png)
8-22Voice recognition
5. Highlight a user to edit, and push
6. Highlight [Setting] and push
7. Highlight an item to edit, and push
Setting items
.[Edit User Name]:
Edit the user name.
.[Delete Voice Data]:Reset the user voice that the voice
recognition system has learned.
.[Continuous Learning]:Have the system learn the voice com-
mands of the user in succession, without
selecting commands one by one.
VOICE COMMAND EXAMPLES
To use the voice recognition function, speaking
one command is sometimes sufficient, but at
other times it is necessary to speak two or more
commands. As examples, some additional basic
operations by voice commands are described
here.
Example 1: Switching map to 2D
(Plan View) mode
1. Push <>located on the steering wheel.
2. The system announces, “Please say a command”.
3. After the tone sounds and the icon on the screen changes from [
]to[], speak
“Plan View Map”.
4. Voice feedback will be provided when the command is accepted, and the map is
displayed in 2D (Plan View) .
Page 237 of 315
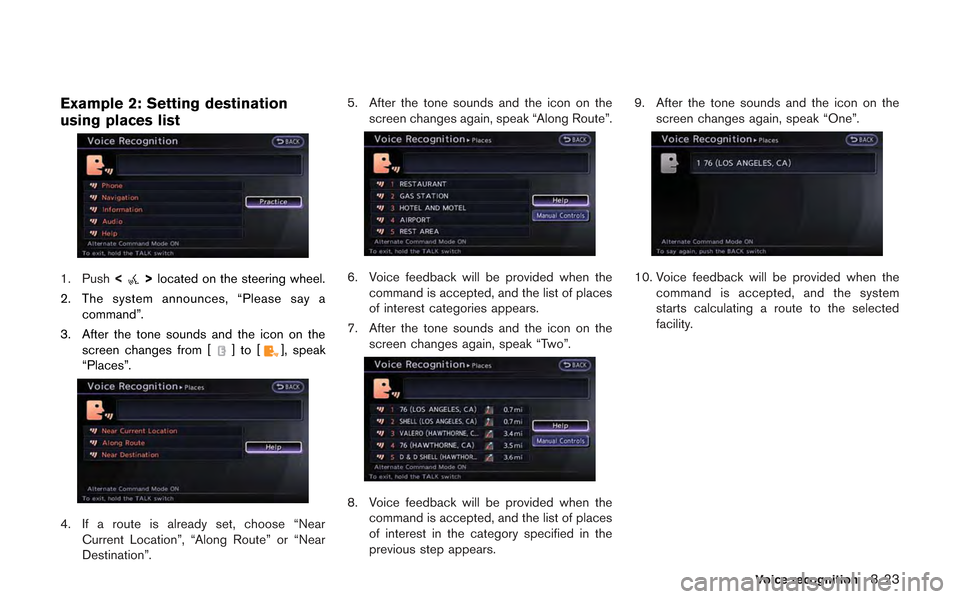
Example 2: Setting destination
using places list
1. Push<>located on the steering wheel.
2. The system announces, “Please say a command”.
3. After the tone sounds and the icon on the screen changes from [
]to[], speak
“Places”.
4. If a route is already set, choose “Near Current Location”, “Along Route” or “Near
Destination”. 5. After the tone sounds and the icon on the
screen changes again, speak “Along Route”.
6. Voice feedback will be provided when thecommand is accepted, and the list of places
of interest categories appears.
7. After the tone sounds and the icon on the screen changes again, speak “Two”.
8. Voice feedback will be provided when thecommand is accepted, and the list of places
of interest in the category specified in the
previous step appears. 9. After the tone sounds and the icon on the
screen changes again, speak “One”.
10. Voice feedback will be provided when the command is accepted, and the system
starts calculating a route to the selected
facility.
Voice recognition8-23
Page 241 of 315
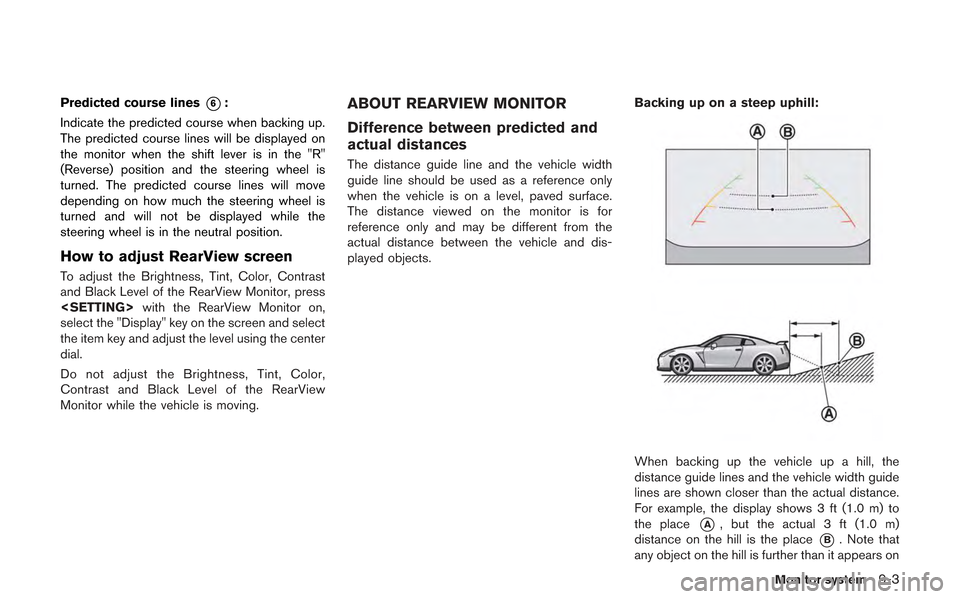
Predicted course lines*6:
Indicate the predicted course when backing up.
The predicted course lines will be displayed on
the monitor when the shift lever is in the "R"
(Reverse) position and the steering wheel is
turned. The predicted course lines will move
depending on how much the steering wheel is
turned and will not be displayed while the
steering wheel is in the neutral position.
How to adjust RearView screen
To adjust the Brightness, Tint, Color, Contrast
and Black Level of the RearView Monitor, press
select the "Display" key on the screen and select
the item key and adjust the level using the center
dial.
Do not adjust the Brightness, Tint, Color,
Contrast and Black Level of the RearView
Monitor while the vehicle is moving.
ABOUT REARVIEW MONITOR
Difference between predicted and
actual distances
The distance guide line and the vehicle width
guide line should be used as a reference only
when the vehicle is on a level, paved surface.
The distance viewed on the monitor is for
reference only and may be different from the
actual distance between the vehicle and dis-
played objects. Backing up on a steep uphill:
When backing up the vehicle up a hill, the
distance guide lines and the vehicle width guide
lines are shown closer than the actual distance.
For example, the display shows 3 ft (1.0 m) to
the place
*A, but the actual 3 ft (1.0 m)
distance on the hill is the place
*B. Note that
any object on the hill is further than it appears on
Monitor system9-3
Page 243 of 315
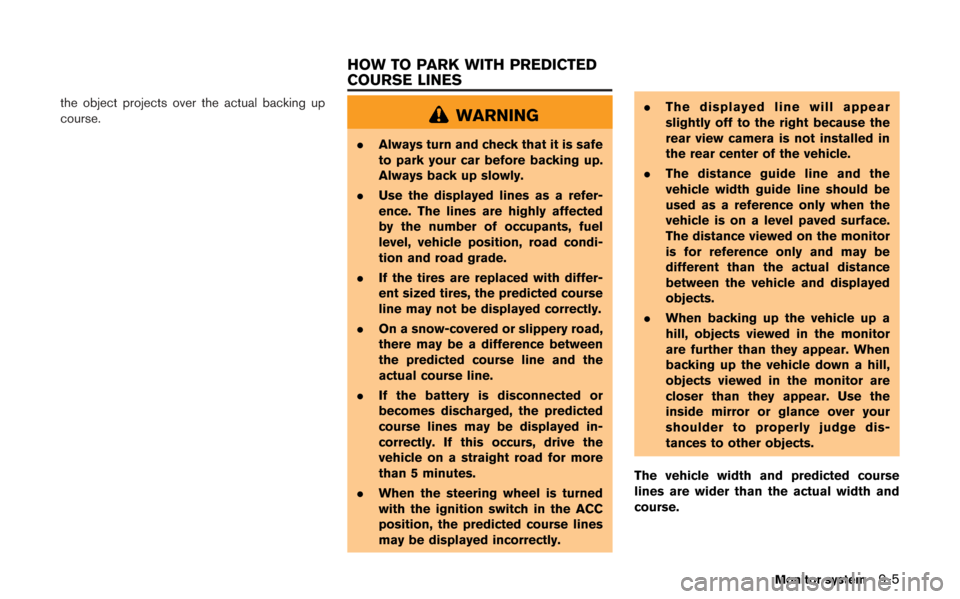
the object projects over the actual backing up
course.WARNING
.Always turn and check that it is safe
to park your car before backing up.
Always back up slowly.
. Use the displayed lines as a refer-
ence. The lines are highly affected
by the number of occupants, fuel
level, vehicle position, road condi-
tion and road grade.
. If the tires are replaced with differ-
ent sized tires, the predicted course
line may not be displayed correctly.
. On a snow-covered or slippery road,
there may be a difference between
the predicted course line and the
actual course line.
. If the battery is disconnected or
becomes discharged, the predicted
course lines may be displayed in-
correctly. If this occurs, drive the
vehicle on a straight road for more
than 5 minutes.
. When the steering wheel is turned
with the ignition switch in the ACC
position, the predicted course lines
may be displayed incorrectly. .
The displayed line will appear
slightly off to the right because the
rear view camera is not installed in
the rear center of the vehicle.
. The distance guide line and the
vehicle width guide line should be
used as a reference only when the
vehicle is on a level paved surface.
The distance viewed on the monitor
is for reference only and may be
different than the actual distance
between the vehicle and displayed
objects.
. When backing up the vehicle up a
hill, objects viewed in the monitor
are further than they appear. When
backing up the vehicle down a hill,
objects viewed in the monitor are
closer than they appear. Use the
inside mirror or glance over your
shoulder to properly judge dis-
tances to other objects.
The vehicle width and predicted course
lines are wider than the actual width and
course.
Monitor system9-5
HOW TO PARK WITH PREDICTED
COURSE LINES
Page 244 of 315
9-6Monitor system
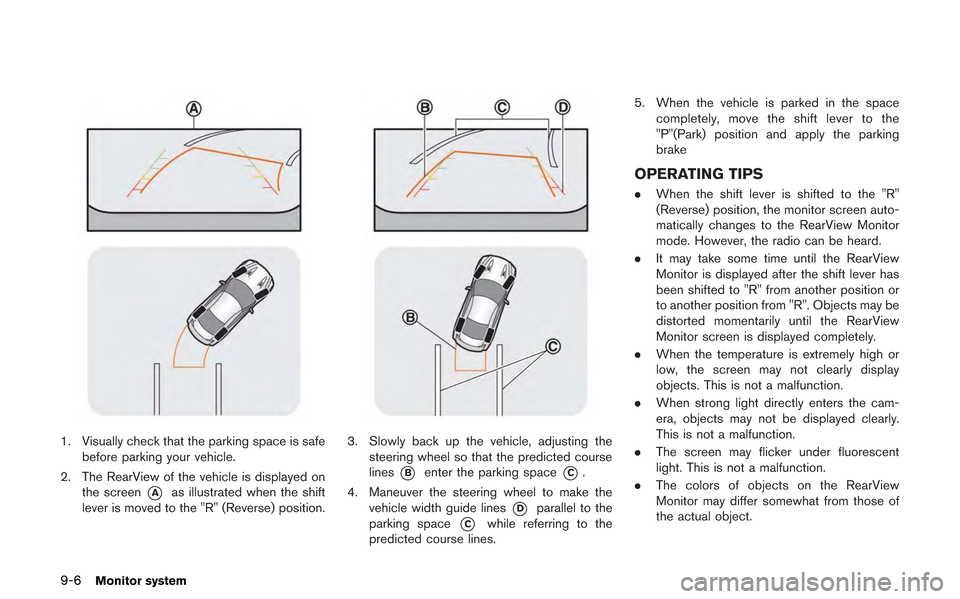
1. Visually check that the parking space is safebefore parking your vehicle.
2. The RearView of the vehicle is displayed on the screen
*Aas illustrated when the shift
lever is moved to the "R" (Reverse) position.
3. Slowly back up the vehicle, adjusting the steering wheel so that the predicted course
lines
*Benter the parking space*C.
4. Maneuver the steering wheel to make the vehicle width guide lines
*Dparallel to the
parking space
*Cwhile referring to the
predicted course lines. 5. When the vehicle is parked in the space
completely, move the shift lever to the
"P"(Park) position and apply the parking
brake
OPERATING TIPS
. When the shift lever is shifted to the "R"
(Reverse) position, the monitor screen auto-
matically changes to the RearView Monitor
mode. However, the radio can be heard.
. It may take some time until the RearView
Monitor is displayed after the shift lever has
been shifted to "R" from another position or
to another position from "R". Objects may be
distorted momentarily until the RearView
Monitor screen is displayed completely.
. When the temperature is extremely high or
low, the screen may not clearly display
objects. This is not a malfunction.
. When strong light directly enters the cam-
era, objects may not be displayed clearly.
This is not a malfunction.
. The screen may flicker under fluorescent
light. This is not a malfunction.
. The colors of objects on the RearView
Monitor may differ somewhat from those of
the actual object.
Page 247 of 315
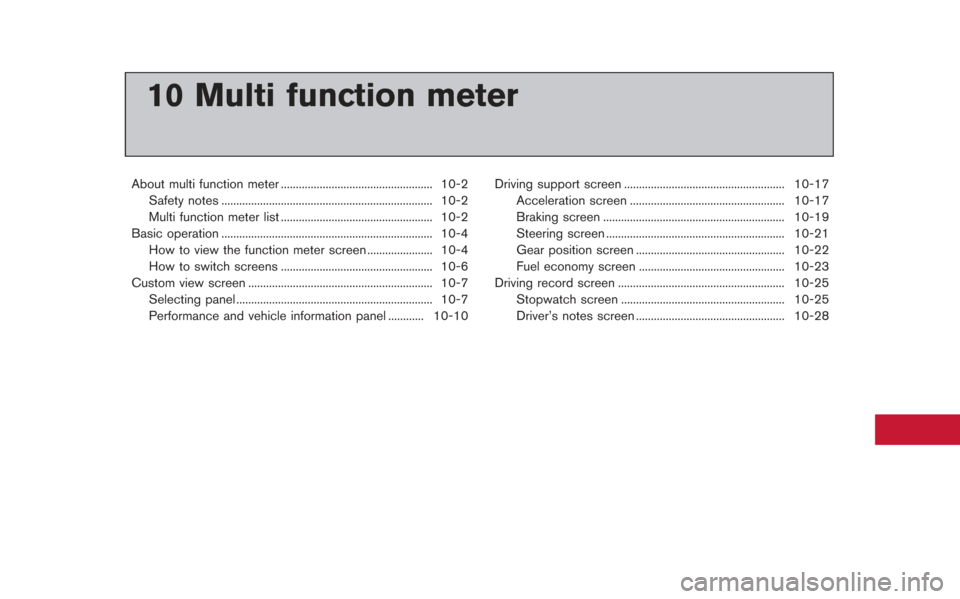
10 Multi function meter
About multi function meter ................................................... 10-2Safety notes ....................................................................... 10-2
Multi function meter list ................................................... 10-2
Basic operation ....................................................................... 10-4 How to view the function meter screen ...................... 10-4
How to switch screens ................................................... 10-6
Custom view screen .............................................................. 10-7 Selecting panel .................................................................. 10-7
Performance and vehicle information panel ............ 10-10 Driving support screen ...................................................... 10-17
Acceleration screen .................................................... 10-17
Braking screen ............................................................. 10-19
Steering screen ............................................................ 10-21
Gear position screen .................................................. 10-22
Fuel economy screen ................................................. 10-23
Driving record screen ........................................................ 10-25 Stopwatch screen ....................................................... 10-25
Driver’s notes screen .................................................. 10-28