End User shall indemnify and save harmless the
licensors, including Her Majesty, Canada Post
and NRCan, and their officers, employees and
agents from and against any claim, demand or
action, irrespective of the nature of the cause of
the claim, demand or action, alleging loss, costs,
expenses, damages or injuries (including injuries
resulting in death) arising out of the use or pos-
session of the data or the Data.
Terms and conditions
Personal Use Only:
You agree to use this Data together with
NISSAN Automotive Products for the solely
personal, non-commercial purposes for which
you were licensed, and not for service bureau,
timesharing or other similar purposes.
Accordingly, but subject to the restrictions set
forth in the following paragraphs, you may copy
this Data only as necessary for your personal use
to view it, and save it, provided that you do not
remove any copyright notices that appear and do
not modify the Data in any way. You agree not to
otherwise reproduce, copy, modify, decompile,
disassemble or reverse engineer any portion of
this Data, and may not transfer or distribute it in
any form, for any purpose, except to the extent
such restrictions are expressly prohibited or lim-
ited by applicable law.Restrictions:
Except where you have been specifically li-
censed to do so by NISSAN and without limiting
the preceding paragraph, you may not:
a. use this Data with any products, systems, or
applications installed or otherwise connected
to or in communication with vehicles, capable
of vehicle navigation positioning, dispatch,
real time route guidance, fleet management
or similar applications;
b. use this Data with or in communication with any positioning devices or any mobile or
wireless-connected electronic or computer
devices, including without limitation mobile
phones, palmtop and handheld computers,
pagers, and personal digital assistants or
PDAs.
Warnings:
The Data may contain inaccurate or incomplete
information due to the passage of time, changing
circumstances, sources used and the nature of
collecting comprehensive geographic data, any
of which may lead to incorrect results. No Warranty:
This Data is provided to you “as is,” and you
agree to use it at your own risk. NISSAN and its
licensors (and their licensors and suppliers)
make no guarantees, representations or warran-
ties of any kind, express or implied, arising by law
or otherwise, including but not limited to,
content, quality, accuracy, completeness,
effectiveness, reliability, fitness for a particular
purpose, usefulness, use or results to be ob-
tained from this Data, or that the Data or server
will be uninterrupted or error-free.
Disclaimer of Warranty:
NISSAN AND ITS LICENSORS (INCLUDING
THEIR LICENSORS AND SUPPLIERS) DIS-
CLAIM ANY WARRANTIES, EXPRESS OR
IMPLIED, OF QUALITY, PERFORMANCE, MER-
CHANTABILITY FITNESS FOR A PARTICULAR
PURPOSE OR NON-INFRINGEMENT.
Some countries, local laws and territories do not
allow certain warranty exclusions, so to that ex-
tent the above exclusion may not apply to you.
Map settings3-11
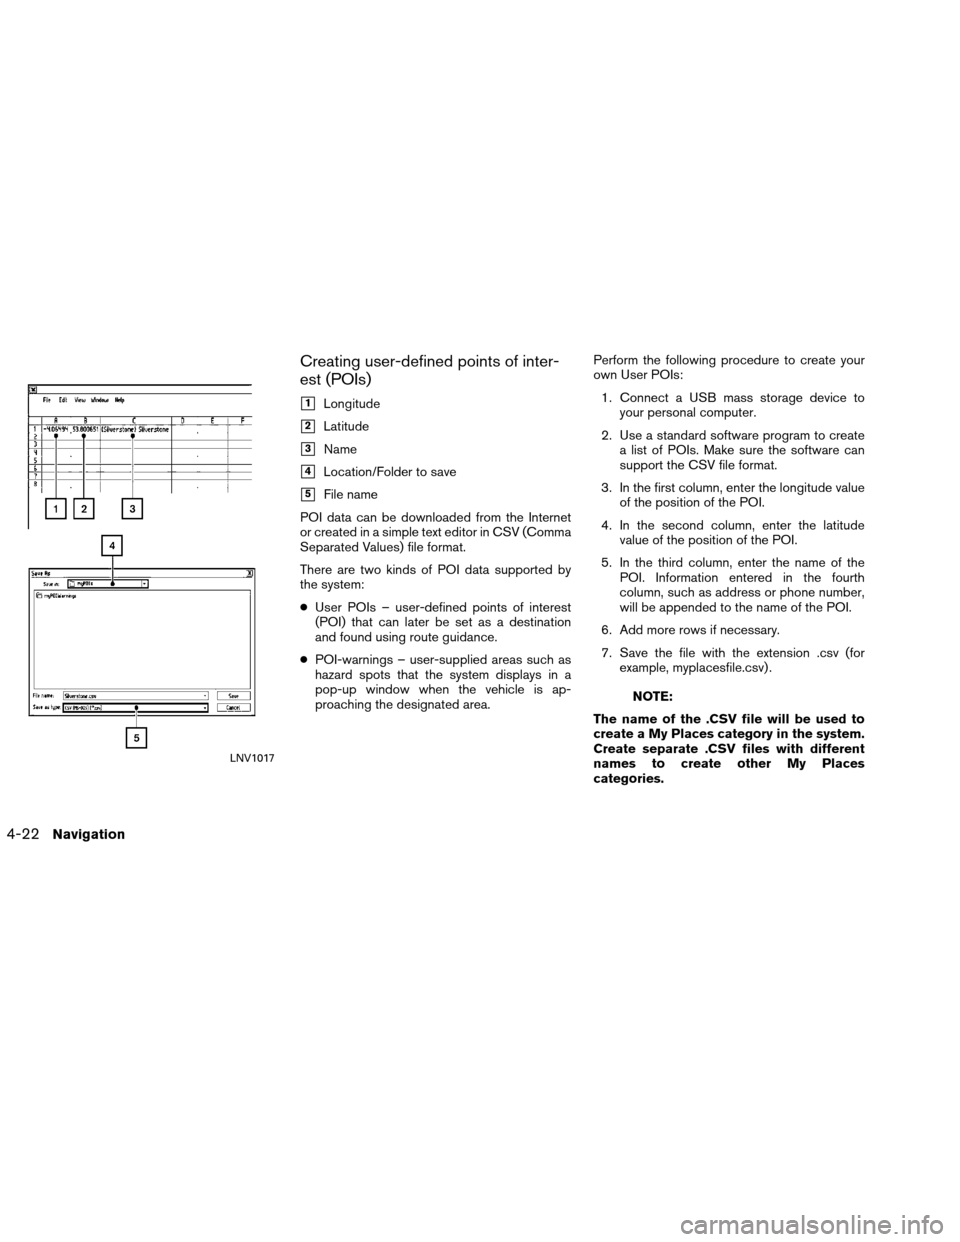
Creating user-defined points of inter-
est (POIs)
�1Longitude
�2Latitude
�3Name
�4Location/Folder to save
�5File name
POI data can be downloaded from the Internet
or created in a simple text editor in CSV (Comma
Separated Values) file format.
There are two kinds of POI data supported by
the system:
● User POIs – user-defined points of interest
(POI) that can later be set as a destination
and found using route guidance.
● POI-warnings – user-supplied areas such as
hazard spots that the system displays in a
pop-up window when the vehicle is ap-
proaching the designated area. Perform the following procedure to create your
own User POIs:
1. Connect a USB mass storage device to your personal computer.
2. Use a standard software program to create a list of POIs. Make sure the software can
support the CSV file format.
3. In the first column, enter the longitude value of the position of the POI.
4. In the second column, enter the latitude value of the position of the POI.
5. In the third column, enter the name of the POI. Information entered in the fourth
column, such as address or phone number,
will be appended to the name of the POI.
6. Add more rows if necessary.
7. Save the file with the extension .csv (for example, myplacesfile.csv) .
NOTE:
The name of the .CSV file will be used to
create a My Places category in the system.
Create separate .CSV files with different
names to create other My Places
categories.
LNV1017
4-22Navigation
DISPLAY
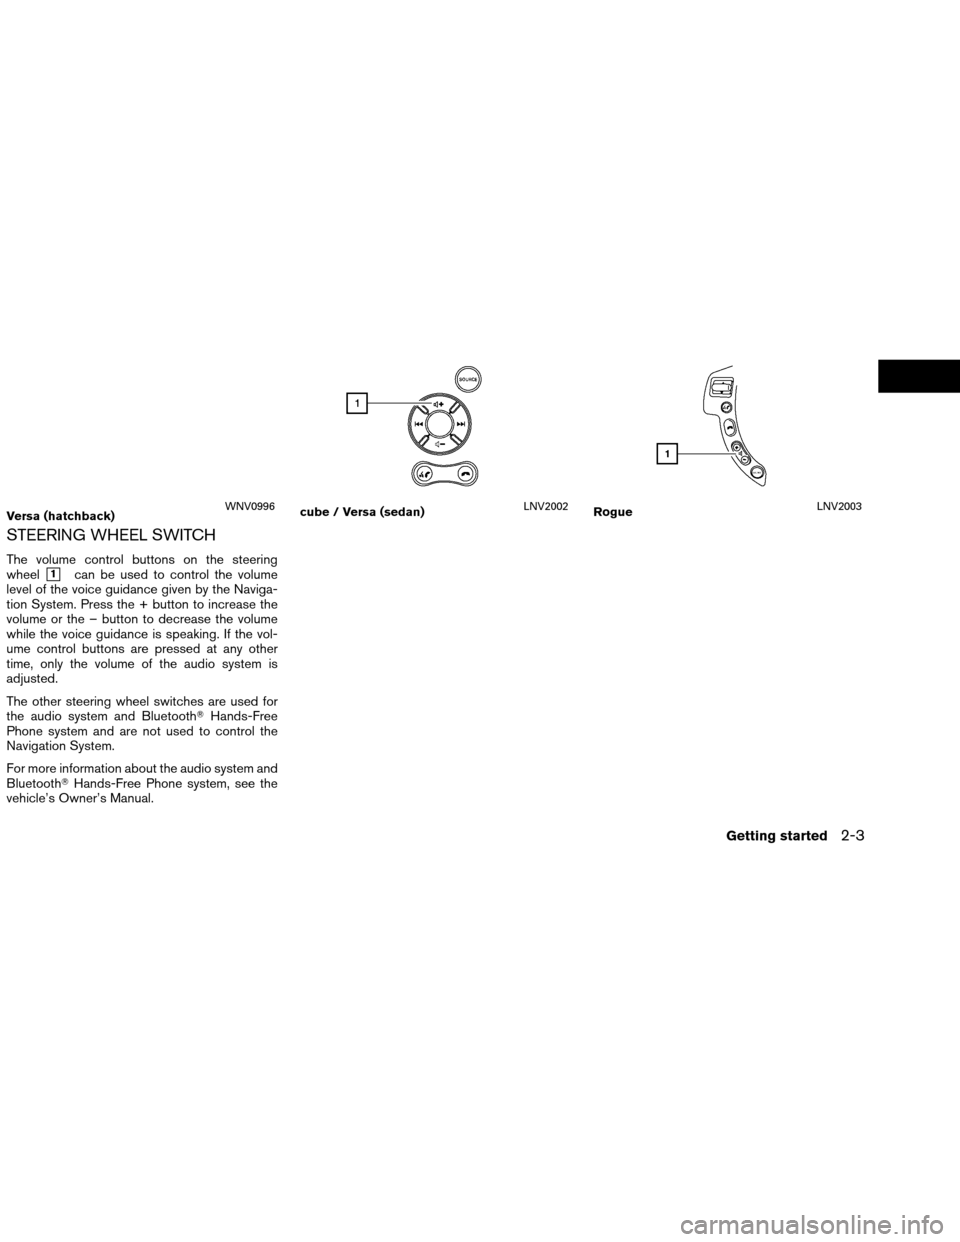
Switching the display on or off
This setting allows you to turn the display on or
off. When the display is turned off, the clock will
still be displayed.
To turn off the display, press and hold the
button for more than 2 seconds.
The display will switch on when:
●the
button is pressed.
● any other button is pressed.
● receiving incoming calls or during a phone
call. When the call is ended, the display re-
turns to clock display.
Voice guidance (if active) continues even when
the display is turned off. Changing day-night brightness
Press the
button for less than two sec-
onds to toggle:
● between day and auto (night) when head-
lights are on.
● between night and auto (day) when head-
lights are off.
While the display is showing the current bright-
ness mode, you can turn the scroll knob to adjust
the brightness.
The day or night mode can also be toggled from
the Display Settings menu.
BRIGHTNESS
This menu allows you to adjust the brightness of
the screen. 1. Press the SETUP button.
2. Touch the “System” key.
3. Touch the “Display” key.
4. Touch the “Brightness” key repeatedly. Each time the key is touched the brightness
mode will change as follows:
Very Bright →Bright →Default →Dark →
Very Dark →Very Bright
5. To save the setting, press the
BACK
button to return to the previous screen.
WNV0980LNV0981
DISPLAY SETTINGS
Other settings5-3