Page 6 of 413
Table of
ContentsIllustrated table of contents
Safety—Seats, seat belts and supplemental restraint system
Instruments and controls
Pre-driving checks and adjustments
Monitor, climate, audio, phone and voice recognition systems
Starting and driving
In case of emergency
Appearance and care
Maintenance and do-it-yourself
Technical and consumer information
Index
0
1
2
3
4
5
6
7
8
9
10
Page 18 of 413
1 Safety—Seats, seat belts and
supplemental restraint system
Seats ............................................1-2
Front manual seat adjustment —
(for passenger’s seat) ...........................1-2
Front power seat adjustment
(for driver’s seat) ...............................1-4
Folding rear seat ...............................1-6
Head restraints .................................1-7
Seat belts ....................................... 1-10
Precautions on seat belt usage ..................1-10
Pregnant women .............................. 1-13
Injured persons ................................ 1-13
Three-point type seat belt with retractor ..........1-13
Seat belt extenders ............................ 1-16
Seat belt maintenance ......................... 1-17
Child safety ...................................... 1-17
Infants ........................................ 1-18
Small children ................................. 1-18
Larger children ................................ 1-18
Child restraints ................................... 1-19
Precautions on child restraints ..................1-19
LATCH (Lower Anchors and Tethers for
CHildren) System ............................. 1-21Rear-facing child restraint installation using
LATCH.......................................
1-23
Rear-facing child restraint installation using
the seat belts . . ............................... 1-25
Forward-facing child restraint installation
using LATCH. . . ............................... 1-28
Forward-facing child restraint installation
using the seat belts ............................ 1-30
Installing top tether strap .......................1-33
Booster seats ................................. 1-33
Supplemental restraint system .....................1-37
Precautions on supplemental restraint
system ....................................... 1-37
Front seat-mounted side-impact
supplemental air bag and roof-mounted
curtain side-impact supplemental air bag
systems ...................................... 1-50
Seat belts with pretensioners (Front seats) .......1-51
Supplemental air bag warning labels .............1-52
Supplemental air bag warning light ..............1-52
Page 19 of 413
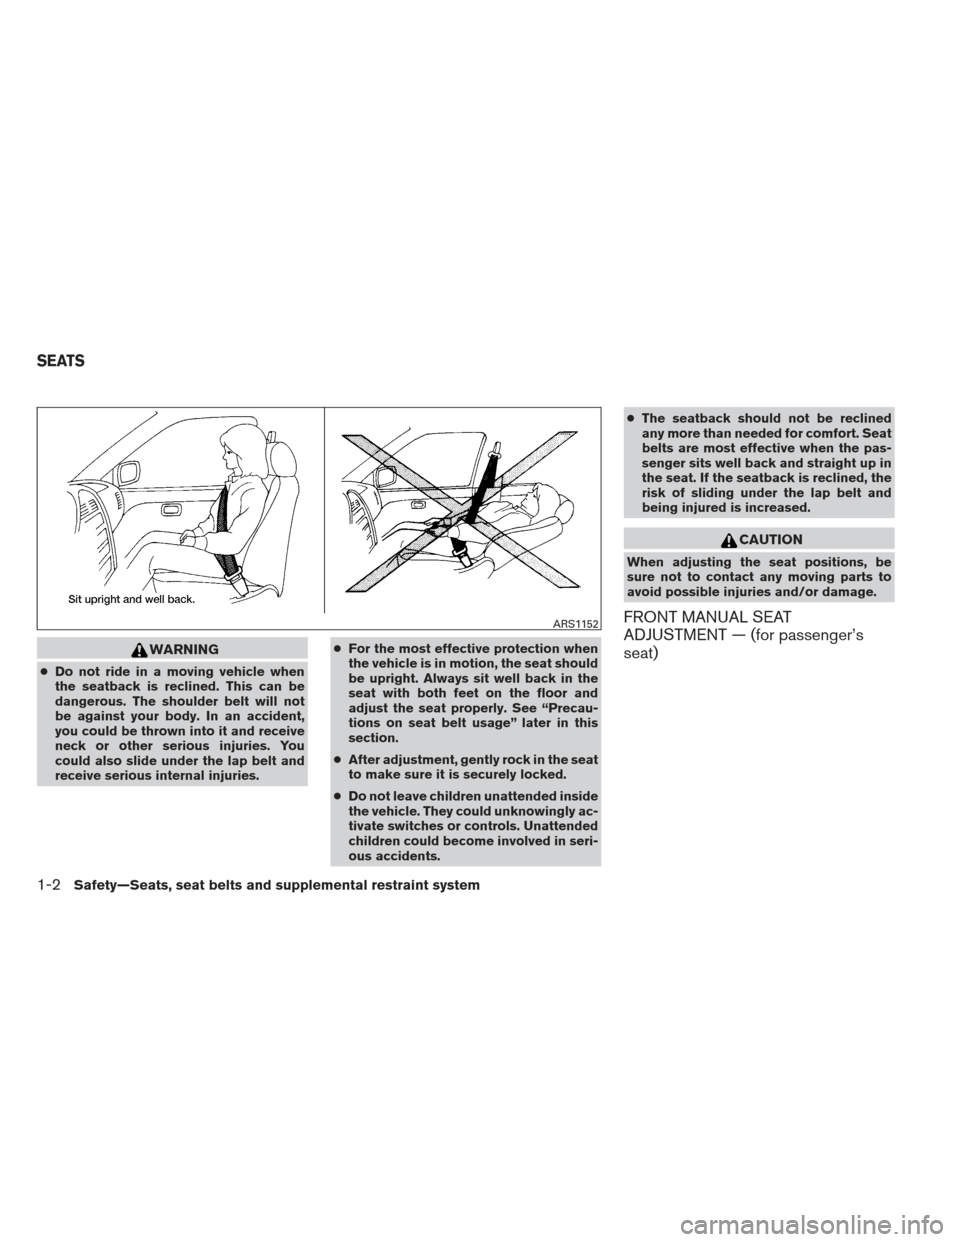
WARNING
●Do not ride in a moving vehicle when
the seatback is reclined. This can be
dangerous. The shoulder belt will not
be against your body. In an accident,
you could be thrown into it and receive
neck or other serious injuries. You
could also slide under the lap belt and
receive serious internal injuries. ●
For the most effective protection when
the vehicle is in motion, the seat should
be upright. Always sit well back in the
seat with both feet on the floor and
adjust the seat properly. See “Precau-
tions on seat belt usage” later in this
section.
● After adjustment, gently rock in the seat
to make sure it is securely locked.
● Do not leave children unattended inside
the vehicle. They could unknowingly ac-
tivate switches or controls. Unattended
children could become involved in seri-
ous accidents. ●
The seatback should not be reclined
any more than needed for comfort. Seat
belts are most effective when the pas-
senger sits well back and straight up in
the seat. If the seatback is reclined, the
risk of sliding under the lap belt and
being injured is increased.
CAUTION
When adjusting the seat positions, be
sure not to contact any moving parts to
avoid possible injuries and/or damage.
FRONT MANUAL SEAT
ADJUSTMENT — (for passenger’s
seat)ARS1152
SEATS
1-2Safety—Seats, seat belts and supplemental restraint system
Page 20 of 413
Forward and backward
Pull the center of the bar up and hold it while you
slide the seat forward or backward to the desired
position. Release the bar to lock the seat in
position.
Reclining
To recline the seatback, pull the lever up and lean
back. To bring the seatback forward, pull the lever
up and lean your body forward. Release the lever
to lock the seatback in position.
The reclining feature allows adjustment of the
seatback for occupants of different sizes for
added comfort and to help obtain proper seat
belt fit. See “Precautions on seat belt usage” later
in this section. Also, the seatback can be reclined
to allow occupants to rest when the vehicle is
stopped and the transmission is in the P (Park)
position.
LRS2160LRS2161
Safety—Seats, seat belts and supplemental restraint system1-3
Page 21 of 413
FRONT POWER SEAT ADJUSTMENT
(for driver’s seat)
Operating tips
WARNING
Before driving the vehicle, return the seat-
back to an upright seating position after
manually releasing it. Also, make sure the
seat is locked in place. Failure to do so
may cause the seat to move in a collision
or sudden stop. This may result in damage
to the seat or personal injury.●
The power seat motor has an auto-reset
overload protection circuit. If the motor
stops during operation, wait 30 seconds,
then reactivate the switch.
● Do not operate the power seat switch for a
long period of time when the engine is off.
This will discharge the battery.
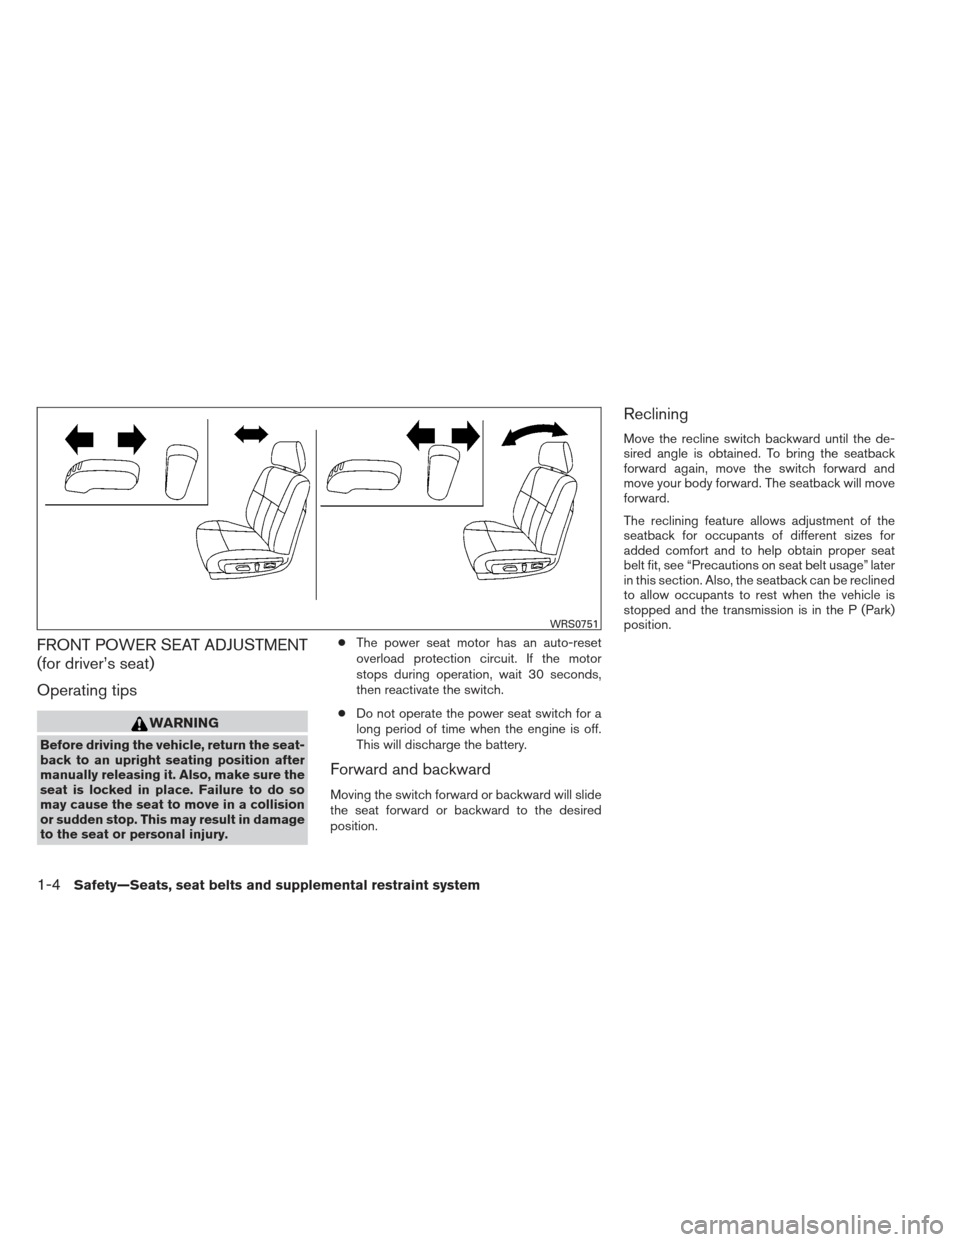
Forward and backward
Moving the switch forward or backward will slide
the seat forward or backward to the desired
position.
Reclining
Move the recline switch backward until the de-
sired angle is obtained. To bring the seatback
forward again, move the switch forward and
move your body forward. The seatback will move
forward.
The reclining feature allows adjustment of the
seatback for occupants of different sizes for
added comfort and to help obtain proper seat
belt fit, see “Precautions on seat belt usage” later
in this section. Also, the seatback can be reclined
to allow occupants to rest when the vehicle is
stopped and the transmission is in the P (Park)
position.
WRS0751
1-4Safety—Seats, seat belts and supplemental restraint system
Page 24 of 413
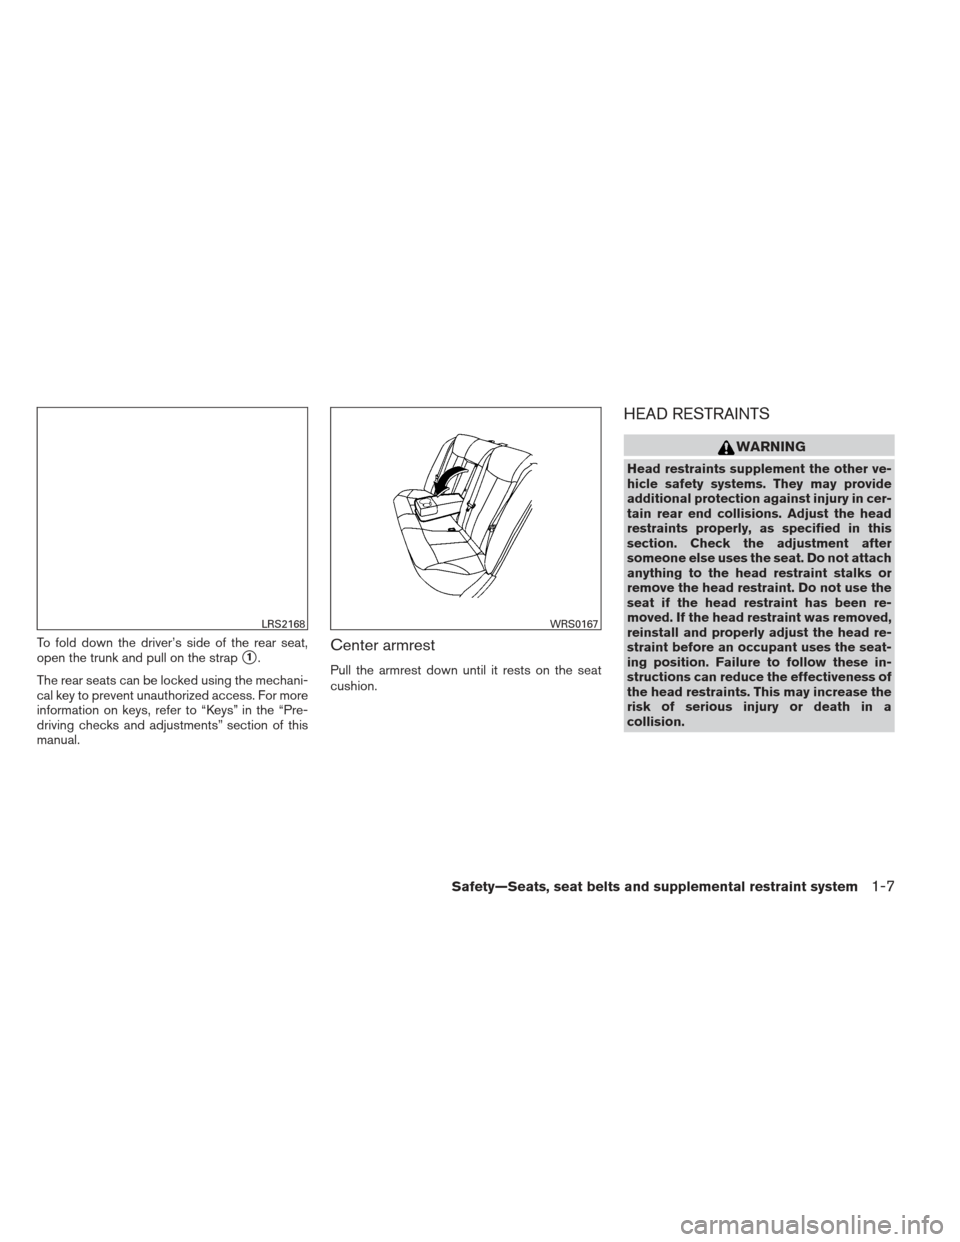
To fold down the driver’s side of the rear seat,
open the trunk and pull on the strap
�1.
The rear seats can be locked using the mechani-
cal key to prevent unauthorized access. For more
information on keys, refer to “Keys” in the “Pre-
driving checks and adjustments” section of this
manual.Center armrest
Pull the armrest down until it rests on the seat
cushion.
HEAD RESTRAINTS
WARNING
Head restraints supplement the other ve-
hicle safety systems. They may provide
additional protection against injury in cer-
tain rear end collisions. Adjust the head
restraints properly, as specified in this
section. Check the adjustment after
someone else uses the seat. Do not attach
anything to the head restraint stalks or
remove the head restraint. Do not use the
seat if the head restraint has been re-
moved. If the head restraint was removed,
reinstall and properly adjust the head re-
straint before an occupant uses the seat-
ing position. Failure to follow these in-
structions can reduce the effectiveness of
the head restraints. This may increase the
risk of serious injury or death in a
collision.
LRS2168WRS0167
Safety—Seats, seat belts and supplemental restraint system1-7
Page 25 of 413
The illustration shows the seating positions
equipped with head restraints.
Cloth seat:The front seat head restraints are
adjustable and removable. The rear head re-
straints do not adjust or remove.
Leather seat: The front and rear outboard head
restraints are adjustable and removable. The cen-
ter headrest is not removable and does not ad-
just.
� Indicates the seating position is equipped with
a head restraint.
+ Indicates the seating position is not equipped
with a head restraint or adjustable headrest.Components
1. Head restraint
2. Adjustment notches
3. Lock knob
4. Stalks
Adjustment
Adjust the head restraint so the center is level
with the center of the seat occupant’s ears.
LRS2164LRS0887WRS0134
1-8Safety—Seats, seat belts and supplemental restraint system
Page 27 of 413
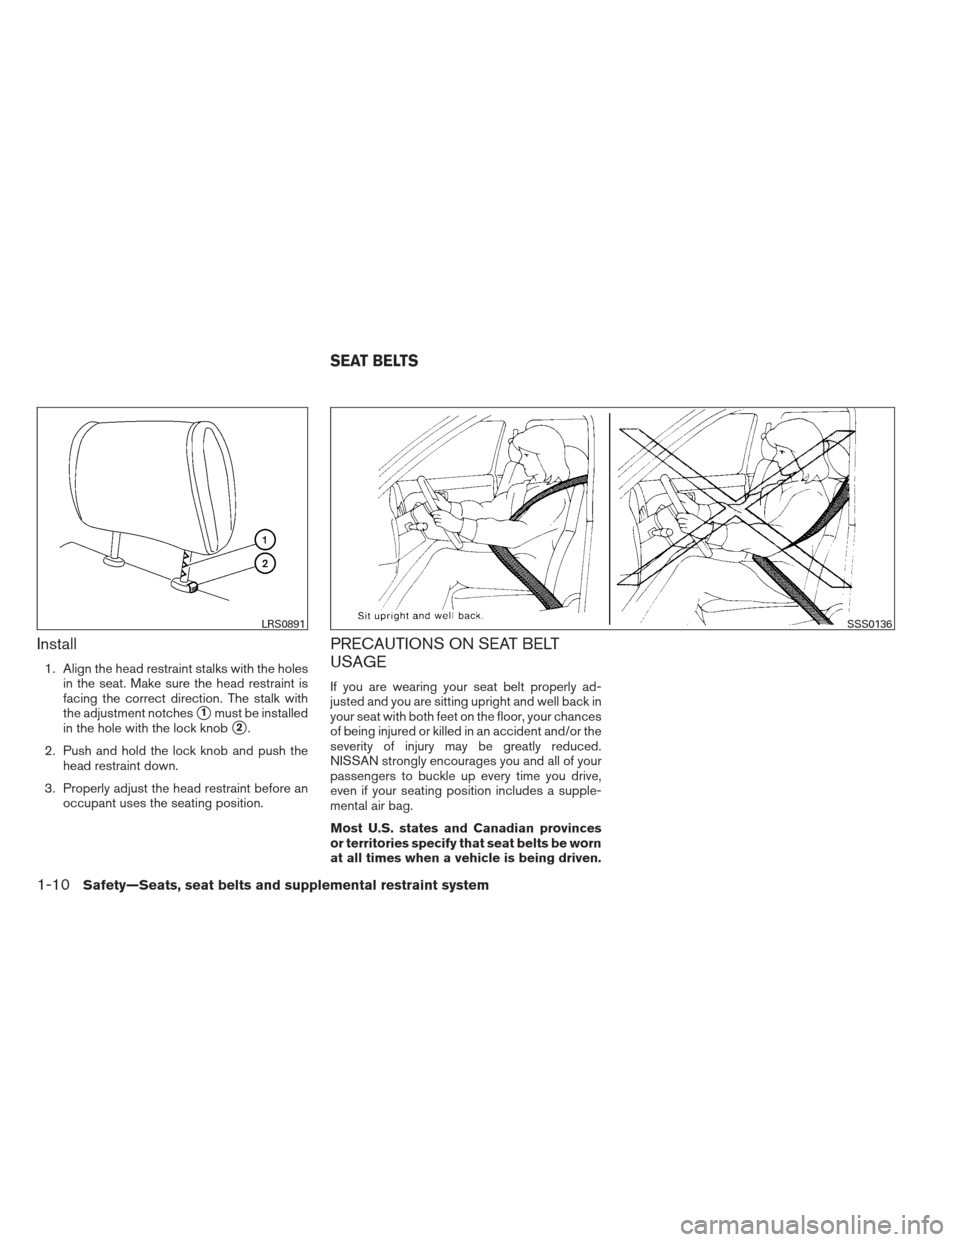
Install
1. Align the head restraint stalks with the holesin the seat. Make sure the head restraint is
facing the correct direction. The stalk with
the adjustment notches
�1must be installed
in the hole with the lock knob
�2.
2. Push and hold the lock knob and push the head restraint down.
3. Properly adjust the head restraint before an occupant uses the seating position.
PRECAUTIONS ON SEAT BELT
USAGE
If you are wearing your seat belt properly ad-
justed and you are sitting upright and well back in
your seat with both feet on the floor, your chances
of being injured or killed in an accident and/or the
severity of injury may be greatly reduced.
NISSAN strongly encourages you and all of your
passengers to buckle up every time you drive,
even if your seating position includes a supple-
mental air bag.
Most U.S. states and Canadian provinces
or territories specify that seat belts be worn
at all times when a vehicle is being driven.
LRS0891SSS0136
SEAT BELTS
1-10Safety—Seats, seat belts and supplemental restraint system