Page 222 of 414

ALL RPT: all songs in the current list are re-
peated.
RPT OFF: no repeat play pattern is applied.
RDM button:
Press the RDM button while a track is playing to
change the play pattern as follows:
TRK SHUFFLE→ALBUM SHUFFLE →
SHUFFLE OFF
TRK SHUFFLE: the tracks in the current list will
be played randomly.
ALBUM SHUFFLE: the albums in the current list
will be played randomly.
SHUFFLE OFF: no random play pattern is ap-
plied.
iPod�* PLAYER OPERATION WITH
NAVIGATION SYSTEM (if so
equipped)
Connecting iPod�
To connect an iPod� to the vehicle so that the
iPod� can be controlled with the audio system
controls and display screen, use the USB jack
located in the center console. Open the protec-
tive cover
�1on the USB jack in the center
console. Then connect the iPod�-specific end of
the cable to the iPod� and the USB end of the
cable to the USB jack on the vehicle. If your iPod�
supports charging via a USB connection, its bat- tery will be charged while connected to the ve-
hicle with the ignition switch in the ACC or ON
position.
While connected to the vehicle, the iPod�
can
only be operated by the vehicle audio controls.
To disconnect the iPod� from the vehicle, remove
the USB end of the cable from the USB jack on
the vehicle, then remove the cable from the
iPod�.
*iPod �is a trademark of Apple Inc., registered in
the U.S. and other countries.
Compatibility
The following models are compatible:
● iPod� 5th Generation (firmware version
1.2.3 or later)
● iPod� Classic (firmware version 1.1.1 or
later)
● iPod� Touch (firmware version 2.0.0 or
later)*
● iPod� Nano - 1st generation (firmware ver-
sion 1.3.1 or later)
● iPod� Nano - 2nd generation (firmware ver-
sion 1.1.3 or later)
● iPod� Nano - 3rd generation (firmware ver-
sion 1.1.3 or later)
WHA1530
Monitor, climate, audio, phone and voice recognition systems4-73
Page 223 of 414
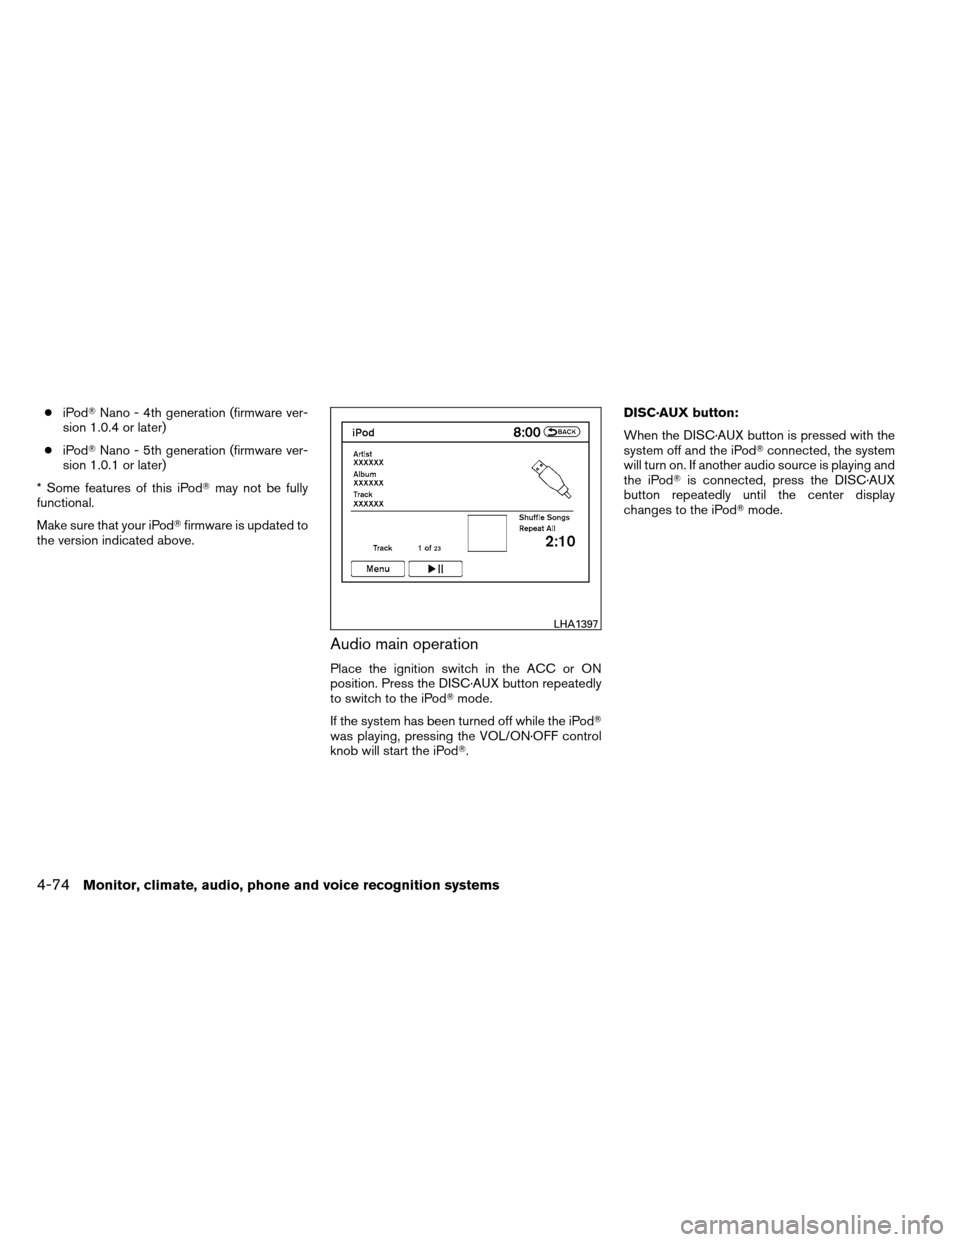
●iPod� Nano - 4th generation (firmware ver-
sion 1.0.4 or later)
● iPod� Nano - 5th generation (firmware ver-
sion 1.0.1 or later)
* Some features of this iPod� may not be fully
functional.
Make sure that your iPod� firmware is updated to
the version indicated above.
Audio main operation
Place the ignition switch in the ACC or ON
position. Press the DISC·AUX button repeatedly
to switch to the iPod� mode.
If the system has been turned off while the iPod�
was playing, pressing the VOL/ON·OFF control
knob will start the iPod�. DISC·AUX button:
When the DISC·AUX button is pressed with the
system off and the iPod�
connected, the system
will turn on. If another audio source is playing and
the iPod� is connected, press the DISC·AUX
button repeatedly until the center display
changes to the iPod� mode.
LHA1397
4-74Monitor, climate, audio, phone and voice recognition systems
Page 224 of 414

Interface:
The interface for iPod�operation shown on the
vehicle center display is similar to the iPod� in-
terface. Use the touchscreen to control your fa-
vorite settings.
The following items can be chosen from the menu
list screen. For further information about each
item, see the iPod� Owner’s Manual.
● Now Playing
● Playlists
● Artists
● Albums ●
Songs
● Podcasts
● Genres
● Composers
● Audiobooks
● Shuffle Songs
The following keys shown on the screen are also
available: ● Menu: returns to the previous screen.
●
: plays/pauses the music selected.
Play mode:
While the iPod�is playing, touch the “Menu” key
to display the iPod� menu. Touch the “Play
Mode” key to display the Play Mode screen and
adjust the settings for Shuffle, Repeat and Audio-
books. For further information about each item,
see the iPod� Owner’s Manual.
Seeking button:
When the
orside of the seeking
button is pressed for less than 1.5 seconds while
the iPod� is playing, the next track or the begin-
ning of the current track on the iPod� will be
played.
LHA1398LHA1315
Monitor, climate, audio, phone and voice recognition systems4-75
Page 225 of 414
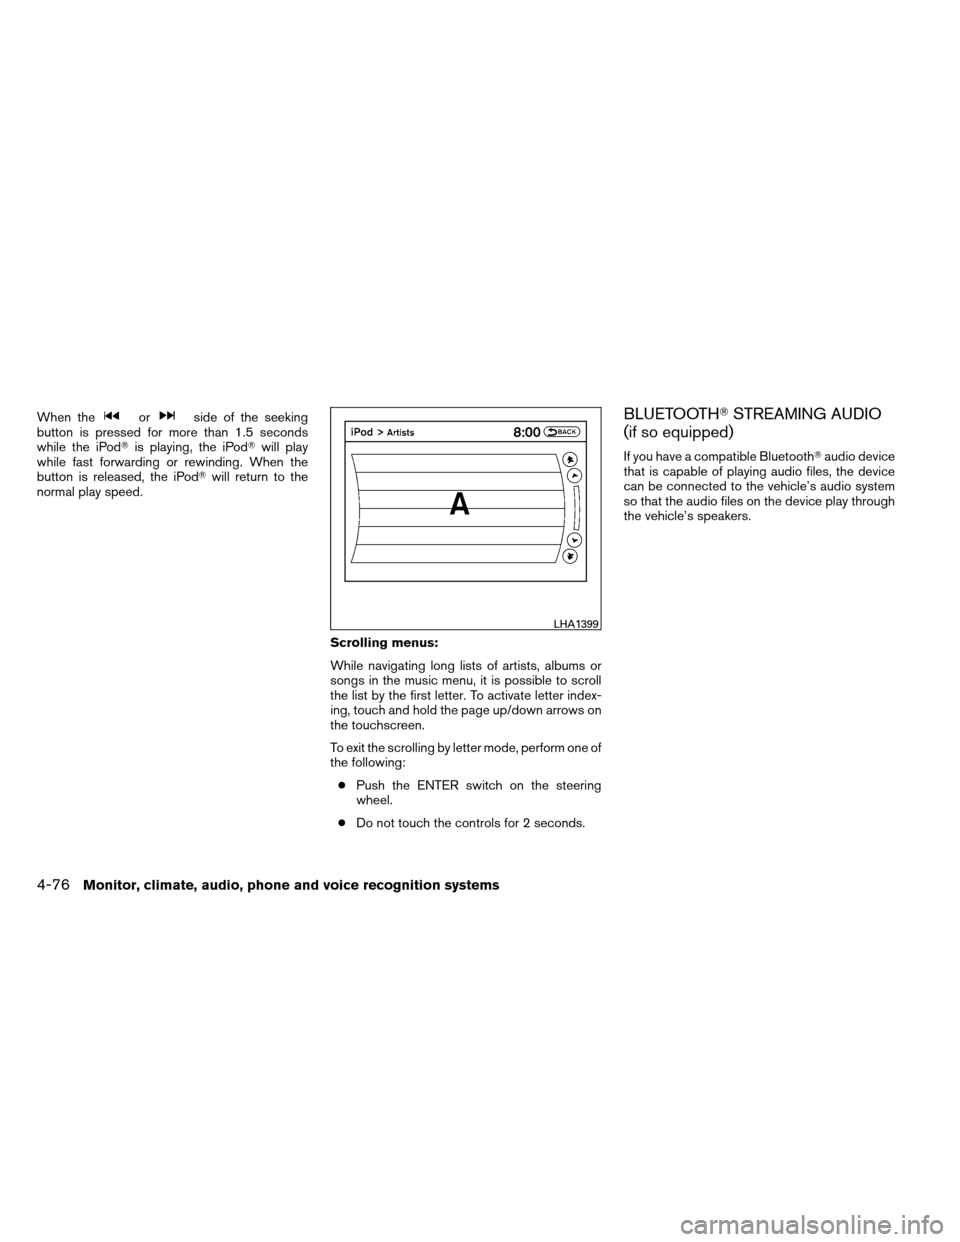
When theorside of the seeking
button is pressed for more than 1.5 seconds
while the iPod� is playing, the iPod� will play
while fast forwarding or rewinding. When the
button is released, the iPod� will return to the
normal play speed.
Scrolling menus:
While navigating long lists of artists, albums or
songs in the music menu, it is possible to scroll
the list by the first letter. To activate letter index-
ing, touch and hold the page up/down arrows on
the touchscreen.
To exit the scrolling by letter mode, perform one of
the following:● Push the ENTER switch on the steering
wheel.
● Do not touch the controls for 2 seconds.BLUETOOTH� STREAMING AUDIO
(if so equipped)
If you have a compatible Bluetooth� audio device
that is capable of playing audio files, the device
can be connected to the vehicle’s audio system
so that the audio files on the device play through
the vehicle’s speakers.
LHA1399
4-76Monitor, climate, audio, phone and voice recognition systems
Page 227 of 414
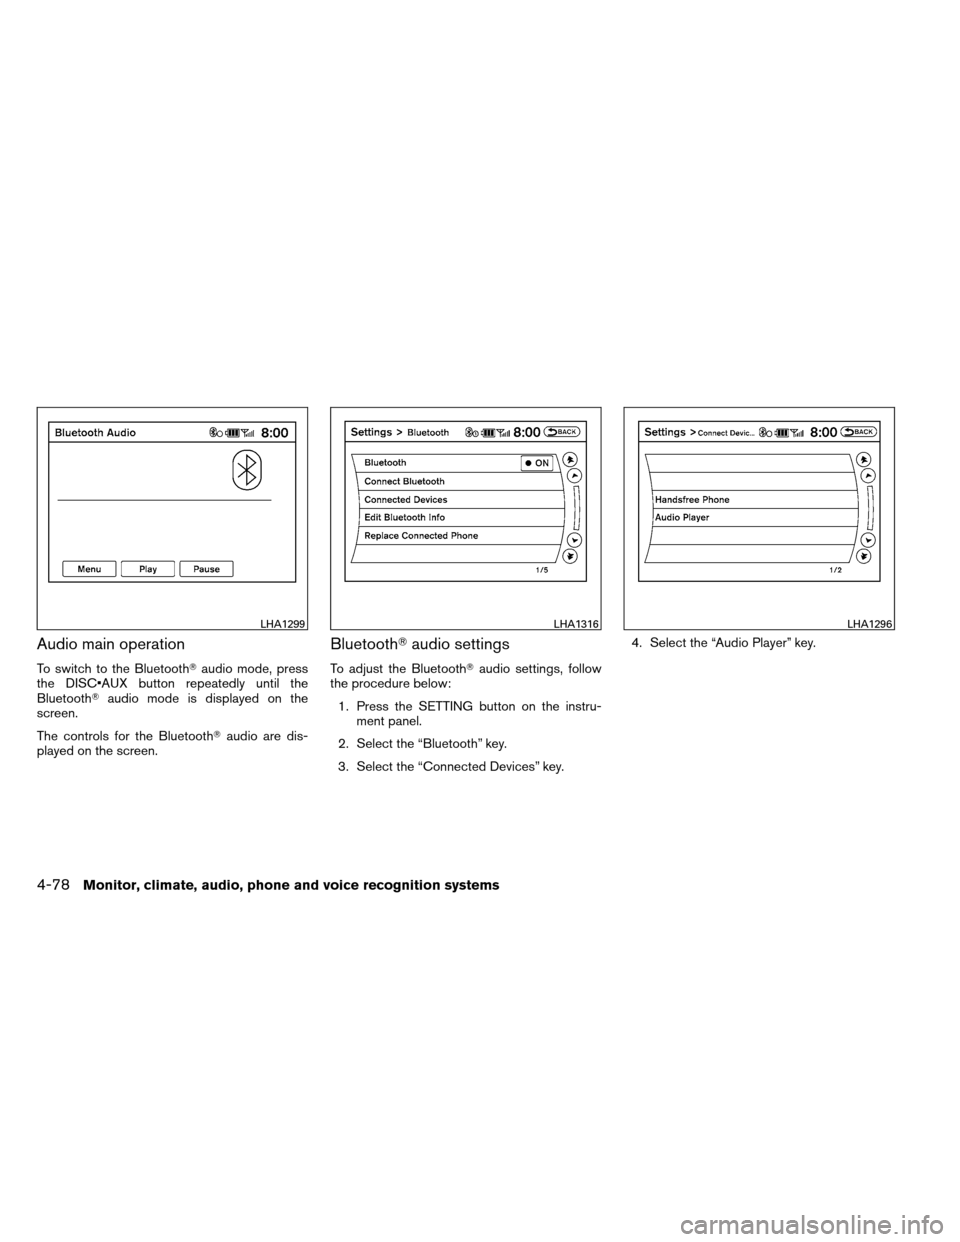
Audio main operation
To switch to the Bluetooth�audio mode, press
the DISC button repeatedly until the
Bluetooth� audio mode is displayed on the
screen.
The controls for the Bluetooth� audio are dis-
played on the screen.
Bluetooth� audio settings
To adjust the Bluetooth� audio settings, follow
the procedure below:
1. Press the SETTING button on the instru- ment panel.
2. Select the “Bluetooth” key.
3. Select the “Connected Devices” key. 4. Select the “Audio Player” key.
LHA1299LHA1316LHA1296
4-78Monitor, climate, audio, phone and voice recognition systems
Page 230 of 414

POWER on switch
With the ignition switch in t")
1. Source select and Power on switch
2. Menu control switch/ENTER button
3. Volume control switch
STEERING WHEEL SWITCH FOR
AUDIO CONTROL (if so equipped)
POWER on switch
With the ignition switch in the ACC or ON posi-
tion, push the SOURCE switch to turn the audio
system on.
SOURCE select switch
Push the source select switch to change the
mode in the following sequence:
Type A Switch:
PRESET BANK A→PRESET BANK B →PRE-
SET BANK C →CD* →AUX* →PRESET BANK
A.
* These modes are only available when compat-
ible media storage is inserted into the device.
While in one of the preset radio station banks (A,
B or C) , use the tuning switch
orto
select one of the preset radio stations (1 – 6) .
Type B Switch:
AM →FM* →XM* (satellite radio, if so equipped)
→ CD** →USB/iPod** →AUX** →AM
* When using the SOURCE switch, the audio
mode switches to the FM preset bank (FM1 or
FM2) or XM preset bank (XM1 or XM2) that was
last active. To switch between the FM1 and FM2
preset banks or the XM1 and XM2 preset banks,
use the controls on the audio system.
** These modes are only available when compat-
ible media is connected to the system. Type C Switch:
AM
→FM1 →FM2 →XM1 →XM2 →XM3
(satellite radio, if so equipped) →CD/DVD*→
USB/iPod�* →Bluetooth� Audio*→AUX* →
AM.
* These modes are only available when compat-
ible media storage is inserted into the device.
Volume control switch
Push the volume control switch to increase or
decrease the volume.
Tuning (Type A and
Type B switches only)
Memory change (radio):
While in one of the preset radio station banks,
push the tuning switch
orfor less
than 1.5 seconds to change to the next preset
station in memory.
Seek tuning (radio):
Push the tuning switch
orfor more
than 1.5 seconds to seek the next or previous
radio station.
Type C
LHA0754
Monitor, climate, audio, phone and voice recognition systems4-81
Page 232 of 414

ANTENNA
Window antenna
The antenna pattern is printed inside the rear
window.
CAUTION
●Do not place metalized film near the
rear window glass or attach any metal
parts to it. This may cause poor recep-
tion or noise.
● When cleaning the inside of the rear
window, be careful not to scratch or
damage the rear window antenna.
Lightly wipe along the antenna with a
dampened soft cloth. When installing a CB, ham radio or car phone in
your vehicle, be sure to observe the following
precautions; otherwise, the new equipment may
adversely affect the engine control system and
other electronic parts.
WARNING
●
A cellular phone should not be used for
any purpose while driving so full atten-
tion may be given to vehicle operation.
Some jurisdictions prohibit the use of
cellular phones while driving.
● If you must make a call while your ve-
hicle is in motion, the hands free cellu-
lar phone operational mode (if so
equipped) is highly recommended. Ex-
ercise extreme caution at all times so
full attention may be given to vehicle
operation.
● If you are unable to devote full attention
to vehicle operation while talking on
the phone, pull off the road to a safe
location and stop your vehicle.
CAUTION
●Keep the antenna as far away as pos-
sible from the electronic control
modules.
● Keep the antenna wire more than 8 in
(20 cm) away from the electronic con-
trol system harnesses. Do not route the
antenna wire next to any harness.
● Adjust the antenna standing-wave ratio
as recommended by the manufacturer.
● Connect the ground wire from the CB
radio chassis to the body.
● For details, consult a NISSAN dealer.
CAR PHONE OR CB RADIO
Monitor, climate, audio, phone and voice recognition systems4-83
Page 237 of 414

CONTROL BUTTONS
The control buttons for the Bluetooth�Hands-
Free Phone System are located on the steering
wheel.
PHONE/SEND
Press the
button to initiate
a VR session or answer an incom-
ing call. You can also use the
button
to interrupt the system feedback
and give a command at once. See
“List of voice commands” and
“During a call” in this section for
more information.
PHONE/END
While the voice recognition sys-
tem is active, press and hold
the
button for 5 seconds to
quit the voice recognition system
at any time.
TUNING SWITCH
While using the voice recognition
system, tilt the tuning switch up or
down to manually control the
phone system.
GETTING STARTED
The following procedures will help you get
started using the Bluetooth� Hands-Free Phone
System with NISSAN Voice Recognition. For ad-
ditional command options, refer to “List of voice
commands” in this section.
Choosing a language
You can interact with the Bluetooth� Hands-Free
Phone System using English, Spanish or French.
To change the language, perform the following.
1. Press and hold the
button for more
than 5 seconds.
2. The system announces: “Press the PHONE/SEND (
) button for the
hands-free phone system to enter the voice
adaptation mode or press the PHONE/END
(
) button to select a different lan-
guage.”
3. Press the
button.
For information on voice adaptation, see
“Voice Adaptation (VA) mode” in this sec-
tion.
4. The system announces the current language and gives you the option to change the lan-
guage to Spanish (in Spanish) or French (in
French) . To select the current language,
press the PHONE/SEND (
) button. To
select a different language, tilt the tuning
switch (
or) up or down.
LHA0757
4-88Monitor, climate, audio, phone and voice recognition systems