Page 36 of 602
Seat and restraint systems2-9
2
Arm rest
(if so equipped)
N00402300069
The lid on the floor console box can be moved forward and
backward and used as an arm rest.
Heated seat
(if so equipped)
N00435600352
The heated seats can be operated by pushing the switch when
the ignition switch or the operation mode is in ON. The indica-
tor light (A) will illuminate while the heater is on.1 (HI) - Heater high (for quick heating)
2 - Heater off
3 (LO) - Heater low (to keep the seat warm)
BK0150700US.book 9 ページ 2012年3月22日 木曜日 午後6時46分
Page 37 of 602

2-10 Seat and restraint systems
2
WARNING
!�Persons who are unable to feel temperature change
or skin pain due to age, illness, injury, medication,
alcohol use, fatigue or other physical conditions or
who have sensitive skin may suffer burns when
using the heated seat even at low temperatures. To
reduce the risk of burns, people with such conditions
must use care when using the heated seat.
CAUTION
!�Switch off the heated seats when not in use. Operate
the heaters at the “HI” position for quick heating.
After the seat has become warm, set the heater
switch to the “LO” position to keep it warm. Slight
variations in the seat temperature may be felt while
using the heated seats. This is caused by the opera-
tion of the heater’s internal thermostat and does not
indicate a malfunction.
CAUTION
!� Do not place heavy objects on the seat or stick pins,
needles, or other pointed objects into the seat.�Do not place a blanket, cushion, or other insulating
material on the seat while using the heater; doing so
can cause the heater element to overheat.�When cleaning the seat, do not use benzine, kero-
sene, gasoline, alcohol, or other organic solvents;
doing so can cause damage not only to the surface of
the seat, but also to the heater.�If water or any other liquid is spilled on the seat,
allow it to dry thoroughly before attempting to use
the heater. Turn the heater off immediately if it
appears to be malfunctioning during use.
BK0150700US.book 10 ページ 2012年3月22日 木曜日 午後6時46分
Page 163 of 602
3-66 Features and controls
3
Door mirror heater
N00549300191
When the rear window defogger switch is pressed with the
engine running, the outside rearview mirrors are defogged or
defrosted. Current will flow through the heater element inside
the mirrors, thus clearing away frost or condensation.
The indicator light (A) will illuminate while the defogger is on.
The heater will be turned off automatically in about 20 min-
utes.
Ignition switch
N00512400673
[For vehicles equipped with the Free-hand Advanced Secu-
rity Transmitter (F.A.S.T.-key)]
For information on operations for vehicles equipped with the
Free-hand Advanced Security Transmitter (F.A.S.T.-key), refer
to “Free-hand Advanced Security Transmitter (F.A.S.T.-key):
Engine switch”on page 3-22.
[Except for vehicles equipped with the Free-hand
Advanced Security Transmitter (F.A.S.T.-key)]
BK0150700US.book 66 ページ 2012年3月22日 木曜日 午後6時46分
Page 301 of 602
3-204 Features and controls
3
NOTE�As your vehicle is equipped with heated mirrors, mist can
also be removed from the outside rearview mirrors when
the rear window defogger switch is pressed. (Refer to
“Door mirror heater” on page 3-66.)
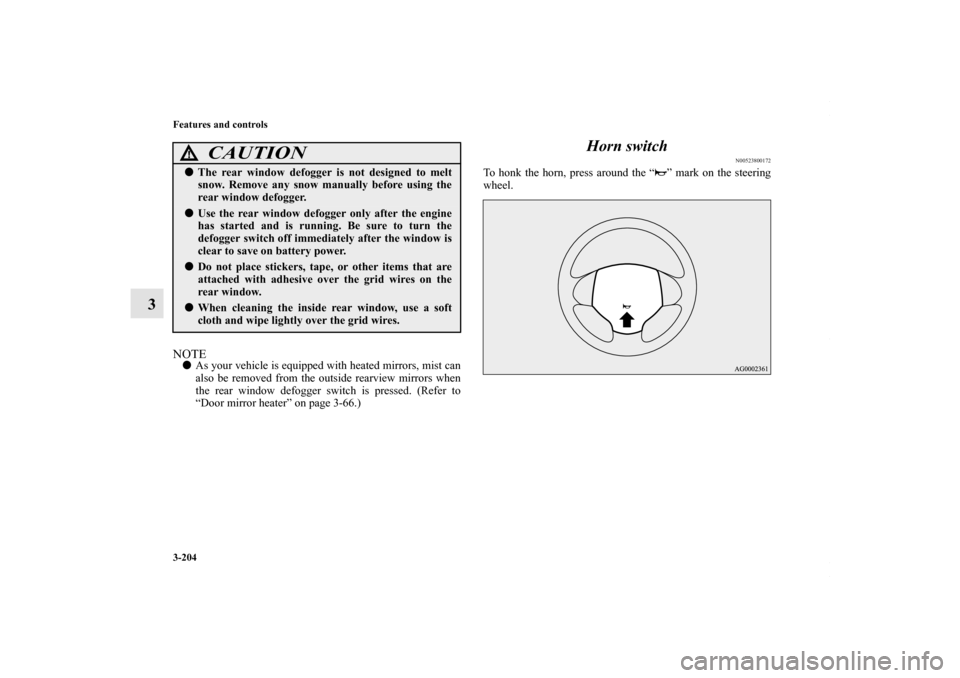
Horn switch
N00523800172
To honk the horn, press around the “ ” mark on the steering
wheel.
CAUTION
!�The rear window defogger is not designed to melt
snow. Remove any snow manually before using the
rear window defogger.�Use the rear window defogger only after the engine
has started and is running. Be sure to turn the
defogger switch off immediately after the window is
clear to save on battery power.�Do not place stickers, tape, or other items that are
attached with adhesive over the grid wires on the
rear window.�When cleaning the inside rear window, use a soft
cloth and wipe lightly over the grid wires.
BK0150700US.book 204 ページ 2012年3月22日 木曜日 午後6時46分
Page 363 of 602

4-10 Driving safety
4
�Curb weight: the weight of a motor vehicle with standard
equipment including the maximum capacity of fuel, oil,
and coolant.
� Accessory weight: the combined weight (in excess of
those standard items which may be replaced) of automatic
transmission, power steering, power brakes, power win-
dows, power seats, radio, and heater, to the extent that
these items are available as factory- installed equipment
(whether installed or not).
� Vehicle capacity weight: the rated cargo and luggage load
plus 150 lbs (68 kg) * times the vehicle’s designated seat-
ing capacity.
� Production options weight: the combined weight of those
installed regular production options weighing over 5 lbs
(2.3 kg) in excess of those standard items which they
replace, not previously considered in curb weight or
accessory weight, including heavy duty brakes, ride level-
ers, roof rack, heavy duty battery, and special trim.
� Normal occupant weight: 150 lbs (68 kg) * times the num-
ber of specified occupants. (In your vehicle the number is
3)
� Occupant distribution: Occupant distribution within the
passenger compartment (In your vehicle the distribution is
2 in front, 1 in second row seat)
Tire and loading information placard
N00630100383
The tire and loading information placard is located on the
inside sill of the driver’s door.
This placard shows the maximum number of occupants permit-
ted to ride in your vehicle as well as “the combined weight of
occupants and cargo” (A), which is called the vehicle capacity
weight. The weight of roof load is included in the definition of
“cargo” when determining the vehicle capacity weight. This
placard also tells you the size and recommended inflation pres-
sure for the original equipment tires on your vehicle. For more
information, refer to “Tires” on page 7-23.
*: 150 lbs (68 kg) is the weight of one person as defined by
U.S.A. and Canadian regulations.
BK0150700US.book 10 ページ 2012年3月22日 木曜日 午後6時46分
Page 376 of 602
Comfort controls5-7
5
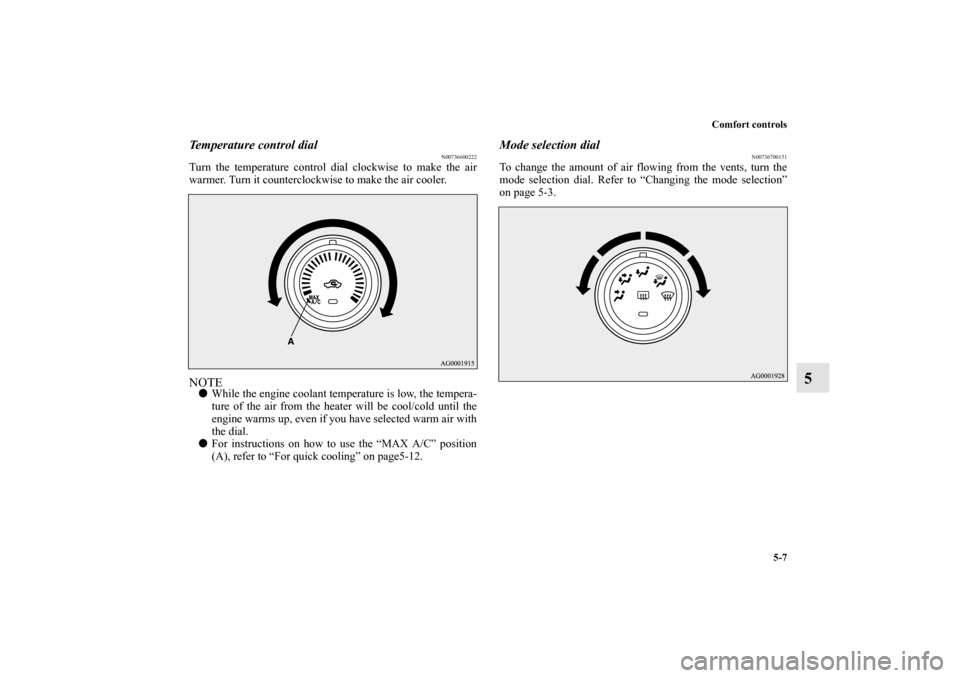
Temperature control dial
N00736600222
Turn the temperature control dial clockwise to make the air
warmer. Turn it counterclockwise to make the air cooler.NOTE�While the engine coolant temperature is low, the tempera-
ture of the air from the heater will be cool/cold until the
engine warms up, even if you have selected warm air with
the dial.
� For instructions on how to use the “MAX A/C” position
(A), refer to “For quick cooling” on page5-12.
Mode selection dial
N00736700151
To change the amount of air flowing from the vents, turn the
mode selection dial. Refer to “Changing the mode selection”
on page 5-3.
BK0150700US.book 7 ページ 2012年3月22日 木曜日 午後6時46分
Page 386 of 602
Comfort controls5-17
5
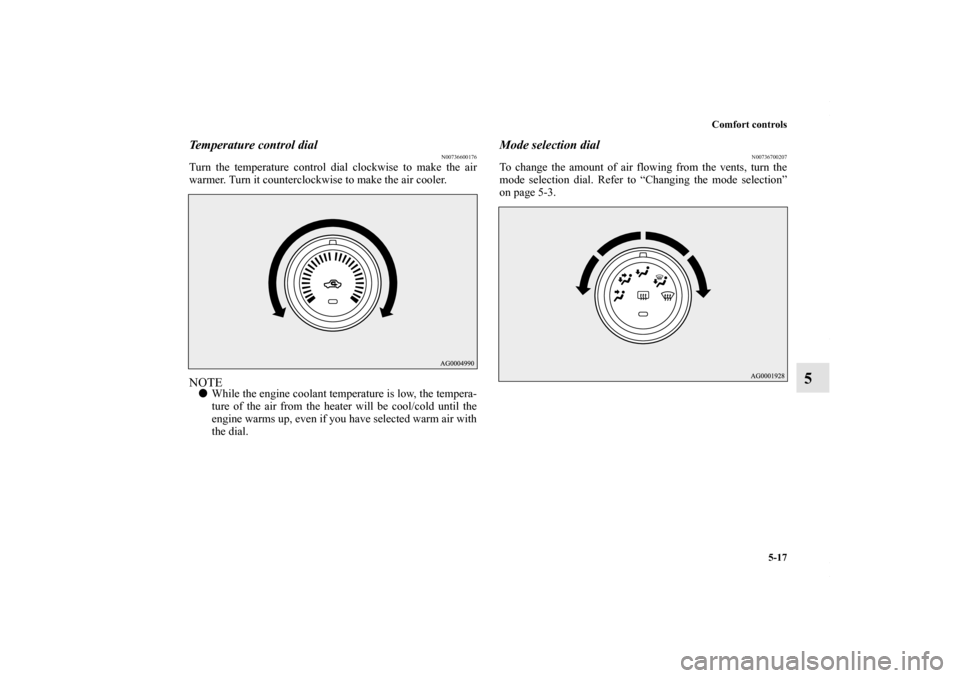
Temperature control dial
N00736600176
Turn the temperature control dial clockwise to make the air
warmer. Turn it counterclockwise to make the air cooler.NOTE�While the engine coolant temperature is low, the tempera-
ture of the air from the heater will be cool/cold until the
engine warms up, even if you have selected warm air with
the dial.
Mode selection dial
N00736700207
To change the amount of air flowing from the vents, turn the
mode selection dial. Refer to “Changing the mode selection”
on page 5-3.
BK0150700US.book 17 ページ 2012年3月22日 木曜日 午後6時46分
Page 396 of 602

Comfort controls5-27
5
NOTE�While the engine coolant temperature is low, the tempera-
ture of the air from the heater will be cool/cold until the
engine warms up, even if you have selected warm air with
the dial.
� When the temperature is set to the highest or the lowest
setting under the AUTO operation, the air selection and
the air conditioning will be automatically changed as fol-
lows.
Also, if the air selection is operated manually after an
automatic changeover, manual operation will be selected.
• Quick Heating (When the temperature is set to the high-
est setting)
Outside air will be introduced and the air conditioning
will stop.
• Quick Cooling (When the temperature is set to the low- est setting)
Inside air will be recirculated and the air conditioning
will operate.
The above indicates the factory settings. You can personalize
the air selection switch and air conditioning switch to match
your personal preferences.
Contact your Mitsubishi Motors dealer or a repair facility of
your choice for assistance.
Refer to “Personalizing the air conditioning switch (Changing
the function setting)” on page5-31.
Refer to “Personalizing the air selection (Changing the func-
tion setting)” on page5-29.
Mode selection dial
N00737100093
To change the amount of air flowing from the vents, turn the
mode selection dial. Refer to “Changing the mode selection”
on page 5-3.
BK0150700US.book 27 ページ 2012年3月22日 木曜日 午後6時46分

N00402300069
The lid on the floor console box can be moved forward and
backward and used as an arm rest.
Heated seat
(if so equipped)
N00435")