2013 MITSUBISHI iMiEV window
[x] Cancel search: windowPage 150 of 258

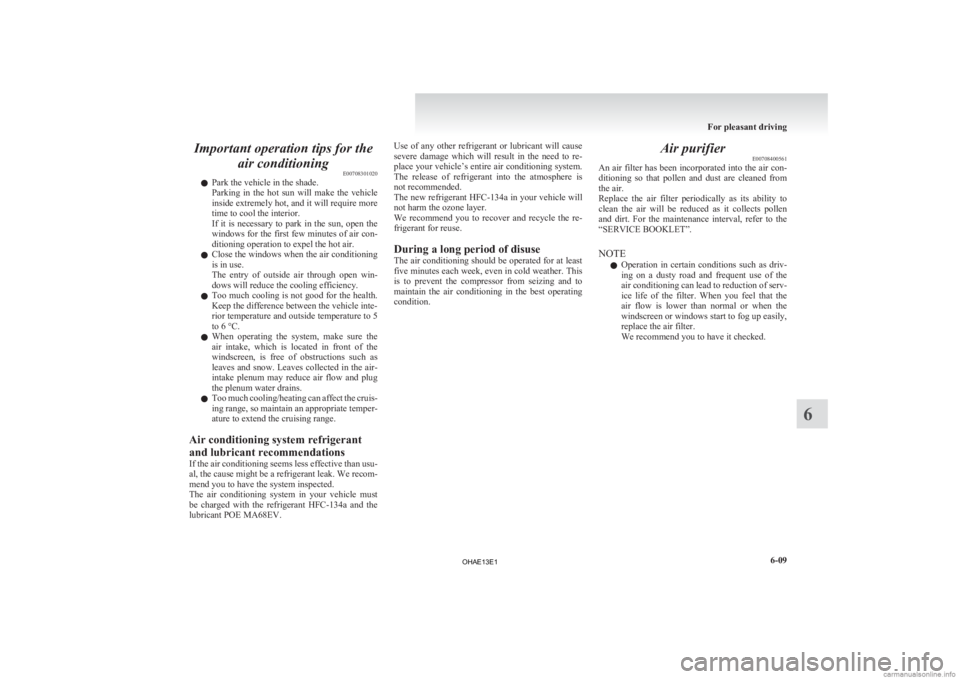
Demisting of the windscreen and door windows
E00702100830CAUTION
l
For safety, make sure you have a clear
view through all the windows.
Use the mode selection dial (“ ”
or “ ”) to re-
move frost or mist from the windscreen or door win-
dows.
For ordinary demisting
Perform the following settings to prevent misting
of the windscreen and door windows, and to heat
the leg area. 1. Set
the air selection switch (A) to the outside
position.
2. Set the mode selection dial to the “ ”
posi-
tion.
3. Turn the temperature control dial clockwise or anticlockwise to the desired temperature
between the middle (•) and “H” position.
4. Select the desired blower speed.
5. Push the air conditioning switch (B). For quick demisting
1.
Set
the mode selection dial to the “ ” posi-
tion.
2. Turn
the temperature control dial clockwise
or anticlockwise to the desired temperature
between the middle (•) and “H” position.
3. Press the MAX switch (A).
NOTE l When the mode selection dial is in the “ ”
position,
the system operates automatically
and outside air is set automatically.
l To demist effectively, direct the air flow
from the side ventilators towards the door win-
dows.
l Do not set the temperature control dial to the
max. cool position. Cool air will blow
against the window glasses and prevent de-
misting.
l Since demisting or defrosting with the MAX
switch consumes the power greatly, stop the
switch after demisting or defrosting.
Use for a long time may shorten the cruising
range. Introduction of outside air
E00702200424
To
introduce air into the vehicle during hot weath-
er, follow these procedures: 1. Set the mode selection dial to any position
other than “ ” position.
2. Turn
the temperature control dial to the mid-
dle (•) position.
3. Set the air selection switch (A) to the outside position.
4. Select the desired blower speed. NOTE
l When
the temperature control dial is turned
to the middle (•) position while the air condi-
tioning is operating, the air conditioning
turns off. For pleasant driving
6-08
6 LHD RHD
OHAE13E1
Page 151 of 258

Important operation tips for the
air conditioning E00708301020
l Park the vehicle in the shade.
Parking
in the hot sun will make the vehicle
inside extremely hot, and it will require more
time to cool the interior.
If it is necessary to park in the sun, open the
windows for the first few minutes of air con-
ditioning operation to expel the hot air.
l Close the windows when the air conditioning
is in use.
The entry of outside air through open win-
dows will reduce the cooling efficiency.
l Too much cooling is not good for the health.
Keep the difference between the vehicle inte-
rior temperature and outside temperature to 5
to 6 °C.
l When operating the system, make sure the
air intake, which is located in front of the
windscreen, is free of obstructions such as
leaves and snow. Leaves collected in the air-
intake plenum may reduce air flow and plug
the plenum water drains.
l Too much cooling/heating can affect the cruis-
ing range, so maintain an appropriate temper-
ature to extend the cruising range.
Air conditioning system refrigerant
and lubricant recommendations
If the air conditioning seems less effective than usu-
al, the cause might be a refrigerant leak. We recom-
mend you to have the system inspected.
The air conditioning system in your vehicle must
be charged with the refrigerant HFC-134a and the
lubricant POE MA68EV. Use of any other refrigerant or lubricant will cause
severe
damage which will result in the need to re-
place your vehicle’s entire air conditioning system.
The release of refrigerant into the atmosphere is
not recommended.
The new refrigerant HFC-134a in your vehicle will
not harm the ozone layer.
We recommend you to recover and recycle the re-
frigerant for reuse.
During a long period of disuse
The air conditioning should be operated for at least
five minutes each week, even in cold weather. This
is to prevent the compressor from seizing and to
maintain the air conditioning in the best operating
condition. Air purifier
E00708400561
An
air filter has been incorporated into the air con-
ditioning so that pollen and dust are cleaned from
the air.
Replace the air filter periodically as its ability to
clean the air will be reduced as it collects pollen
and dirt. For the maintenance interval, refer to the
“SERVICE BOOKLET”.
NOTE
l Operation in certain conditions such as driv-
ing on a dusty road and frequent use of the
air conditioning can lead to reduction of serv-
ice life of the filter. When you feel that the
air flow is lower than normal or when the
windscreen or windows start to fog up easily,
replace the air filter.
We recommend you to have it checked. For pleasant driving
6-09 6
OHAE13E1
Page 203 of 258

CAUTION
l
Do not use a scrubbing brush or other
hard tools as they may damage the plastic
part surface.
l Do not use wax containing compound (pol-
ishing powder) which may damage the
plastic part surface.
l Do not bring the plastic parts into contact
with petrol, light oil, brake fluids,
greases, paint thinners, and sulphuric
acid (battery electrolyte) which may
crack, stain or discolour the plastic parts.
If they touch the plastic parts, wipe them
off with soft cloth, chamois or the like
and an aqueous solution of neutral deter-
gent then immediately rinse the affected
parts with water.
Chrome parts E08401200013
In order to prevent spots and corrosion of chrome
parts,
wash with water, dry thoroughly, and apply a
special protective coating. This should be done
more frequently in winter.
Aluminium wheels E08401300014
1. Remove
dirt using a sponge while sprinkling
water on the vehicle.
2. Use neutral detergent on any dirt that cannot be removed easily with water.
Rinse off the neutral detergent after washing
the vehicle.
3. Dry the vehicle thoroughly using a chamois leather or a soft cloth. CAUTION
l
Do
not use a brush or other hard imple-
ment on the wheels.
Doing so could scratch the wheels.
l Do not use any cleaner that contains an
abrasive substance or is acidic or alka-
line. Doing so could cause the coating on
the wheels to peel or become discoloured
or stained.
l Do not directly apply hot water using a
steam cleaner or by any other means.
l Contact with seawater and road deicer
can cause corrosion. Rinse off such sub-
stances as soon as possible.
Window glass E08401400015
The window glass can normally be cleaned using
only a sponge and water.
Glass
cleaner can be used to remove oil, grease, in-
sect carcasses, etc. After washing the glass, wipe it
dry with a clean, dry, soft cloth. Never use a cloth
that is used for cleaning a painted surface to clean a
window. Wax from the painted surface could get
on the glass and lower glass transparency and visi-
bility.
NOTE
l To clean the inside of the rear window, al-
ways use a soft cloth and wipe the window
glass along the demister heater element so as
not to cause damage. Wiper blades
E08401500016
Use a soft cloth and glass cleaner to remove grease,
dead
insects, etc., from the wiper blades. Replace
the wiper blades when they no longer wipe proper-
ly. (Refer to page 8-17.)
Bonnet room E08401600017
Clean the bonnet room at the beginning and end of
winter.
Pay particular attention to flanges, crevices
and peripheral parts where dust containing road
chemicals and other corrosive materials might col-
lect.
If salt and other chemicals are used on the roads in
your area, clean the engine compartment at least ev-
ery three months.
Never spray or splash water on the electrical com-
ponents in the bonnet room, as this may cause dam-
age.
Do not bring the nearby parts, the plastic parts and
so on into contact with sulphuric acid (battery elec-
trolyte) which may crack, stain or discolour them.
If they are in contact, wipe off with soft cloth, cha-
mois or the like and an aqueous solution of neutral
detergent then immediately rinse the affected parts
with plenty of water. Vehicle care and Maintenance
8-05 8
OHAE13E1
Page 209 of 258

The concentration should be checked before the
start
of cold weather and anti-freeze added to the
system if necessary. Washer fluid
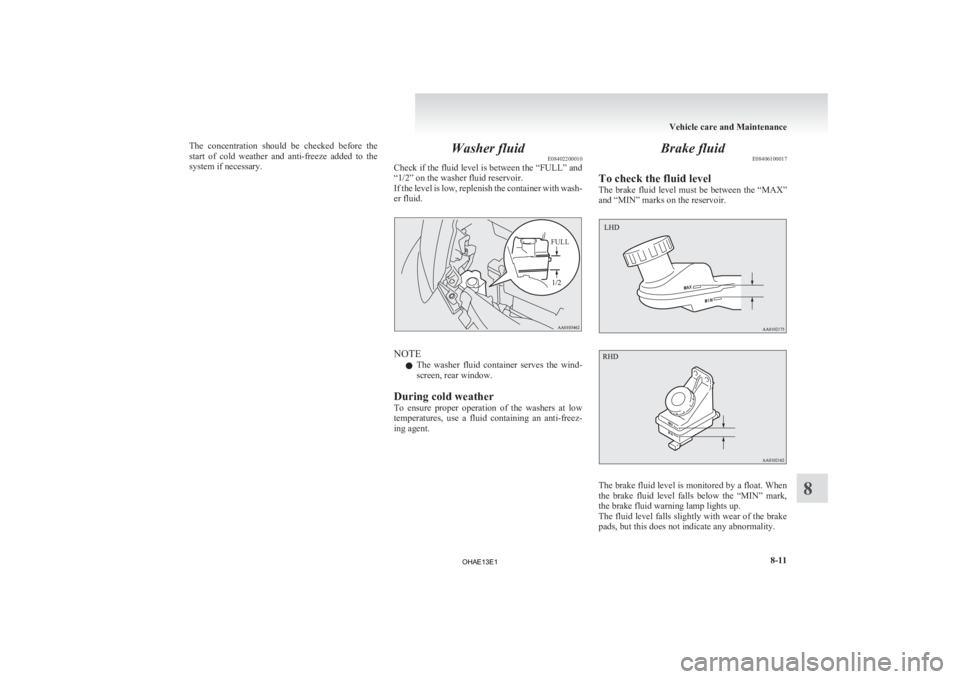
E08402200010
Check
if the fluid level is between the “FULL” and
“1/2” on the washer fluid reservoir.
If the level is low, replenish the container with wash-
er fluid.
FULL NOTE
l The
washer fluid container serves the wind-
screen, rear window.
During cold weather
To ensure proper operation of the washers at low
temperatures, use a fluid containing an anti-freez-
ing agent. Brake fluid
E08406100017
To check the fluid level
The
brake fluid level must be between the “MAX”
and “MIN” marks on the reservoir. The brake fluid level is monitored by a float. When
the
brake fluid level falls below the “MIN” mark,
the brake fluid warning lamp lights up.
The fluid level falls slightly with wear of the brake
pads, but this does not indicate any abnormality.
Vehicle care and Maintenance
8-11 8
OHAE13E1
Page 215 of 258

CAUTION
l
Observe permissible maximum speed for
your snow tyres and the legal speed limit.
NOTE l The
laws and regulations concerning snow
tyres (driving speed, required use, type, etc.)
vary. Find out and follow the laws and regu-
lations in the area you intend to drive.
l If flange nuts are used on your vehicle,
change to tapered nuts when steel wheels are
used.
Tyre chains E08403400035
If tyre chains have to be used, ensure that they are
fitted
only on the drive wheels (rear) in accordance
with the manufacturer’s instructions.
Use only tyre chains which are designed for use
with the tyres mounted on the vehicle: use of the in-
correct size or type of chain could result in damage
to the vehicle body.
Contact a MITSUBISHI MOTORS Authorized
Service Point before putting on tyre chains. The
max. chain height is as follows. Tyre size Wheel size Max chain
height[mm]
175/55R15 15 x 5 J 14 mm When driving with tyre chains on the tyres, do not
drive
faster than 50 km/h (30 mph). When you
reach roads that are not covered in snow, immedi-
ately remove the tyre chains. CAUTION
l
Practice
fitting the chains before you
need them. Don’t expect help from other
people in the cold.
l Choose a clear straight stretch of road
where you can pull over and still be seen
while you are fitting the chains.
l Do not fit chains before you need them.
This will wear out your tyres and the
road surface.
l After driving around 100-300 metres,
stop and retighten the chains.
l Drive carefully and do not exceed
50 km/h (30 mph). Remember that pre-
venting accidents is not the purpose of
tyre chains.
l An aluminium wheel can be damaged by
a tyre chain while driving. When fitting a
tyre chain on an aluminium wheel, take
care that no part of the chain and fitting
can be brought into contact with the wheel.
l When installing or removing the tyre
chains, take care that hands and other
parts of your body are not injured by the
sharp edges of the vehicle body.
NOTE l The
laws and regulations concerning the use
of tyre chains vary. Always follow local laws
and regulations.
In most countries, it is prohibited by law to
use tyre chains on roads without snow. Wiper blades
E08403500010
If
the blades are frozen to the windscreen or rear
window, do not operate the wipers until the ice has
melted and the blades are freed, otherwise the wip-
er motor may be damaged.
NOTE
l When replacing the front wiper with a wiper
for use in cold regions, it is necessary to ad-
just the washer nozzle spray positions. Al-
ways contact your MITSUBISHI MOTORS
Authorized Service Point when replacing the
front wiper with a wiper for use in cold re-
gions.
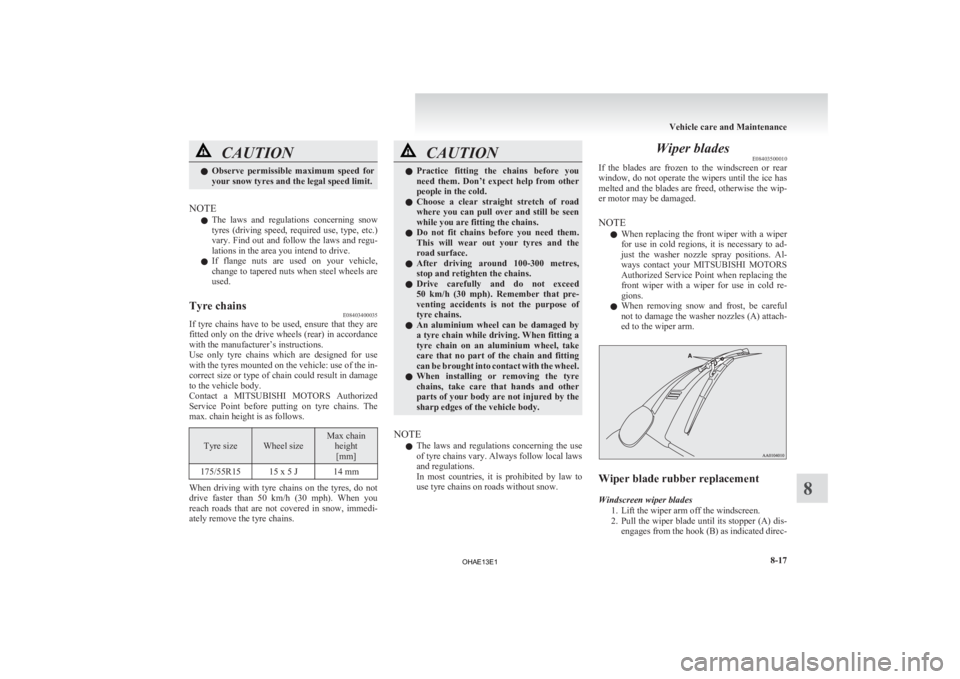
l When removing snow and frost, be careful
not to damage the washer nozzles (A) attach-
ed to the wiper arm. Wiper blade rubber replacement
Windscreen wiper blades
1.
Lift the wiper arm off the windscreen.
2. Pull the wiper blade until its stopper (A) dis- engages from the hook (B) as indicated direc- Vehicle care and Maintenance
8-17 8
OHAE13E1
Page 216 of 258

tion by the arrow (C) on the hook. Pull the
wiper blade to remove it.
NOTE
l Do
not let the wiper arm drop onto the wind-
screen. This could damage the glass. 3. Attach
the retainers (D) to a new wiper
blade. Refer to the illustration to ensure that
the retainers are correctly aligned as you at-
tach them. 4. Insert
the wiper blade into the arm, starting
with the opposite end of the blade from the
stopper. Make sure the hook (B) is fitted cor-
rectly in the grooves in the blade.
NOTE l If a retainer is not supplied with the new wip-
er blade, use the retainer from the old blade. 5. Push
the wiper blade until the hook (B) en-
gages securely with the stopper (A). Rear window wiper blades
1.
Lift the wiper arm off the window glass.
2. Pull the wiper blade downward to disengage it from the stopper (A) at the end of the wip-
er arm. Pull the wiper blade further to re-
move it.
3. Slide a new wiper blade through the hook (B) on the wiper arm. Vehicle care and Maintenance
8-18
8
OHAE13E1
Page 217 of 258

NOTE
l Do
not allow the wiper arm to fall onto the
window glass; it could damage the glass. 4. Firmly
insert the retainer (C) into the groove
(D) in the wiper blade.
Refer to the illustration to ensure that the re-
tainers are correctly aligned as you insert
them into the groove. NOTE
l If
a retainer is not supplied with the new wip-
er blade, use the retainer from the old blade. General maintenance
E08403600011
Coolant and oil leakage
Look
under the body of your vehicle to check for
coolant and oil leakage.
Exterior and interior lamp operation
Operate the combination lamp switch to check that
all lamps are functioning properly.
If the lamps do not illuminate, the probable cause
is a blown fuse or defective lamp bulb. Check the
fuses first. If there is no blown fuse, check the
lamp bulbs.
For information regarding the inspection and re-
placement of the fuses and the bulbs, refer to
“Fuses” on page 8-20 and “Replacement of lamp
bulbs” on page 8-23.
If the fuses and bulbs are all OK, we recommend
you to have your vehicle checked and repaired.
Meter, gauge and indicator/warning
lamps operation
Start the electric motor unit and check the opera-
tion of all instruments, gauges and indication and
warning lamps.
If there is anything wrong, we recommend you to
have your vehicle inspected.
Hinges and latches lubrication
Check all latches and hinges, and, if necessary,
have them lubricated. Vehicle care and Maintenance
8-19 8
OHAE13E1
Page 218 of 258

For cold and snowy weather
E08403700012
Ventilation slots
The
ventilation slots in front of the windscreen
should be kept clear of leaves or brushed clear after
heavy snowfall, so that the operation of the heating
and ventilation systems will not be impaired.
Weatherstripping
To prevent freezing of the weatherstripping on the
doors, bonnet, etc., they should be treated with sili-
cone grease.
Additional equipment
It is a good idea to carry a shovel or a short-han-
dled spade in the vehicle during the winter so that
you can clear away snow if you get stranded. A
small hand-brush for sweeping snow off the vehi-
cle and a plastic scraper for the windscreen and
rear window are also useful. Fusible links
E08403800013
The
fusible links will melt to prevent a fire if a
large current attempts to flow through certain elec-
trical systems.
In case of a melted fusible link, we recommend
you to have your vehicle inspected.
For the fusible links, please refer to “Passenger com-
partment fuse location table” on page 8-21 and
“Bonnet room fuse location table” on page 8-22. WARNING
l Fusible
links must not be replaced by any
other device. Failing to fit the correct fusi-
ble link may result in fire in the vehicle,
property destruction and serious or fatal
injuries at any time. Fuses
E08403900014
Fuse block location E08404000012
To prevent damage to the electrical system due to
shortcircuiting
or overloading, each individual cir-
cuit is provided with a fuse.
There are fuse blocks in the passenger compart-
ment and in the bonnet room.
NOTE
l Spare fuses are not provided. Please pur-
chase it from a MITSUBISHI MOTORS Au-
thorized Service Point or other locations.
Passenger compartment
The fuse block in the passenger compartment is lo-
cated in front of the driver’s seat at the position
shown in the illustration.
Press the tab (A) and remove the fuse cover (B). Vehicle care and Maintenance
8-20
8
OHAE13E1