2013 MINI Paceman display
[x] Cancel search: displayPage 87 of 275

CONTROLSLamps
86
In reverse, the Adaptive Light Control is not acti-
vated.
Malfunction
A message is displayed.
The Adaptive Light Control is malfunctioning or
failed. Have the system checked as soon as pos-
sible.
High beams/
roadside parking lamps
1 Turn signals/roadside parking lamps
2 Switching on high beams
3 Switching off high beams/headlamp flasher
Roadside parking lamps, left or right
The vehicle can be illuminated on one side for
parking. Comply with local regulations when
doing so.
Switching on
After parking the vehicle, press and hold the
lever up or down, arrow 1.
The roadside parking lamps drain the bat-
tery. Therefore, do not leave them on for
unduly long periods of time; otherwise, the bat-
tery might not have enough power to start the
engine. <
Switching off
Press the lever up or down to the pressure point.
Front fog lamps
Turn on front fog lamps:
Press the switch.
To switch them off, press the switch upward or
downward again.
Front fog lamps
The parking lamps or low beams must be
switched on for the fog lamps to operate. The
green indicator lamp lights up when the fog
lamps are switched on.
Depending on your vehicle's equipment, the fog
lamps are switched off when you activate the
headlamp flasher or switch on the high beams.
If the automatic headlamp control is acti-
vated, the low beams will come on auto-
matically when you switch on the fog lamps. <
Instrument lighting
You can adjust the brightness of the instrument
lighting only when the parking lamps or the low
beams are on.
The intensity of the brightness changes up to a
predetermined end point, and then decreases.
00320051004F004C00510048000300280047004C0057004C005200510003
Page 91 of 275

CONTROLSClimate
90
Automatic climate control
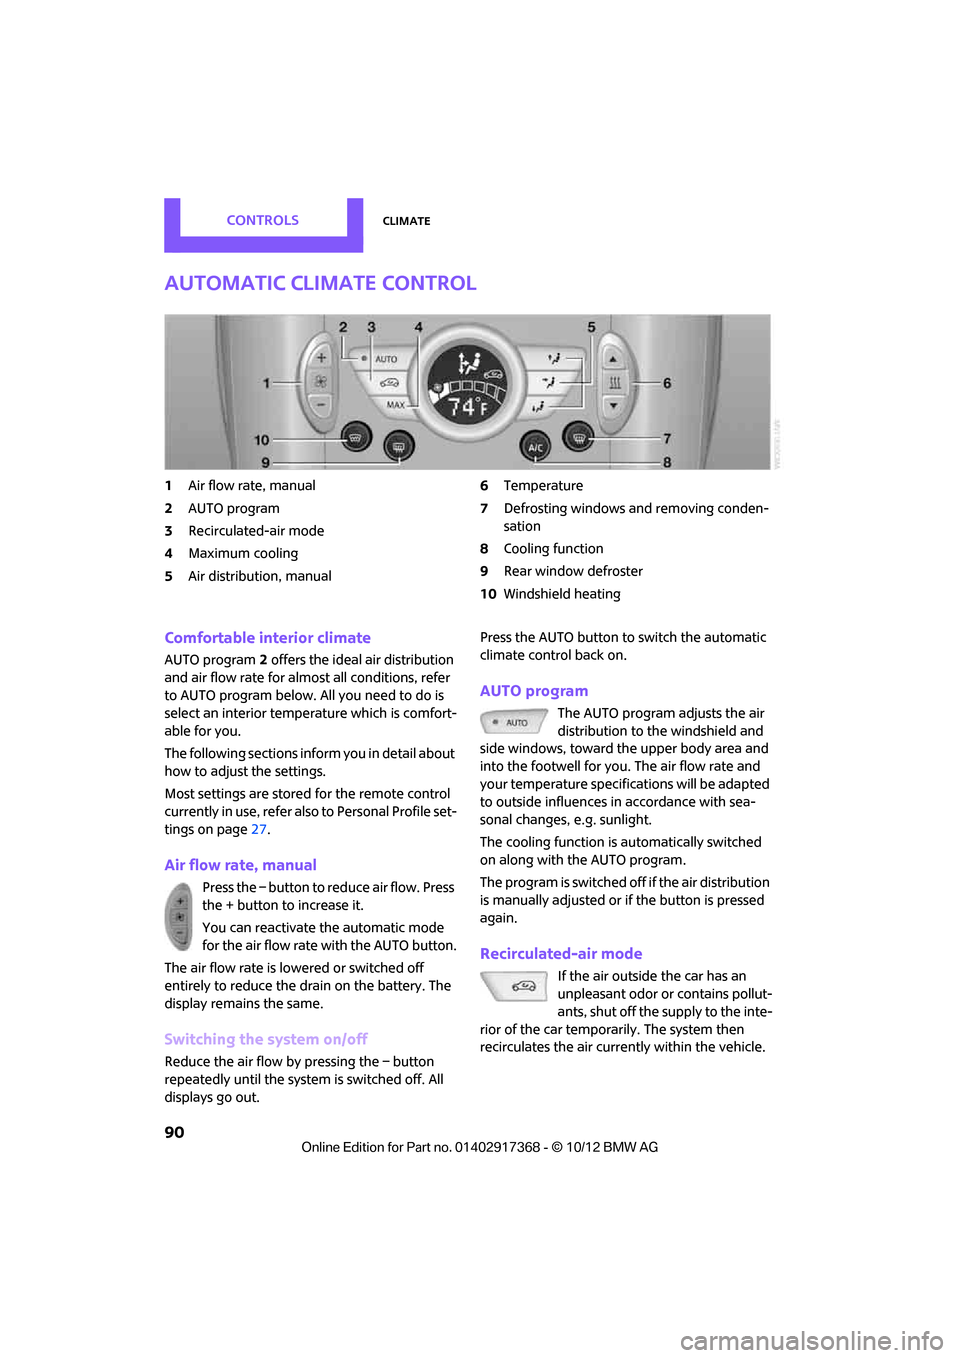
1Air flow rate, manual
2 AUTO program
3 Recirculated-air mode
4 Maximum cooling
5 Air distribution, manual 6
Temperature
7 Defrosting windows and removing conden-
sation
8 Cooling function
9 Rear window defroster
10 Windshield heating
Comfortable interior climate
AUTO program 2 offers the ideal air distribution
and air flow rate for almo st all conditions, refer
to AUTO program below. All you need to do is
select an interior temperature which is comfort-
able for you.
The following sections inform you in detail about
how to adjust the settings.
Most settings are stored for the remote control
currently in use, refer also to Personal Profile set-
tings on page 27.
Air flow rate, manual
Press the – button to reduce air flow. Press
the + button to increase it.
You can reactivate the automatic mode
for the air flow rate with the AUTO button.
The air flow rate is lo wered or switched off
entirely to reduce the drain on the battery. The
display remains the same.
Switching the system on/off
Reduce the air flow by pressing the – button
repeatedly until the system is switched off. All
displays go out. Press the AUTO button to switch the automatic
climate control back on.
AUTO program
The AUTO program adjusts the air
distribution to the windshield and
side windows, toward the upper body area and
into the footwell for you. The air flow rate and
your temperature specifications will be adapted
to outside influences in accordance with sea-
sonal changes, e.g. sunlight.
The cooling function is automatically switched
on along with the AUTO program.
The program is switched off if the air distribution
is manually adjusted or if the button is pressed
again.
Recirculated-air mode
If the air outside the car has an
unpleasant odor or contains pollut-
ants, shut off the supply to the inte-
rior of the car temporarily. The system then
recirculates the air currently within the vehicle.
00320051004F004C00510048000300280047004C0057004C005200510003
Page 93 of 275

CONTROLSClimate
92
outside air. Your MINI dealer replaces this com-
bined filter as a standard part of your scheduled
maintenance.
You can call up further in formation in the service
requirements display, page 64.
Ventilation
1 Knob for continuous opening and closing
2 Jet for direction of air flow
Opening/closing
Turn the knob.
Direction of air flow
Swivel the entire jet.
00320051004F004C00510048000300280047004C0057004C005200510003
Page 96 of 275

Practical interior accessoriesCONTROLS
95
press the button on the hand-held transmit-
ter for 2 seconds and release several times.
Operation
Before using the integrated universal
remote control, always inspect the imme-
diate area to make certain that no people, ani-
mals or objects are within the travel range of the
device.
Comply also with the safe ty instructions supplied
with the original hand-held transmitter. <
The device, for example a garage door, can be
operated while the engine is running or when
the ignition is on by using the button on the
rearview mirror. In addi tion, while within the
reception range of the device, press the button
until the function is deleted. The LED on the
rearview mirror is constant ly on while the signal
is being transmitted.
Deleting stored functions
Press and hold the right and left buttons on the
rearview mirror for approx. 20 seconds until the
LED on the rearview mirror starts flashing
quickly. All stored functions are deleted. The
functions can not be deleted individually.
Digital compass
1 Setting button on the back of the mirror
2 Display
The cardinal or ordinal direction in which the
vehicle is moving is shown on the display.
Operating principle
By pressing the setting button with a thin, sharp
object, e.g., a pen or a similar object, various
functions can be called up. The following setting
options are displayed one after the other,
depending on how long the setting button is
pressed down:
> Quick press: display switches on/off
> 3 to 6 seconds: compass zone setting
> 6 to 9 seconds: compass calibration
> 9 to 12 seconds: left/right-hand drive setting
> 12 to 15 seconds: setting the language
Setting the compass zones
Set the appropriate compass zone on your vehi-
cle so that the compass operates properly; see
world map with compass zones.
To set the compass zones, press the setting but-
ton for approx. 3-4 seconds. The number of the
compass zones that have been set are shown on
the display.
To change the zone se tting, quickly press the
setting button as often as necessary until the
number of the compass zone for your location is
displayed.
The compass is again ready to use after approx.
10 seconds.
00320051004F004C00510048000300280047004C0057004C005200510003
Page 97 of 275

CONTROLSPractical interior accessories
96
Calibrating the digital compass
The digital compass must be calibrated in the
following situations:
>The incorrect cardinal direction is displayed.
> The direction that is displayed does not
change even though the driving direction
changes.
> Not all cardinal directions are displayed.
Procedure
1.Make sure that there are no large metal
objects or overhead power lines near your
vehicle, and that you have enough space to
drive in circles.
2. Set the compass zone th at currently applies.
3. Press the setting button approx. 6-7 seconds
to call up C. Then drive in a complete circle at
a maximum speed of 4 mph/7 km/h.
If the calibration is successful, the C will be
replaced by the directions.
Setting right/left-hand drive
Your digital compass is already set to right-hand
drive or left-hand drive at the factory, depend-
ing upon your vehicle.
Setting the language
You can set the language on the display:
Press the setting button for approx. 12-13 sec-
onds. Briefly press the setting button again to
switch between English "E" and German "O".
The setting is automatically stored after approx.
10 seconds.
00320051004F004C00510048000300280047004C0057004C005200510003
Page 119 of 275

NAVIGATIONNavigation system
118
Navigation system
Vehicle equipment
In this chapter, all production, country, and
optional equipment that is offered in the model
range is described. Equipment is also described
that is not available because of, for example,
selected options or coun try version. This also
applies to safety relate d functions and systems.
General information
The navigation system can determine the pre-
cise position of the vehicle, with the aid of satel-
lites and vehicle sensors, and can reliably guide
you to every entered destination.
Enter data only with the vehicle station-
ary, and always give priority to the appli-
cable traffic regulations in the event of any con-
tradiction between traffic and road conditions
and the instructions issu ed by the navigation
system. Failure to take to this precaution can
place you in violation of the law and put vehicle
occupants and other ro ad users in danger.<
Selecting navigation
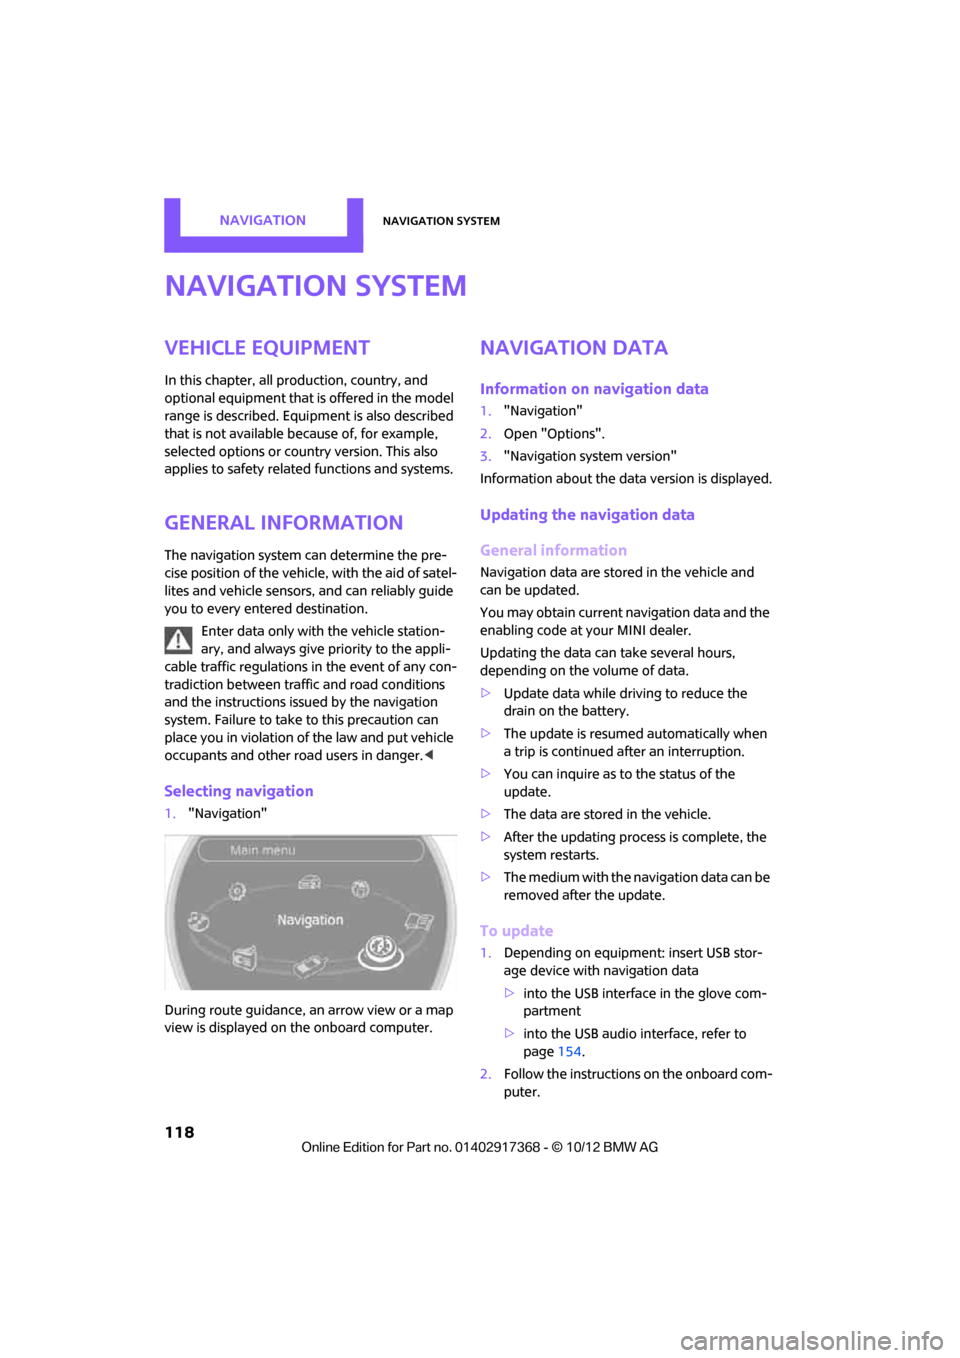
1."Navigation"
During route guidance, an arrow view or a map
view is displayed on the onboard computer.
Navigation data
Information on navigation data
1. "Navigation"
2. Open "Options".
3. "Navigation system version"
Information about the data version is displayed.
Updating the navigation data
General information
Navigation data are stored in the vehicle and
can be updated.
You may obtain current navigation data and the
enabling code at your MINI dealer.
Updating the data can take several hours,
depending on the volume of data.
> Update data while driving to reduce the
drain on the battery.
> The update is resumed automatically when
a trip is continued after an interruption.
> You can inquire as to the status of the
update.
> The data are stored in the vehicle.
> After the updating process is complete, the
system restarts.
> The medium with the na vigation data can be
removed after the update.
To update
1. Depending on equipment: insert USB stor-
age device with navigation data
>into the USB interface in the glove com-
partment
> into the USB audio interface, refer to
page 154.
2. Follow the instructions on the onboard com-
puter.
00320051004F004C00510048000300280047004C0057004C005200510003
Page 121 of 275

NAVIGATIONDestination entry
120
Destination entry
General information
In entering your destination you can select from
among the following options:
>Manual destination entry, see below
> Selecting destination from address book,
page 122
> Last destin ations, page 123
> Special destinations, refer to page 124
> Entering the destinatio n via map, refer to
page 125
> Selecting home address, refer to page 123
> Entering destinatio n via voice, page126
After selecting your dest ination you can proceed
to start the route guidance, page 129.
Manual destination
entry
To make it easier to enter town/city names and
street names, you are supported with the word-
match principle, refer to page128. This makes it
possible to enter different spellings and com-
pletes your entry automatically so that stored
town/city names and st reet names can be
accessed quickly.
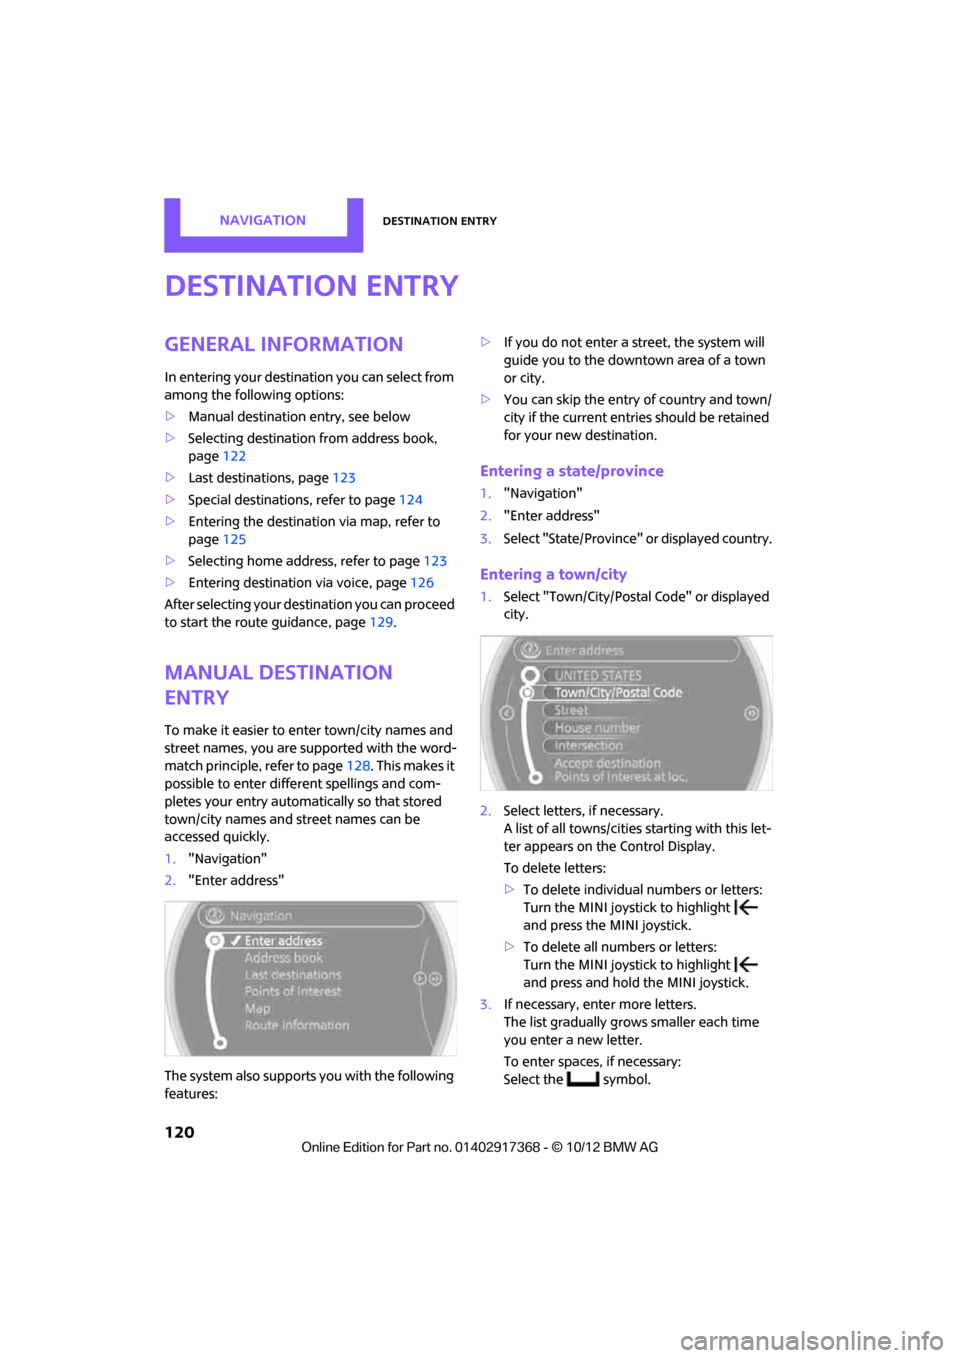
1. "Navigation"
2. "Enter address"
The system also supports you with the following
features: >
If you do not enter a street, the system will
guide you to the downtown area of a town
or city.
> You can skip the entry of country and town/
city if the current entries should be retained
for your new destination.
Entering a state/province
1."Navigation"
2. "Enter address"
3. Select "State/Province" or displayed country.
Entering a town/city
1.Select "Town/City/Postal Code" or displayed
city.
2. Select letters, if necessary.
A list of all towns/cities starting with this let-
ter appears on the Control Display.
To delete letters:
>To delete individual numbers or letters:
Turn the MINI joystick to highlight
and press the MINI joystick.
> To delete all numbers or letters:
Turn the MINI joystick to highlight
and press and hold the MINI joystick.
3. If necessary, enter more letters.
The list gradually grow s smaller each time
you enter a new letter.
To enter spaces, if necessary:
Select the symbol.
00320051004F004C00510048000300280047004C0057004C005200510003
Page 122 of 275

Destination entryNAVIGATION
121
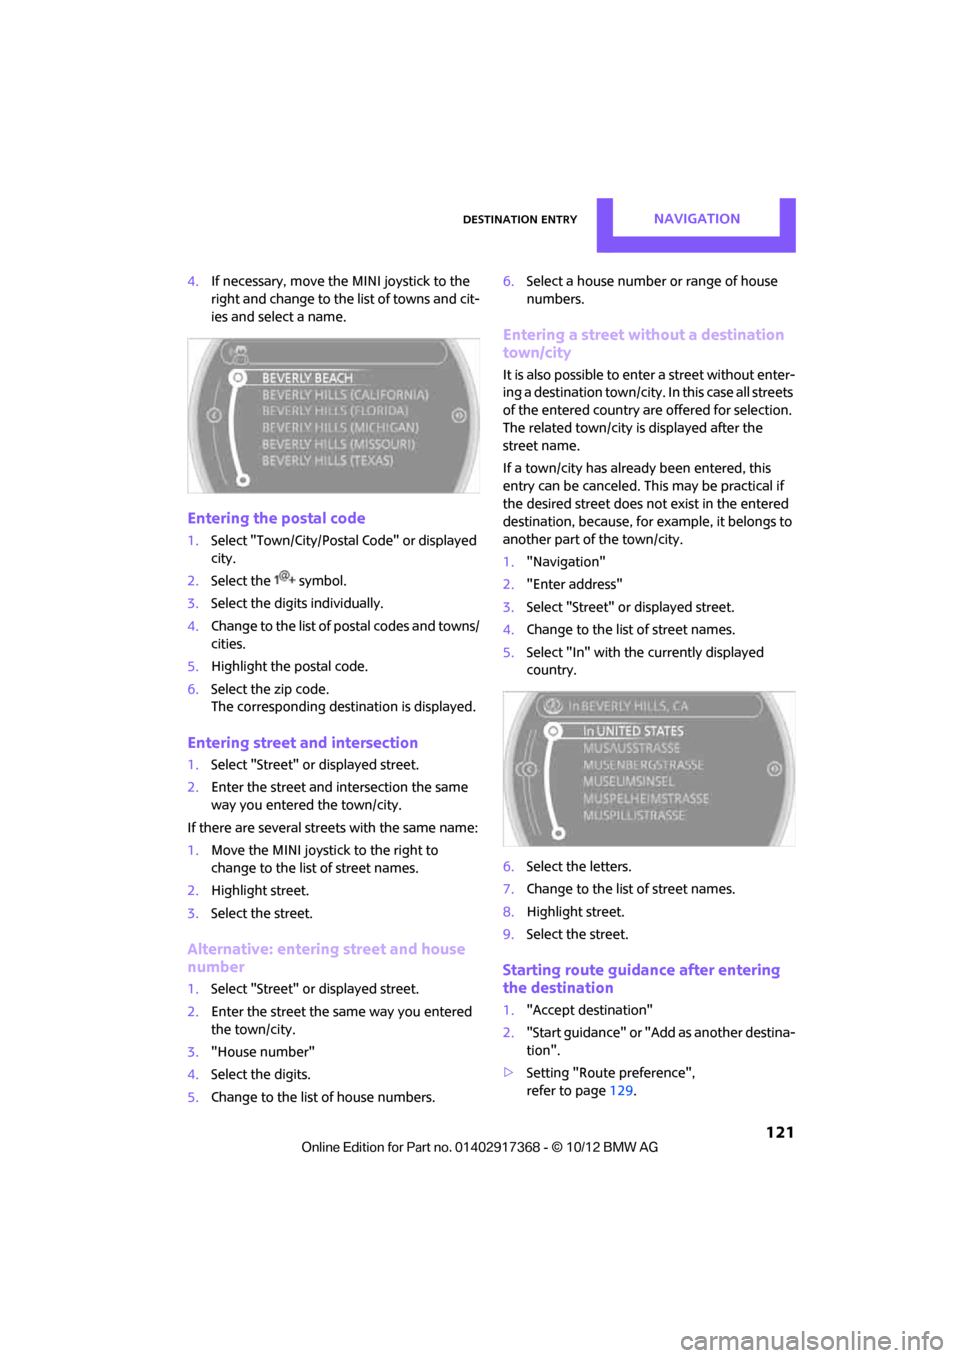
4.If necessary, move the MINI joystick to the
right and change to the list of towns and cit-
ies and select a name.
Entering the postal code
1. Select "Town/City/Postal Code" or displayed
city.
2. Select the symbol.
3. Select the digits individually.
4. Change to the list of postal codes and towns/
cities.
5. Highlight the postal code.
6. Select the zip code.
The corresponding dest ination is displayed.
Entering street and intersection
1.Select "Street" or displayed street.
2. Enter the street and intersection the same
way you entered the town/city.
If there are several streets with the same name:
1. Move the MINI joystick to the right to
change to the list of street names.
2. Highlight street.
3. Select the street.
Alternative: entering street and house
number
1.Select "Street" or displayed street.
2. Enter the street the same way you entered
the town/city.
3. "House number"
4. Select the digits.
5. Change to the list of house numbers. 6.
Select a house number or range of house
numbers.
Entering a street without a destination
town/city
It is also possible to enter a street without enter-
ing a destination town/city. In this case all streets
of the entered country are offered for selection.
The related town/city is displayed after the
street name.
If a town/city has already been entered, this
entry can be canceled. Th is may be practical if
the desired street does not exist in the entered
destination, because, for example, it belongs to
another part of the town/city.
1. "Navigation"
2. "Enter address"
3. Select "Street" or displayed street.
4. Change to the list of street names.
5. Select "In" with the currently displayed
country.
6. Select the letters.
7. Change to the list of street names.
8. Highlight street.
9. Select the street.
Starting route guidance after entering
the destination
1."Accept destination"
2. "Start guidance" or "Add as another destina-
tion".
> Setting "Route preference",
refer to page 129.
00320051004F004C00510048000300280047004C0057004C005200510003