2013 MERCEDES-BENZ S-Class lock
[x] Cancel search: lockPage 267 of 542

Vehicle
Vehicle functions
General information In this menu, you can set the following vehicle
functions:
R ECO
R multicontou rseat settings
R rear window blind
R EASY-ENTRY/EXIT feature
R exterior lighting delayed switch-off
R interior lighting delayed switch-off
R ambient lighting
R automatic folding mirror function
R locator lighting
R automatic locking feature
R trun klid opening height restriction
You can open the "Vehicle" menu in one of
two ways.
Opening the "Vehicle" menu from the
main area in the center of the display 0002
"Vehicle" menu item
0003 Main area
X Select Vehicle in the main function bar by
sliding 003C001C003Dand turning 0031001C0032the
COMAND controller and press 0021to
confirm.
Main area 0003is active.
X Selec tthe individual vehicle functions by
sliding 003C001C003Dor turning 0031001C0032the COMAND
controller and press 0021to confirm. Opening from the "Vehicle" menu
X
Select Vehicle in the main function bar by
sliding 003C001C003Dand turning 0031001C0032the
COMAND controller and press 0021to
confirm.
The "Vehicle" submenu opens.
X Select the individual vehicle functions in
the menu by sliding 003C001C003Dor turning 0031001C0032
the COMAND controller and press 0021to
confirm.
In the next section, it is the first procedure
that is always described.
Switching the ECO function on/off i
Hybrid vehicles: the ECO start/stop
function cannot be switched off.
The ECO start/stop function switches the
engine off automatically if the vehicle is
stopped under certain conditions. When
pulling away again, the engine starts
automatically (Y page 310). You can switch
the ECO start/stop function on and off using
COMAND.
If you switch the ECO start/stop function off
using COMAND, the function is switched on
again automatically .This is the case if you
switch the ignition off and on again. Vehicle
265COMAND Z
Page 268 of 542

X
To switch the ECO start/stop function
on/off: selectVehicle in the main
functio nbar by sliding 003C001C003Dand turning
0031001C0032 the COMAND controller and press
0021 to confirm.
The main area is active.
X Select the ECO function
by sliding 003C001C003Dor
turning 0031001C0032the COMAND controller and
press 0021to confirm.
The ECO start/stop function is switched on
and off alternately.
Extending/retracting the rea rwindow
blind !
Make sure that the rear window blind can
move freely. Otherwise, the blind or other
objects could be damaged.
i The rear window blind is deactivated at
temperatures below -2 0†.X
To extend/retract the rear window
blind: selectVehicle in the main function
ba rb y sliding 003C001C003Dand turning 0031001C0032the COMAND controller and press
0021to
confirm.
The main area is active.
X Selec tthe Rear Window Sunshade function
by sliding 003C001C003Dor turning 0031001C0032
the COMAND controller and press 0021to
confirm.
Activating/deactivating the automatic
folding mirror function In the
Automatic Mirror Folding menu,
you can set the exterior mirrors so that they
automatically fold in when the vehicle is
locked. X
To activate/deactivate automatic
mirror folding: selectVehicle in the main
function bar by sliding 003C001C003Dand turning
0031001C0032 the COMAND controller and press
0021 to confirm.
The main area is active.
X Select the Automatic Mirror Folding function
by sliding 003C001C003Dor turning 0031001C0032
the COMAND controller and press 0021to
confirm.
Setting the EASY-ENTRY/EXIT feature G
WARNING
Make sure that nobody can become trapped
when you activate the EASY-ENTRY/EXIT
feature.
If there is a risk of entrapmentb y the steering
column, move the steering wheel adjustment 266
VehicleCOMAND
Page 269 of 542

lever or press the position button of the
memory function.
If there is a risk of entrapmen tby the seat, you
can also cancel the adjustmen tprocedure by
moving the switch for seat adjustment. The
steering colum nand driver's sea tstop moving
immediately.
Never leave children unsupervised in the
vehicle. They could open the driver's door and
thereby unintentionally activate the EASY-
ENTRY/EXIT feature and become trapped.
You can make a setting in COMAND so that
the steering wheel swings upwards and/or
the driver's seat moves backwards before you
get into the vehicle. You can make the
following settings:
R Off : the function is switched off.
R Steering Column :t
he steering wheel
swings upwards.
R Steering Column and Seat :t
he steering
wheel swings upwards and the driver’s seat
moves backwards. X
To set the EASY-ENTRY/EXIT feature:
select Vehicle in the main function bar by
sliding 003C001C003Dand turning 0031001C0032the COMAND controller and press
0021to
confirm.
The main area is active.
X Select the Easy Entry/Exit Feature menu
by sliding 003C001C003Dor turning 0031001C0032the
COMAND controller.
The EASY-ENTRY/EXIT feature menu
appears. The current setting is indicated by
a 002C dot.
X Select Setting by sliding 002A001C0006or turning
0031001C0032 the COMAND controller.
The selected setting is indicated by a 002C
dot.
Setting the interior/exterior lighting
delayed switch-off time Interior lighting: you can set whether and for
how long you wish the interior lighting to
remain on in the dark after you have removed
the SmartKey from the ignition lock.
Exterior light: you can set whether and for
how long you want the exterior lighting to
remain on in the dark after the doors have
been closed. The exterior lighting
automatically switches off after the switch-off
delay has elapsed.
You may select from the following settings:
R
0s econds: delayed switch-off is
deactivated.
R 15, 30, 45, 60 seconds: delayed switch-off
is activated.
i You can reactivate this function by
opening a door within one minute. If none
of the doors are opened after the key is
removed from the ignition lock or if a door
is not closed after it has been opened, the
exterior lights switch off after 60 seconds. Vehicle
267COMAND Z
Page 270 of 542

X
To se tthe interior/exterio rlighting
delayed switch-off time: selectVehicle in the main function bar by sliding
003C001C003Dand
turning 0031001C0032the COMAND controller and
press 0021to confirm.
The main area is active.
X Selec tthe Interior Lighting Delayed
Shut-off /Exterior Lighting
Delayed Shut-off menu
by sliding
003C001C003D or turning 0031001C0032the COMAND
controller.
The interior/exterior lighting delayed
switch-off menu appears. The current
setting is indicated by a 002Cdot.
X Select Setting by sliding 002A001C0006or turning
0031001C0032 the COMAND controller.
The selected setting is indicated by a 002C
dot.
Setting the ambient lighting You can make the following settings:
R
SOLAR (yellow interior lighting)
R NEUTRAL (white interior lighting)
R POLAR (blue interior lighting)
R Brightness of the interior lighting on a
scale of 0 (off) to 5 (bright) X
To set the ambient lighting: select
Vehicle in the main function bar by sliding
003C001C003D and turning 0031001C0032the COMAND
controller and press 0021to confirm.
The main area is active.
X Select the Ambient Lighting menu
by
sliding 003C001C003Dor turning 0031001C0032the COMAND
controller.
The ambient lighting menu appears. The
current setting is indicated by a 002Cdot.
X Select Setting by sliding 002A001C0006or turning
0031001C0032 the COMAND controller.
The selected setting is indicated by a 002C
dot.
Switching locator lighting on/off If you switch on the locator lighting, the
following come on in the dark after you have
unlocked the vehicle using the remote
control:
R
the parking lamps
R the tail lamps
R the license plate lamp
R the front fog lamps
R the entry lamps in the exterior mirror
The locator lighting switches off again when
you open the driver’s door. If you do not open
the driver’s door, the locator lighting switches
off automatically after 40 seconds. 268
VehicleCOMAND
Page 271 of 542

X
To switc hthe locator lighting on/off:
select Vehicle in the mai
nfunction bar by
sliding 003C001C003Dand turning 0031001C0032the
COMAND controller and press 0021to
confirm.
The main area is active.
X Selec tthe Locator Lighting function
by
sliding 003C001C003Dor turning 0031001C0032the COMAND
controller and press 0021to confirm.
Switching the automatic locking
feature on/off You can use this function to activate or
deactivate the automatic central locking
feature. If the automatic locking feature is
activated, your vehicle will lock centrally from
a speed of approximately 15 km/h.
Further information about the automatic
locking feature is available in the "Automatic
locking feature" section (Y page 89).X
To switch the automatic locking
feature on/off: selectVehicle in the
main function bar by sliding 003C001C003Dand turning
0031001C0032the COMAND controller and
press 0021to confirm.
The main area is active.
X Select the Automatic Locking function
by sliding 003C001C003Dor turning 0031001C0032the
COMAND controller and press 0021to
confirm.
Activating/deactivating the trunk lid
opening height restriction X
To activate/deactivate the trunk lid
opening height restriction: select
Vehicle in the main function bar by sliding
003C001C003D and turning 0031001C0032the COMAND
controller and press 0021to confirm.
The main area is active.
X Select the Trunk Opening-height Restriction function
by sliding 003C001C003Dor
turning 0031001C0032the COMAND controller and
press 0021to confirm. Automatic climate control
Introduction to automatic climate
control You can operate automatic climate control
using COMAND or the buttons on the upper
section of the center console (Y
page 295).
Several special automatic climate control
functions can only be adjusted using
COMAND.
You can access the automatic climate control
menu via the air-conditioning function bar. Vehicle
269COMAND Z
Page 272 of 542

To do so, make certain that the SmartKey is
in position
2in the ignition lock. Air-conditioning function bar
0002
To set the temperature, left
0003 To set the air distribution, left
0026 To set the airflow, left
0025 Climate control main menu
(Ypage 271)
0023 To set the airflow, right
0024 To set the air distribution, right
0014 To set the temperature, right
Setting the temperature You can set the temperature separately for
the driver’s and front-passenger side.
X
Select left temperature display 0002or right
temperature display 0014in the air-
conditioning function bar by turning 0031001C0032
the COMAND controller and press 0021to
confirm. X
To adjust the temperature: slide002A001C0006 or
turn 0031001C0032 the COMAND controller.
X To confirm the selection: press0021the
COMAND controller.
Setting the air distribution You can set the air distribution separately for
the driver’s and front-passenger side.
X
Select left air distribution 0003or right air
distribution 0024by turning 0031001C0032the
COMAND controller and press 0021to
confirm. 0005
Directs air through the defroster vents
0018 Directs air through the center and side
air vents
0017 Directs air through the footwell vents
0019 Directs air through the center, side and
footwell vents
0013 Directs air through the defroster and
footwell vents
0015 Directs air through the defroster,
center, side and footwell vents
0014 Directs air through the defroster,
center and side air vents
0006 Controls air distribution automatically
X To adjust the air distribution: turn0031001C0032
the COMAND controller.
X To confirm the selection: press0021the
COMAND controller. 270
VehicleCOMAND
Page 276 of 542
To switch back to operation of the rear-
compartment air-conditioning system from
the front:
X
In the climate control main menu, select
Front Climate Control and press
0021.
The air-conditioning function bar shows the
climate control settings for the driver and
frontp assenger.
To switch off the rear-compartment air
conditioning:
X In the climate control main menu, select
Rear Climate Control OFF and press
0021.
To switch on automatic mod efor the rear-
compartment air conditioning:
X In the climate control main menu, select
Rear Automatic and press
0021.
Automatic mode for the rear-compartment
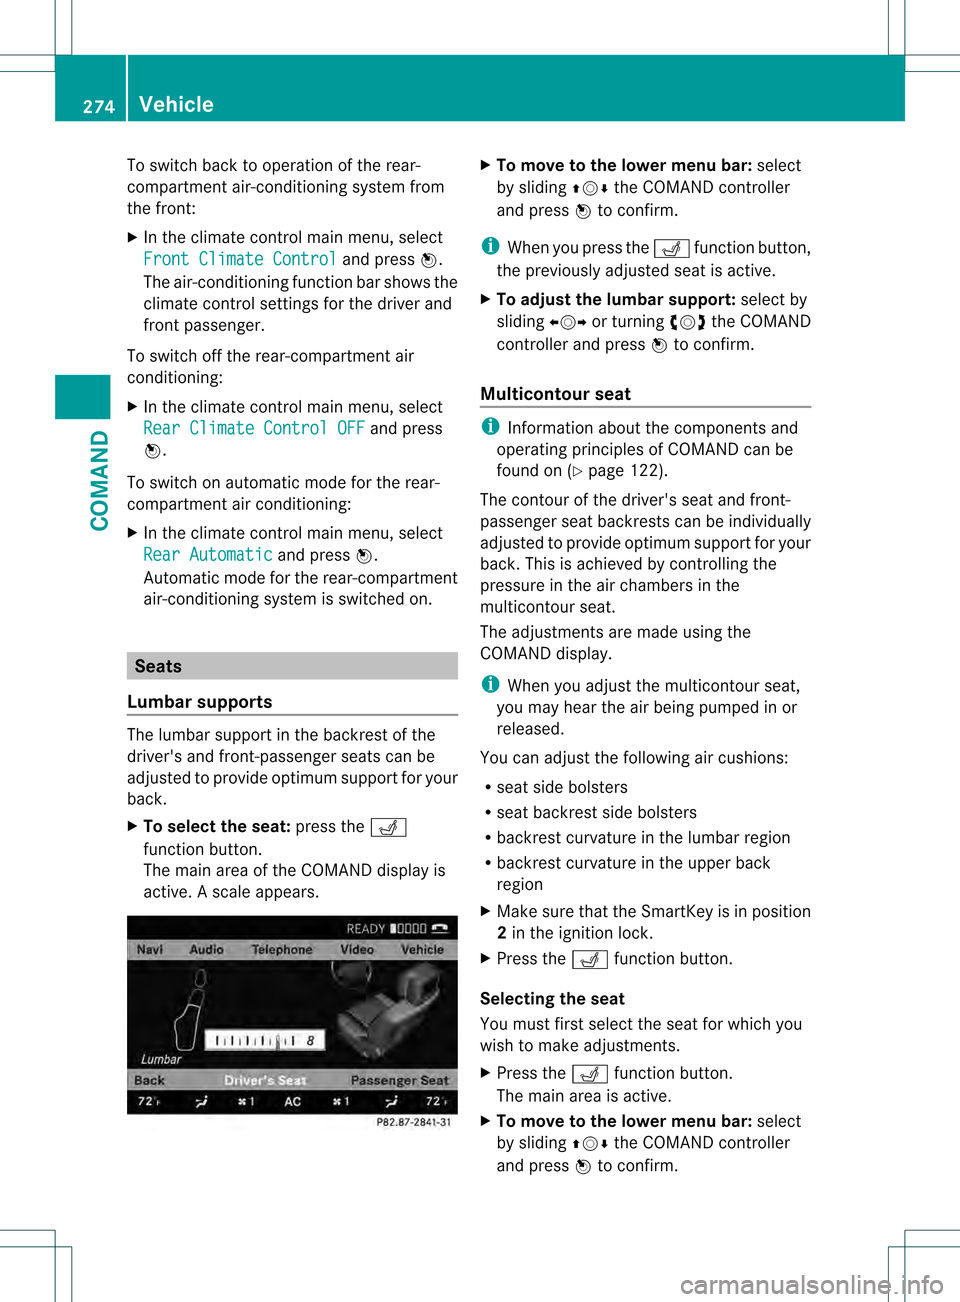
air-conditioning system is switched on. Seats
Lumbar supports The lumbar support in the backrest of the
driver's and front-passenger seats can be
adjusted to provide optimum support for your
back.
X
To select the seat: press the0012
function button.
The main area of the COMAND display is
active. Ascale appears. X
To move to the lower menu bar: select
by sliding 002A001C0006the COMAND controller
and press 0021to confirm.
i Whe nyou press the 0012function button,
the previously adjusted seat is active.
X To adjust the lumbar support: select by
sliding 003C001C003Dor turning 0031001C0032the COMAND
controller and press 0021to confirm.
Multicontour seat i
Information about the components and
operating principles of COMAND can be
found on (Y page 122).
The contour of the driver's seat and front-
passenger seat backrests can be individually
adjusted to provide optimum support for your
back. This is achieved by controlling the
pressure in the air chambers in the
multicontour seat.
The adjustments are made using the
COMAND display.
i When you adjust the multicontour seat,
you may hear the air being pumped in or
released.
You can adjust the following air cushions:
R seat side bolsters
R seat backrest side bolsters
R backrest curvature in the lumbar region
R backrest curvature in the upper back
region
X Make sure that the SmartKey is in position
2in the ignition lock.
X Press the 0012function button.
Selecting the seat
You must first select the seat for which you
wish to make adjustments.
X Press the 0012function button.
The main area is active.
X To move to the lower menu bar: select
by sliding 002A001C0006the COMAND controller
and press 0021to confirm. 274
VehicleCOMAND
Page 282 of 542

Useful information
i This Operator's Manual describes all
models and all standard and optional
equipment of your vehicle available at the
time of publication of the Operator's
Manual. Country-specific differences are
possible. Please note that your vehicle may
not be equipped with all features
described. This also applies to safety-
related systems and functions.
i Please read the information on qualified
specialist workshops (Y page 31).Exterior lighting
Important safety notes
For reasons of safety, Mercedes-Benz
recommends that you drive with the lights
switched on even during the daytime. In some
countries, operation of the headlamps varies
due to legal requirements and self-imposed
obligations. Information about driving abroad
To convert to symmetrical low beam
when driving abroad: switch the headlamps
to symmetrical low beam in countries in
which traffic drives on the opposite side of the
road from the country where the vehicle is
registered. This prevents glare to oncoming
traffic. Symmetrical lights do not illuminate
as large an area of the edge of the road.
Have the headlamps converted at a qualified
specialist workshop as close to the border as
possible before driving in these countries.
To convert to asymmetrical low beam
after returning: have the headlamps
converted back to asymmetrical low beam at
a qualified specialist workshop as soon as
possible after crossing the border and
returning to the original country. Light switch
Operation Depending on the date of manufacture of your
vehicle, the
000Dor0004 symbol for the
automatic headlamp mode/daytime running
lamps is located on the light switch. 0005000E
Left-hand standing lamps
00060010 Right-hand standing lamps
0007000E Lights off/daytime running lamps
000B000D Automatic headlamp mode/daytime
running lamps
000C0012 Parking lamps, license plate and
instrumen tcluste rlighting
000D000A Low-beam/high-beam headlamps
000E000B Front fog lamps 11
000F000D Rear fog lamp
The tur nsignals, high-beam headlamps and
the high-beam flasher are operated using the
combination switch (Y page 283).
! Switch off the parking lamps and standing
lamps when you leave the vehicle. This
prevents the battery fro mdischarging.
The exterior lighting (except the parking/
standing lamps) switches off automatically if
you:
R remove the SmartKey fro mthe ignition lock
R open the driver's door with the SmartKey
in position 0
If you hear a warning tone when you leave the
vehicle, the lights may still be switched on.
11 Only vehicles with Bi-Xenon headlamps without the Intelligent Light System are equipped with front fog lamps. 280
Exterior lightingLights and windshield wipers