2013 MERCEDES-BENZ R-CLASS FAMILY TOURER clock
[x] Cancel search: clockPage 9 of 364

Cargo compartment enlargement
Full ................................................ .255
Important safety notes ..................254
Partial ............................................ 255
Cargo compartment floor .................298
Cargo net Attaching ....................................... 263
Important safety information .........262
Cargo tie down rings .........................259
Car keys see SmartKey
Car wash (care) ................................. 290
CD player/CD changer (on-board
computer) .......................................... 204
Center console 2nd row of seats ............................ 253
Lowe rsection .................................. 35
Uppe rsection .................................. 34
Central locking
Automatic locking (on-board
computer) ...................................... 209
Locking/unlocking (SmartKey) ........77
Changing bulbs
High-beam headlamps ...................128
Important safety notes ..................125
License plate lighting .....................130
Low-beam headlamps ....................127
Overview of bul btypes .................. 126
Parking lamps ................................ 128
Removing/replacing the cover
(front wheel arch) .......................... 127
Reversing lamps ............................ 129
Side marker lamps .........................128
Standing lamps (front) ...................128
Turn signals (front) ......................... 128
Child-proof locks
Important safety notes ....................66
Rea rdoors ....................................... 67
Children
In the vehicle ................................... 60
Restraint systems ............................ 60
Specia lseat belt retractor ...............62
Child seat
LATCH-type (ISOFIX) child seat
anchors ............................................ 63
Top Tether ....................................... 64
Cigarette lighter ................................ 268Cleaning
Mirro rturn signal ........................... 293
Trailer tow hitch ............................. 294
Climate control
Automatic climate control (3-
zone) .............................................. 136
Controlling automatically ...............139
Cooling with aird ehumidification..138
Defrosting the windows .................142
Defrosting the windshield ..............142
Dual-zone automatic climate
control ........................................... 135
Important safety notes ..................134
Indicator lamp ................................ 139
Information on using 3-zone
automatic climate control ..............137
Notes on using automatic climate
control ........................................... 135
Overview of systems ......................134
Problems with cooling with air
dehumidification ............................ 139
Problem with the rear window
defroster ........................................ 143
Rea rcontrol panel ......................... 136
Setting the aird istribution.............141
Setting the airflow .........................141
Setting the airv ents...................... 144
Setting the temperature ................140
Switching air-recirculation mode
on/off ............................................ 143
Switching on/off ........................... 137
Switching residual hea ton/off ......143
Switching the MONO function on/
off .................................................. 141
Switching the rear window
defroster on/off ............................ 142
Clock (on-board computer) ...............207
Cockpit Overview .......................................... 30
see Instrument cluster
Collapsible spare wheel
Inflating ......................................... 343
see Emergency spare wheel
COMAND
see separate operating instructions
COMAND display
Cleaning ......................................... 294
Combination switch ..........................1236
Index
Page 34 of 364

Instrumen
tcluster Displays and controls
Function Page
:
Speedometer with
segments
201
;
Adjusts the instrument
cluster lighting: dimmer
200
=
Reset button
?
Adjusts the instrument
cluster lighting: brighter
200 Function Page
A
Tachometer 201
B
Fuel gauge
C
Multifunction display 202
D
Clock 207Instrument cluster
31At a glance
Page 87 of 364

You could therefore be locked out if:
R
the vehicle is being pushed.
R the vehicle is being towed.
R the vehicle is being tested on a
dynamometer.
You can switch the automatic locking
function on and off using the on-board
computer (Y page 209). Unlocking the driver's door
(mechanical key)
If the vehicle can no longer be unlocked with
the SmartKey, use the mechanical key.
If you use the mechanical key to unlocka nd
open the driver's door, the anti-thef talarm
system will be triggered ( Ypage 72).
X Take the mechanical key out of the
SmartKey (Y page 78).
X Insert the mechanical key into the lock of
the driver's door as far as it will go. X
Turn the mechanical key counter-clockwise
as far as it will go to position 1and hold
it in this position.
X Pull the door handle beyond the first
resistance.
The locking knob pops up.
The door is unlocked.
X Turn the mechanical key back and remove
it.
X Pull the door handle again.
X Insert the mechanical key into the
SmartKey. Locking the vehicle
If the vehicle can no longer be locked with the
SmartKey, you can lock it by taking the
following steps.
X Close the front-passenger door, the rear
door on the front-passenger side and the
tailgate.
X Open the driver’s door and the rear door on
the driver’s side.
X Press the locking button on the driver’s
door (Y page 83).
The locking knobs in the front-passenger
door and in the rear doors drop down.
X Press down the locking knobs in the front-
passenger and rear doors manually, if
necessary (Y page 83).
X Close the driver's door fro mthe outside.
X Press down the locking knob of the driver's
door by reaching in through the open rear
door.
i Make sure that you have the SmartKey on
your person and that it has not been left in
the vehicle.
X Close the rear door on the driver’s side.
X Make sure that the doors and the tailgate
are locked.
i If you lock the vehicle as described above,
the fuel filler flap is not locked. The anti-
theft alarm system is not armed. 84
DoorsOpening/closing
Page 130 of 364

Tail lamp
:
Backup lamp: W 16 W License plate lamp
:
License plate lamp: C 5WChanging the front bulbs
Removing and installing th ecover in the
front wheel housing You must remove the cover from the front
wheel housing before you can change the
frontb
ulbs. X
To remove: switch off the lights.
X Turn the fron twheels inwards.
X Turn rotary catch :90° counter-
clockwise.
X Pull away the cover and lift it off.
X To install: re-insert the cover.
X Turn rotary catch :90° clockwise.
Low-beam headlamps (halogen
headlamps) X
Remove the cover in the front wheel
housing (Y page 127).
X Turn housing cover :counter-clockwise
and pull it out.
X Turn bulb holder ;counter-clockwise and
pull it out.
X Take the bulb out of bulb holder ;.
X Insert the new bulb into bulb holder ;.
X Insert bulb holder ;into the lamp and turn
it clockwise.
X Align housing cover :and turn it
clockwise until it engages.
X Replace the cover in the front wheel
housing (Y page 127). Replacing bulbs
127Lights and windshield wipers Z
Page 131 of 364

High-beam headlamps (halogen
headlamps)
X
Remove the cover in the front wheel
housing (Y page 127).
X Turn housing cover :counter-clockwise
and pull it out.
X Turn bulb holder ;counter-clockwise and
pull it out.
X Take the bulb out of bulb holder ;.
X Insert the new bulb into bulb holder ;.
X Insert bulb holder ;into the lamp and turn
it clockwise.
X Align housing cover :and turn it
clockwise until it engages.
X Replace the cover in the front wheel
housing (Y page 127).
Parking lamp/standin glamp X
Switch off the lights.
X Remove the cover in the front wheel
housing (Y page 127). X
Tur nhousing cover :counter-clockwise
and pull it out.
X Pull out bulb holder ;.
X Take the bulb out of bulb holder ;.
X Insert the new bulb into bulb holder ;.
X Insert bulb holder ;.
X Align housing cover :and turn it
clockwise until it engages.
X Replace the cover in the front wheel
housing (Y page 127).
Turn signals X
Remove the cover in the front wheel
housing (Y page 127).
X Pull out bulb holder :.
X Take the bulb out of bulb holder :.
X Insert the new bulb into bulb holder :.
X Insert bulb holder :.
X Replace the cover in the front wheel
housing (Y page 127).
Side marker lamps 128
Replacing bulbsLights and windshiel
dwipers
Page 132 of 364

X
Remove the cover in the front wheel
housing (Y page 127).
X Turn housing cover :counter-clockwise
and pull it out.
X Pull out bulb holder ;.
X Take the bulb out of bulb holder ;.
X Inser tthe new bulb into bulb holder ;.
X Insert bulb holder ;.
X Align housing cover :and turn it
clockwise until it engages.
X Replace the cover in the front wheel
housing (Y page 127). Changing the rear bulbs
Opening and closing the side trim
panels Left-hand side trim panel
Right-hand side trim panel You must open the side trim panel in the
cargo compartment before you can change
the bulbs in the backup lamp.
X
To open: insert a suitable object,e .g. a
coin, into the slot of release knob :on
side trim panel ;.
X Turn release knob :90° in the direction
of the arrow and remove side trim
panel ;.
X To close: insert side trim panel ;and turn
release knob :90° in the opposite
direction to the arrow.
Backup lamp :
Backup lamp
X Switch off the lights.
X Open the cargo compartment.
X Ope nthe side trim panel (Y page 129).
X Turn the bulb holder counter-clockwise and
remove it.
X Remove the bulb from the bulb holder.
X Insert the new bulb into the bulb holder.
X Insert the bulb holder and turn it clockwise.
X Close the side trim panel (Y page 129). Replacing bulbs
129Lights and windshield wipers Z
Page 143 of 364

set. Automatic air distribution remains
activated.
or
X Press either MorO.
Automatic air distribution is deactivated.
Air distribution is controlled according to
the position set. Automatic airflow remains
activated. Setting the temperature
Climate control Different temperatures can be set for the
driver's and front-passenger sides.
X
Turn the SmartKey to position 2in the
ignition lock.
X To increase/reduce: turn control:or
C clockwise or counter-clockwise
(Y page 135).
Only change the temperature setting in
small increments. Start at 72 ‡ (22 †).
3-zone automatic climate control Automatic climate control zones You can select different temperature settings
for the driver's and front-passenger sides as
well as for the rear compartment.
X
Turn the SmartKey to position 2in the
ignition lock.
X To increase/reduce the temperature in
the front compartment: turn controls:
and C5
/E 6
clockwise or counter-
clockwise (Y page 136).
Only change the temperature setting in
small increments. Start at 72 ‡ (22 †).
USA only:
X To increase/reduce the temperature in
the rear compartment via the front
control panel: turn the SmartKey in the
ignition lock to position 2.
X Press the ±button.
X Turn control Cclockwise or counter-
clockwise (Y page 136).
Only change the temperature setting in
small increments. Start at 72 ‡ (22 †).
Canada only:
X To increase/reduce the temperature in
the rear compartment via the front
control panel: turn the SmartKey in the
ignition lock to position 2.
X Press the Ybutton.
The display changes to rear-compartment
climate control.
X Turn control Eclockwise or counter-
clockwise (Y page 136).
Only change the temperature setting in
small increments. Start at 72 ‡ (22 †).
i To return to the standard display, press
the Y button.
i The rear display changes to the standard
display automatically after three seconds.
X To increase/reduce the temperature in
the rear compartment via the rear
5 USA only
6 Canada only 140
Operating the climate control systemsClimate control
Page 144 of 364
control panel:
turn the SmartKey in the
ignition loc kto position 2.
X Turn control N5
/R 6
clockwise or
counter-clockwise (Y page 136).
Only change the temperature setting in
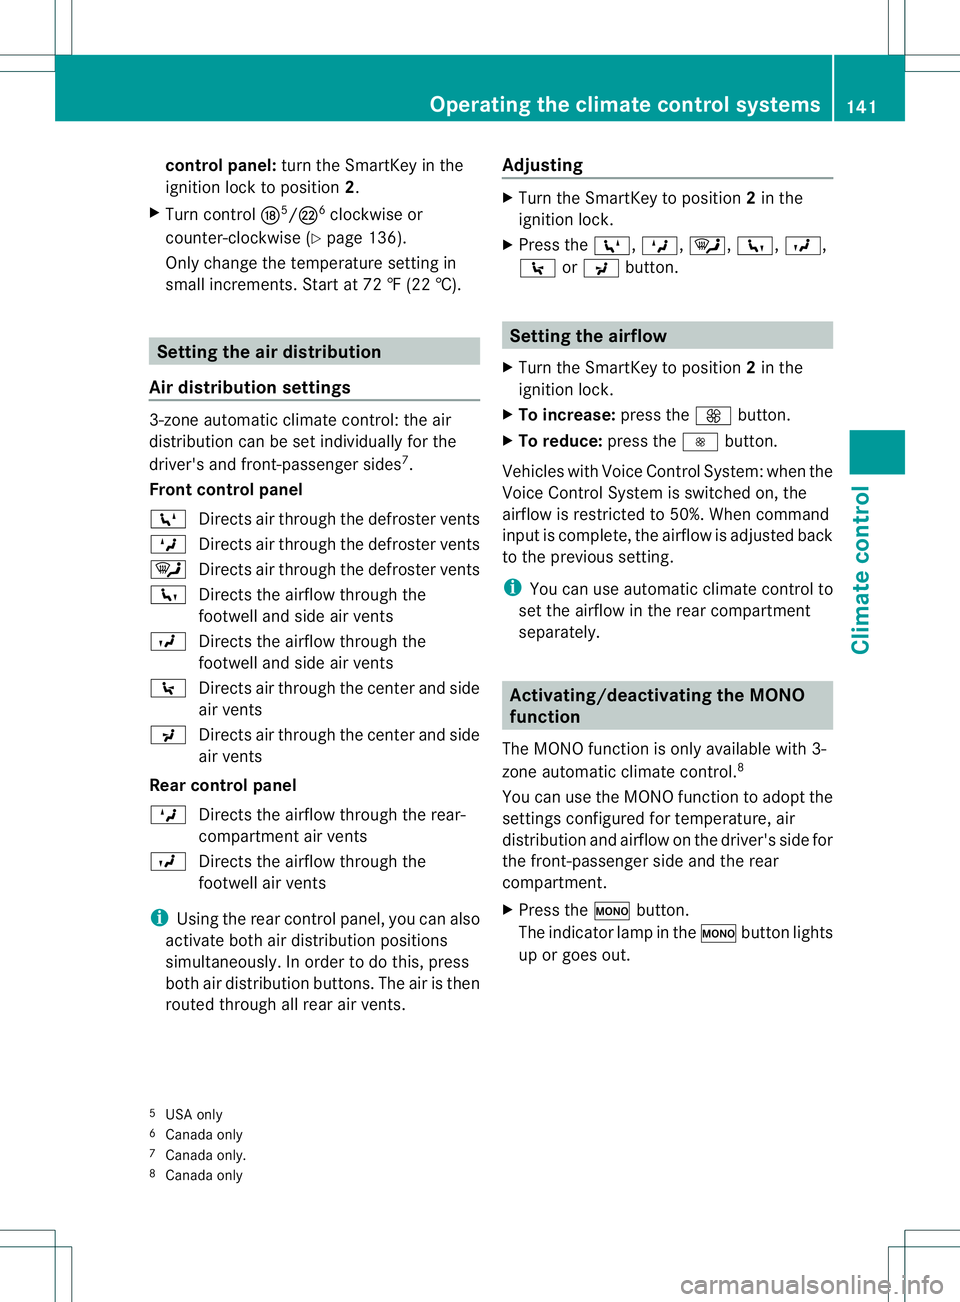
small increments. Start at 72 ‡ (22 †). Setting the air distribution
Air distribution settings 3-zone automatic climate control: the air
distribution can be set individually for the
driver's and front-passenger sides
7
.
Front control panel
Z Directs air through the defroster vents
M Directs air through the defroster vents
¯ Directs air through the defroster vents
c Directs the airflow through the
footwell and side air vents
O Directs the airflow through the
footwell and side air vents
\ Directs air through the center and side
air vents
P Directs air through the center and side
air vents
Rear control panel
M Directs the airflow through the rear-
compartment air vents
O Directs the airflow through the
footwell air vents
i Using the rear control panel, you can also
activate both air distribution positions
simultaneously. In order to do this, press
both air distribution buttons. The air is then
routed through all rear air vents. Adjusting X
Turn the SmartKey to position 2in the
ignition lock.
X Press the Z,M,¯,c,O,
\ orP button. Setting the airflow
X Turn the SmartKey to position 2in the
ignition lock.
X To increase: press theKbutton.
X To reduce: press theIbutton.
Vehicles with Voice Control System: when the
Voice Control System is switched on, the
airflow is restricted to 50%. When command
input is complete, the airflow is adjusted back
to the previous setting.
i You can use automatic climate control to
set the airflow in the rear compartment
separately. Activating/deactivating the MONO
function
The MONO function is only available with 3-
zone automatic climate control. 8
You can use the MONO function to adopt the
settings configured for temperature, air
distribution and airflow on the driver's side for
the front-passenger side and the rear
compartment.
X Press the ºbutton.
The indicator lamp in the ºbutton lights
up or goes out.
5 USA only
6 Canada only
7 Canada only.
8 Canada only Operating the climate control systems
141Climate control Z