2013 MERCEDES-BENZ GLK-CLASS SUV warning
[x] Cancel search: warningPage 210 of 380

symbol
0043 is shown in green. Active Lane
Keeping Assist is ready for use.
If Standard is selected, no warning
vibration occurs if:
R you have switched on
the
turn signals. In
this event, the warnings are suppressed
for a certain period of time.
R a driving safety system intervenes, such
as ABS, BAS or ESP ®
.
If Adaptive is selected, no warning
vibration occurs if:
R you have switched on the turn signals. In
this event, the warnings are suppressed
for a certain period of time.
R a driving safety system intervenes, e.g.
ABS, BAS or ESP ®
.
R you accelerate hard, e.g. kickdown.
R you brake hard.
R you steer actively, e.g. swerve to avoid
an obstacle or change lanes quickly.
R you cut the corner on a sharp bend.
Towing a trailer
When you attach a trailer,
make sure you have
correctly established the electrical
connection. This can be accomplished by
checking the trailer lighting. Towing a trailer
Notes on towing a trailer
Important safety notes G
WARNING
If you rest your foot on the brake pedal while
driving, the braking system can
overheat. This
increases the stopping distance and can even
cause the braking system to fail. There is a
risk of an accident.
Never use the brake pedal as a footrest. Never
depress the brake pedal and the accelerator
pedal at the same time. G
WARNING
When the vehicle/trailer combination begins
to lurch, you could lose control of it. The
vehicle/trailer combination could even
rollover. There is a risk of an accident.
On no account should you attempt to
straighten up the vehicle/trailer combination
by increasing the speed. Reduce vehicle
speed and do not countersteer. Apply the
brake as necessary.
! Depressing the brake pedal constantly
results
in excessive and premature wear to
the brake pads.
Please observe the manufacturer's operating
instructions for the trailer coupling if a
detachable trailer coupling is used.
Couple and uncouple the trailer carefully. If
you do not couple the trailer to the towing
vehicle correctly, the trailer could become
detached.
Make sure that the following values are not
exceeded:
R the permissible trailer drawbar noseweight
R the permissible trailer load
R the permissible rear axle load of the towing
vehicle
R the maximum permissible gross vehicle
weight of both the towing vehicle and the
trailer
The applicable permissible values, which
must not be exceeded, can be found:
R in the vehicle documents
R on the identification plates of the trailer tow
hitch, the trailer and the vehicle
If the values differ, the lowest value applies.
You will find the values approved by the
manufacturer on the vehicle identification
plates and those for the towing vehicle under
"Technical data".
When towing a trailer, your vehicle's handling
characteristics will be different in comparison
with when driving without a trailer. 208
Towing a trailer
Driving and parking
Page 212 of 380

i
This also applies if you have activated
cruise control.
This will use the braking
effect of the engine,
so that less braking will be required to
maintain the speed, This relieves the load on
the brake system and prevents the brakes
from overheating and wearing too quickly. If
you need additional braking, depress the
brake pedal repeatedly rather than
continuously.
Driving tips R
Maintain a greater distance from the
vehicle in front than when
driving without a
trailer.
R Avoid braking abruptly. If possible, brake
gently at first to allow the trailer to run on.
Then, increase the braking force rapidly.
R The values given for gradient-climbing
capabilities from a standstill refer to sea
level. When driving in mountainous areas,
note that the power output of the engine
and, consequently, the vehicle's gradient-
climbing capability, decreases with
increasing altitude.
If the trailer swings from side to side:
X Do not accelerate.
X Do not counter-steer.
X Brake if necessary. Installing the ball coupling
G
WARNING
If the ball coupling is not installed and secured
correctly the trailer
may come
loose. There is
a risk of an accident.
Install and secure the ball coupling as
described in the ball coupling installation
instructions. Make sure that the ball coupling
is installed and secured correctly before every
journey.
! Mercedes-Benz recommends that you
only use ball couplings that have been tested and approved by Mercedes-Benz.
This helps to avoid damage to the vehicle.
Cover cap
X
Pull protective cap 0043 in the direction of
the
arrow, out of ball coupling recess 0044.
X Store protective cap 0043 in a safe place.
X Observe the manufacturer's installation
instructions. G
WARNING
If the ball coupling is not installed and secured
correctly it can become detached while the
vehicle is in motion and fall onto the road.
There is a risk of an accident and injury.
Install and secure the ball coupling as
described in the ball coupling installation
instructions. Make sure that the
ball coupling
is installed and secured correctly before every
journey. Coupling up a trailer
Observe the maximum permissible trailer
dimensions (width and length).
Most U.S. states and all Canadian provinces
require by law:
R safety chains between the towing vehicle
and the trailer. The chains
should be cross-
wound under the trailer drawbar. They must
be fastened to the vehicle's trailer
coupling, not to the bumper or the axle. 210
Towing a trailer
Driving and parking
Page 214 of 380

when driving up or downhill, restrict the
shift range. Select shift
range 4,
3, 2, or 1.
A lower gear and lower speed reduce the
risk of engine failure.
R When driving downhill, shift to a lower gear
to utilize the engine's braking effect.
Avoid continuous brake application as this
may overheat the vehicle brakes and, if
installed, the trailer brakes.
R If the coolant temperature increases
dramatically while the air-conditioning
system is switched on, switch off the air-
conditioning system.
Coolant heat can additionally be dissipated
by opening the windows and by setting the
blower fan and the interior temperature to
maximum.
R When overtaking, pay particular attention
to the extended length of your vehicle/
trailer combination.
Due to the length of the vehicle/trailer
combination, you require additional road
space in relation to the vehicle you are
overtaking, before you can change back to
the original lane. Decoupling a trailer
G
WARNING
If you uncouple a trailer with the overrun
brake engaged, you could trap your hand
between the vehicle and the trailer drawbar.
There is a risk of injury.
Do not uncouple a trailer
if the overrun brake
is engaged.
! Do not disconnect a trailer with an
engaged overrun brake. Otherwise, your
vehicle could be damaged by the
rebounding of the overrun brake.
X Make sure that the automatic transmission
is set to position P.
X Apply the vehicle's parking brake. X
Close all doors and the tailgate.
X Apply the trailer's parking brake.
X Remove the trailer cable and decouple the
trailer. Permissible trailer loads and drawbar
loads
Weight specifications The gross trailer weight is calculated by
adding the weight of the trailer to the weight
of the load and equipment on the trailer.
Missing values were not
available
at the time
of going to print.
The maximum permissible trailer drawbar
noseweight is the maximum weight with
which the trailer drawbar can be loaded.
Missing values were not available at the time
of going to print.
Loading a trailer R
When loading the trailer, make sure that
neither the permissible gross weight
of the
trailer nor the gross vehicle weight is
exceeded. The permissible gross vehicle
weight is indicated on the identification
plate on the B-pillar on the driver's side of
the vehicle.
You can find the maximum permissible
values on the type plates of your vehicle
and the trailer. When calculating how much
weight the vehicle and trailer may carry,
pay attention to the respective lowest
values.
R The trailer drawbar load on the ball coupling
must be added to the rear axle load to avoid
exceeding the permissible gross axle
weight. The permissible gross vehicle
weight is indicated on the identification
plate on the B-pillar on the driver's side of
the vehicle.
i Mercedes-Benz recommends a trailer
load where the trailer drawbar noseweight 212
Towing a trailer
Driving and parking
Page 215 of 380

accounts for 8% to 15% of the trailer's
permissible gross weight.
i The weight of other accessories,
passengers and loads reduces:
R the permissible trailer load
R the permissible noseweight that your
vehicle can tow
Checking the vehicle and trailer
weightR
To ensure compliance of the weight of the
towing vehicle and the trailer with the
maximum permissible values, have the
vehicle/trailer combination (towing vehicle
including driver, passenger, load and fully
laden trailer) weighed on a calibrated
weighbridge.
R Check the gross axle weight rating of the
front and
rear axles, the gross weight of the
trailer and trailer drawbar load. Removing the ball coupling
X Observe the manufacturer's installation
instructions.
X Press the protective cap into the ball
coupling recess.
X Make sure that the protective cap is firmly
in place. Storing the ball coupling
G
WARNING
Do not carry the ball coupling in the vehicle
interior if it is not secured.
Otherwise, you and others could
be injured by
the ball coupling being thrown around if you:
R brake sharply
R change direction suddenly
R are involved in an accident
X Observe the manufacturer's installation
instructions. Trailer power supply
The trailer socket of your
vehicle is equipped
at the factory with a permanent power supply.
The permanent power supply is supplied via
trailer socket pin 4.
! You can connect accessories with a
maximum power consumption of 240 W to
the permanent power supply.
You must not charge a trailer battery using
the power supply.
The trailer's permanent power supply is
switched off in the event of low vehicle supply
voltage and after six hours at the latest.
A qualified specialist workshop can provide
more information about installing the trailer
electrics. Towing a trailer
213
Driving and parking Z
Page 217 of 380

Useful information ............................
216
Important safety notes ....................216
Displays and operation .................... 216
Menus and submenus ...................... 219
Display messages ............................. 231
Warning and indicator lamps in
the
instrument cluster ............................257 215
On-board computer and displays
Page 218 of 380

Useful information
i This Operator's Manual describes all
models and all standard and optional
equipment of your vehicle available at the
time of publication of the Operator's
Manual. Country-specific differences are
possible. Please note that your
vehicle may
not be equipped with all features
described. This also applies to safety-
related systems and functions.
i Read the information on qualified
specialist workshops: ( Y page 27).Important safety notes
G
WARNING
If you operate information systems and
communication equipment integrated in the
vehicle while driving, you will be distracted
from traffic conditions. You could also lose
control of the vehicle. There is a risk of an
accident.
Only operate the equipment when the traffic
situation permits. If you are
not sure that this
is possible, park the vehicle paying attention
to traffic conditions and operate the
equipment when the vehicle is stationary. G
WARNING
If the instrument cluster has failed or
malfunctioned, you may not recognize
function restrictions in systems relevant to
safety. The operating safety of your vehicle
may be impaired. There is a risk of an
accident.
Drive on carefully. Have the vehicle checked
at a qualified specialist workshop
immediately.
You must observe the legal requirements for
the country in which you
are currently driving
when operating the on-board computer.
The on-board computer only shows messages
or warnings from certain systems in the multifunction display. You should therefore
make sure your vehicle is operating safely at
all times. Otherwise, a vehicle that is not
operating safely may cause an accident.
For an overview, see the instrument panel
illustration (
Y page 31). Displays and operation
Coolant temperature display
G
WARNING
Opening the hood when the engine is
overheated or when there is a fire in the
engine compartment could expose you
to hot
gases or other service products. There is a
risk of injury.
Let an overheated engine cool down before
opening the hood. If there is a fire in the
engine compartment, keep the hood closed
and contact the fire department.
The coolant temperature gauge is in the
instrument cluster on the left-hand side.
Under normal operating conditions and with
the specified coolant level, the coolant
temperature may rise to 248 ‡ (120 †).
! A display message is shown if the coolant
temperature is too high.
If the coolant temperature is over
248 ‡(120 †), do not continue driving. The
engine will otherwise be damaged. Tachometer
The red band in the
tachometer indicates the
engine's overrevving range.
! Do not drive in the overrevving range, as
this could damage the engine.
The fuel supply is interrupted to protect the
engine when the red band is reached. 216
Displays and operation
On-board computer and displays
Page 225 of 380

Video DVD operation
X
Switch on COMAND and select video DVD;
see the separate operating instructions.
X Press the 0059 or 0065 button on the
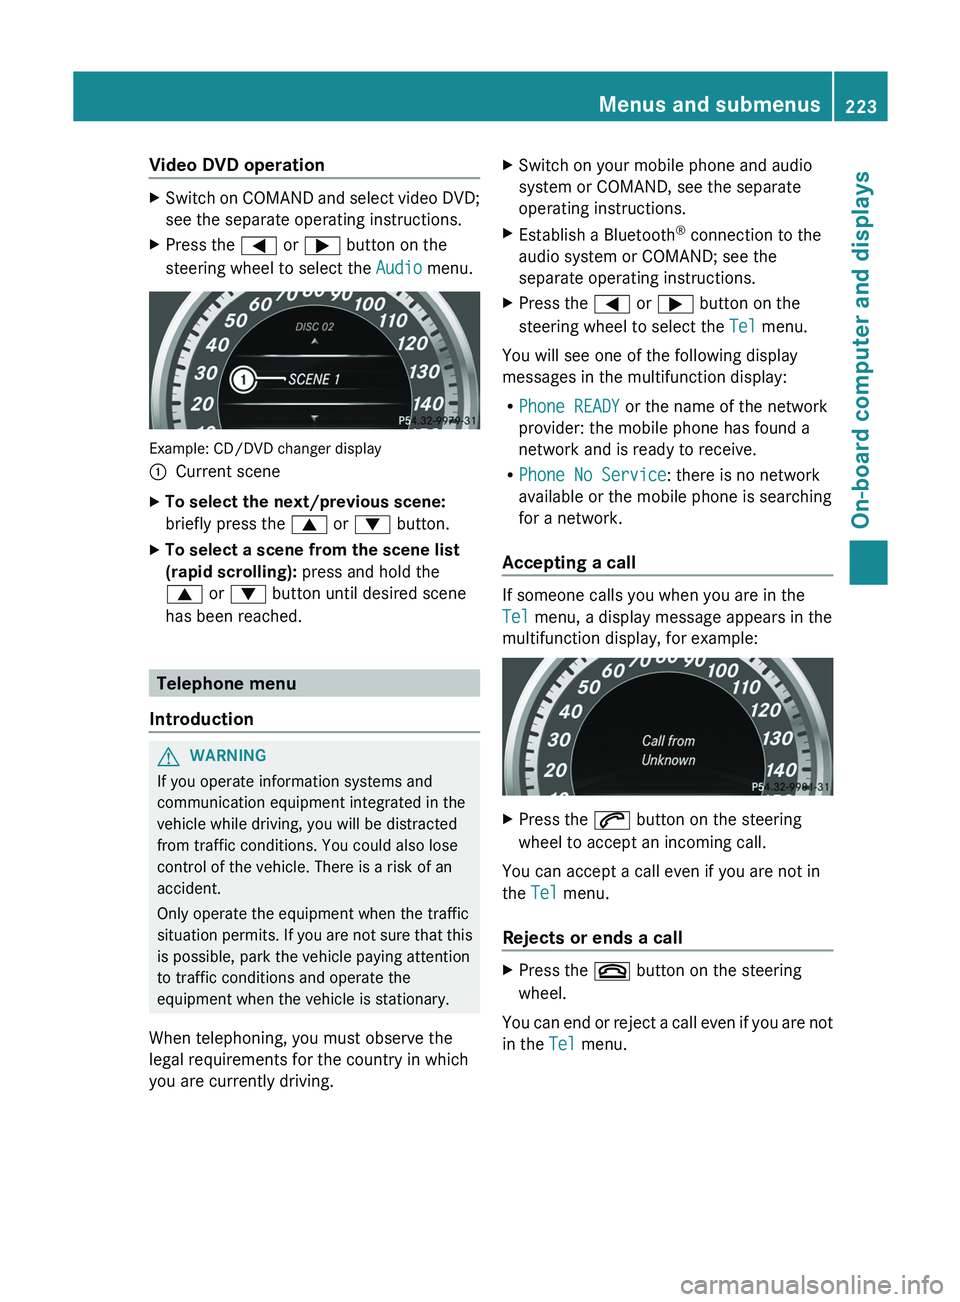
steering wheel to select the Audio menu. Example: CD/DVD changer display
0043
Current scene
X To select the next/previous scene:
briefly press the 0063 or 0064 button.
X To select a scene from the scene list
(rapid scrolling): press and hold the
0063 or 0064 button until desired scene
has been reached. Telephone menu
Introduction G
WARNING
If you operate information systems and
communication equipment integrated in the
vehicle while driving, you will be distracted
from traffic conditions. You could also lose
control of the vehicle. There is a risk of an
accident.
Only operate the equipment when the traffic
situation permits. If you are
not sure that this
is possible, park the vehicle paying attention
to traffic conditions and operate the
equipment when the vehicle is stationary.
When telephoning, you must observe the
legal requirements for the country in which
you are currently driving. X
Switch on your mobile phone and audio
system or COMAND, see the separate
operating instructions.
X Establish a Bluetooth ®
connection to the
audio system or COMAND; see the
separate operating instructions.
X Press the 0059 or 0065 button on the
steering wheel to select the Tel menu.
You will see one of the following display
messages in the multifunction display:
R Phone READY or the name of the network
provider: the mobile phone has found a
network and is ready to receive.
R Phone No Service: there is no network
available or the mobile phone is searching
for a network.
Accepting a call If someone calls you when you are in the
Tel menu, a display message appears in the
multifunction display, for example:
X
Press the 0061 button on the steering
wheel to accept an incoming call.
You can accept a call even if you are not in
the Tel menu.
Rejects or ends a call X
Press the 0076 button on the steering
wheel.
You can end or reject a call even if you are not
in the Tel menu. Menus and submenus
223
On-board computer and displays Z
Page 228 of 380

When Lane Keeping Assist or Active Lane
Keeping Assist is activated,
the 00B0
symbol
appears in the multifunction display when the
ignition is on.
For further information about Lane Keeping
Assist, see (Y page 200).
For further information about Active Lane
Keeping Assist, see ( Y page 205).Maintenance menu
In the
Serv. menu, you have the following
options:
R Calling up display messages
(Y page 231)
R Restarting the tire pressure loss warning
system (Canada only) ( Y page 335)
R Checking the tire pressure electronically
(USA only) ( Y page 336)
R Calling up the service due date
(Y
page 298) Settings menu
Introduction In the
Sett. menu, you have the following
options:
R Changing the instrument cluster settings
(Y page 226)
R Changing the light settings (Y page 227) R
Changing the vehicle settings
(Y page 228)
R Changing the convenience settings
(Y page 229)
R Restoring the factory settings
(Y page 230)
Instrument cluster Selecting the unit of measurement for
distance
The Display Unit Speed-/Odometer:
function allows you to choose whether
certain displays appear in
kilometers
or miles
in the multifunction display.
You can determine whether the multifunction
display shows some messages in miles or
kilometers.
X Press the 0059 or 0065 button on the
steering wheel to select the Sett. menu.
X Press the 0064 or 0063 button to
select the
Instr. Cluster submenu.
X Press 0076 to confirm.
X Press the 0064
or 0063
button to
select the
Display Unit Speed-/Odometer:
function.
You will see the selected setting: km or
miles.
X Press the 0076 button to save the setting.
The selected unit of measurement for
distance applies to:
R the digital speedometer in the Trip menu
R the odometer and the trip odometer
R the trip computer
R current consumption and the range
R the navigation instructions in the Navi
menu
R cruise control
R DISTRONIC PLUS
R ASSYST PLUS service interval display226
Menus and submenus
On-board computer and displays