2013 MERCEDES-BENZ GLK-Class steering
[x] Cancel search: steeringPage 197 of 378

Activating the 360° camera using
reverse gear The 360° camera images can be
automatically displayed by engaging reverse
gear.
X Make sure that the SmartKey is in position
2in the ignition lock.
X Make sure that the Activation by R gear setting is active in COMAND, see the
separate COMAND operating instructions.
X To show the 360° camera image: engage
reverse gear.
The COMAND display shows the area
behind the vehicle in split screen:
R vehicle with guide lines
R top view of the vehicle
Selecting the split-screen and full
screen displays X
To switch between split screen views:
switch to the line with the vehicle icons by
sliding 00090002the COMAND controller.
X Turn 000C0002000D the COMAND controller and
select one of the vehicle symbols.
X To switch to full screen mode: select
Full Screen by turning
000C0002000Dthe
COMAND controller and press 000Ato
confirm.
Displays in the COMAND display Important safety notes
!
Objects no tatground level may appear to
be further away than they actually are, e.g.:
R the bumper of a parked vehicle
R the drawbar of a trailer
R the ball coupling of a trailer tow hitch
R the rear section of an HGV
R a slanted post
Use the guidelines only for orientation.
Approach objects no further than the
bottom-most guideline. Top view with picture from the rear view
camera
0002
Symbol for the spli tscree nsetting with
top view and rear view camera image
0003 Yellow guide line at a distance of
approximately 13 ft (4.0 m) from the rear
of the vehicle
0021 Yellow guide line for the vehicle width
including the exterior mirrors, for current
steering wheel angle (dynamic)
0020 Yellow lane marking tires at current
steering wheel angle (dynamic) 001E
Yellow guide line at a distance of
approximately 3 ft (1.0 m) from the rear
of the vehicle
001F Vehicle center axle (marker assistance)
0011 Red guide line at a distance of
approximately 12 in (0.30 m) from the
rear of the vehicle
0012 Bumper
The guide lines are show nwhen the
transmission is in position R.
The distance specifications only apply to
objects that are at ground level. Driving systems
195Driving and parking Z
Page 198 of 378
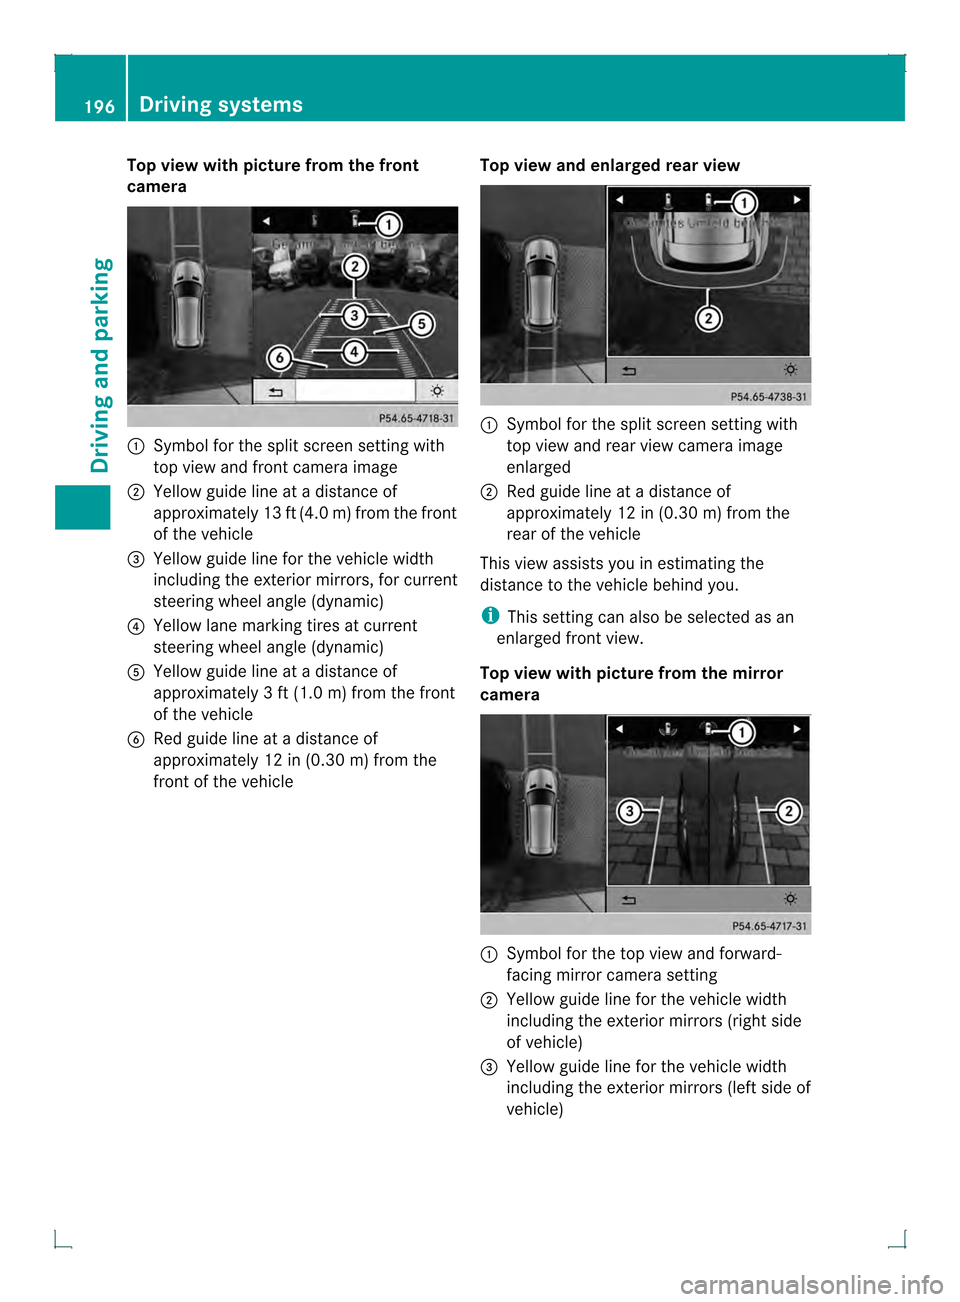
Top view with picture from the front
camera
0002
Symbol for the split screen setting with
top view and front camera image
0003 Yellow guide line at a distance of
approximatel y13 ft (4.0 m) from the front
of the vehicle
0021 Yellow guide line for the vehicle width
including the exterior mirrors, for current
steering wheel angle (dynamic)
0020 Yellow lane marking tires at current
steering wheel angle (dynamic)
001E Yellow guide line at a distance of
approximately 3 ft (1.0 m) fromthe front
of the vehicle
001F Red guide line at a distance of
approximately 12 in (0.30 m) fromthe
front of the vehicle Top view and enlarged rea
rview 0002
Symbol for the split screen setting with
top view and rear view camera image
enlarged
0003 Red guide line at a distance of
approximately 12 in (0.30 m) from the
rear of the vehicle
This view assists you in estimating the
distance to the vehicle behind you.
i This setting can also be selected as an
enlarged fron tview.
Top view with picture from the mirror
camera 0002
Symbol for the top view and forward-
facing mirror camera setting
0003 Yellow guide line for the vehicle width
including the exterior mirrors (right side
of vehicle)
0021 Yellow guide line for the vehicle width
including the exterior mirrors (left side of
vehicle) 196
Driving systemsDriving and parking
Page 199 of 378
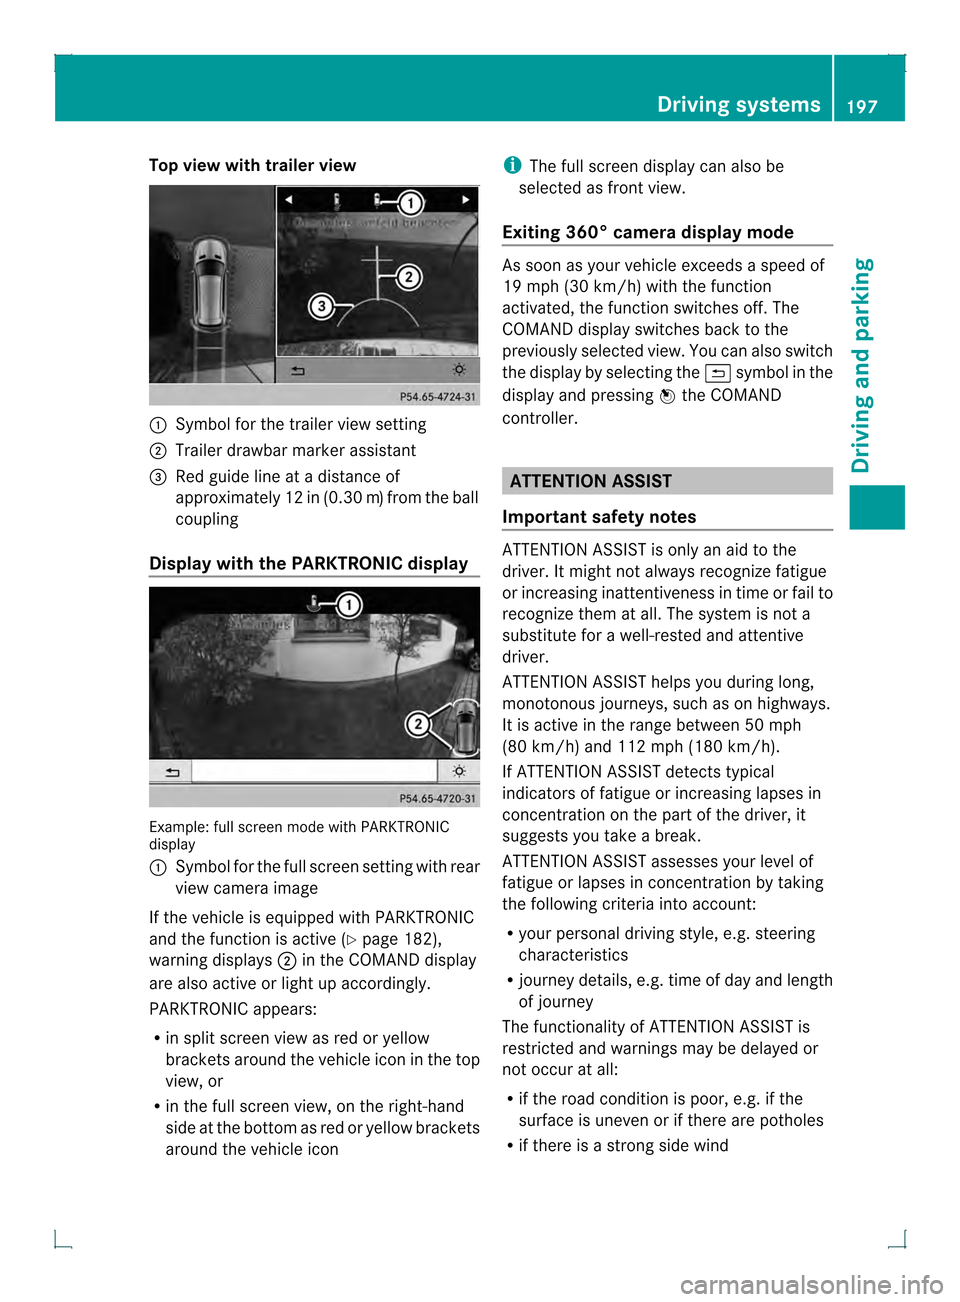
Top view with trailer view
0002
Symbol for the traile rview setting
0003 Trailer drawbar marker assistant
0021 Red guide line at a distanc eof
approximately 12 in (0.30 m)from the ball
coupling
Display with the PARKTRONIC display Example
:full screen mode with PARKTRONIC
display
0002 Symbol for the full screen setting with rear
view camera image
If the vehicle is equipped with PARKTRONIC
and the function is active (Y page 182),
warning displays 0003in the COMAND display
are also active or light up accordingly.
PARKTRONIC appears:
R in split screen view as red or yellow
brackets around the vehicle ico ninthe top
view, or
R in the full screen view, on the right-hand
side at the bottom as red or yellow brackets
around the vehicle icon i
The full screen display can also be
selected as front view.
Exiting 360° camera display mode As soon as your vehicle exceeds a speed of
19 mph (30 km/h) with the function
activated, the function switches off. The
COMAND display switches back to the
previously selected view. You can also switch
the display by selecting the
0008symbol in the
display and pressing 000Athe COMAND
controller. ATTENTION ASSIST
Important safety notes ATTENTION ASSIST is only an aid to the
driver. It might not always recognize fatigue
or increasing inattentiveness in time or fail to
recognize them at all. The system is not a
substitute for a well-rested and attentive
driver.
ATTENTION ASSIST helps you during long,
monotonous journeys, such as on highways.
It is active in the range between 50 mph
(80 km/h) and 112 mph (180 km/h).
If ATTENTION ASSIST detects typical
indicators of fatigue or increasing lapses in
concentration on the part of the driver, it
suggests you take a break.
ATTENTION ASSIST assesses your level of
fatigue or lapses in concentration by taking
the following criteria into account:
R
your personal driving style, e.g. steering
characteristics
R journey details, e.g. time of day and length
of journey
The functionality of ATTENTION ASSIST is
restricted and warnings may be delayed or
not occur at all:
R if the road condition is poor, e.g. if the
surface is uneven or if there are potholes
R if there is a strong side wind Driving systems
197Driving and parking Z
Page 203 of 378
G
WARNING
Lane Keeping Assist may not always clearly
recognize lane markings.
In this case, Lane Keeping Assist may:
R give an unnecessary warning
R not give a warning
There is a risk of an accident.
Always pay particular attention to the traffic
situation and stay in lane, in particular if
warned by Lane Keeping Assist. G
WARNING
The Lane Keeping Assist warning does not
return the vehicle to the original lane. There
is a risk of an accident.
You should always steer, brake or accelerate
yourself, in particular if warned by Lane
Keeping Assist.
The Lane Keeping Assist does not keep the
vehicle in the lane.
The system may be impaired or may not
function if:
R there is poor visibility, e.g. due to
insufficient illumination of the road, or due
to snow, rain, fog or spray
R there is glare, e.g. from oncoming traffic,
the sun or reflections (e.g. when the road
surface is wet)
R the windshield is dirty, fogged up, damaged
or covered, for instance by a sticker, in the
vicinity of the camera
R there are no, several or unclea rlane
markings for a lane, e.g .inareas with road
construction work
R the lane markings are worn away, dark or
covered up, e.g. by dirt or snow
R the distance to the vehicle in front is too
small and the lane markings thus cannot be
detected
R the lane markings change quickly, e.g.
lanes branch off, cross one another or
merge R
the road is narrow and winding
R there are strong shadows cast on the lane
General notes
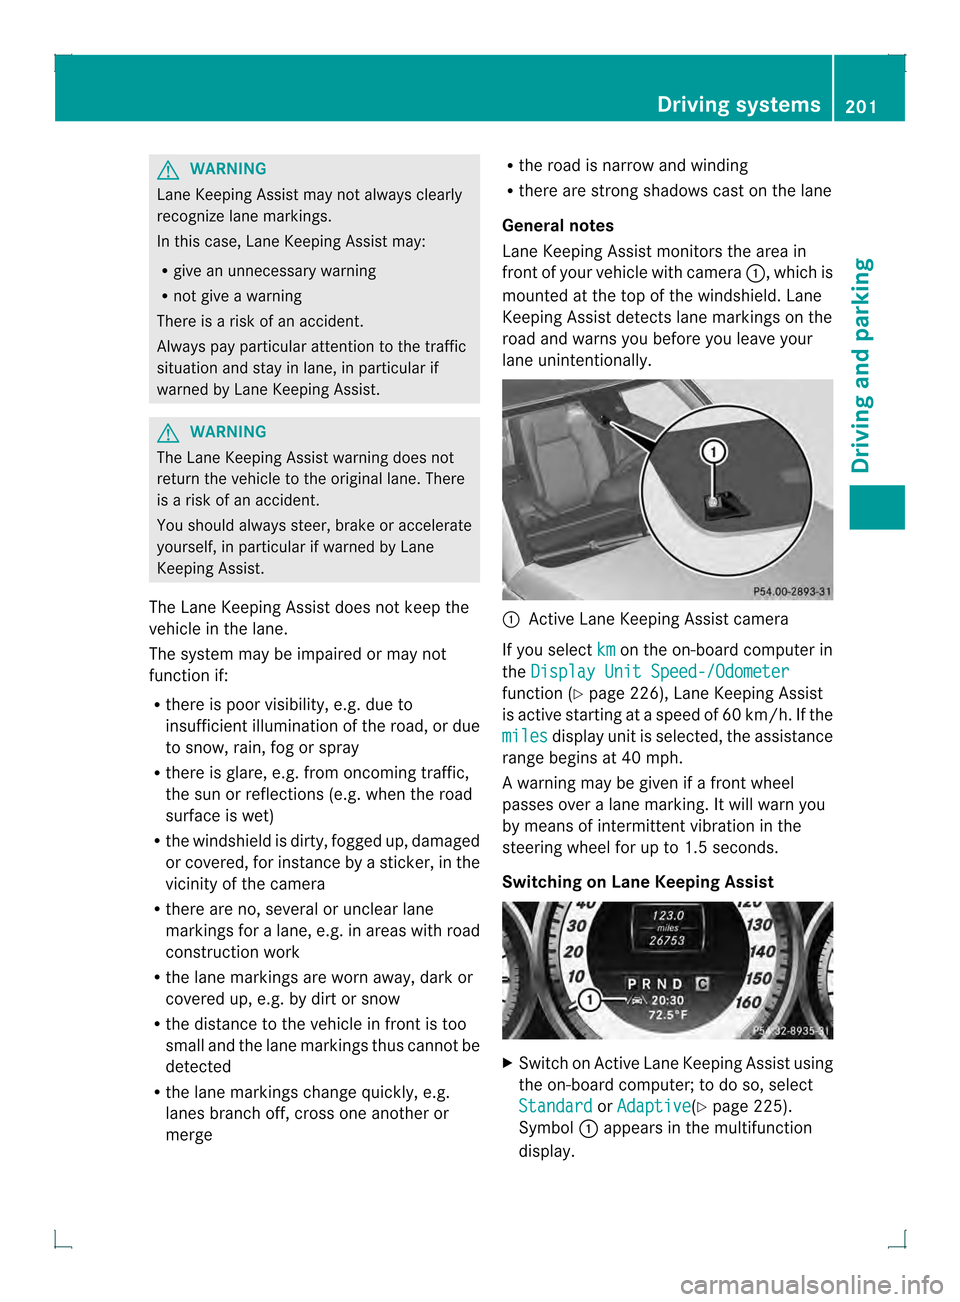
Lane Keeping Assist monitors the area in
front of yourv ehicle with camera 0002, which is
mounted at the top of the windshield. Lane
Keeping Assist detects lane markings on the
road and warns you before you leave your
lane unintentionally. 0002
Active Lane Keeping Assist camera
If you select km on the on-board computer in
the Display Unit Speed-/Odometer function (Y
page 226), Lane Keeping Assist
is active starting at aspeed of 60 km/h. If the
miles display unit is selected, the assistance
range begins at 40 mph.
A warning may be given if a front wheel
passes over a lane marking. It will warn you
by means of intermittent vibration in the
steering wheel for up to 1.5 seconds.
Switching on Lane Keeping Assist X
Switch on Active Lane Keeping Assist using
the on-board computer; to do so, select
Standard or
Adaptive (Y
page 225).
Symbol 0002appears in the multifunction
display. Driving systems
201Driving and parking Z
Page 208 of 378
Important safety notes
If you fail to adapt your driving style, Active
Lane Keeping Assist can neither reduce the
ris kofa ccident nor override the laws of
physics .Lane Keeping Assist canno ttake into
accoun tthe road, traffic and weather
conditions. Lane Keeping Assist is merely an
aid. You are responsible for the distance to
the vehicle in front, for vehicle speed, for
braking in good time and for staying in your
lane.
Active Lane Keeping Assist cannot
continuously keep your vehicle in its lane. G
WARNING
Active Lane Keeping Assist cannot always
clearly detect lane markings.
In such cases, Active Lane Keeping Assist
can:
R give an unnecessary warning and then
make a course-correcting brake application
to the vehicle
R not give a warning or intervene
There is a risk of an accident.
Always pay particular attention to the traffic
situation and keep within the lane, especially
if Active Lane Keeping Assist alerts you.
Terminate the intervention in a non-critical
driving situation.
The system may be impaired or may not
function if:
R there is poor visibility, e.g. due to
insufficient illumination of the road, or due
to snow, rain, fog or spray
R there is glare, e.g. from oncoming traffic,
the sun or reflections (e.g. when the road
surface is wet)
R the windshield is dirty, fogged up, damaged
or covered, for instance by a sticker, in the
vicinity of the camera
R there are no, several or unclear lane
markings for a lane, e.g. in areas with road
construction work
R the lane markings are worn away, dark or
covered up, e.g. by dirt or snow R
the distance to the vehicle in front is too
small and the lane markings thus cannot be
detected
R the lane markings change quickly, e.g.
lanes branch off, cross one another or
merge
R the road is narrow and winding
R there are highly variable shade conditions
on the roadway
R no vehicle is detected in the adjacent lane
and there are broken lane markings
Warning vibration in the steering wheel
A warning may be given if a front wheel
passes over a lane marking. It will warn you
by means of intermittent vibration in the
steering wheel for up to 1.5 seconds.
In order that you are warned only when
necessary and in good time if you cross the
lane marking, the system recognizes certain
conditions and warns you accordingly.
The warning vibration occurs earlier if:
R you approach the outer lane marking on a
bend.
R the road has very wide lanes, e.g. a
highway.
R the system recognizes solid lane markings.
The warning vibration occurs later if:
R the road has narrow lanes.
R you cut the corner on a bend.
Lane-correcting brake application G
WARNING
A lane-correcting brake application cannot
always bring the vehicle back into the original
lane. There is a risk of an accident.
Always steer, brake or accelerate yourself,
especially if Active Lane Keeping Assist warns
you or makes a lane-correcting brake
application. G
WARNING
Active Lane Keeping Assist does not detect
traffic conditions or road users. In very rare
cases, the system may make an inappropriate 206
Driving systemsDriving and parking
Page 209 of 378
brake application, e.g. after intentionally
driving over a solid lane marking. There is a
risk of an accident.
An inappropriate brake application may be
interrupted at any time if you steer slightly in
the opposite direction. Always make sure that
there is sufficien tdistance on the side for
other traffic or obstacles.
If you leave your lane, under certain
circumstances the vehicle will brake briefly
on one side. This is mean tto assist you in
bringing the vehicle back to the original lane.
This function is available in the range between
40 mph and 120 mph (60 km/h and
200 km/h).
A lane-correcting brake application can only
be made after driving over a solid,
recognizable lane marking. Before this, a
warning must be given by means of
intermittent vibration in the steering wheel.
In addition, a lane with lane markings on both
sides must be recognized. The brake
application also slightly reduces vehicle
speed.
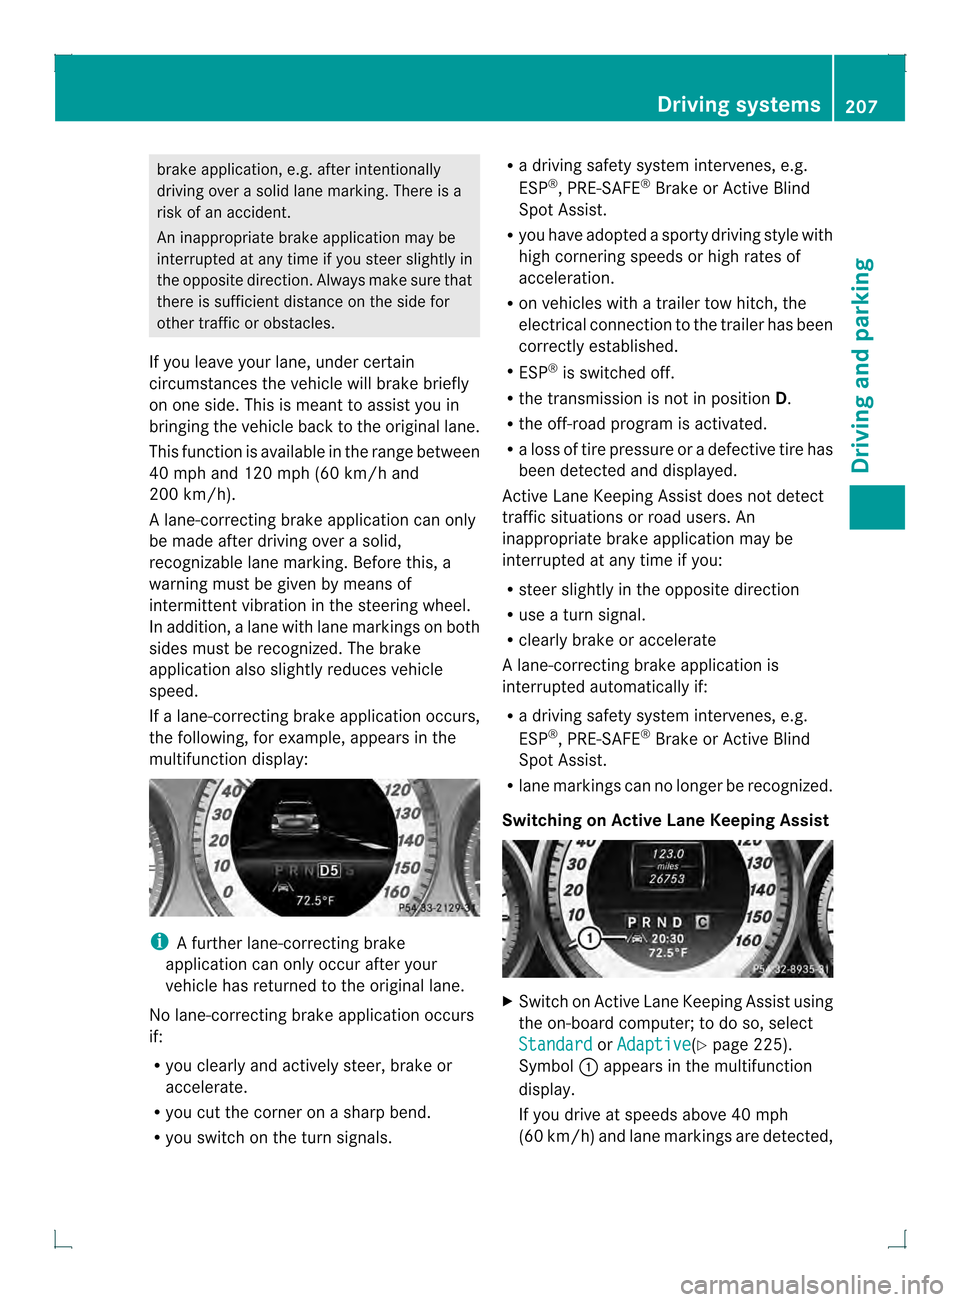
If a lane-correcting brake application occurs,
the following, for example, appears in the
multifunction display: i
A further lane-correcting brake
application can only occur after your
vehicle has returned to the original lane.
No lane-correcting brake application occurs
if:
R you clearly and actively steer, brake or
accelerate.
R you cut the corner on a sharp bend.
R you switch on the turn signals. R
a driving safety system intervenes, e.g.
ESP ®
, PRE-SAFE ®
Brake or Active Blind
Spot Assist.
R you have adopted a sporty driving style with
high cornering speeds or high rates of
acceleration.
R on vehicles with a trailer tow hitch, the
electrical connection to the trailer has been
correctly established.
R ESP ®
is switched off.
R the transmission is not in position D.
R the off-road program is activated.
R a loss of tire pressure or a defective tire has
been detected and displayed.
Active Lane Keeping Assist does not detect
traffic situations or road users. An
inappropriate brake application may be
interrupted at any time if you:
R steer slightly in the opposite direction
R use a turn signal.
R clearly brake or accelerate
Al ane-correcting brake applicatio nis
interrupted automatically if:
R a driving safety system intervenes, e.g.
ESP ®
, PRE-SAFE ®
Brake or Active Blind
Spot Assist.
R lane markings can no longer be recognized.
Switching on Active Lane Keeping Assist X
Switch on Active Lane Keeping Assist using
the on-board computer; to do so, select
Standard or
Adaptive (Y
page 225).
Symbol 0002appears in the multifunction
display.
If you drive at speeds above 40 mph
(60 km/h) and lane markings are detected, Driving systems
207Driving and parking Z
Page 211 of 378

The vehicle/trailer combination:
R
is heavier
R is restricted in its acceleration and
gradient-climbing capability
R has an increased braking distance
R is affected more by strong crosswinds
R demands more sensitive steering
R has a larger turning radius
This could impair the handling
characteristics.
When towing a trailer, always adjust your
speed to the curren troad and weather
conditions. Do not exceed the maximum
permissible speed for your vehicle/trailer
combination.
General notes R
Do not exceed the legally prescribed
maximum speed for vehicle/trailer
combinations in the relevant country.
This lowers the risk of an accident.
R Only install an approved trailer coupling on
your vehicle.
Further information on availability and on
installation is available from any authorized
Mercedes-Benz Center.
R The bumpers of your vehicle are not
suitable for installing detachable trailer
couplings.
R Do not install hired trailer couplings or
other detachable trailer couplings on the
bumpers of your vehicle.
R To reduce the risk of damage to the ball
coupling, remove it from the ball coupling
recess when not in use.
i When towing a trailer, set the tire
pressure on the rear axle of the towing
vehicle for a maximum load; see the tire
pressure table in the fuel filler flap
(Y page 349).
You will find installation dimensions and loads
in the "Technical data" section
(Y page 374). Missing values for the maximum noseweight
of the trailer drawbar on the ball coupling
were unavailable at the time of going to print.
However, the actual noseweight must not
exceed the value given on the identification
plates of the trailer tow hitch and trailer. The
lowest weight applies.
Please note that when towing a trailer,
PARKTRONIC (Y page 180) is only available
with limitations or not at all.
i On vehicles without level control, the
height of the ball coupling will alter
according to the load placed on the vehicle.
If necessary, use a trailer with a height-
adjustable drawbar.
Driving tips i
Observe the notes on ESP ®
trailer
stabilization (Y page 69).
The maximum permissible speed for vehicle/
trailer combinations depends on the type of
trailer. Before beginning the journey, check
the trailer's documents to see what the
maximum permissible speed is. Observe the
legally prescribed maximum speed in the
relevant country.
For certain Mercedes-Benz vehicles, the
maximum permissible rear axle load is
increased when towing a trailer. Refer to the
"Technical data" section to find out whether
this applies to your vehicle.
If you utilize any of the added maximum rear
axle load when towing a trailer, the vehicle/
trailer combination may not exceed a
maximum speed of 60 mph (100 km/h) for
reasons concerning the operating permit.
This also applies in countries in which the
permissible maximum speed for vehicle/
trailer combinations is above 60 mph
(100 km/h).
When towing a trailer, your vehicle's handling
characteristics will be different in comparison
with when driving without atrailer.
On long and steep downhill gradients, you
must select shift range 1,2or 3in good time. Towing
atrailer
209Driving an d parking Z
Page 213 of 378

Leave enough play in the chains to make
tight cornering possible.
R a separate brake system for certain types
of trailer.
R a safety switch for braked trailers. Check
the specifi clegal requirements applicable
to your state.
If the trailer detaches from the towing
vehicle, the safety switch applies the
trailer's brakes.
! Do not connectt he trailer's brake system
(if featured) to the hydraulic brake system
of the towing vehicle, as the latter is
equipped with an anti-lock brake system.
Doing so will result in a loss of function of
the brake systems of both the vehicle and
the trailer.
i The vehicle's wiring harness features a
connection to the brake indicator lamp.
X Make sure that the automatic transmission
is set to position P.
X Apply the vehicle's parking brake.
X Close all doors and the tailgate.
X Couple up the trailer.
X Establish all electrical connections. Towing
atrailer
There are numerous legal requirements
concerning the towing of a trailer, e.g .speed
restrictions. Make sure that your car/trailer
combination complies with the local
regulations:
R in your place of residence
R in the location to which you are driving
The police and local authorities can provide
reliable information.
Observe the following when towing a trailer:
R To gain driving experience and to become
accustomed to the new handling characteristics, you should practice the
following in a traffic-free location:
-
cornering
- stopping
- backing up
R Before driving, check:
-the trailer tow hitch
- the safety switch for braked trailers
- the safety chains
- electrical connections
- the lights
- the wheels
R Adjust the exterior mirrors to provide an
unobstructed view of the rear section of the
trailer.
R If the trailer has electronically controlled
brakes, pull away carefully. Brake manually
using the brake controller and check
whether the brakes function correctly.
R Secure any objects on the trailer to prevent
the cargo from slipping when the vehicle is
in motion.
R When you couple up a trailer, chec kat
regular intervals that the load is firmly
secured. If the trailer is equipped with
trailer lights and brakes, check the trailer
to ensure that these are working.
R Bear in mind that the handling will be less
stable when towing a trailer than when
driving without one. Avoid sudden steering
movements.
R The vehicle/trailer combination is heavier,
accelerates more slowly, has a decreased
gradient climbing capability and a longer
braking distance.
It is more susceptible to side winds and
requires more careful steering.
R If possible, avoid abrupt braking. Depress
the brake pedal moderately at first, so that
the trailer can activate its own brakes .Then
increase the pressure on the brake pedal.
R If the automatic transmission continues to
shift back and forth between two gears Towing
atrailer
211Driving an d parking Z