Page 225 of 274

sliding
005B0064and turning 0082005B0083the COMAND
controller and press 00A1to confirm.
The options list appears. The 003Bdot
indicates the option selected.
X Select an option and press 00A1to confirm.
The following options are available:
R Normal Track Sequence Normal Track Sequence
Normal track sequence: you hear the
tracks in their normal order (e.g. numerical
or alphabetical).
R Random Medium Random Medium
All the tracks on the medium are played in
random order.
R Random Track List Random Track List
The tracks in the currently active category
or folder, including any subfolders, are
played in random order. MP3 player instructions
General information Up to 30,000 tracks per medium are
supported.
You can speed up some functions and
improve the search results by:
R making sure the names of tracks, albums
and artists, for example, are written the
same way
R labeling albums featuring various artists as
“compilations”
i Multiple entries of tracks in playlists are
filtered out for some players.
Data formats MP3 and WMA are supported as data formats
with fixed and variable bit rates (up to
320 kbits/s).
Special considerations when using MP3
players
Up to eight directory levels with up to 1,000
tracks per directory are supported. Do not use USB extension leads or adapters.
They can impair functionality.
i
DRM (Digital Rights Management)
protected files are not supported by the
Media Interface. Audio AUX mode
Notes on audio AUX mode
G
WARNING
External audio sources may have different
volumes, which can mean that system
messages such as traffic announcements and
navigation system announcements are much
louder. If necessary, please deactivate the
system messages or adjust their volume
manually.
You can connect an external audio source
(AUX) to COMAND. You will find the socket in
the center console stowage compartment.
If COMAND is equipped with the Media
Interface, external audio sources are
connected using the cable set provided. An
AUX socket is not provided. The connections
for the Media Interface are located in the
stowage compartment in the center console.
i You will find further information online at
http://www.mbusa-mobile.com. Or call
the Mercedes-Benz Customer Assistance
Center at
1-800-FOR-MERCedes(1-800-367-6372)
(for the USA) or Customer Relations at
1-800-387-0100 (for Canada). Activating audio AUX mode
Switching modes using the function
button The external device is connected to the audio
AUX in.
X
Press the 003Afunction button one or more
times. Audio AUX mode
223Audio Z
Page 226 of 274

By pressing the function button repeatedly,
you can change the operating mode in the
following order:
R audio CD/DVD/MP3 (disc)
R memory card mode
R MUSIC REGISTER
R USB storage device
R Media Interface or audio AUX mode
R Bluetooth ®
audio mode
Switching modes via the audio menu When you connect an external audio source,
audio AUX is not selected automatically.
X Select Audio Audioin the main function bar by
sliding 00A0005Band turning 0082005B0083the COMAND
controller and press 00A1to confirm.
If AUX mode was the last mode selected, it
will now be active.
If another audio source is switched on, you
can now switch to audio AUX mode in the
audio menu.
X Select Audio
Audio using00A0005Band press 00A1to
confirm.
The audio menu appears.
X Select Aux
Aux using 0082005B0083and press 00A1to
confirm.
The audio AUX menu appears. The medium
in the external audio source is played if the
source is connected and playback
selected. Please see the respective operating
instructions for how to operate the external
audio source. Information on:
R
volume settings (Y page 27)
R sound settings (Y page 28) Increasing the volume on COMAND
X
Select Volume Volume in the AUX display by turning
0082005B0083 the COMAND controller and press
00A1 to confirm.
A menu appears. The 003Bdot indicates the
current setting.
X Select Standard
Standard orBoost
Boost and press 00A1to
confirm.
Standard Standard : the volume of the external audio
source is adjusted to a standard value.
Boost Boost: the volume of the external audio
source is raised by approximately 10 dB.
A device which is connected as an external
audio source may seem quieter or louder in
the vehicle, or the usual maximum volume
cannot be achieved. On some devices, it is
possible to adjust the volume separately. In
this case, start at a medium volume and
increase it gradually. This enables you to
determine whether the system is able to play
the music at high volume without distorting
it. 224
Audio AUX modeAudio
Page 227 of 274
Your COMAND equipment
................226
General information .........................226
Basic settings .................................... 226
Video DVD mode ............................... 226
AUX video mode ................................ 232
Picture viewer ................................... 233 225Video
Page 228 of 274

Your COMAND equipment
These operating instructions describe all the
standard and optional equipment for your
COMAND system, as available at the time of
going to print. Country-specific differences
are possible. Please note that your COMAND
system may not be equipped with all the
features described. General information
Automatic picture shutoff
The video image is shown only when the
transmission selector lever is in position P.
If the transmission selector lever is moved out
of position P, theIn order not to
In order not to
distract you from the traffic distract you from the traffic
situation, situation, the
thepicture
picture is
isfaded
faded out
out
while the vehicle is in motion
message appears
As soon as the selector lever of the
transmission is returned to position P, the
video image is shown. Basic settings
Adjusting the brightness, contrast or
color
X In video DVD or video AUX mode, press
00A1 the COMAND controller and show the
menu.
X Select DVD-V
DVD-V by sliding 005B0064and turning
0082005B0083 the COMAND controller and press
00A1 to confirm.
A menu appears.
X Select Brightness Brightness ,Contrast
Contrast orColor
Color by
turning 0082005B0083the COMAND controller and
press 00A1to confirm. Changing the picture format
X Press 00A1the COMAND controller to show
the menu.
X Select DVD-V
DVD-Vby sliding 005B0064and turning
0082005B the COMAND controller and press
00A1 to confirm.
A menu appears.
X Select 16:9 Optimized
16:9 Optimized ,4:3
4:3 or
Widescreen
Widescreen and press00A1to confirm.
The dot in front of the entry indicates the
currently selected format.
X Select a setting by turning 0082005Bthe
COMAND controller and press 00A1to
confirm. Video DVD mode
Important safety notes
G
WARNING
COMAND is classified as a Class 1 laser
product. Never open the housing. There is a
risk of damage to the eyes due to exposure to
invisible laser radiation if you open the casing,
or if the casing is faulty or damaged.
COMAND does not contain any parts that can
be serviced by the user. For safety reasons,
all maintenance work must be carried out by
qualified aftersales technicians. G
WARNING
Only when the vehicle is stationary should
you:
R load a disc
R eject a disc
There is a risk of being distracted from the
road and traffic conditions if this is done while
the vehicle is in motion. Notes on discs
! Do not affix stickers or labels to the discs.
They could peel off and damage COMAND. 226
Video DVD
modeVideo
Page 229 of 274

Stickers can cause the disc to bend, which
can result in read errors and disc
recognition problems.
! COMAND is designed to play discs that
comply with the EN 60908 standard.
Therefore, you can only use discs with a
maximum thickness of 1.3 mm.
If you insert thicker discs, e.g. those that
contain data on both sides (DVD on one
side and audio data on the other), they
cannot be ejected and can damage the
device.
Only use round discs with a diameter of
12 cm. Do not use discs with a diameter of
8 cm, even with an adapter.
Playback problems may occur when playing
copied discs. There are a large variety of
discs, DVD authoring software, writing
software and writers available. This variety
means that there is no guarantee that the
system will be able to play discs that you have
copied yourself. DVD playback conditions
If video DVDs do not conform to the NTSC or
PAL TV standards, they may create picture,
sound or other problems during playback.
COMAND is capable of playing back video
DVDs produced according to the following
standards:
R Region code 1 or region code 0 (no region
code)
R PAL or NTSC standard
You will generally find the relevant details
either on the DVD itself or on the DVD case.
i If you insert a video DVD with a different
region code, you will see a message to this
effect.
i COMAND is set to region code 1 at the
factory. This setting can be changed at an
authorized Mercedes-Benz Center. This will
allow you to play video DVDs with a
different region code, provided that they are produced in accordance with the PAL
or NTSC standard. The region code can be
changed up to five times. Function restrictions
Depending on the DVD, it is possible that
certain functions or actions will be
temporarily blocked or may not function at all.
As soon as you try to activate these functions
or actions, you will see the 0050symbol in the
display. Inserting and removing DVDs
X Proceed as described in the "Inserting and
ejecting CDs and DVDs" section
(Y page 192). Switching to video DVD mode
Switching on automatically X
Single DVD drive: insert a video DVD.
COMAND loads the medium inserted and
starts to play it.
X DVD changer: insert a video DVD.
X Press 003A.
or
X Press the 0041back button.
COMAND loads the medium inserted and
starts to play it. Video DVD mode
227Video Z
Page 230 of 274

Switching modes using the function
button
X
Press the 003Afunction button one or more
times.
COMAND switches to the previous disc
operating mode.
By pressing the function button repeatedly,
you can change the operating mode in the
following order:
R audio CD/DVD / video DVD/MP3 in the
DVD changer or DVD single drive (disc
mode)
audio CD/DVD, video DVD or MP3 disc in
the DVD changer
R memory card mode
R MUSIC REGISTER
R USB storage device
R Media Interface or audio AUX mode
R Bluetooth ®
audio mode
X DVD changer: selectMedia
Media orChanger Changer by
sliding 005B0064and turning 0082005B0083the COMAND
controller and press 00A1to confirm.
Single DVD drive: selectMedia
Media by sliding
005B0064 and turning 0082005B0083the COMAND
controller and press 00A1to confirm.
X Select a ývideo DVD from the media list
(Y page 230).
Switching on with the video menu X
Select Video
Videoin the main function bar by
sliding 00A0005Band turning 0082005B0083the COMAND
controller and press 00A1to confirm.
Video DVD mode is switched on. Hiding/showing the navigation menu
X To show: in DVD video mode, slide 00A0005B0064
the COMAND controller.
X To hide: slide00A0005B0064 the COMAND
controller.
or
X Wait for approximately eight seconds. Navigation menu displayed
0043
Type of data medium
0044 Current title
0087 Current scene
0085 Track time
0083 To show the menu
i This function is not available while the
DVD's own menu is being displayed. Showing/hiding the menu
X To show: in full-screen DVD video mode,
press 00A1the COMAND controller.
or
X Select Menu Menuwhile the navigation menu is
shown and press 00A1to confirm.
X To hide: slide00A0005Bthe COMAND controller
and confirm Full Screen
Full Screen by pressing00A1. Menu shown
0043
Video DVD options
0044 Pause function
0087 Stop function 228
Video DVD modeVideo
Page 231 of 274

0085
Media selection
0083 sound settings
i This function is not available while the
DVD's own menu is being displayed. Fast forwarding/rewinding
X In full-screen DVD video mode, slide 009E005B009F
and hold the COMAND controller until the
desired position is reached.
or
X Press and hold the 0048or0049 button
until the desired position is reached.
You see the navigation menu. Stop function
X Show the menu (Y page 228).
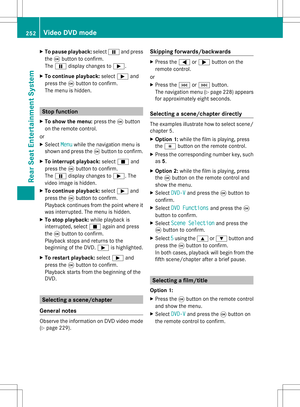
X To interrupt playback: select00E5by
turning 0082005B0083the COMAND controller and
press 00A1to confirm.
The 00D8 display changes to 00D9. The
video image is hidden.
X To continue playback: select00D9and
press 00A1to confirm.
Playback continues from the point where it
was interrupted.
X To stop playback: while playback is
interrupted, select 00E5again and press
00A1 to confirm.
or
X During playback, confirm 00E5by pressing
00A1 twice in rapid succession.
00D9 is selected.
X To restart playback: confirm00D9by
pressing 00A1.
Playback restarts from the beginning. Pause function
X Show the menu (Y page 228).
X To pause playback: select00D8by
turning 0082005B0083the COMAND controller and
press 00A1to confirm.
The 00D8 display changes to 00D9.
X To continue playback: select00D9and
press 00A1to confirm.
The menu is hidden. Selecting a scene/chapter
If the film is divided into scenes or chapters,
you can select them directly while the film is
running, or skip forwards step by step. Some
DVDs do not permit this at certain points (e.g.
during the opening credits).
It may also be possible to select the scene/
chapter from within the menu stored on the
DVD.
X To skip forwards or back: in full screen
mode, turn 0082005B0083the COMAND controller.
or
X Slide 009E005B009F the COMAND controller
or
X Press the 0048or0049 button on the
control panel.
The navigation menu (Y page 228) appears
for approximately eight seconds. Selecting a film/title
DVD function menu Video DVD mode
229Video Z
Page 232 of 274

This function is only available if the DVD is
divided into several films/titles. If the DVD
contains several films, these can be selected
directly. A film can be selected either when
the DVD is being played back or when it is
stopped.
The film can also be selected from the menu
on the DVD itself.
X Show the menu (Y page 228).
X Select DVD-Video
DVD-Video by turning0082005B0083the
COMAND controller and press 00A1to
confirm.
X Select DVD Functions
DVD Functions and press00A1to
confirm.
A menu appears.
X Select Title Selection Title Selection by turning0082005B0083
the COMAND controller and press 00A1to
confirm.
X Select a film/title and press 00A1to confirm. Selecting a video DVD from the media
list
X Show the menu (Y page 228).
X Select Changer
Changer orMedia
Media by sliding 005B0064and
turning 0082005B0083the COMAND controller and
press 00A1to confirm.
The media list appears. The 003Bdot indicates
the current medium being played. Video
DVDs are indicated by the ýicon.
X Equipped with a DVD changer: press00A1
the COMAND controller to display all
magazine trays.
X Select a video DVD by turning 0082005B0083the
COMAND controller and press 00A1to
confirm.
COMAND loads the video DVD and begins
playing it.
i If you select a CD, an audio DVD or an
MP3 medium, you switch to the respective
audio mode.
Further information on the media list
(Y page 197). DVD menu
Calling up the DVD menu The DVD menu is the menu stored on the DVD
itself. It is structured in various ways
according to the individual DVD and permits
certain actions and settings.
In the case of multi-language DVDs, for
example, you can change the DVD language
in the DVD menu.
X Show the menu (Y page 228).
X Select DVD-Video DVD-Video in the menu by turning
0082005B0083 the COMAND controller and press
00A1 to confirm.
X Select DVD Functions
DVD Functions and press00A1to
confirm.
X Select Menu
Menuand press 00A1to confirm.
The DVD menu appears.
Selecting menu items in the DVD menu X
Show the DVD menu (Y page 230).
X Select a menu item by sliding 00A0005B0064the
COMAND controller and press 00A1to
confirm.
or
X Select a menu item by sliding 009E005B009Fthe
COMAND controller and press 00A1to
confirm.
The menu appears.
X To reconfirm your selection: confirm
Select
Select by pressing 00A1.
COMAND carries out the action. 230
Video DVD modeVideo