2013 MERCEDES-BENZ G-CLASS SUV check engine
[x] Cancel search: check enginePage 291 of 364
Opening the hood
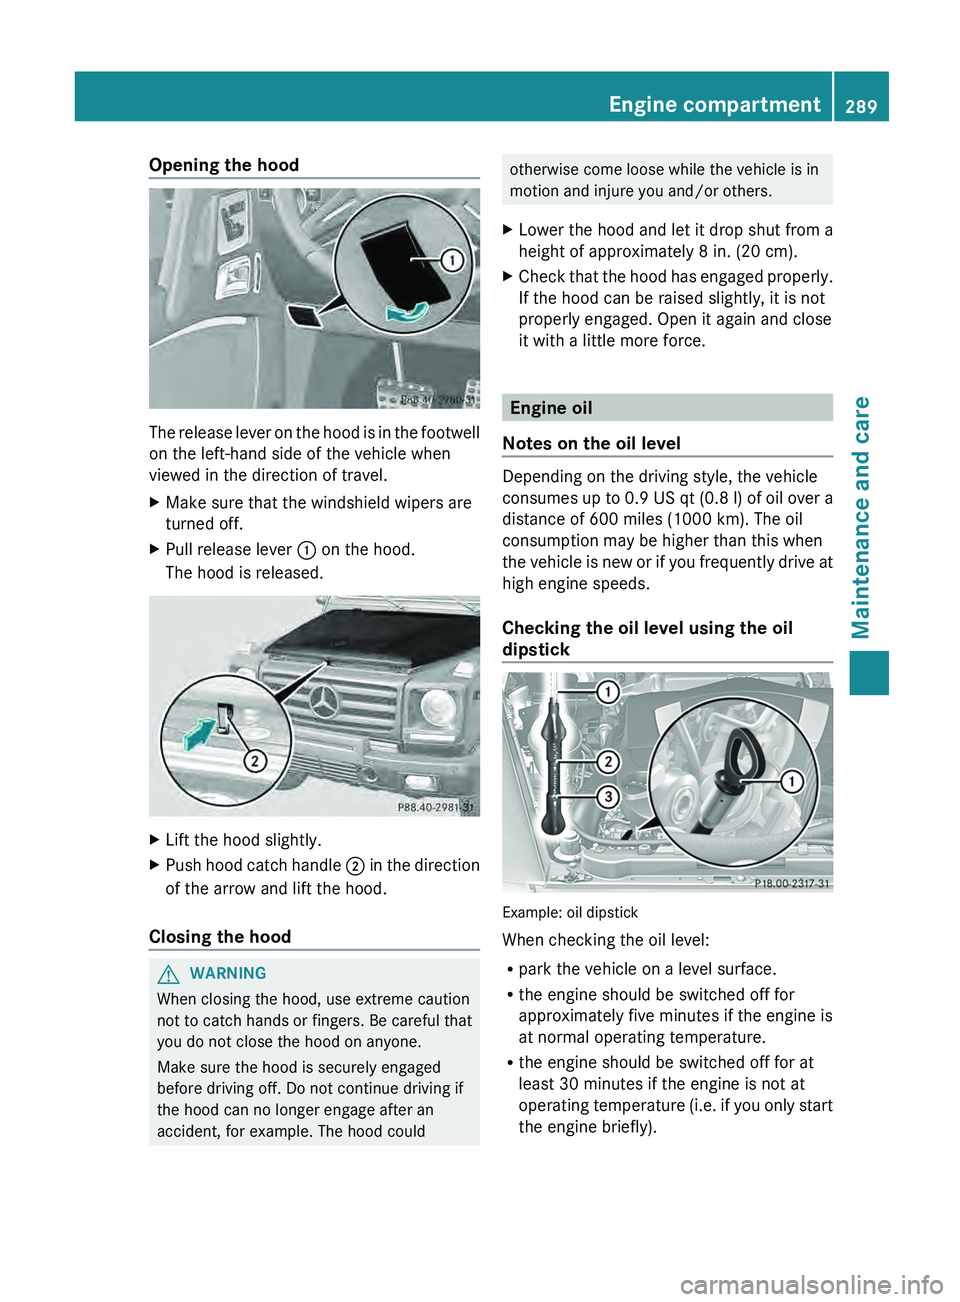
The release lever on the hood is in the footwell
on the left-hand side of the vehicle when
viewed in the direction of travel.
X
Make sure that the windshield wipers are
turned off.
X Pull release lever 0043 on the hood.
The hood is released. X
Lift the hood slightly.
X Push hood catch handle 0044 in the direction
of the arrow and lift the hood.
Closing the hood G
WARNING
When closing the hood, use extreme caution
not to catch hands or fingers. Be careful that
you do not close the hood on anyone.
Make sure the hood is securely engaged
before driving off. Do not continue driving if
the hood can no longer engage after an
accident, for example. The hood could otherwise come loose while the vehicle is in
motion and injure you and/or others.
X Lower the hood and let it drop shut from a
height of approximately 8 in. (20 cm).
X Check that
the hood has engaged properly.
If the hood can be raised slightly, it is not
properly engaged. Open it again and close
it with a little more force. Engine oil
Notes on the oil level Depending on the driving style, the vehicle
consumes up to
0.9
US qt (0.8 l) of oil over a
distance of 600 miles (1000 km). The oil
consumption may be higher than this when
the vehicle is new or if you frequently drive at
high engine speeds.
Checking the oil level using the oil
dipstick Example: oil dipstick
When checking the oil level:
R
park the vehicle on a level surface.
R the engine should be switched off for
approximately five minutes if the engine is
at normal operating temperature.
R the engine should be switched off for at
least 30 minutes if the engine is not at
operating temperature
(i.e. if
you only start
the engine briefly). Engine compartment
289
Maintenance and care Z
Page 292 of 364
X
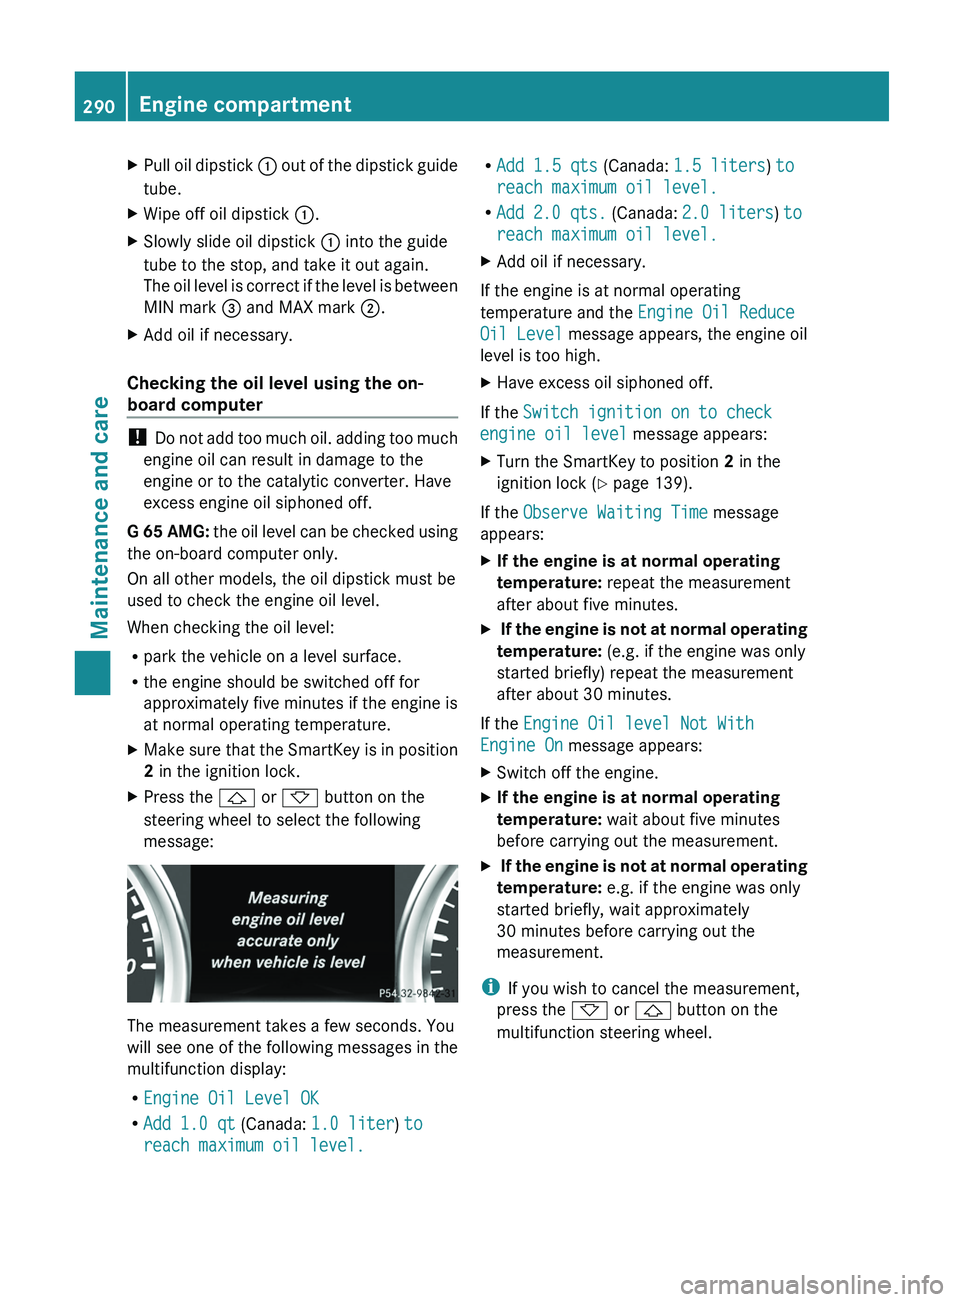
Pull oil dipstick 0043 out of the dipstick guide
tube.
X Wipe off oil dipstick 0043.
X Slowly slide oil dipstick 0043 into the guide
tube to the stop, and take it out again.
The oil level
is
correct if the level is between
MIN mark 0087 and MAX mark 0044.
X Add oil if necessary.
Checking the oil level using the on-
board computer !
Do not add too
much oil. adding too much
engine oil can result in damage to the
engine or to the catalytic converter. Have
excess engine oil siphoned off.
G 65 AMG: the oil level can be checked using
the on-board computer only.
On all other models, the oil dipstick must be
used to check the engine oil level.
When checking the oil level:
R park the vehicle on a level surface.
R the engine should be switched off for
approximately five minutes if the engine is
at normal operating temperature.
X Make sure that the SmartKey is in position
2 in the ignition lock.
X Press the 0041 or 0068 button on the
steering wheel to select the following
message: The measurement takes a few seconds. You
will see one
of
the following messages in the
multifunction display:
R Engine Oil Level OK
R Add 1.0 qt (Canada: 1.0 liter) to
reach maximum oil level. R
Add 1.5 qts (Canada: 1.5 liters) to
reach maximum oil level.
R Add 2.0 qts.
(Canada: 2.0 liters ) to
reach maximum oil level.
X Add oil if necessary.
If the engine is at normal operating
temperature and the Engine Oil Reduce
Oil Level message appears, the engine oil
level is too high.
X Have excess oil siphoned off.
If the Switch ignition on to check
engine oil level
message appears:
X Turn the SmartKey to position 2 in the
ignition lock (Y page 139).
If the Observe Waiting Time message
appears:
X If the engine is at normal operating
temperature: repeat the measurement
after about five minutes.
X If the engine is not at normal operating
temperature: (e.g. if the engine was only
started briefly) repeat the measurement
after about 30 minutes.
If the Engine Oil level Not With
Engine On message appears:
X Switch off the engine.
X If the engine is at normal operating
temperature: wait about five minutes
before carrying out the measurement.
X If the engine is not at normal operating
temperature: e.g. if the engine was only
started briefly, wait approximately
30 minutes before carrying out the
measurement.
i If you wish to cancel the measurement,
press the 0068 or 0041 button on the
multifunction steering wheel. 290
Engine compartment
Maintenance and care
Page 293 of 364
Adding engine oil
H
Environmental note
When adding oil, take care not to spill any. If
oil enters the soil or waterways, it is harmful
to the environment.
! Only use engine oils and oil filters that
have been approved for vehicles with a
service system. You can
obtain a list of the
engine oils and oil filters tested and
approved in accordance with the
Mercedes-Benz Specifications for Service
Products at any Mercedes-Benz Service
center.
Damage to the engine or exhaust system is
caused by the following:
R using engine oils and oil filters that have
not been specifically approved for the
service system
R replacing engine oil and oil filters after
the interval for replacement specified by
the service system has been exceeded
R using engine oil additives.
! Do not add too much oil. If the oil level is
above the "max" mark on the dipstick, too
much oil has been added. This can lead to
damage to the engine or the catalytic
converter. Have excess oil siphoned off. Example: engine oil cap
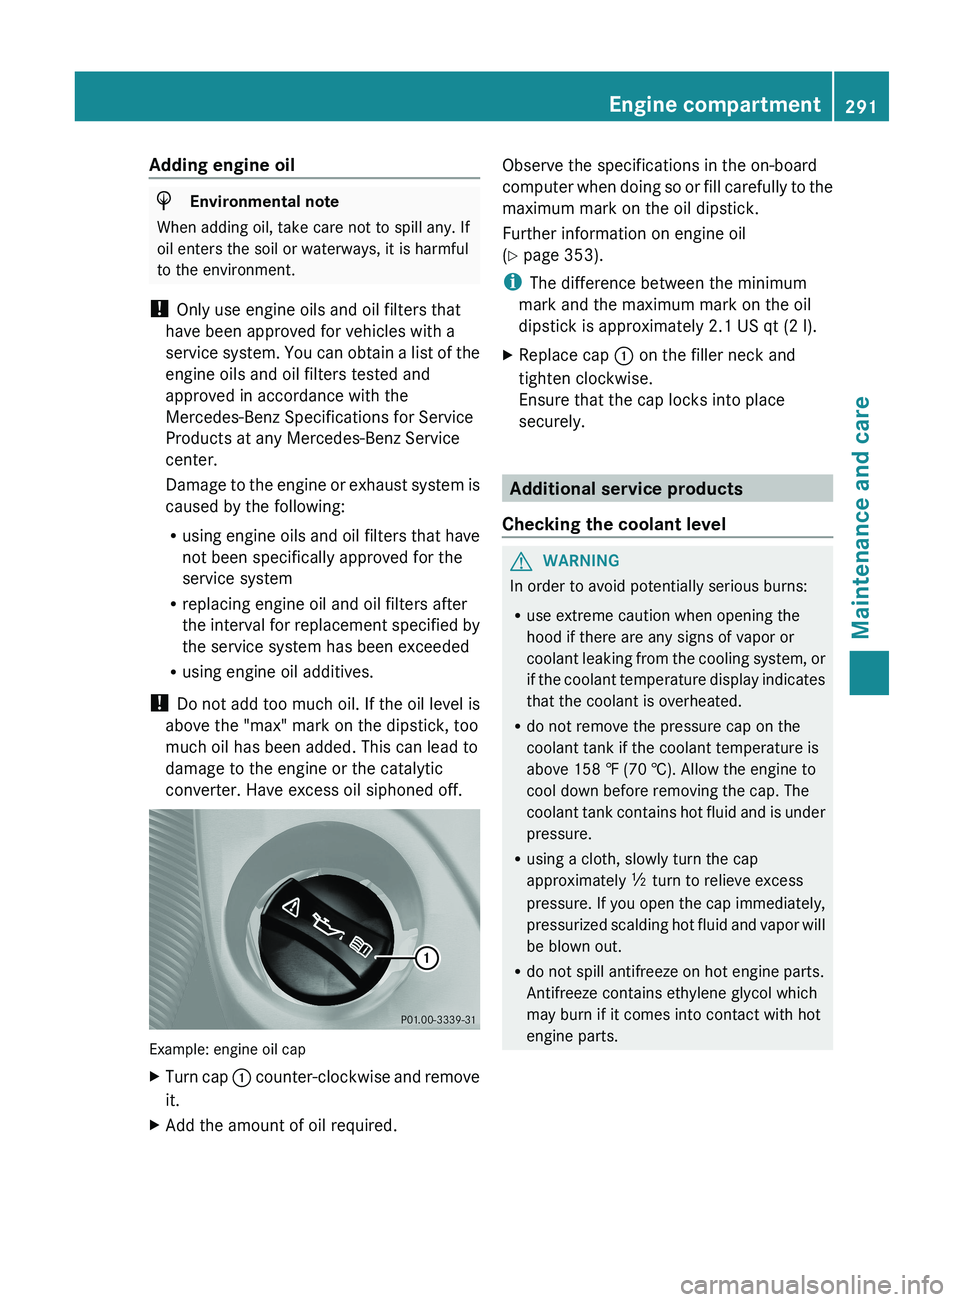
X
Turn cap 0043 counter-clockwise and remove
it.
X Add the amount of oil required. Observe the specifications in the on-board
computer
when doing
so
or fill carefully to the
maximum mark on the oil dipstick.
Further information on engine oil
(Y page 353).
i The difference between the minimum
mark and the maximum mark on the oil
dipstick is approximately 2.1 US qt (2 l).
X Replace cap 0043 on the filler neck and
tighten clockwise.
Ensure that the cap locks into place
securely. Additional service products
Checking the coolant level G
WARNING
In order to avoid potentially serious burns:
R use extreme caution when opening the
hood if there are any signs of vapor or
coolant leaking from the
cooling system, or
if the coolant temperature display indicates
that the coolant is overheated.
R do not remove the pressure cap on the
coolant tank if the coolant temperature is
above 158 ‡ (70 †). Allow the engine to
cool down before removing the cap. The
coolant tank contains hot fluid and is under
pressure.
R using a cloth, slowly turn the cap
approximately 00C5 turn to relieve excess
pressure. If you open the cap immediately,
pressurized scalding hot fluid and vapor will
be blown out.
R do not spill antifreeze on hot engine parts.
Antifreeze contains ethylene glycol which
may burn if it comes into contact with hot
engine parts. Engine compartment
291
Maintenance and care Z
Page 294 of 364
X
Park the vehicle on a level surface.
Only check the coolant level when the
vehicle is on a
level surface and the engine
has cooled down.
X Turn the SmartKey to position
2 (Y page 139) in the ignition lock.
X Check the coolant temperature display in
the instrument cluster.
The coolant temperature must be below
158 ‡ (70 †).
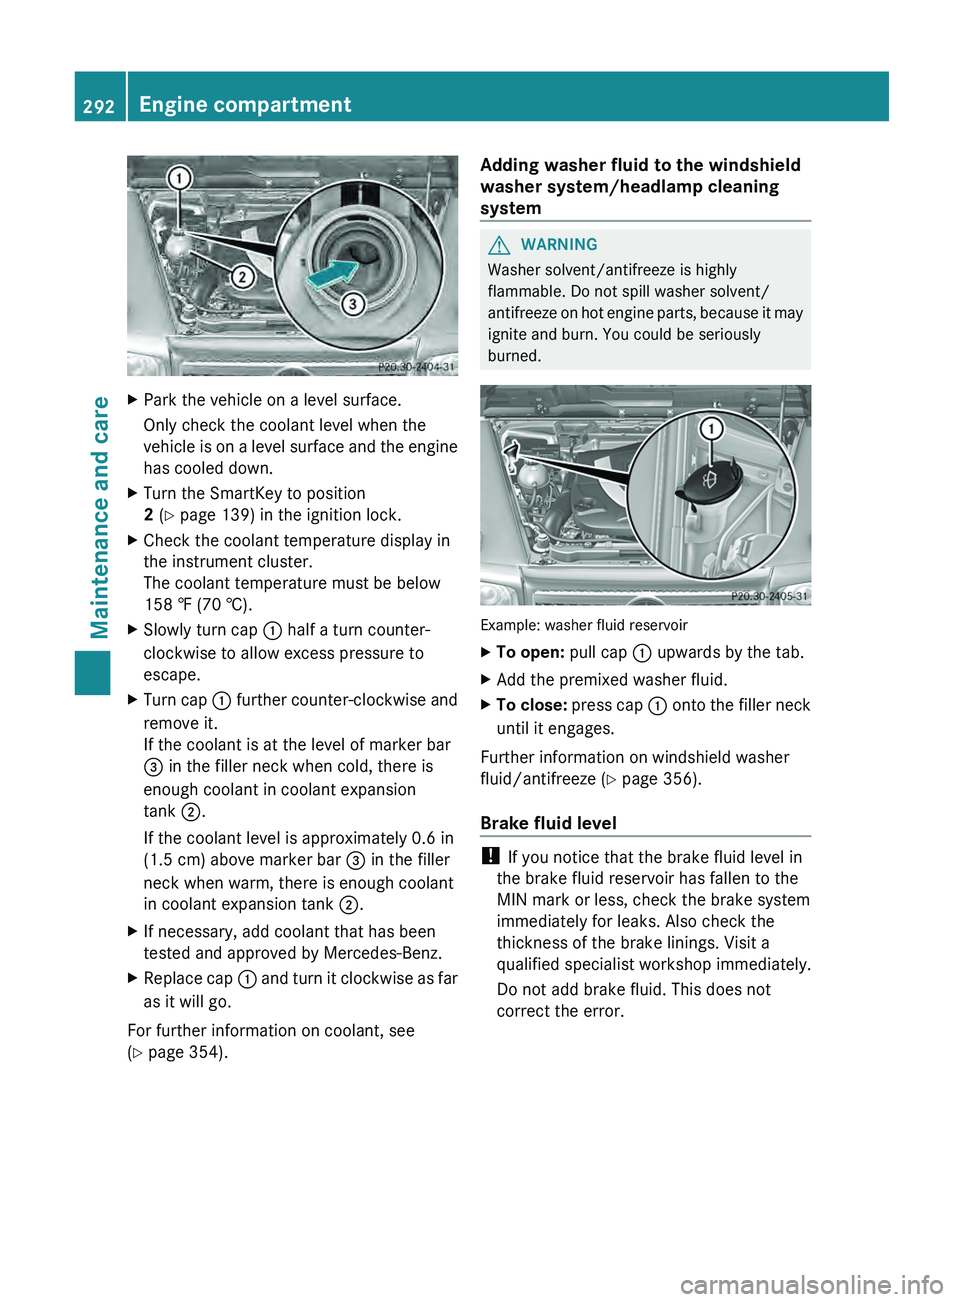
X Slowly turn cap 0043 half a turn counter-
clockwise to allow excess pressure to
escape.
X Turn cap 0043
further counter-clockwise and
remove it.
If the coolant is at the level of marker bar
0087
in the filler neck when cold, there is
enough coolant in coolant expansion
tank 0044.
If the coolant level is approximately 0.6 in
(1.5 cm) above marker bar 0087 in the filler
neck when warm, there is enough coolant
in coolant expansion tank 0044.
X If necessary, add coolant that has been
tested and approved by Mercedes-Benz.
X Replace cap 0043 and turn
it
clockwise as far
as it will go.
For further information on coolant, see
(Y page 354). Adding washer fluid to the windshield
washer system/headlamp cleaning
system G
WARNING
Washer solvent/antifreeze is highly
flammable. Do not spill washer solvent/
antifreeze on hot engine
parts, because it may
ignite and burn. You could be seriously
burned. Example: washer fluid reservoir
X
To open: pull cap 0043 upwards by the tab.
X Add the premixed washer fluid.
X To close: press cap
0043 onto
the filler neck
until it engages.
Further information on windshield washer
fluid/antifreeze ( Y page 356).
Brake fluid level !
If you notice that the brake fluid level in
the brake fluid reservoir has fallen to the
MIN mark or less, check the brake system
immediately for leaks. Also check the
thickness of the brake linings. Visit a
qualified specialist workshop immediately.
Do not add brake fluid. This does not
correct the error. 292
Engine compartment
Maintenance and care
Page 295 of 364
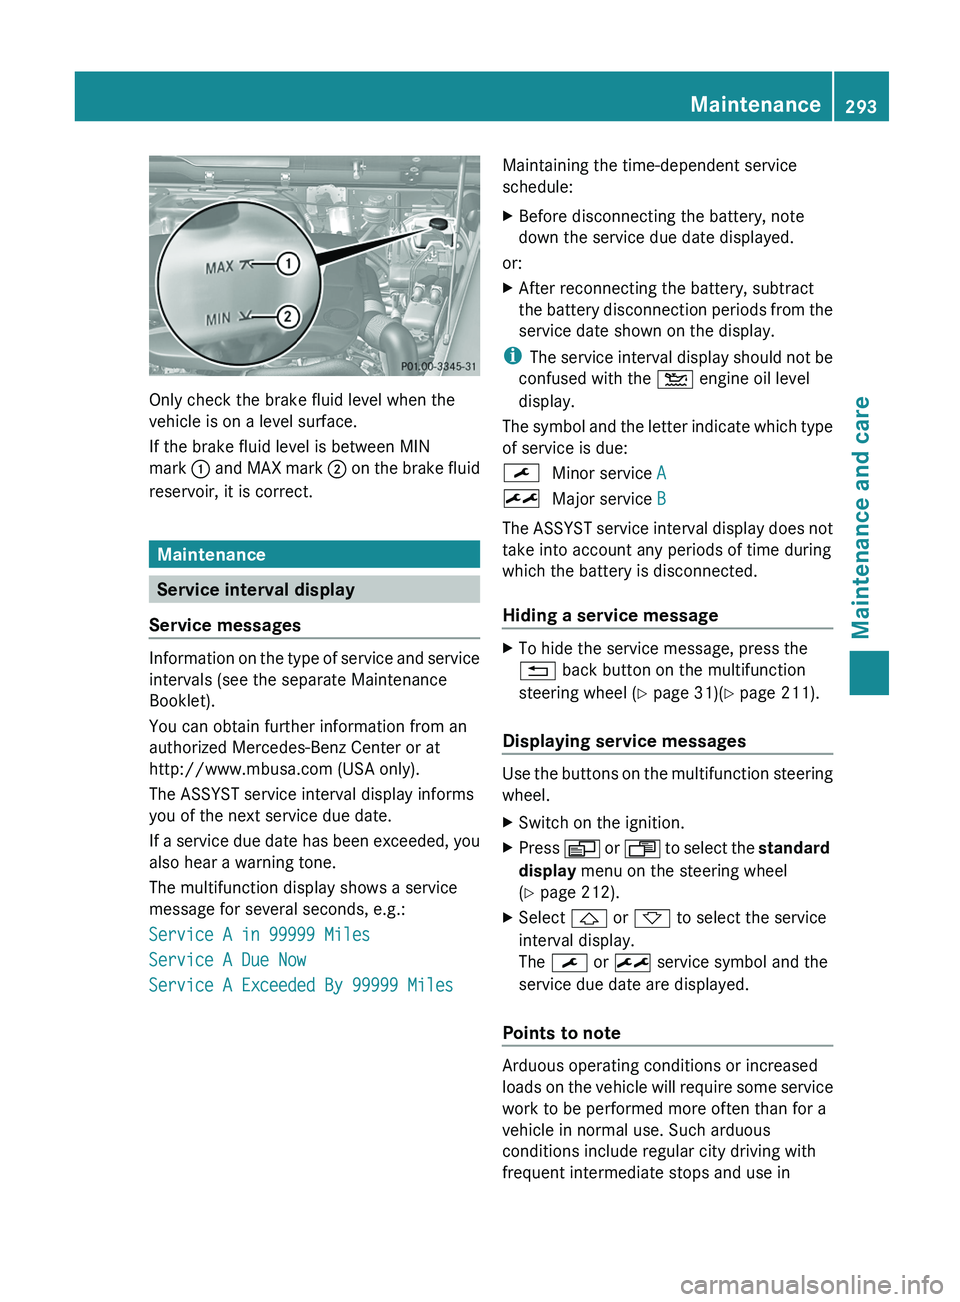
Only check the brake fluid level when the
vehicle is on a level surface.
If the brake fluid level is between MIN
mark
0043 and MAX mark 0044
on the brake fluid
reservoir, it is correct. Maintenance
Service interval display
Service messages Information on the type of service and service
intervals (see the separate Maintenance
Booklet).
You can obtain further information from an
authorized Mercedes-Benz Center or at
http://www.mbusa.com (USA only).
The ASSYST service interval display informs
you of the next service due date.
If a service
due
date has been exceeded, you
also hear a warning tone.
The multifunction display shows a service
message for several seconds, e.g.:
Service A in 99999 Miles
Service A Due Now
Service A Exceeded By 99999 Miles Maintaining the time-dependent service
schedule:
X
Before disconnecting the battery, note
down the service due date displayed.
or:
X After reconnecting the battery, subtract
the battery disconnection periods
from the
service date shown on the display.
i The service interval display
should not be
confused with the 00B2 engine oil level
display.
The symbol and the letter indicate which type
of service is due:
0099 Minor service A
009B Major service B
The ASSYST service interval display does not
take into account any periods of time during
which the battery is disconnected.
Hiding a service message X
To hide the service message, press the
0041 back button on the multifunction
steering wheel ( Y page 31)(Y page 211).
Displaying service messages Use the buttons on the multifunction steering
wheel.
X
Switch on the ignition.
X Press 0080 or 007F to
select the standard
display menu on the steering wheel
(Y page 212).
X Select 0041 or 0068 to select the service
interval display.
The 0099 or 009B service symbol and the
service due date are displayed.
Points to note Arduous operating conditions or increased
loads on the
vehicle
will require some service
work to be performed more often than for a
vehicle in normal use. Such arduous
conditions include regular city driving with
frequent intermediate stops and use in Maintenance
293
Maintenance and care Z
Page 296 of 364
mountainous terrain or on poor road
surfaces.
For example, if the vehicle is used under
arduous operating conditions,
have
air filters,
engine oil and oil filters changed frequently
and check the wheels often. Further
information can be obtained at a qualified
specialist workshop, e.g. an authorized
Mercedes-Benz Center. Fuel/water separator
H
Environmental note
Dispose of service products in an
environmentally responsible manner.
! If you continue driving
without having the
fuel/water separator serviced, this could
cause damage to the engine. Any resulting
damage is not covered by the warranty.
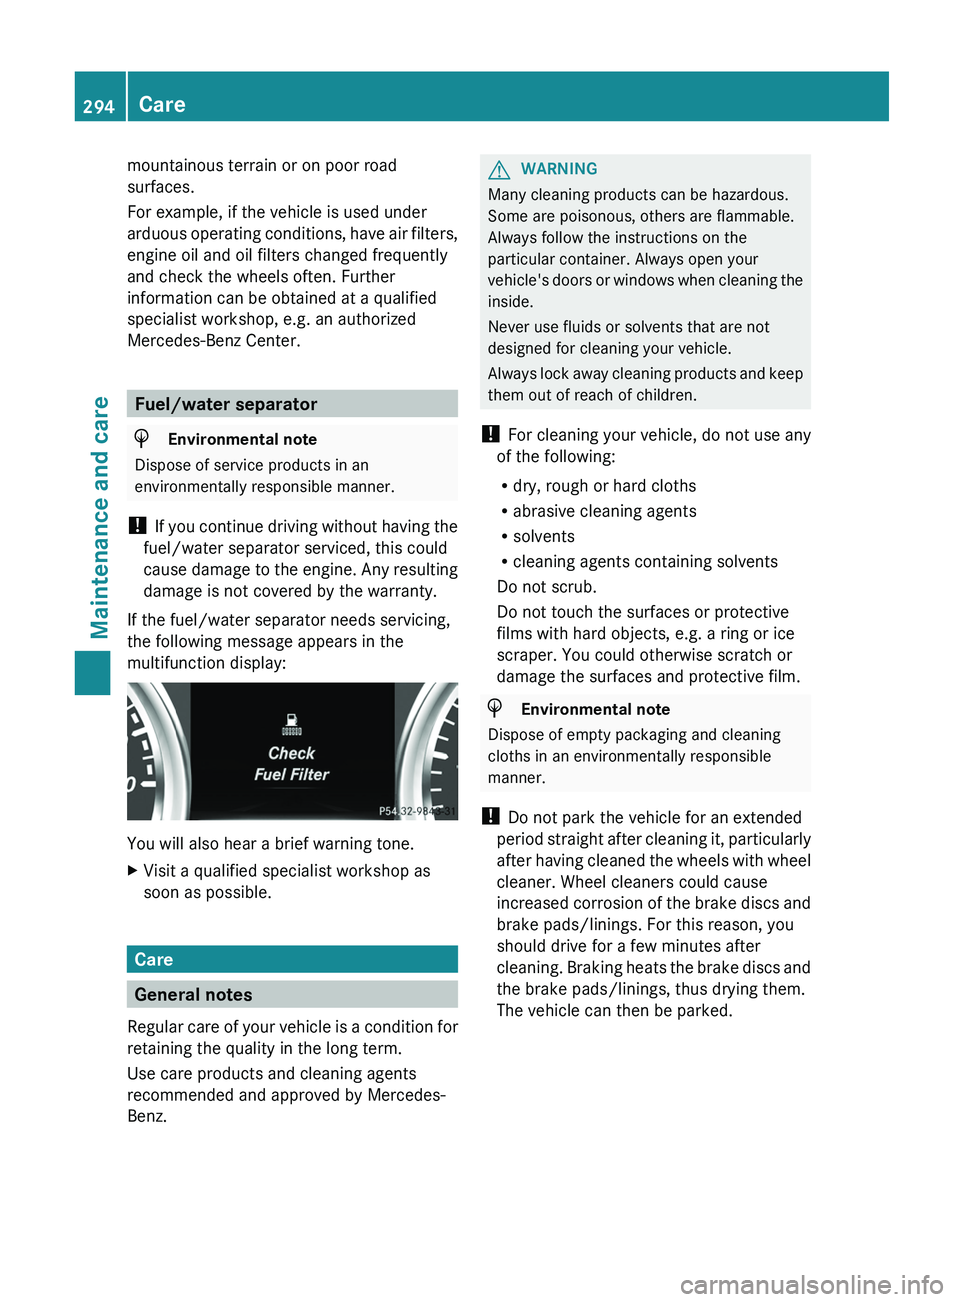
If the fuel/water separator needs servicing,
the following message appears in the
multifunction display: You will also hear a brief warning tone.
X
Visit a qualified specialist workshop as
soon as possible. Care
General notes
Regular care of your
vehicle is a condition for
retaining the quality in the long term.
Use care products and cleaning agents
recommended and approved by Mercedes-
Benz. G
WARNING
Many cleaning products can be hazardous.
Some are poisonous, others are flammable.
Always follow the instructions on the
particular container. Always open your
vehicle's doors or windows
when cleaning the
inside.
Never use fluids or solvents that are not
designed for cleaning your vehicle.
Always lock away cleaning products and keep
them out of reach of children.
! For cleaning your vehicle, do not use any
of the following:
R dry, rough or hard cloths
R abrasive cleaning agents
R solvents
R cleaning agents containing solvents
Do not scrub.
Do not touch the surfaces or protective
films with hard objects, e.g. a ring or ice
scraper. You could otherwise scratch or
damage the surfaces and protective film. H
Environmental note
Dispose of empty packaging and cleaning
cloths in an environmentally responsible
manner.
! Do not park the vehicle for an extended
period straight after cleaning
it, particularly
after having cleaned the wheels with wheel
cleaner. Wheel cleaners could cause
increased corrosion of the brake discs and
brake pads/linings. For this reason, you
should drive for a few minutes after
cleaning. Braking heats the brake discs and
the brake pads/linings, thus drying them.
The vehicle can then be parked. 294
Care
Maintenance and care
Page 308 of 364
over the battery. Keep children away from
batteries. Wash battery
acid
immediately with
water and seek medical attention.
! Have the battery checked regularly at a
qualified specialist workshop.
Observe the service intervals in the
Maintenance Booklet or contact a qualified
specialist workshop for more information.
! You should have all work involving the
battery carried out at a qualified specialist
workshop. In the exceptional case that it is
necessary for you to disconnect the battery
yourself, make sure that:
R you switch off the engine and remove the
SmartKey. Check that all the indicator
lamps in the instrument cluster are off.
Otherwise, electronic components, such
as the alternator, may be damaged.
R you first remove the negative terminal
clamp and then the positive terminal
clamp. Never swap the terminal clamps.
Otherwise, the vehicle's electronic
system may be damaged.
R on vehicles with automatic transmission,
the transmission is locked in position P
after disconnecting the battery. The
vehicle is secured against rolling away.
You can then no longer move the vehicle.
The battery and the cover of the positive
terminal clamp must be installed securely
during operation. H
Environmental note Batteries contain dangerous
substances. It is against the
law to dispose of them with
the household rubbish. They
must be collected
separately
and recycled to protect the
environment. Dispose of batteries in an
environmentally friendly
manner. Take discharged
batteries to a qualified
specialist workshop or a special collection point for
used batteries.
In order for the battery to achieve the
maximum possible service life,
it must always
be sufficiently charged.
Comply with safety precautions and take
protective measures when handling
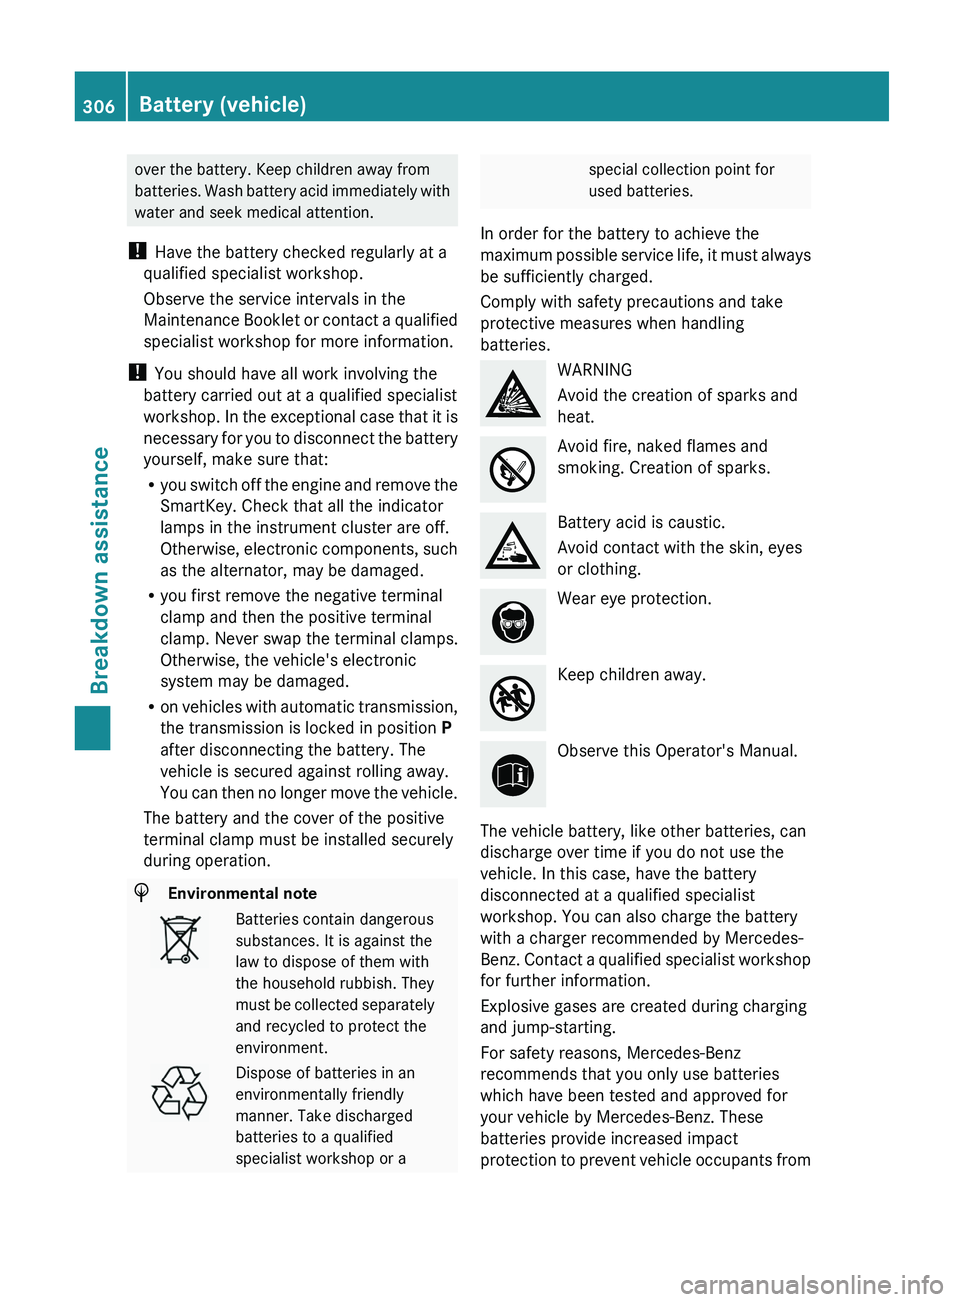
batteries. WARNING
Avoid the creation of sparks and
heat.
Avoid fire, naked flames and
smoking. Creation of sparks.
Battery acid is caustic.
Avoid contact with the skin, eyes
or clothing.
Wear eye protection.
Keep children away.
Observe this Operator's Manual.
The vehicle battery, like other batteries, can
discharge over time if you do not use the
vehicle. In this case, have the battery
disconnected at a qualified specialist
workshop. You can also charge the battery
with a charger recommended by Mercedes-
Benz. Contact a qualified
specialist workshop
for further information.
Explosive gases are created during charging
and jump-starting.
For safety reasons, Mercedes-Benz
recommends that you only use batteries
which have been tested and approved for
your vehicle by Mercedes-Benz. These
batteries provide increased impact
protection to prevent vehicle occupants from 306
Battery (vehicle)
Breakdown assistance
Page 309 of 364
suffering acid burns should the battery be
damaged in the event of an accident.
Have the battery charge level checked more
frequently if you use the vehicle mainly for
short trips or if you leave it standing idle for
a lengthy period.
Consult
a qualified specialist
workshop if you wish to leave your vehicle
parked up for a long period of time.
i Remove the SmartKey if you park the
vehicle and do not require any electrical
consumers. The vehicle will then use very
little energy, thus conserving battery
power.
i If the power supply has been interrupted,
e.g. due to a discharged battery, you will
have to:
R set the clock. Information on setting the
clock can be found in the separate
operating instructions.
On vehicles with COMAND and a
navigation system, the clock is set
automatically.
R reset the head restraints on the front
seats (Y page 87).
R reset the function for folding the exterior
mirrors in/out automatically, by folding
the mirrors out once ( Y page 93).Charging the battery
G
WARNING
During charging and jump-starting, explosive
gases can escape from
the battery. There is a
risk of an explosion.
Particularly avoid fire, naked flames, creating
sparks and smoking. Ensure there is sufficient
ventilation while charging and jump-starting.
Do not lean over a battery. G
WARNING
Battery acid is caustic. There is a risk of injury.
Avoid contact with the
skin, eyes or clothing.
Do not inhale any battery gases. Do not lean
over the battery. Keep children away from batteries. Wash battery acid immediately with
water and seek medical attention.
G
WARNING
A discharged battery can freeze at
temperatures below freezing point. When
jump-starting the vehicle or charging the
battery, gases can escape from the battery.
There is a risk of an explosion.
Allow the frozen battery to thaw out before
charging it or jump-starting.
! Only use battery chargers with a
maximum charging voltage of 14.8 V.
! Only charge the battery using the jump-
starting connection point.
Never charge a battery still installed in the
vehicle unless a battery charger unit
approved by Mercedes-Benz is being used.
A battery charger unit specially adapted for
Mercedes-Benz vehicles and tested and
approved by Mercedes-Benz is
available as an
accessory. It permits the charging of the
battery in its installed position. Contact an
authorized Mercedes-Benz Center for
information and availability. Charge the
battery in accordance with the separate
instructions for the battery charger.
The jump-starting connection point is in the
engine compartment (Y page 308).
Read the battery charger's operating
instructions before charging the battery.
X Open the hood (Y page 289).
X Connect the battery charger to the positive
terminal and ground point in the same
order as when connecting the donor
battery in the jump-starting procedure
(Y page 308). Battery (vehicle)
307
Breakdown assistance Z