2013 MERCEDES-BENZ G-CLASS SUV change wheel
[x] Cancel search: change wheelPage 322 of 364
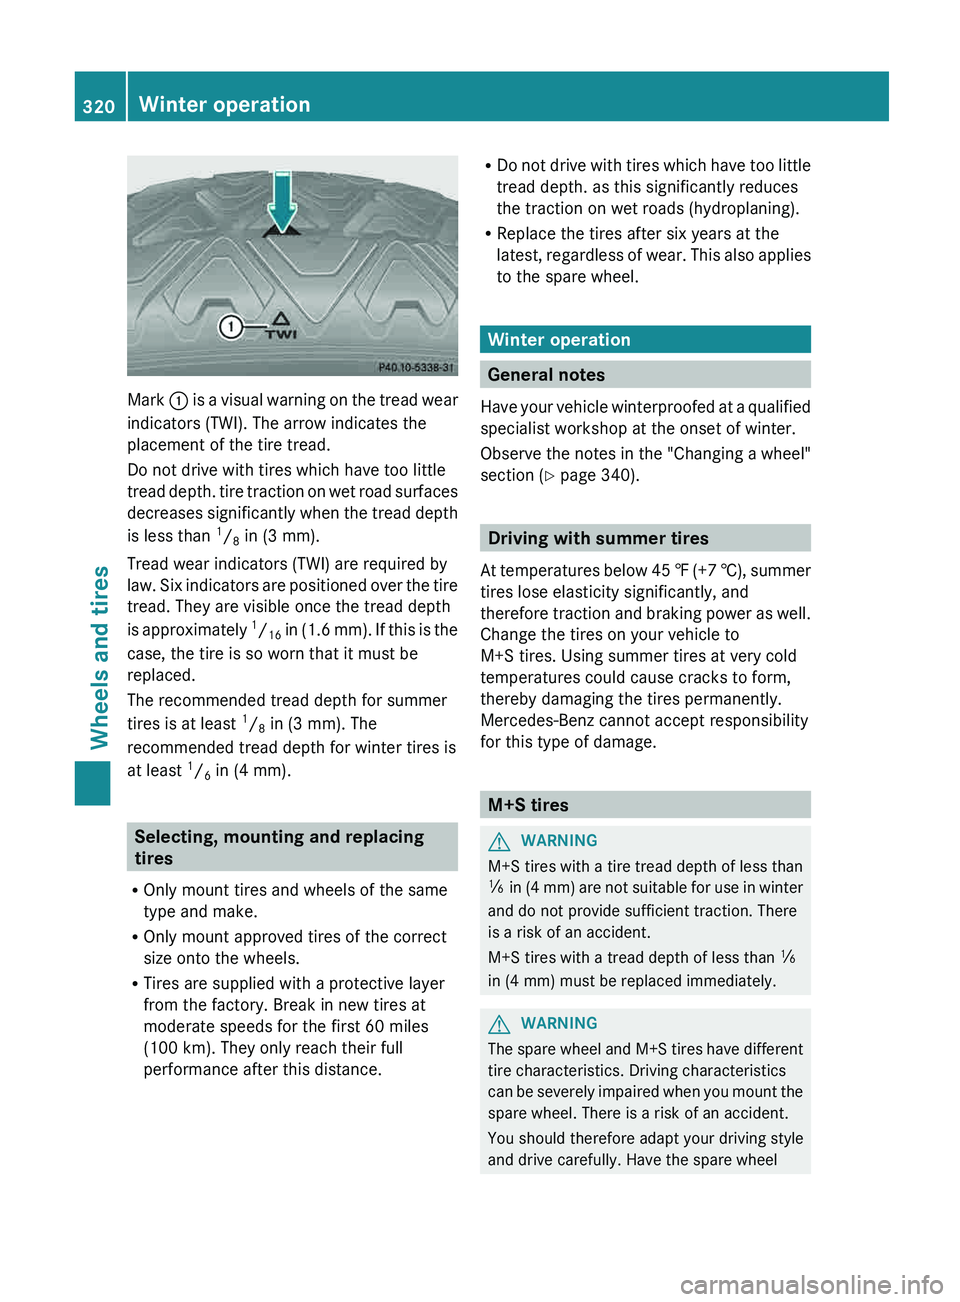
Mark
0043 is a visual warning on the tread wear
indicators (TWI). The arrow indicates the
placement of the tire tread.
Do not drive with tires which have too little
tread depth. tire
traction on wet road surfaces
decreases significantly when the tread depth
is less than 1
/ 8 in (3 mm).
Tread wear indicators (TWI) are required by
law. Six indicators are positioned over the tire
tread. They are visible once the tread depth
is approximately 1
/ 16 in (1.6 mm). If this is the
case, the tire is so worn that it must be
replaced.
The recommended tread depth for summer
tires is at least 1
/ 8 in (3 mm). The
recommended tread depth for winter tires is
at least 1
/ 6 in (4 mm). Selecting, mounting and replacing
tires
R Only mount tires and wheels of the same
type and make.
R Only mount approved tires of the correct
size onto the wheels.
R Tires are supplied with a protective layer
from the factory. Break in new tires at
moderate speeds for the first 60 miles
(100 km). They only reach their full
performance after this distance. R
Do not drive with
tires which have too little
tread depth. as this significantly reduces
the traction on wet roads (hydroplaning).
R Replace the tires after six years at the
latest, regardless of wear. This also applies
to the spare wheel. Winter operation
General notes
Have your vehicle winterproofed
at a qualified
specialist workshop at the onset of winter.
Observe the notes in the "Changing a wheel"
section ( Y page 340). Driving with summer tires
At temperatures below 45
‡ (+7 †), summer
tires lose elasticity significantly, and
therefore traction and braking power as well.
Change the tires on your vehicle to
M+S tires. Using summer tires at very cold
temperatures could cause cracks to form,
thereby damaging the tires permanently.
Mercedes-Benz cannot accept responsibility
for this type of damage. M+S tires
G
WARNING
M+S tires with a tire tread depth of less than
00CF in (4 mm)
are not suitable for use in winter
and do not provide sufficient traction. There
is a risk of an accident.
M+S tires with a tread depth of less than 00CF
in (4 mm) must be replaced immediately. G
WARNING
The spare wheel and M+S tires have different
tire characteristics. Driving characteristics
can be severely impaired
when you mount the
spare wheel. There is a risk of an accident.
You should therefore adapt your driving style
and drive carefully. Have the spare wheel 320
Winter operation
Wheels and tires
Page 324 of 364
Tire pressure
Tire pressure specifications
Important safety notes G
WARNING
Underinflated or overinflated tires pose the
following risks:
R the tires may burst, especially as the load
and vehicle speed increase.
R the tires may wear excessively and/or
unevenly, which may greatly impair tire
traction.
R the driving characteristics, as well as
steering and braking, may be greatly
impaired.
There is a risk of an accident.
Follow recommended tire inflation pressures
and check the pressure of all the tires
including the spare wheel:
R monthly, at least
R if the load changes
R before beginning a long journey
R under different operating conditions, e.g.
off-road driving
If necessary, correct the tire pressure.
i The specifications on the
sample Tire and
Loading Information placard and tire
pressure tables are examples. Tire
pressure specifications are vehicle-specific
and may deviate from the data shown here.
The tire pressure specifications that are
valid for your vehicle can be found on the
Tire and Loading Information placard and
tire pressure table on the vehicle.
General notes The recommended tire pressures for the tires
mounted at the factory can be found on the
labels described here.
Operation with a trailer:
the applicable
value for the rear tires is the maximum tire
pressure value stated in the table inside the
fuel filler flap. Further information on tire pressures can be
obtained at a qualified specialist workshop.
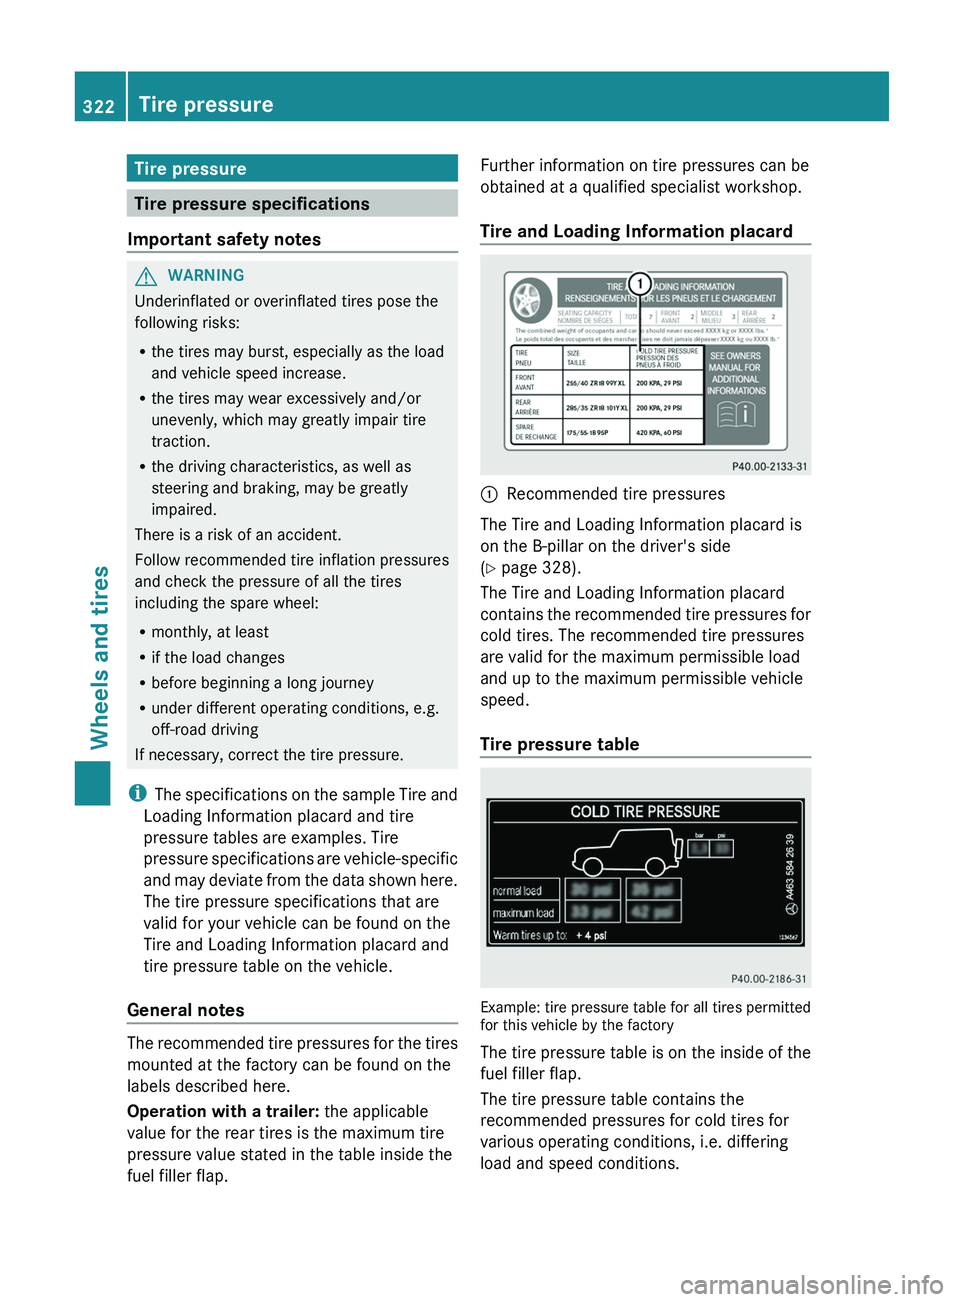
Tire and Loading Information placard
0043
Recommended tire pressures
The Tire and Loading Information placard is
on the B-pillar on the driver's side
(Y page 328).
The Tire and Loading Information placard
contains the
recommended tire
pressures for
cold tires. The recommended tire pressures
are valid for the maximum permissible load
and up to the maximum permissible vehicle
speed.
Tire pressure table Example: tire pressure table for all tires permitted
for this vehicle by the factory
The tire pressure
table
is on the inside of the
fuel filler flap.
The tire pressure table contains the
recommended pressures for cold tires for
various operating conditions, i.e. differing
load and speed conditions. 322
Tire pressure
Wheels and tires
Page 326 of 364
The tires are cold:
R
if the vehicle has been parked without
direct sunlight on the
tires for at least three
hours and
R if the vehicle has been driven for less than
1 mile (1.6 km).
The tire temperature changes depending on
the outside temperature, the vehicle speed
and the tire load. If the tire temperature
changes by 18 ‡ (10 †), the tire pressure
changes by approximately 10 kPa (0.1 bar/
1.5 psi). Take this into account when
checking the pressure of warm tires. Only
correct the tire pressure if it is too low for the
current operating conditions. If you check the
tire pressure when the tires are warm, the
resulting value will be higher than if the tires
were cold. This is normal. Do not reduce the
tire pressure to the value specified for cold
tires. The tire pressure would otherwise be
too low.
Observe the recommended tire pressures for
cold tires:
R on the Tire and Loading Information placard
on the B-pillar on the driver's side
R in the tire pressure table on the inside of
the fuel filler flap
Observe the following for the tire pressure on
the spare wheel:
R the tire and loading information table on
the B-pillar on the driver's side.
R the tire pressure sticker on the inside of the
fuel filler flap. Underinflated or overinflated tires
Underinflation G
WARNING
Tires with pressure that is too low can
overheat and burst as a consequence. In
addition, they also suffer
from excessive and/
or irregular wear, which can severely impair
the braking properties and the driving
characteristics. There is a risk of an accident. Avoid tire pressures that are too low in all the
tires, including the spare wheel.
Underinflated tires may:
R overheat, leading to tire defects
R have an adverse effect on handling
characteristics
R wear quickly and unevenly
R have an adverse effect
on fuel consumption
Overinflation G
WARNING
Tires with excessively high pressure can burst
because they are damaged more easily by
road debris, potholes etc. In addition, they
also suffer from irregular wear, which can
severely impair the braking
properties and the
driving characteristics. There is a risk of an
accident.
Avoid tire pressures that are too high in all the
tires, including the spare wheel.
Overinflated tires may:
R increase the braking distance
R have an adverse effect on handling
characteristics
R wear quickly and unevenly
R have an adverse effect on ride comfort
R be more susceptible to damage
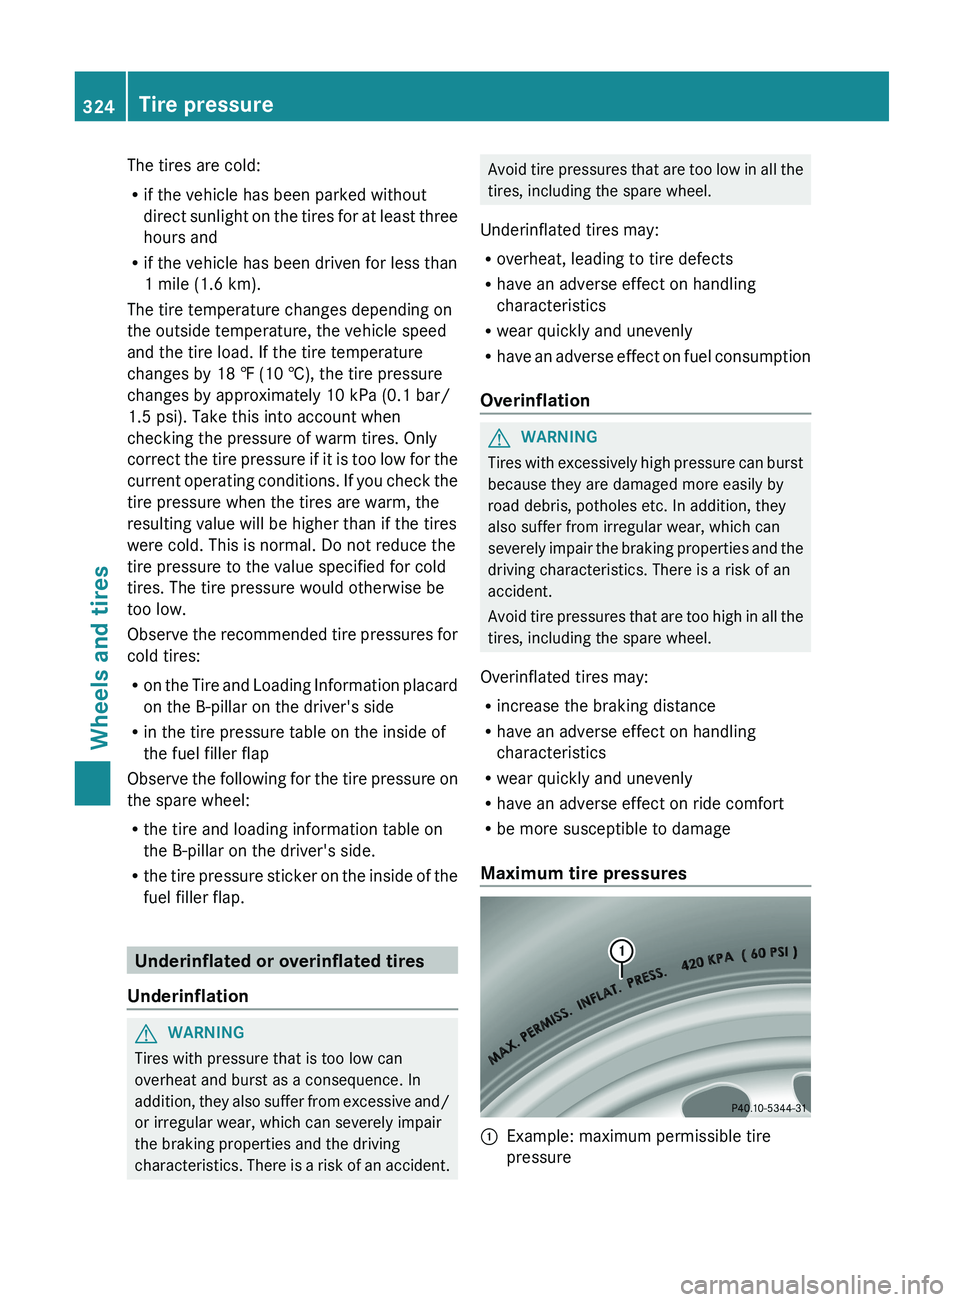
Maximum tire pressures 0043
Example: maximum permissible tire
pressure324
Tire pressure
Wheels and tires
Page 329 of 364

The operation of the tire pressure monitor can
be affected by interference from radio
transmitting equipment (e.g. radio
headphones, two-way radios) that may be
being operated in or near the vehicle.
i
USA only:
This device complies with part 15 of the
FCC Rules. Operation is subject to the
following two conditions:
1. This device may not cause interference,
and
2. this device
must accept any interference
received, including interference that may
cause undesired operation of the device.
Any unauthorized modification to this
device could void the user's authority to
operate the equipment.
i Canada only:
This device complies with RSS-210 of
Industry Canada. Operation is subject to
the following two conditions:
1. This device may not cause interference,
and
2. this device must accept any interference
received, including interference that may
cause undesired operation.
Any unauthorized modification to this
device could void the user's authority to
operate the equipment.
Checking tire pressure electronically X
Make sure that the SmartKey is in
position 2 (Y page 139) in
the ignition lock.
X Press the 0059 or 0065 button on the
steering wheel to select the Serv. menu.
X Press the 0063 or 0064 button to select
Tire Pressure.
X Press button 0076.
The current tire pressure
for each wheel will
be displayed in the multifunction display.
If the vehicle has been parked for over
20 minutes, the message Tire pressure will be displayed after driving a
few minutes appears.
After a teach-in period, the tire pressure
monitor automatically recognizes
new
wheels
or new sensors. As long as a clear allocation
of the tire pressure values to the individual
wheels is not possible, the Tire Pressure
Monitor Active display message is shown
instead of the tire pressure display. The tire
pressures are already being monitored.
i If a spare wheel is mounted, the system
may continue to show the tire pressure of
the wheel that has been removed for a few
minutes. If this occurs, note that the value
displayed for the position where the spare
wheel is mounted is not the same as the
spare wheel's current tire pressure.
Tire pressure monitor warning
messages If the tire pressure monitor detects a
significant pressure loss
on
one or more tires,
a warning message is shown in the
multifunction display. A warning tone also
sounds and the tire pressure warning lamp
lights up in the instrument cluster.
Each tire that is affected by a significant loss
of pressure is highlighted in the pressure
display.
X If the Correct Tire PressureCorrect
Tire Pressure message appears in the
multifunction display, check the tire
pressure on all four
wheels and correct it if
necessary.
i If the wheel positions on the vehicle are
interchanged, the tire pressures may be
displayed for the wrong positions for a
short time. This is rectified after a few
minutes of driving, and the tire pressures
are displayed for the correct positions.
Restarting the tire pressure monitor When you restart the tire pressure monitor,
all existing warning
messages
are deleted and
the warning lamps go out. The monitor uses Tire pressure
327
Wheels and tires Z
Page 330 of 364
the currently set tire pressures as the
reference values for monitoring. In most
cases, the tire pressure monitor will
automatically detect the new reference
values after you have changed the tire
pressure. However, you can also define
reference values manually
as
described here.
X Set the tire pressure to the value
recommended for the corresponding
driving situation on the Tire and Loading
Information placard on the driver's side
B-pillar ( Y page 322).
Additional tire pressure values
for different
loads can also be found on the tire pressure
table on the inside of the fuel filler flap
(Y page 322).
X Make sure that the tire pressure is correct
on all four wheels.
X Make sure that the SmartKey is in
position 2 (Y page 139) in
the ignition lock.
X Press the 0059 or 0065 button on the
steering wheel to select the Serv. menu.
X Press the 0063 or 0064 button to select
Tire Pressure.
X Press the 0076 button.
The multifunction display shows the
current tire pressure for
the individual tires
or the Tire pressure will be
displayed after driving a few
minutes message.
X Press the 0064 button.
The Use Current Pressures as New
Reference Values message appears in
the multifunction display.
If you wish to confirm the restart:
X Press the 0076 button.
The Tire Press. Monitor Restarted
message appears in the multifunction
display.
After driving for
a
few minutes, the system
checks whether the current tire pressures
are within the specified range. The new tire
pressures are then accepted as reference
values and monitored. If you wish to cancel the restart:
X
Press the 0041 button.
The tire pressure values stored at the last
restart will continue to be monitored. Loading the vehicle
Instruction labels for tires and loads
G
WARNING
Overloaded tires can overheat, causing a
blowout. Overloaded tires can
also impair the
steering and driving characteristics and lead
to brake failure. There is a risk of accident.
Observe the load rating of the tires. The load
rating must be at least half of the GAWR of
your vehicle. Never overload the tires by
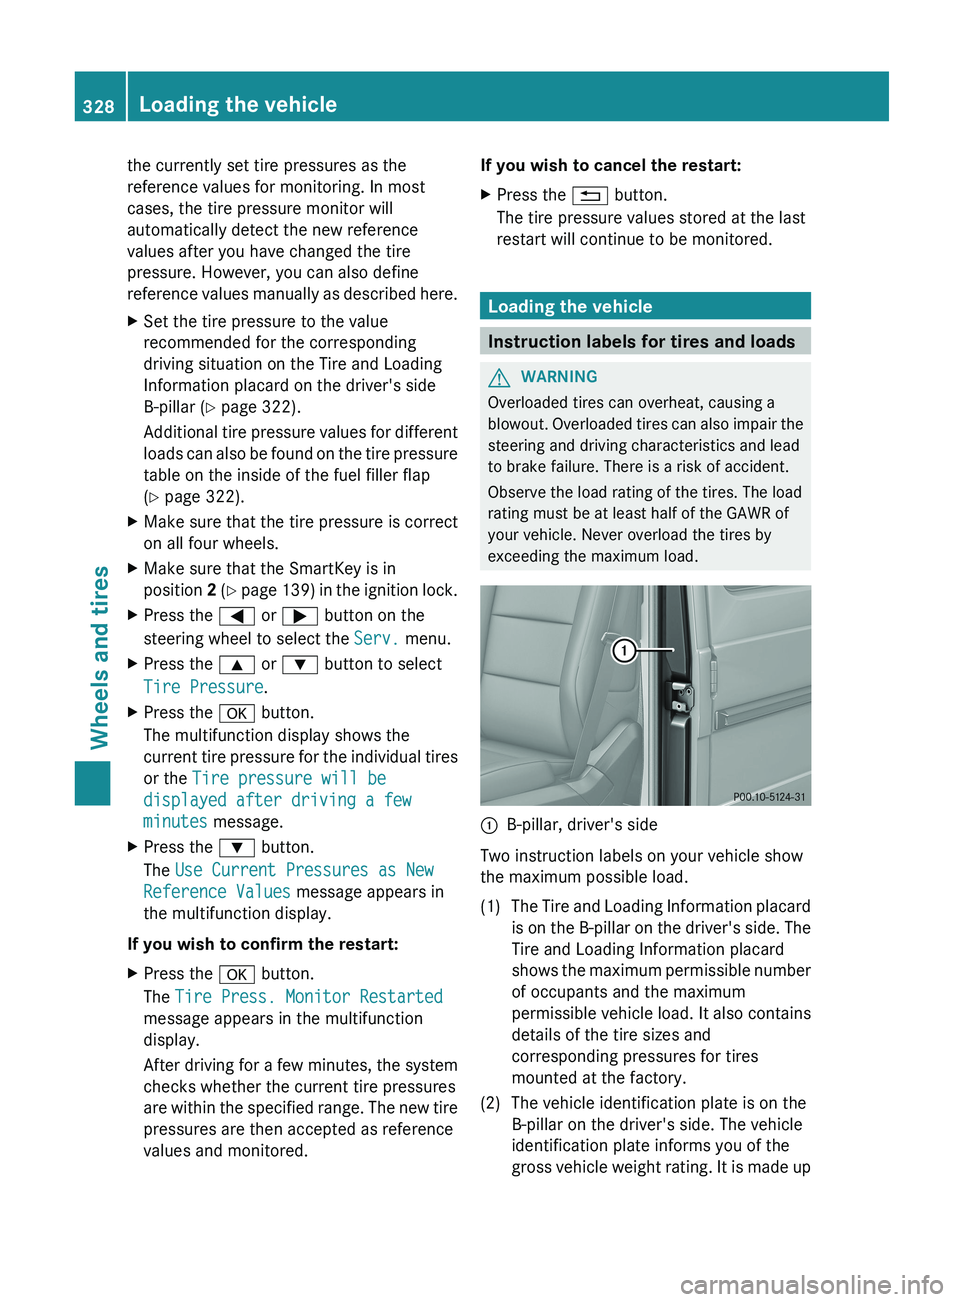
exceeding the maximum load. 0043
B-pillar, driver's side
Two instruction labels on your vehicle show
the maximum possible load.
(1) The Tire and Loading Information placard is on the B-pillar
on the driver's side. The
Tire and Loading Information placard
shows the maximum permissible number
of occupants and the maximum
permissible vehicle load. It also contains
details of the tire sizes and
corresponding pressures for tires
mounted at the factory.
(2) The vehicle identification plate is on the B-pillar on the driver's side. The vehicle
identification plate informs you of the
gross vehicle weight rating.
It is made up328
Loading the vehicle
Wheels and tires
Page 343 of 364
Tire-mounting tools should not be used
near the valve. This could damage the
electronic components.
Only have tires changed at a qualified
specialist workshop.
Interchanging the front and rear wheels of
differing dimensions can render the general
operating permit invalid.
Always pay attention to the instructions and
safety notices in the section on "Changing a
wheel and mounting a spare wheel"
(Y page 341).
The wear patterns on the front and rear tires
differ, depending on the
operating conditions.
Rotate the wheels before a clear wear pattern
has formed on the tires. Front tires typically
wear more on the shoulders and the rear tires
in the center.
If your vehicle's tire configuration allows, you
can rotate the wheels according to the
intervals in the tire manufacturer's warranty
book in your vehicle documents. If no
warranty book is available, the tires should be
replaced every 3000 to
6000 miles(5000 to 10,000 km), or earlier if
tire wear necessitates it. Do not change the
direction of wheel rotation.
Clean the contact surfaces of the wheel and
the brake disc thoroughly every time a wheel
is interchanged. Check the tire pressure and
reactivate the tire pressure monitor
(Y page 325) if necessary. Direction of rotation
Tires with a specified direction of rotation
have additional benefits, e.g.
if there is a risk
of hydroplaning. You will only gain these
benefits if the correct direction of rotation is
observed.
An arrow on the sidewall of the tire indicates
its correct direction of rotation.
You may mount the spare wheel against the
direction of rotation. Adhere to the time
restriction on use as well as the speed
limitation specified on the spare wheel. Storing wheels
Store tires that are not being used in a cool,
dry and preferably dark place. Protect the
tires from oil, grease, gasoline and diesel. Cleaning the wheels
G
WARNING
Do not use power washers with circular-jet
nozzles (dirt grinders) to
clean your vehicle, in
particular the tires. You could otherwise
damage the tires and cause an accident. Mounting a wheel
Preparing the vehicle G
WARNING
You must remove the spare wheel from the
spare wheel carrier before lifting the vehicle.
Otherwise the vehicle could fall off the jack
and injure you or others.
X Prepare the vehicle as described
(Y page 304).
X Remove the vehicle tool kit and the jack
(Y page 302).
X Secure the vehicle to prevent it from rolling
away.
X Remove the spare wheel from the spare
wheel bracket ( Y page 303).
i Vehicles without a spare wheel or
emergency spare wheel are not equipped
with a tire-change tool
kit at the factory. For
more information on which tools are
required to perform a wheel change on your
vehicle e.g. lug wrench or jack, consult an
authorized Mercedes-Benz Center.
Securing the vehicle to prevent it from
rolling away X
On level ground: place chocks or other
suitable items under the front and rear of Changing a wheel
341
Wheels and tires Z
Page 344 of 364
the wheel that is diagonally opposite the
wheel you wish to change.
X On downhill gradients: place chocks or
other suitable items in front of the wheels
of the front and rear axle.
Raising the vehicle G
WARNING
If you do not position the jack correctly at the
appropriate jacking point of the vehicle, the
jack could tip over with the vehicle raised.
There is a risk of injury.
Only position the jack at the appropriate
jacking point of the vehicle. The base of the
jack must be positioned vertically, directly
under the jacking point of the vehicle.
! The jack is designed exclusively for
jacking up the vehicle
at the jacking points.
Otherwise, your vehicle could be damaged.
The following must be observed when raising
the vehicle:
R to raise the vehicle, only use the vehicle-
specific jack that has been tested and
approved by Mercedes-Benz. If used
incorrectly, the jack could tip over with the
vehicle raised.
R the jack is designed only to raise and hold
the vehicle for a short time while a wheel
is being changed. It is not suited for
performing maintenance work under the
vehicle.
R avoid changing the wheel on uphill and
downhill slopes.
R before raising the vehicle, secure it from
rolling away by applying the parking brake
and inserting wheel chocks. Never
disengage the parking brake while the
vehicle is raised.
R the jack must be placed on a firm, flat and
non-slip surface. On a loose surface, a
large, load-bearing underlay must be used.
On a slippery surface, a non-slip underlay
must be used, e.g. rubber mats. R
do not use wooden blocks or similar
objects as a jack underlay. Otherwise, the
jack will not be able to achieve its load-
bearing capacity due to the restricted
height.
R make sure that the distance between the
underside of the tires
and the ground does
not exceed 1.2 inches (3 cm).
R never place your hands and feet under the
raised vehicle.
R never lie under the raised vehicle.
R never start the engine when the vehicle is
raised.
R never open or close a door or the tailgate
when the vehicle is raised.
R make sure that no persons are present in
the vehicle when the vehicle is raised. X
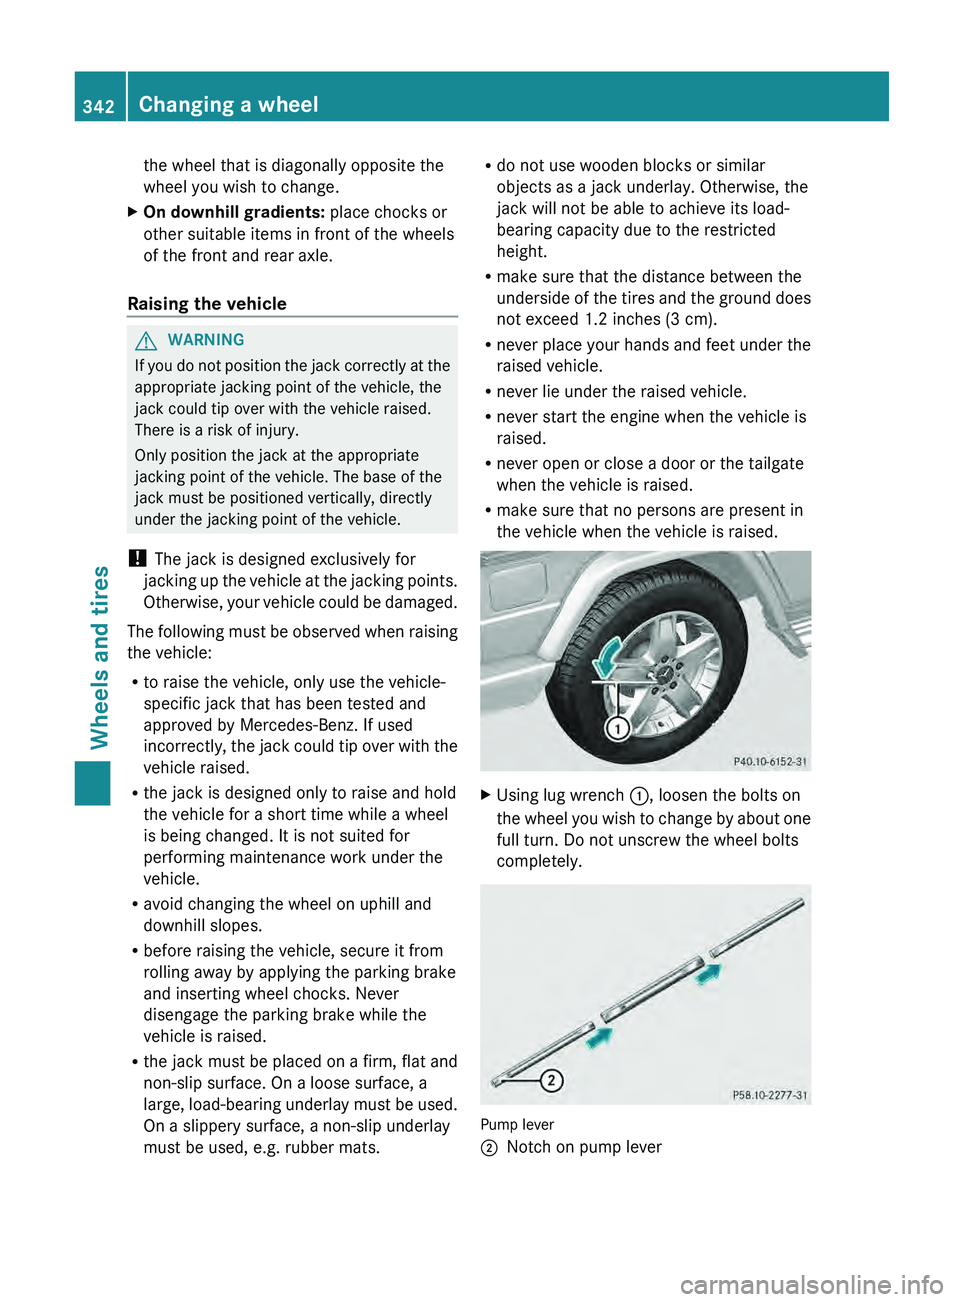
Using lug wrench 0043, loosen the bolts on
the wheel you wish
to change by about one
full turn. Do not unscrew the wheel bolts
completely. Pump lever
0044
Notch on pump lever342
Changing a wheel
Wheels and tires
Page 346 of 364
X
Clean the wheel and wheel hub contact
surfaces.
X Place the new wheel on the wheel hub and
push it on.
X Tighten the wheel bolts until they are
finger-tight.
Lowering the vehicle G
WARNING
The wheels could work loose if the wheel nuts
and bolts are not tightened to the specified
tightening torque. There is a risk of accident.
Have the tightening torque immediately
checked at a qualified specialist workshop
after a wheel is changed. X
Open the pressure release screw on the
jack using the pump lever ( Y page 342) by
approximately one turn.
X Lower the vehicle until it is once again
standing firmly on the ground.
X Place the jack to one side.
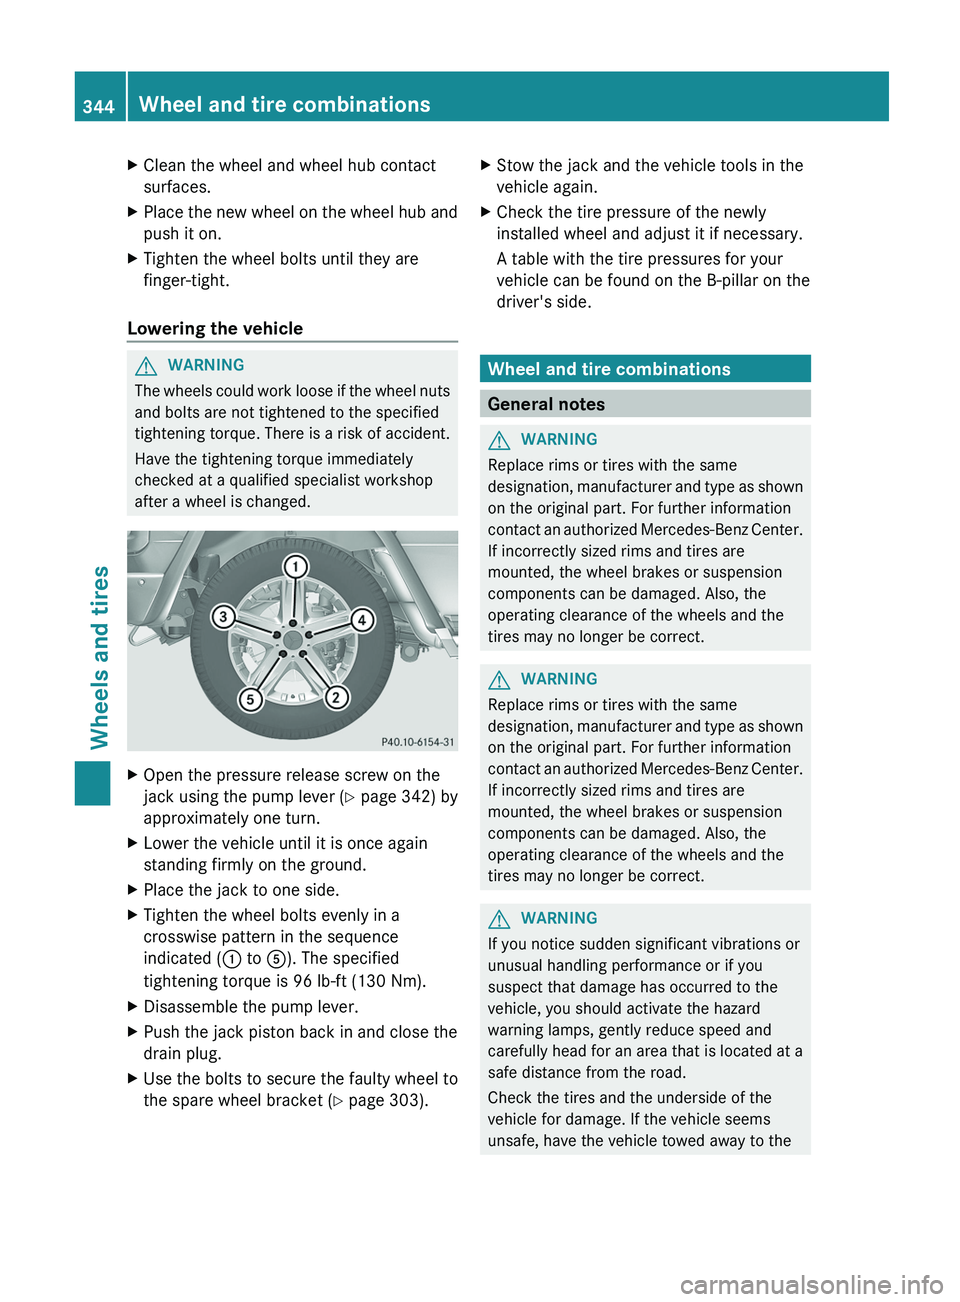
X Tighten the wheel bolts evenly in a
crosswise pattern in the sequence
indicated ( 0043
to 0083). The specified
tightening torque is 96 lb-ft (130 Nm).
X Disassemble the pump lever.
X Push the jack piston back in and close the
drain plug.
X Use the bolts
to secure the faulty wheel to
the spare wheel bracket ( Y page 303).X
Stow the jack and the vehicle tools in the
vehicle again.
X Check the tire pressure of the newly
installed wheel and adjust it if necessary.
A table with the tire pressures for your
vehicle can be found on the B-pillar on the
driver's side. Wheel and tire combinations
General notes
G
WARNING
Replace rims or tires with the same
designation, manufacturer and type
as shown
on the original part. For further information
contact an authorized Mercedes-Benz Center.
If incorrectly sized rims and tires are
mounted, the wheel brakes or suspension
components can be damaged. Also, the
operating clearance of the wheels and the
tires may no longer be correct. G
WARNING
If you notice sudden significant vibrations or
unusual handling performance or if you
suspect that damage has occurred to the
vehicle, you should activate the hazard
warning lamps, gently reduce speed and
carefully head for an area that is located at a
safe distance from the road.
Check the tires and the underside of the
vehicle for damage. If the vehicle seems
unsafe, have the vehicle towed away to the 344
Wheel and tire combinations
Wheels and tires